Step1:Download Arduino IDE and install Arduino driver
Download the Arduino IDE
"Arduino"" is not only the name of the microcontroller board, but also the name of a programming IDE based on C/C++. After you getting your Arduino board or compatible board such as Crowduino, you should install the IDE. Depending on OS version, the specific installation varies. Thankfully Arduino team provides us a detailed installation guide for most OS systems.
Please download the latest version of Arduino IDE at: http://arduino.cc/en/Main/Software 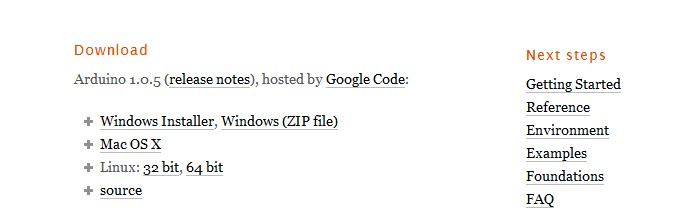
Connect Crowduino to PC
Connect the Crowduino board to your computer using the USB cable.
Install Driver
Installing drivers for the Crowduino In Windows
- Plug in your Crowduino, Windows will try to install the driver automatically. If you are lucy enougth, the installation will be Done automatically in about 1 minute. If not, follow the next steps.
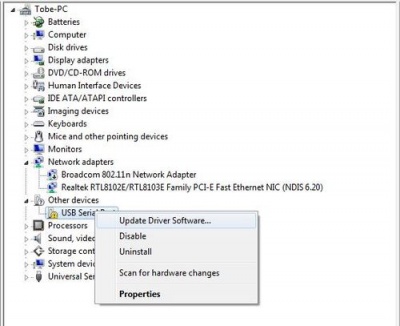
- Open the Device Manager by right clicking “My computer” and selecting control panel.
- Look under Ports (COM & LPT). You should see an open port named "USB Serial Port" Right click on the "USB Serial Port" and choose the "Update Driver Software" option.
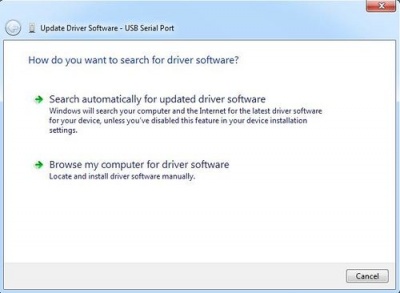
- Choose the "Browse my computer for Driver software" option.
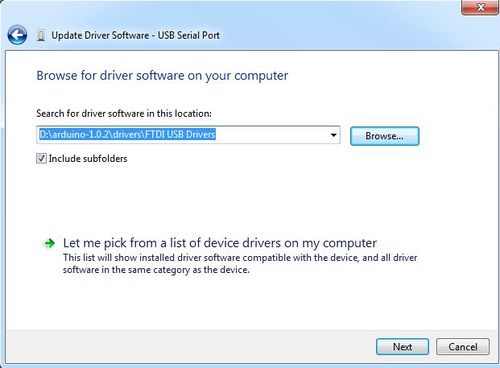
- Select the driver file named FTDI USB Drivers, located in the "Drivers" folder in the Arduino IDE
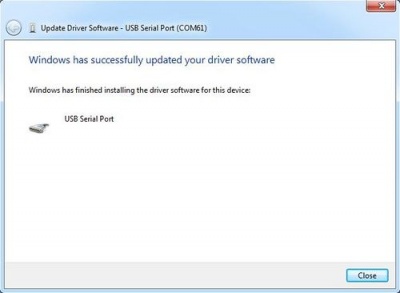
- If you installed driver successfully:
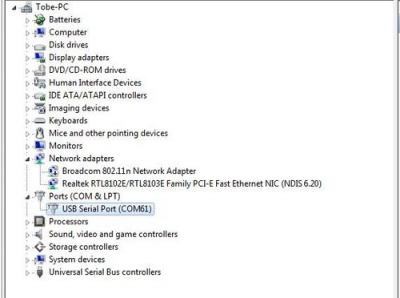
- Check with serial port the Crowduino is using by opening the Windows Device Manager:
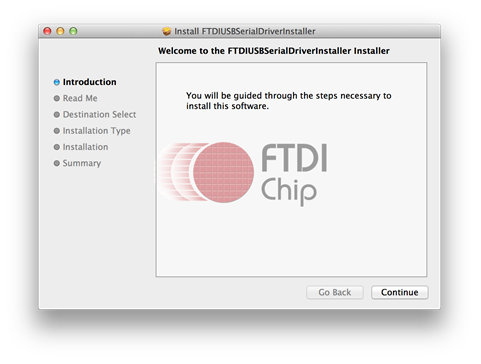
Installing drivers for the Crowduino with Mac OS
- Enter page: http://www.ftdichip.com/Drivers/VCP.htm.
- Download Driver for the Mac OS X version, and the right version for your own computer
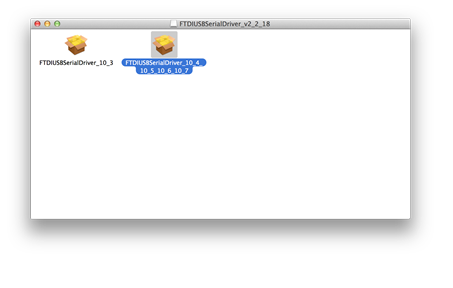
- Open the driver file which you just download, and double click FTDIUSBSerialDriver_10_4_10_5_10_6_10_7.mpkg and continue
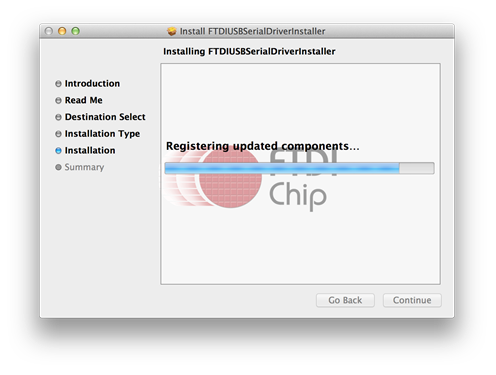
- You can see the below dialog boxes if you have installed driver successfully.
