Currency
How to voice type and print the text on LCD using Raspberry Pi
December 11, 2017

Voice typing feature is quite common to mobile phones; it is considered faster and user-friendly to those who find it difficult to type to input the question about which they need information. If typing fast is required or your handicap, this feature works the best for you.
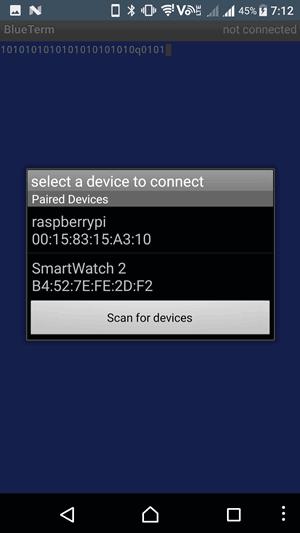
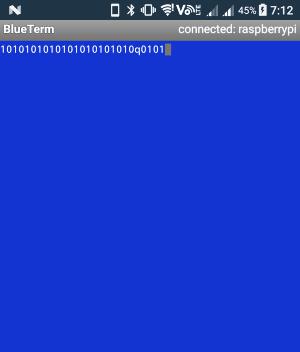
In this article, we will input voice via an Android App and the output will be displayed on LCD using Raspberry Pi. This requires a 16x 2 LCD with Raspberry Pi which is equipped with Bluetooth to receive inputs from the mobile phone.
Start with Connecting 16x2 LCD with Raspberry Pi:
Setting Bluetooth is preceded by interfacing 16x 2 LCD with Raspberry Pi. Bluetooth setup, first we will interface 16x2 LCD as Raspberry Pi accessory. External Adafruit Library is used for making this interface happen. Adafruit Library can be installed using this command:
git clone https://github.com/adafruit/Adafruit_Python_CharLCD.git
cd ./Adafruit_Python_CharLCD
sudo python setup.py install
This is followed by importing the library in the python program using the command:
import Adafruit_CharLCD as LCD
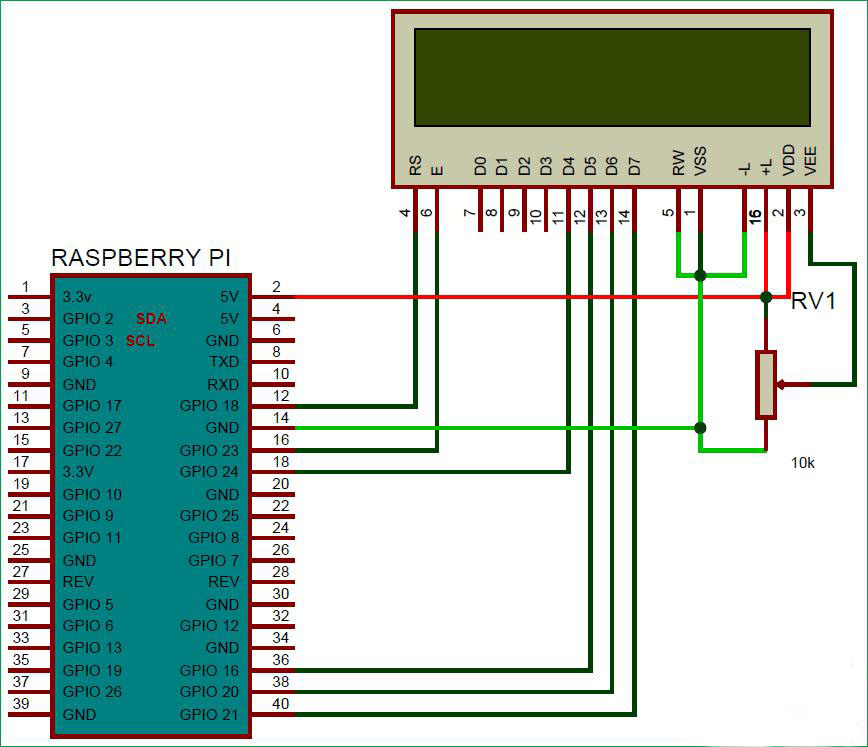
Now, LCD pins are connected with Raspberry Pi with the help of circuit diagram like this:
 Here is the list of functions provided in Adafruit Library for controlling the LCD.

 Python code is provided below. (Source of the code: https://circuitdigest.com/microcontroller-projects/voice-to-text-typing-using-raspberry-pi )
If you want messages in bigger fonts, you can use a bigger LCD display in this project.
This is the Python Code useful for trying Voice Typing
import bluetooth
import RPi.GPIO as GPIO #calling for header file which helps in using GPIOs of PI
import Adafruit_CharLCD as LCD
# Raspberry Pi pin setup
lcd_rs = 18
lcd_en = 23
lcd_d4 = 24
lcd_d5 = 16
lcd_d6 = 20
lcd_d7 = 21
lcd_backlight = 2
# Define LCD column and row size for 16x2 LCD.
lcd_columns = 16
lcd_rows = 2
lcd = LCD.Adafruit_CharLCD(lcd_rs, lcd_en, lcd_d4, lcd_d5, lcd_d6, lcd_d7, lcd_columns, lcd_rows, lcd_backlight)
server_socket=bluetooth.BluetoothSocket( bluetooth.RFCOMM )
port = 1
server_socket.bind(("",port))
server_socket.listen(1)
client_socket,address = server_socket.accept()
print "Accepted connection from ",address
while 1:
data = client_socket.recv(1024)
print "Received: %s" % data
if (data != ""):
lcd.clear()
print (len(data))
if (len(data) > 16): #breaking long strings into 2 parts
i = len(data)-16
a,b = data[:16], data[16:] #first string will be of 16 char
lcd.message(a)
lcd.message('\n')
lcd.message(b)
print i
print a
print b
else:
lcd.message(data)
if (data == "clear"):
lcd.clear()
if (data == "q"):
print ("Quit")
break
client_socket.close()
server_socket.close()”
Voice typing using Google Keyboard is a great achievement. This feature can easily be added with the help of Android Apps and display for Raspberry Pi. The user does require basic knowledge of Python language to accomplish this project. Availability of library of tools makes the project easier and faster to complete.
Thus, Raspberry Pi has proved its worth in bringing more innovations to the existing devices. This mini-computer of credit card size, due to its unmatched flexibility, has changed the way computers and mobile phones were used. The best technology is one that is friendly to privilege and handicapped alike. Voice typing has added to the user-friendliness of the computer and mobile phones and made them accessible to visually impaired users too. The number of Raspberry Pi GPIO pins can be altered as per requirement if you choose to extend this project. So, try it yourself and add to your knowledge base.
 Here is the list of functions provided in Adafruit Library for controlling the LCD.
- lcd.set_cursor(col, row) = Move the cursor to any position at column and row.
- lcd.clear() = To clear the LCD.
- lcd.blink(True) = To blink the cursor (True or False)
- lcd.move_right() = To move the cursor to Right by one position.
- lcd.move_left() = To move the cursor to Left by one position.
- lcd.message(message) = To print the text on LCD.

 Python code is provided below. (Source of the code: https://circuitdigest.com/microcontroller-projects/voice-to-text-typing-using-raspberry-pi )
If you want messages in bigger fonts, you can use a bigger LCD display in this project.
This is the Python Code useful for trying Voice Typing
import bluetooth
import RPi.GPIO as GPIO #calling for header file which helps in using GPIOs of PI
import Adafruit_CharLCD as LCD
# Raspberry Pi pin setup
lcd_rs = 18
lcd_en = 23
lcd_d4 = 24
lcd_d5 = 16
lcd_d6 = 20
lcd_d7 = 21
lcd_backlight = 2
# Define LCD column and row size for 16x2 LCD.
lcd_columns = 16
lcd_rows = 2
lcd = LCD.Adafruit_CharLCD(lcd_rs, lcd_en, lcd_d4, lcd_d5, lcd_d6, lcd_d7, lcd_columns, lcd_rows, lcd_backlight)
server_socket=bluetooth.BluetoothSocket( bluetooth.RFCOMM )
port = 1
server_socket.bind(("",port))
server_socket.listen(1)
client_socket,address = server_socket.accept()
print "Accepted connection from ",address
while 1:
data = client_socket.recv(1024)
print "Received: %s" % data
if (data != ""):
lcd.clear()
print (len(data))
if (len(data) > 16): #breaking long strings into 2 parts
i = len(data)-16
a,b = data[:16], data[16:] #first string will be of 16 char
lcd.message(a)
lcd.message('\n')
lcd.message(b)
print i
print a
print b
else:
lcd.message(data)
if (data == "clear"):
lcd.clear()
if (data == "q"):
print ("Quit")
break
client_socket.close()
server_socket.close()”
Voice typing using Google Keyboard is a great achievement. This feature can easily be added with the help of Android Apps and display for Raspberry Pi. The user does require basic knowledge of Python language to accomplish this project. Availability of library of tools makes the project easier and faster to complete.
Thus, Raspberry Pi has proved its worth in bringing more innovations to the existing devices. This mini-computer of credit card size, due to its unmatched flexibility, has changed the way computers and mobile phones were used. The best technology is one that is friendly to privilege and handicapped alike. Voice typing has added to the user-friendliness of the computer and mobile phones and made them accessible to visually impaired users too. The number of Raspberry Pi GPIO pins can be altered as per requirement if you choose to extend this project. So, try it yourself and add to your knowledge base.
