Currency
Toggle Nav

How to make an ESP32 Weather E-Paper?
June 19, 2025
Pairing an ESP32 microcontroller with an E-Paper display is a classic combination in the DIY world for creating custom, ultra-low-power information displays. Its core appeal lies in its ability to fetch any data you need from the internet via Wi-Fi and present it on a screen that only consumes power during updates. This means your creation can run for weeks, or even months, without a recharge, always showing the latest information.
Makers have already built-in numerous creative and practical projects with this tech stack. For example:
- Personal Productivity Dashboards:
- Meeting Schedule Display: Pulls data directly from the Google Calendar or Outlook API to show today's meeting schedule right on your desk.
- Task Manager: Connects to APIs from services like Todoist or Trello to sync your to-do list in real-time.
- Real-Time Data Trackers:
- Stock Ticker: Tracks the real-time price of stocks or cryptocurrencies from financial APIs.
- Public Transit Timetable: Displays the arrival time of the next bus or train at your local stop.
- Environmental Monitor: Shows local Air Quality Index (AQI) or pollen levels.
- Home Information Centers:
- Dynamic Digital Photo Frame: Periodically fetches and displays new photos from a web album.
- Server Status Monitor: Uses a simple icon to show if your personal website is online.
Of course, this is just the tip of the iceberg. You can find tons of other amazing projects on sites like Hackster.io, which is a fantastic place to hunt for your next project idea.
Now, let's dive into this project: the weather forecast display system. It serves as the perfect launchpad for all the ideas mentioned above. Think of it as a beginner's bootcamp, not just an isolated gadget. During this process, you will master the core skills of the ESP32: connecting to Wi-Fi, making API requests, parsing JSON data, and laying out information on an E-Paper display.
Once you've mastered these skills, you'll have the blueprint to build any of the projects above and countless other personalized displays. So, are you ready to build this practical and cool weather station? Let's get started.
Step by step to setup the System
- Connects to a 2.4 GHz WiFi network on startup.
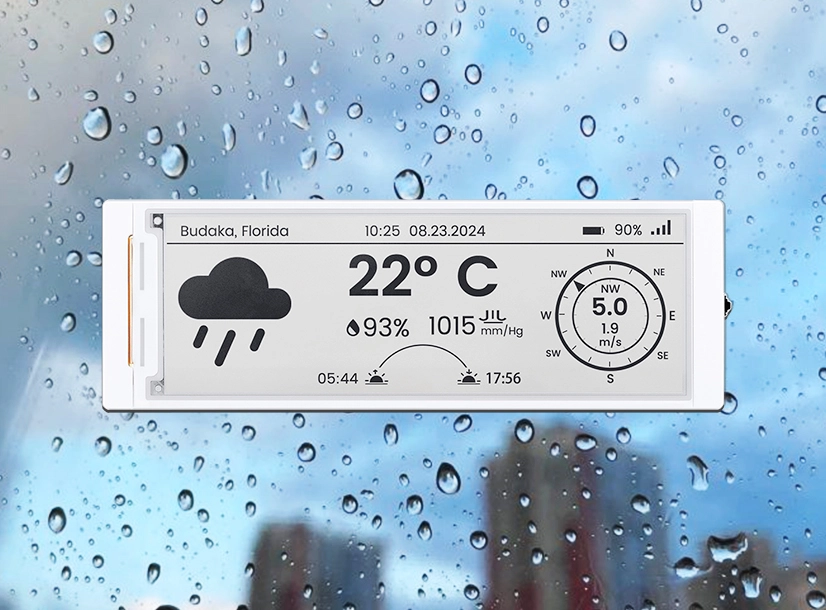
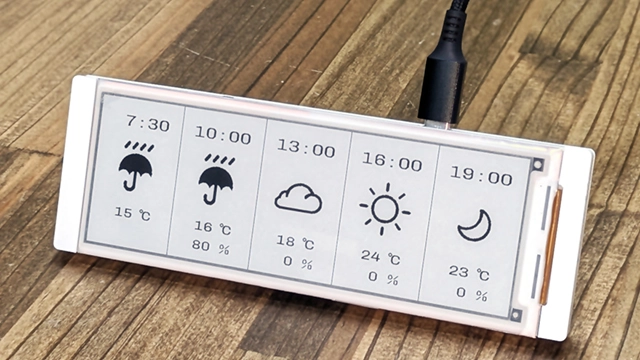
- Retrieves the current weather and forecast (3, 6, 9, and 12 hours ahead) via OpenWeatherMap API.
- Displays weather information (time, weather condition, temperature, and probability of precipitation) on the E-Paper display.
- Enters Deep-sleep mode to save power.
- Restarts after the configured interval (default: 1 hour).
Hardware
- Elecrow CrowPanel ESP32 5.79-inch E-paper HMI Display
- A display module equipped with a 5.79-inch E-Paper display. The display has a resolution of 272(H) × 792(L) pixels.
- Its main controller is ESP32-S3-WROOM-1-N8R8. It is certified under FCC ID 2AC7Z-ESPS3WROOM1, CE compliant under the RED directive, and is certified in Japan under TELEC No. R 201-220052.
- It is housed in an acrylic enclosure.
Of course, this is just one of the models we recommend. You are free to choose other sizes and parameters based on your project needs. You can view all the options on Elecrow's E-Paper HMI Display Series page. For example, if you want to build a more compact version, the 4.2-inch or 2.9-inch CrowPanels are excellent alternatives, as they use the same microcontroller and the code will run with almost no modifications.
Step 1: Get Your Weather Data Source (API Key)
To get weather forecast data, you need an API key from OpenWeatherMap. This system uses One Call API 3.0, which requires registering a credit card, along with your address and phone number. This API is free for up to 1,000 calls per day; beyond that, a charge of £0.12 is incurred for each additional 100 calls.
Important: To avoid unexpected charges, be sure to follow step 16 below to set your daily request limit to 900. This will allow you to use the service for free. If you exceed the daily limit, you'll get an HTTP 429 response status code.
Let's walk through the steps:
- Open the OpenWeatherMap website.
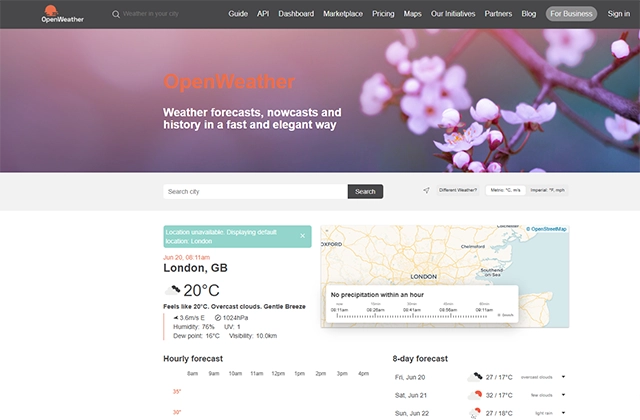
OpenWeatherMap Homepage
- Click "Sign in" at the top right corner.
- Click "Create an Account".
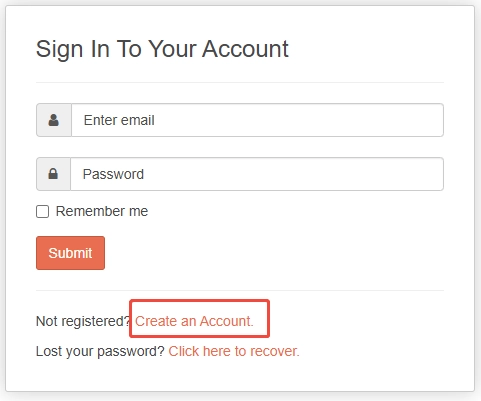
Create Account on OpenWeatherMap
3. Enter your username, email address, and password. Then, check the following boxes:
- "I am 16 years old and over"
- "I agree with Privacy Policy, Terms and conditions of sale and Websites terms and conditions of use"
- "I am not a robot"
Finally, click the "Create Account" button.
- A dialog titled "How and where will you use our API?" will appear.
- If you are registering as an individual, leave the "Company" field blank. Select the appropriate purpose in the "Purpose" field and click the "Save" button.
- You will receive an email from "Open Weather Team" with the subject "OpenWeatherMap Account confirmation."
- Click the "Verify your email" button in the email.
- Sign in using your registered email address and password.
- Click the "API keys" tab.
- Note down your API key.
- Click the "Billing plans" tab.
- Under the "One Call API 3.0" section, click the "Subscribe" button next to the "Base plan."
- Enter your billing information (First name, Last name, Country, Address Line 1, Address Line 2, City, Postal code, and Phone) and click the "Continue to payment" button.
- Enter your credit card information (through Stripe).
- To avoid unexpected charges, click the pencil icon beside the "Calls per day (no more than)" field and set the value to less than 1,000 (I set it to 900).
Step 2: Set Up the Environment and Upload the Code
With the hardware and API key ready, it's time to get the code running.
1. Get the Project Files:
Option A: Clone with Git (Recommended)
If you have Git installed, this is the most straightforward method.
git clone https://github.com/cubic9com/crowpanel-5.79_weather-display.gitOption B: Download the ZIP file
If you don't have Git installed or prefer not to use the command line:
- Open the project's GitHub page in your browser:
https://github.com/cubic9com/crowpanel-5.79_weather-display - Click the green
<> Codebutton on the right side of the page. - Select
Download ZIPfrom the dropdown menu. - Once downloaded, unzip the file. The resulting folder contains our project files.
2. Choose Your Development Environment:
Option A: Use Visual Studio Code (Recommended, Integrated Environment)
This is the best option for beginners and most users, as it provides an all-in-one graphical interface.
- Install VS Code: If you don't have it installed, visit the official website at
https://code.visualstudio.com/to download and install it. - Install the PlatformIO Extension: Launch VS Code, navigate to the Extensions view (the four-squares icon on the left Activity Bar), search for "PlatformIO IDE," and click "Install."
- Open the Project Folder: Go to the top menu bar, select "File" > "Open Folder...", and then select the project folder you obtained in the first step.
Option B: Use PlatformIO Core CLI (Advanced, for any text editor)
This option is for you if you prefer using other text editors (like Sublime Text, Atom, Vim, etc.) or are comfortable with the command line.
- Install Python: Ensure you have Python 3.6+ installed on your system.
- Install PlatformIO Core: Open your terminal (or Command Prompt) and run the following command:
pip install -U platformio - Edit Code: Use any text editor of your choice to open the project folder.
3. Configure Your Personal Information:
- In the project folder, find the
config.template.hfile. Make a copy of it and rename the copy toconfig.h. - Open this new
config.hfile and modify the following lines with your own details:
// 2.4 GHz WiFi Configurations
#define WIFI_SSID "your WiFi SSID"
#define WIFI_PASSWORD "your WiFi password"

// OpenWeatherMap API Configurations
#define OPENWEATHERMAP_API_KEY "your OpenWeatherMap API key"
#define LATITUDE 35.68130      // Latitude (e.g., Tokyo)
#define LONGITUDE 139.76707    // Longitude (e.g., Tokyo)
#define TIMEZONE_OFFSET 9      // Offset from UTC (in hours)

// Interval Configurations (minutes)
#define INTERVAL_IN_MINUTES 60 // 1 hour
- Note: You can get the latitude and longitude from the URL after searching for your desired location in Google Maps.
4. Build and Upload the Project:
If using Option A (Visual Studio Code):
- In the PlatformIO sidebar, go to PROJECT TASKS > esp32-s3-devkit-1 > General > Upload.
If using Option B (CLI):
- Open your terminal (or Command Prompt) and make sure you are in the root directory of the project folder.
- Run the following command to build and upload the code:
pio run -t upload
Wait for the upload process to complete. The device will then restart automatically.
Congratulations! Your custom weather station is now up and running!
Finish Crowpanel 5.79 inch Weather Display
Further Exploration: A Deeper Dive into the Tech Choices
This tutorial guides you down a proven, streamlined path. But the real fun in DIY lies not just in replicating, but in understanding the "why" behind the choices. Here, we'll explore some common technical questions in a Q&A format.
Q: Do I have to use the all-in-one board from the tutorial? Can I use my own ESP32 and E-Paper screen?
A: Absolutely. Mixing and matching is the spirit of DIY and offers great flexibility, but you'll need to tackle these technical challenges:
- Hardware Wiring: This is the most critical step. You must consult the display's datasheet to correctly wire up its SPI bus. This means you'll be handling pins like SCK (Clock), MOSI (Master Out Slave In), CS (Chip Select), DC (Data/Command), RST (Reset), and BUSY and connecting them to the correct GPIOs on your ESP32. Any mistake here will result in a blank screen.
- Pin Configuration in Code: At the software level, you'll need to locate the display driver's configuration file (or its constructor in the code) and explicitly define the GPIO pin numbers you used for each connection.
- The Flexibility Payoff: Once you overcome these hurdles, you gain immense freedom. You can choose any size, resolution, or even a tri-color (red/yellow) E-Paper display to create a truly personalized device.
Q: Is C++ the only way to program this project? What if I want to use Python?
A: You can definitely switch. Using MicroPython is entirely feasible, but it requires you to embrace a completely different tech stack and solve the following:
- Firmware Flashing: You'll first need to use a tool like
esptool.pyto erase the existing firmware on the ESP32 chip and then flash the MicroPython firmware onto it. After this step, the device will no longer run Arduino C++ code. - Finding Compatible Libraries: All the C++ libraries from the original project become unusable. You must find MicroPython-compatible equivalents for each, such as:
- Display Driver: A replacement for
GxEPD2that works with MicroPython. - HTTP Requests: Using the
urequestslibrary. - JSON Parsing: Using the
ujsonlibrary.
- Display Driver: A replacement for
- Switching Your IDE: You would need to move away from PlatformIO and use an IDE like Thonny IDE, which is designed for interactive (REPL) programming with MicroPython devices. This is a fundamental shift in the development workflow.
Q: Can I use a different weather API, perhaps one that doesn't require a credit card?
A: Yes, but it's not as simple as just swapping the API key. You need to "adapt your code to the new interface," which involves this core work:
- HTTP Request Restructuring: Different APIs have unique endpoint URLs and request parameters. You'll need to rewrite the code that constructs the URL based on the new API's documentation. For instance, some APIs use
q=CityNamefor location instead of latitude and longitude. - Rewriting the JSON Parsing Logic: This is the most labor-intensive part. Every API returns a unique JSON data structure. You'll first need to use a tool like Postman to make a sample request to the new API, inspect the JSON response, and then completely rewrite the
ArduinoJsonparsing section of the code to extract temperature, humidity, weather icons, etc., from the new, different paths. - Error Handling: The new API will have its own set of error codes and messages, requiring you to adapt your error-handling logic accordingly.
Q: Why does this tutorial use PlatformIO (with the Arduino framework) instead of using ESP-IDF directly from Espressif?
A: This is a professional-level choice that boils down to a trade-off between "development speed" and "maximum performance." The path chosen in this tutorial is designed to give you the smoothest learning curve and access to the largest pool of community resources.
- Abstraction Level & Learning Curve: Our setup (PlatformIO with Arduino) is a high-level abstraction environment. It wraps complex, low-level operations (like FreeRTOS and memory management) into simple APIs like
digitalWrite(), making it incredibly fast to get started. ESP-IDF, in contrast, is a low-level framework that requires you to work directly with RTOS concepts, resulting in a steeper learning curve but also giving you much finer control. - Ecosystem & Library Support: The Arduino framework gives you seamless access to tens of thousands of community-written libraries. Almost any sensor you can find has ready-to-use code. ESP-IDF relies on official "components," which are high-quality and powerful but far less numerous and comprehensive than the Arduino ecosystem.
- Performance & Hardware Control: ESP-IDF allows you to directly configure registers, interrupts, and DMA, enabling you to squeeze every last drop of performance out of the hardware and achieve optimal power consumption. This makes it the go-to choice for commercial-grade products. The Arduino framework, due to its abstraction layers, introduces some performance overhead and can make it difficult to access certain specific hardware features.
- Conclusion & Path Forward: Therefore, the approach in this tutorial lets you stand on the shoulders of giants to focus on your application logic. When you're ready to move toward more professional embedded development and have strict requirements for performance and power, ESP-IDF is the logical next step in your journey.
This tutorial is based on cubic9com's article on Hackster.io: 12-Hour Weather Forecast Display using CrowPanel E-Paper