


Story
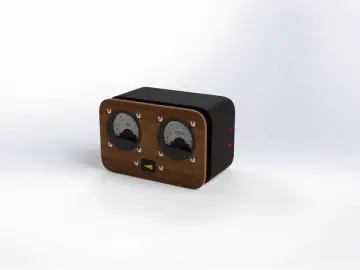
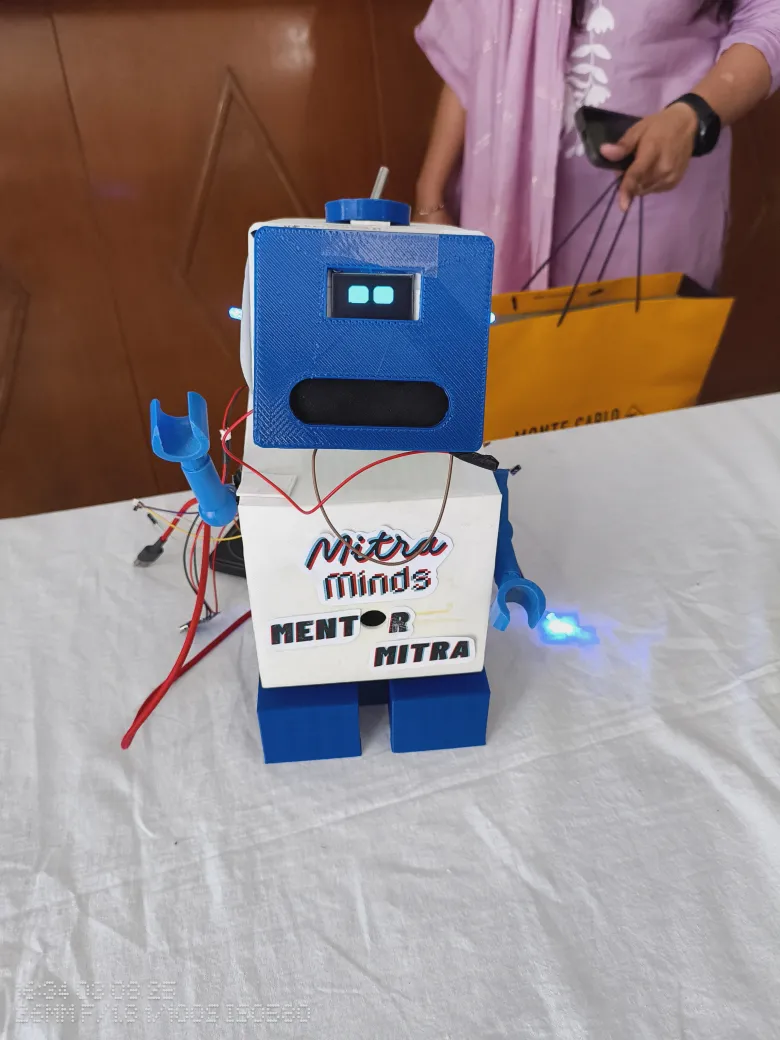
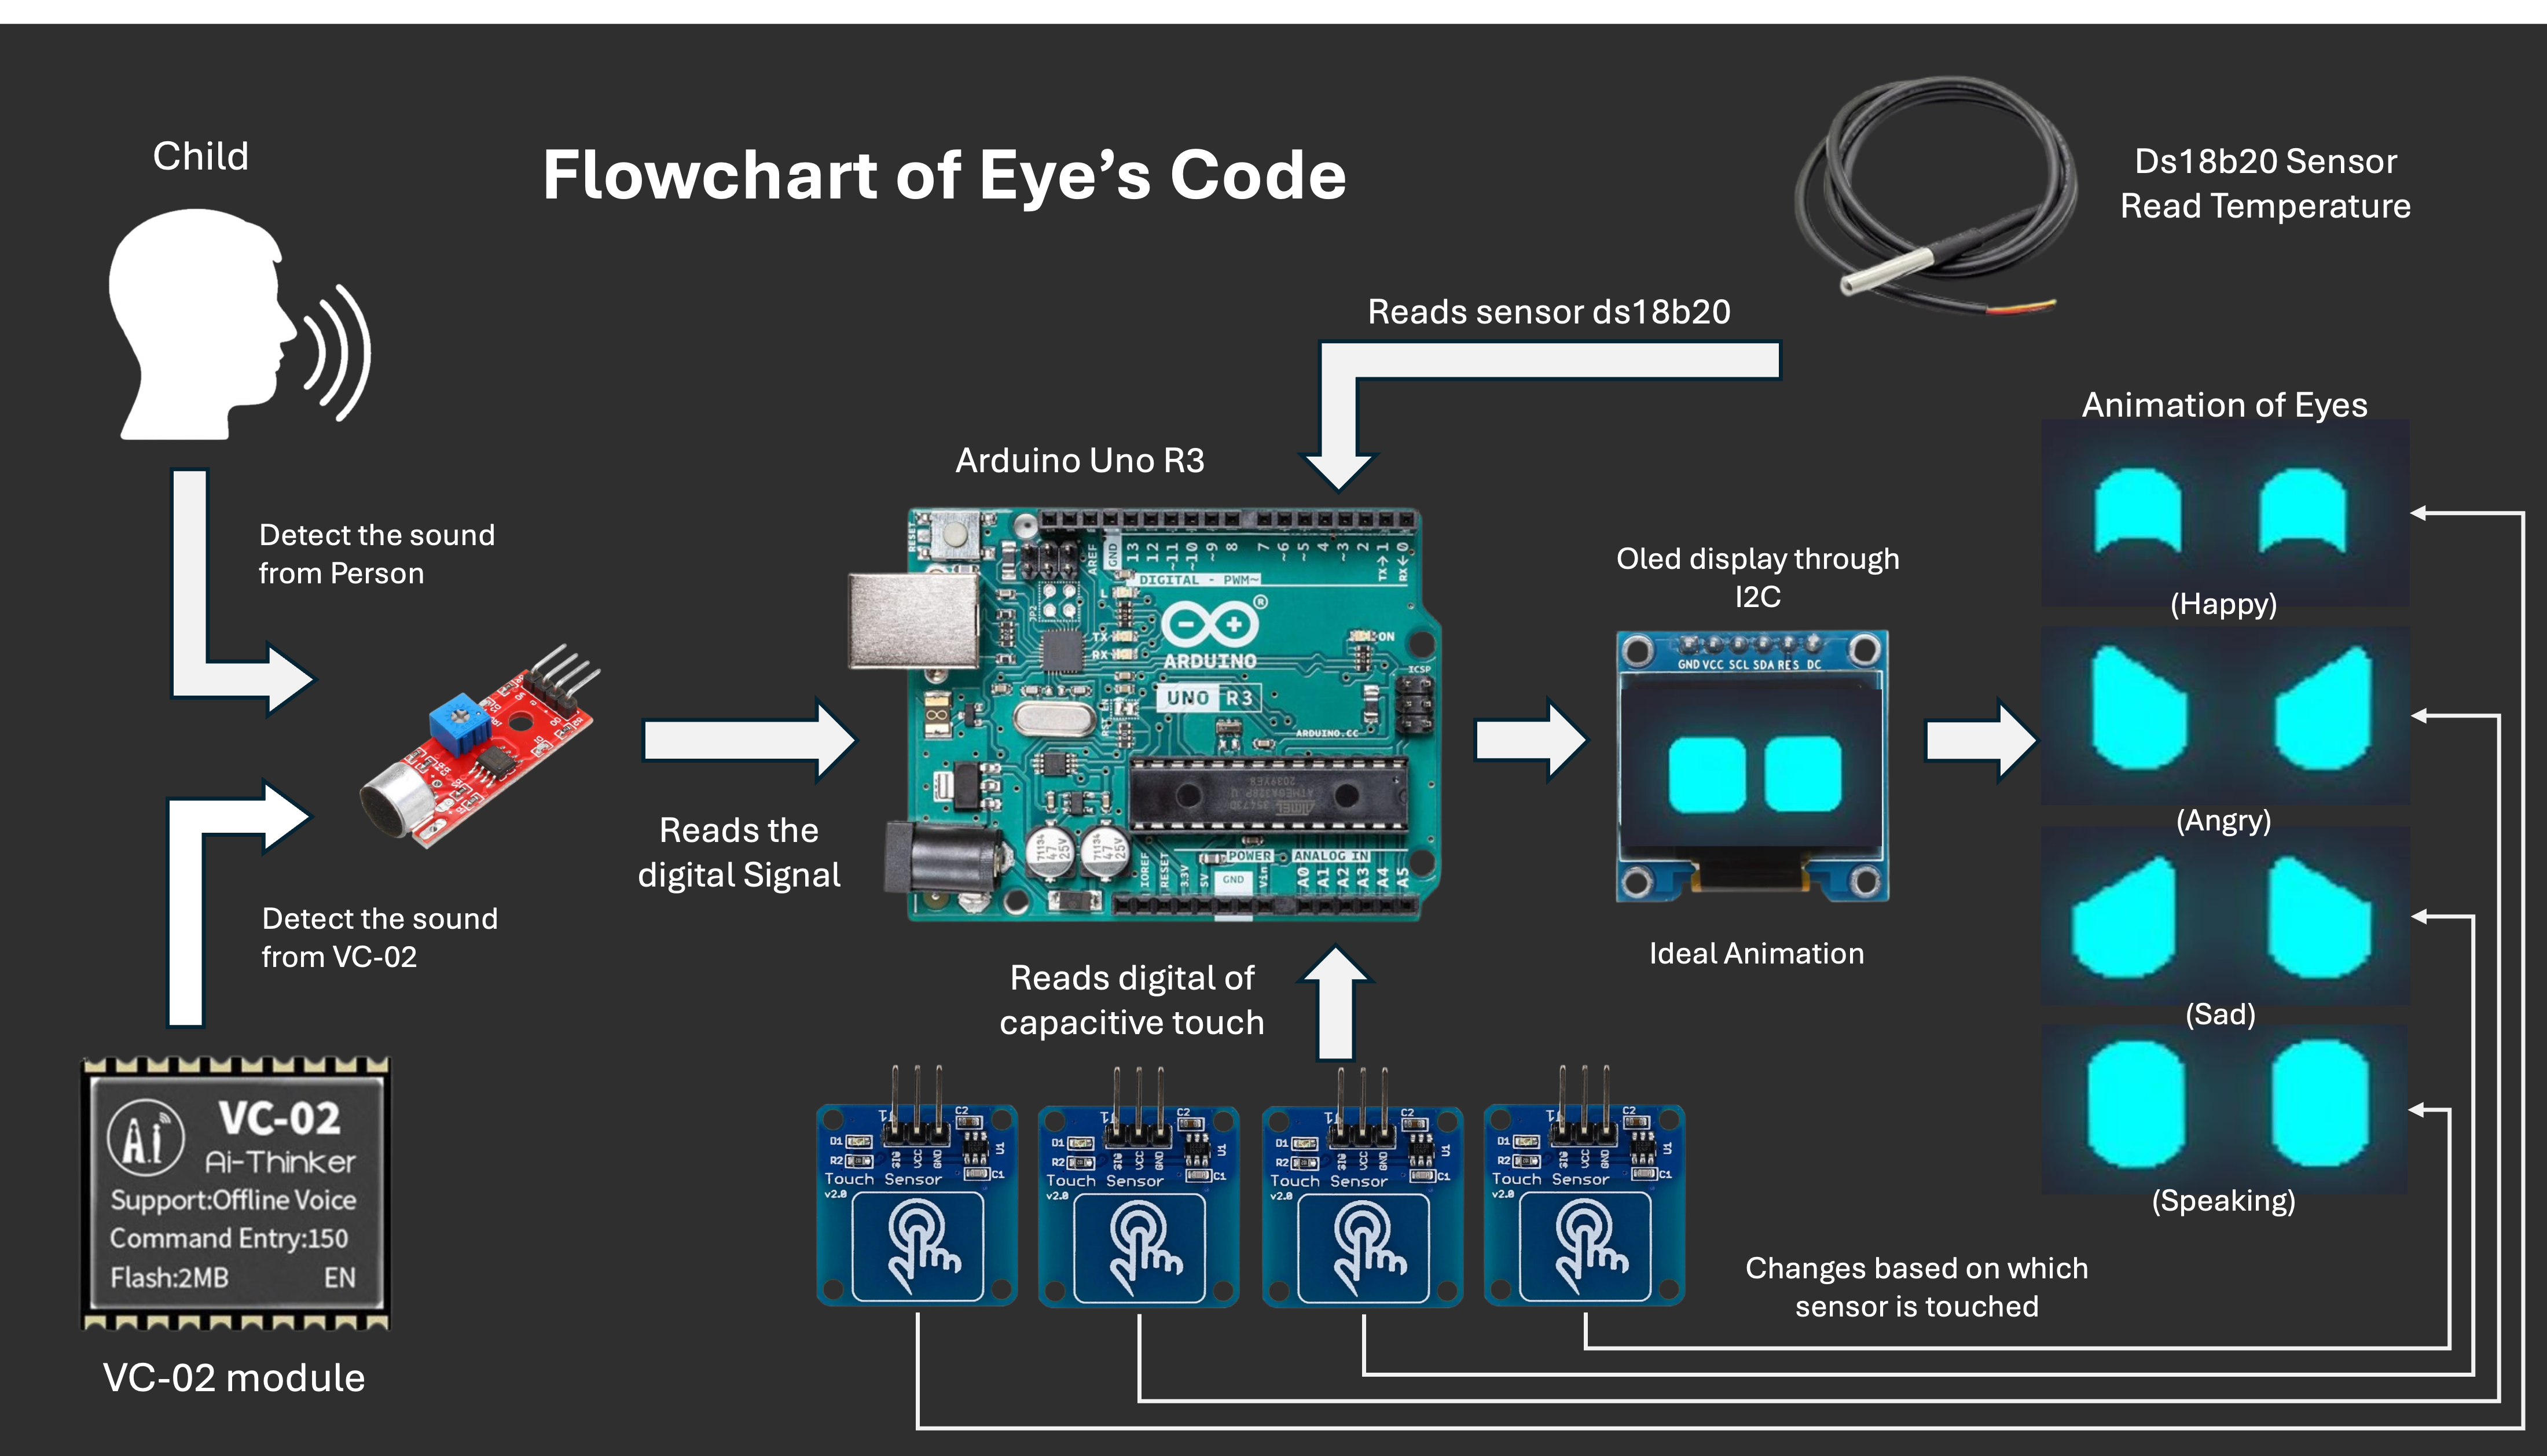
Mentor Mitra AI is an interactive educational toy designed to assist and engage children through voice-based interaction, emotional response, and adaptive learning. Built on a custom-designed PCB using ATmega328P, and integrated with the AI Thinker VC02 module, this toy can detect environmental inputs, interact with children using speech, and share progress data to a custom React + Node.js web dashboard for parents or teachers to monitor learning milestones.
This project blends embedded system design, AI communication, and educational psychology to offer a meaningful learning companion for kids — while promoting STEM concepts to students and hobbyists.
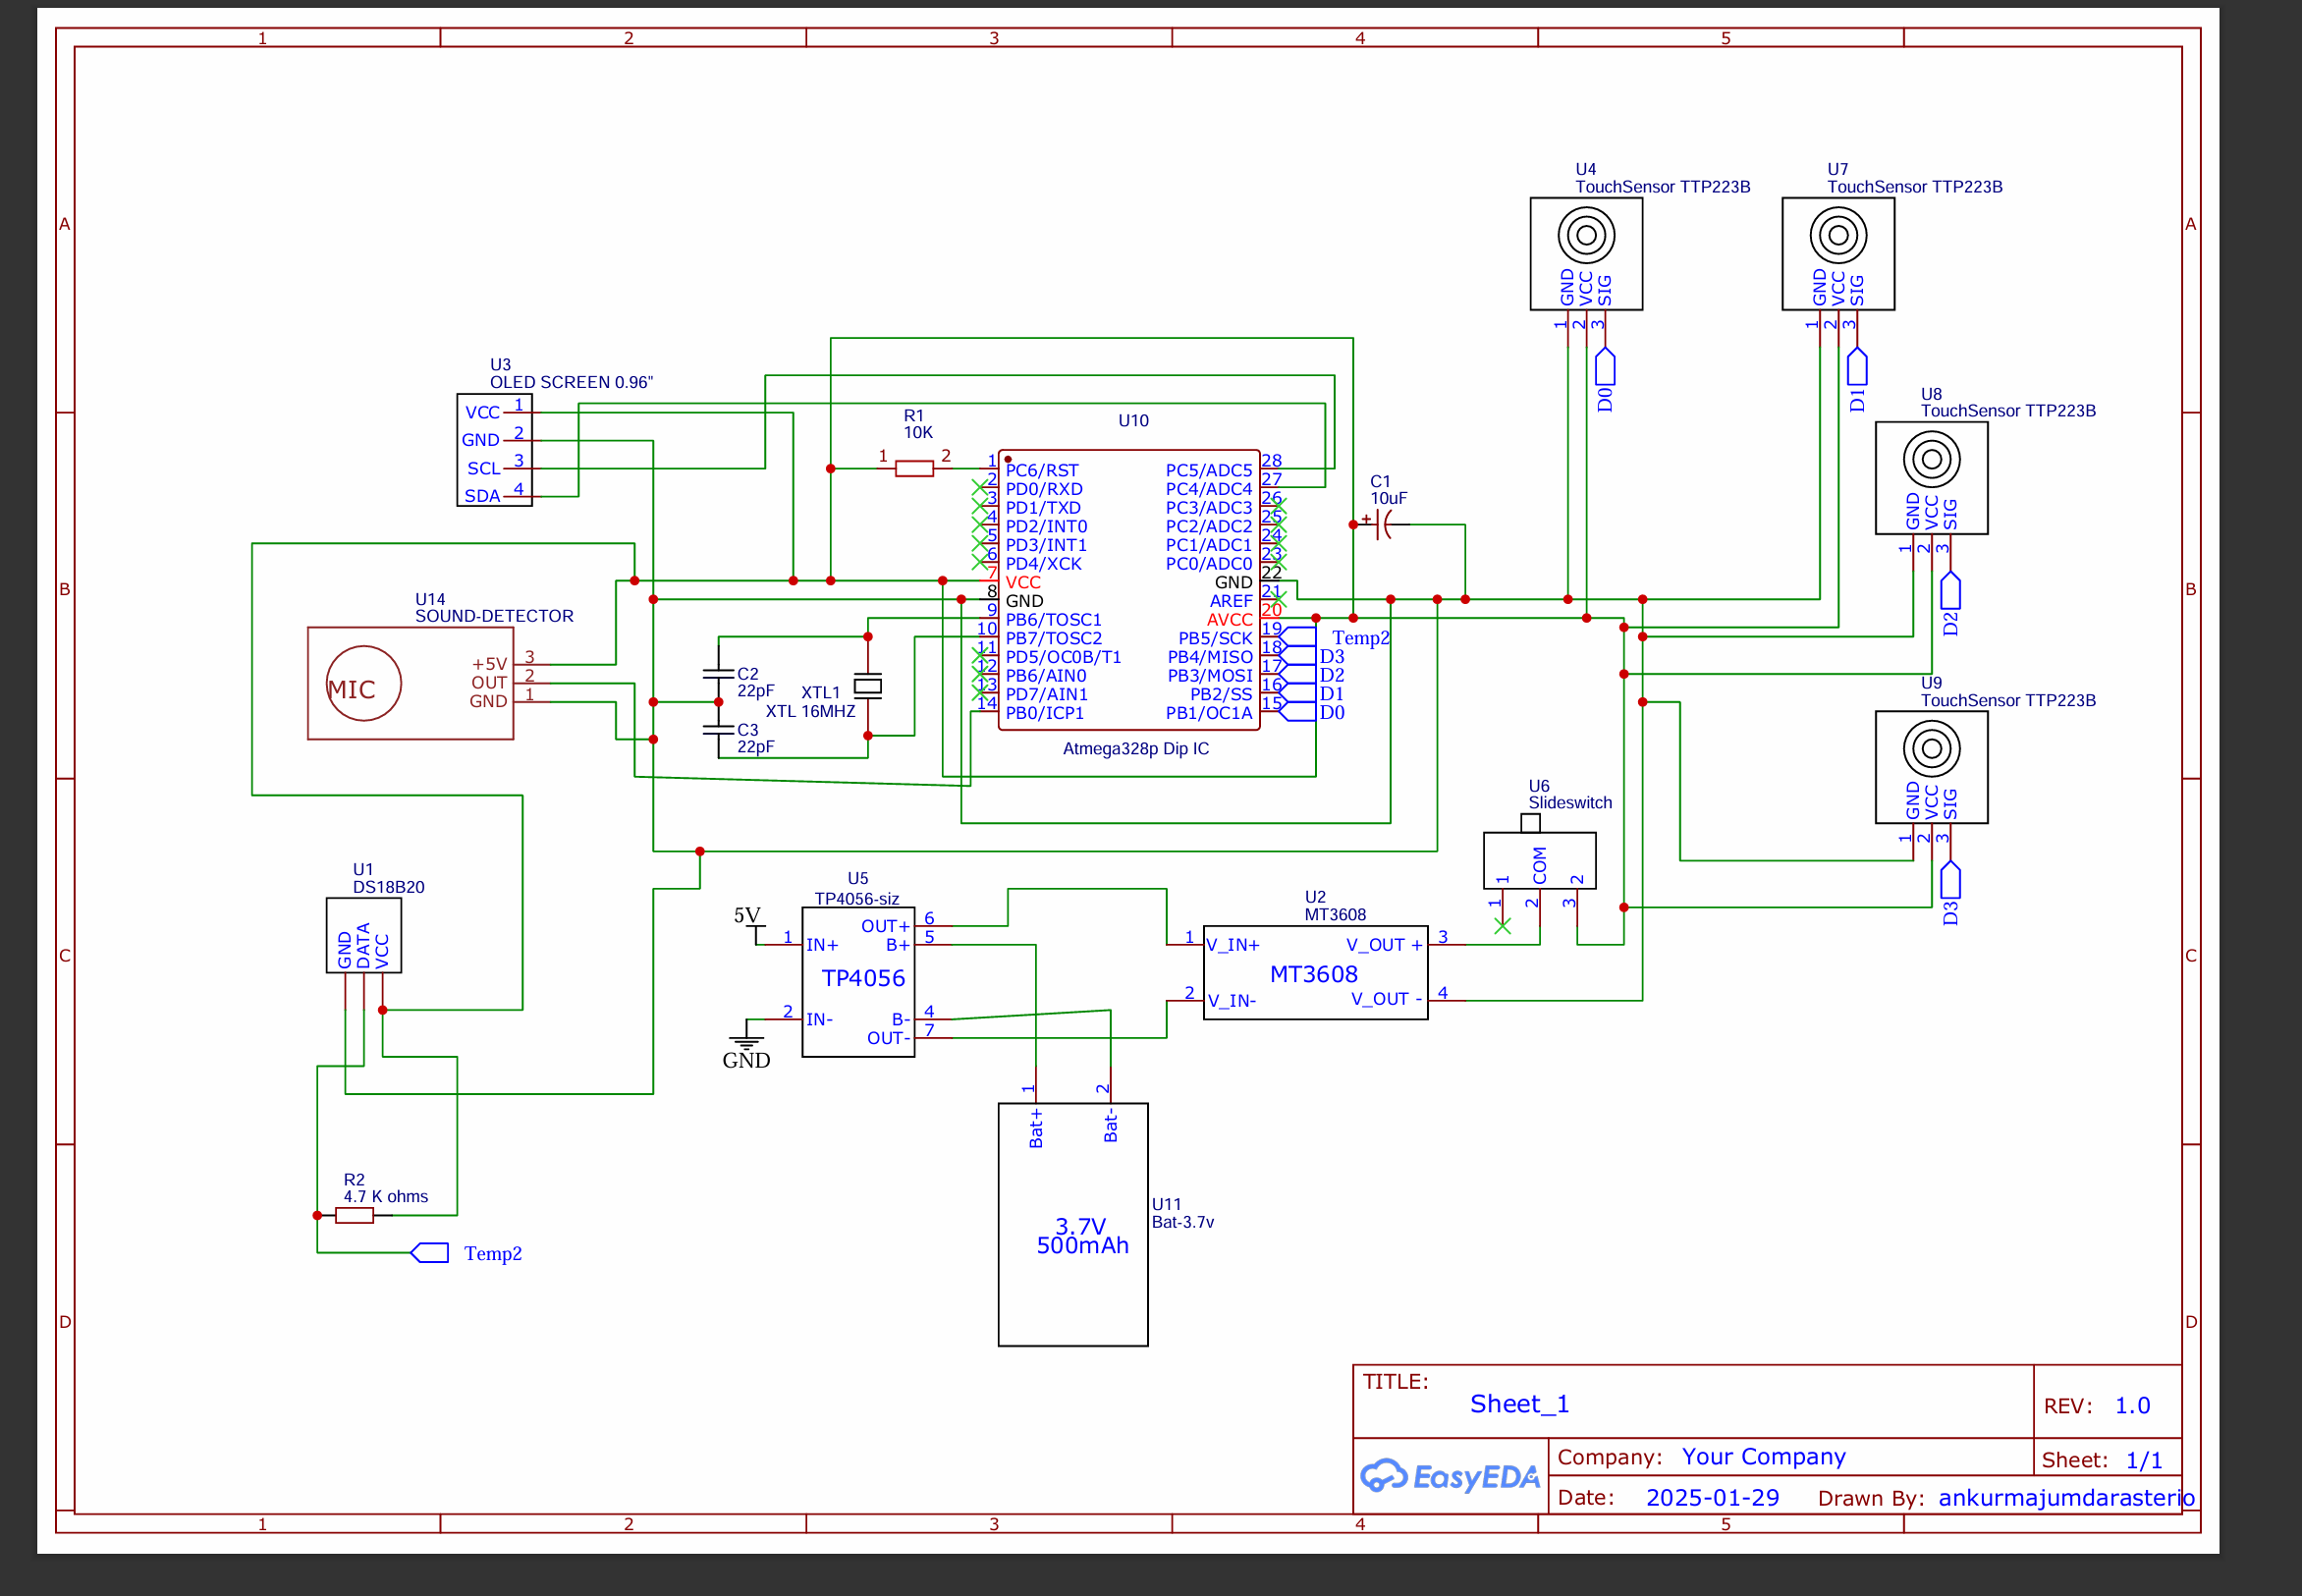
⚙️ How does it work?🔧 1. Hardware System
-
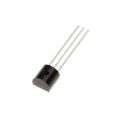
Microcontroller: ATmega328P (on a custom PCB)
-
Modules Used:
-
AI Thinker VC02 for voice-to-AI processing
-
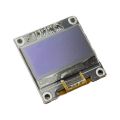
1.3” OLED Display for feedback display
-
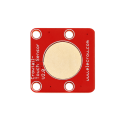
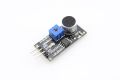
Touch & Sound Sensors for user input
-
RGB LED and Servo Motor for expressive response
-
Temperature Sensor (e.g., DHT11 or LM35)
-
-
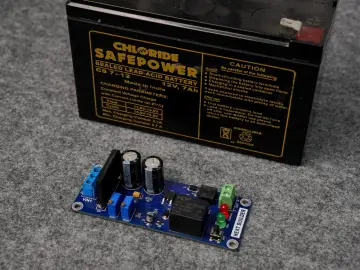
Power Regulation: 5V regulated using MP3608 step-down or USB
🧠 2. AI Communication
-
VC02 sends user voice input to a hosted AI model (e.g., via Gemini API)
-
AI generates intelligent text output based on context
-
ESP32 parses the AI output and sends commands to ATmega328P for action (e.g., move servo, show emotion on LED, say something)
🌐 3. Web Dashboard
-
Built using React.js (Frontend) and Node.js (Backend)
-
Displays:
-
Child interaction history
-
Emotions detected
-
Learning progress
-
-
Data sent from ESP32 to server via Wi-Fi and displayed live
🔨 Step-by-Step Tutorials to Build Mentor Mitra AI
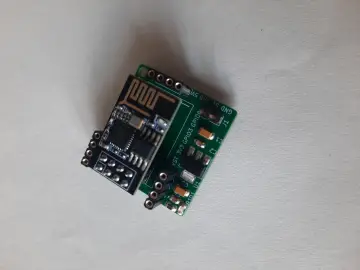
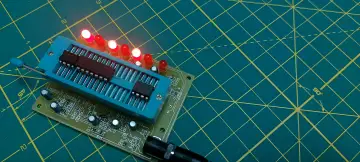
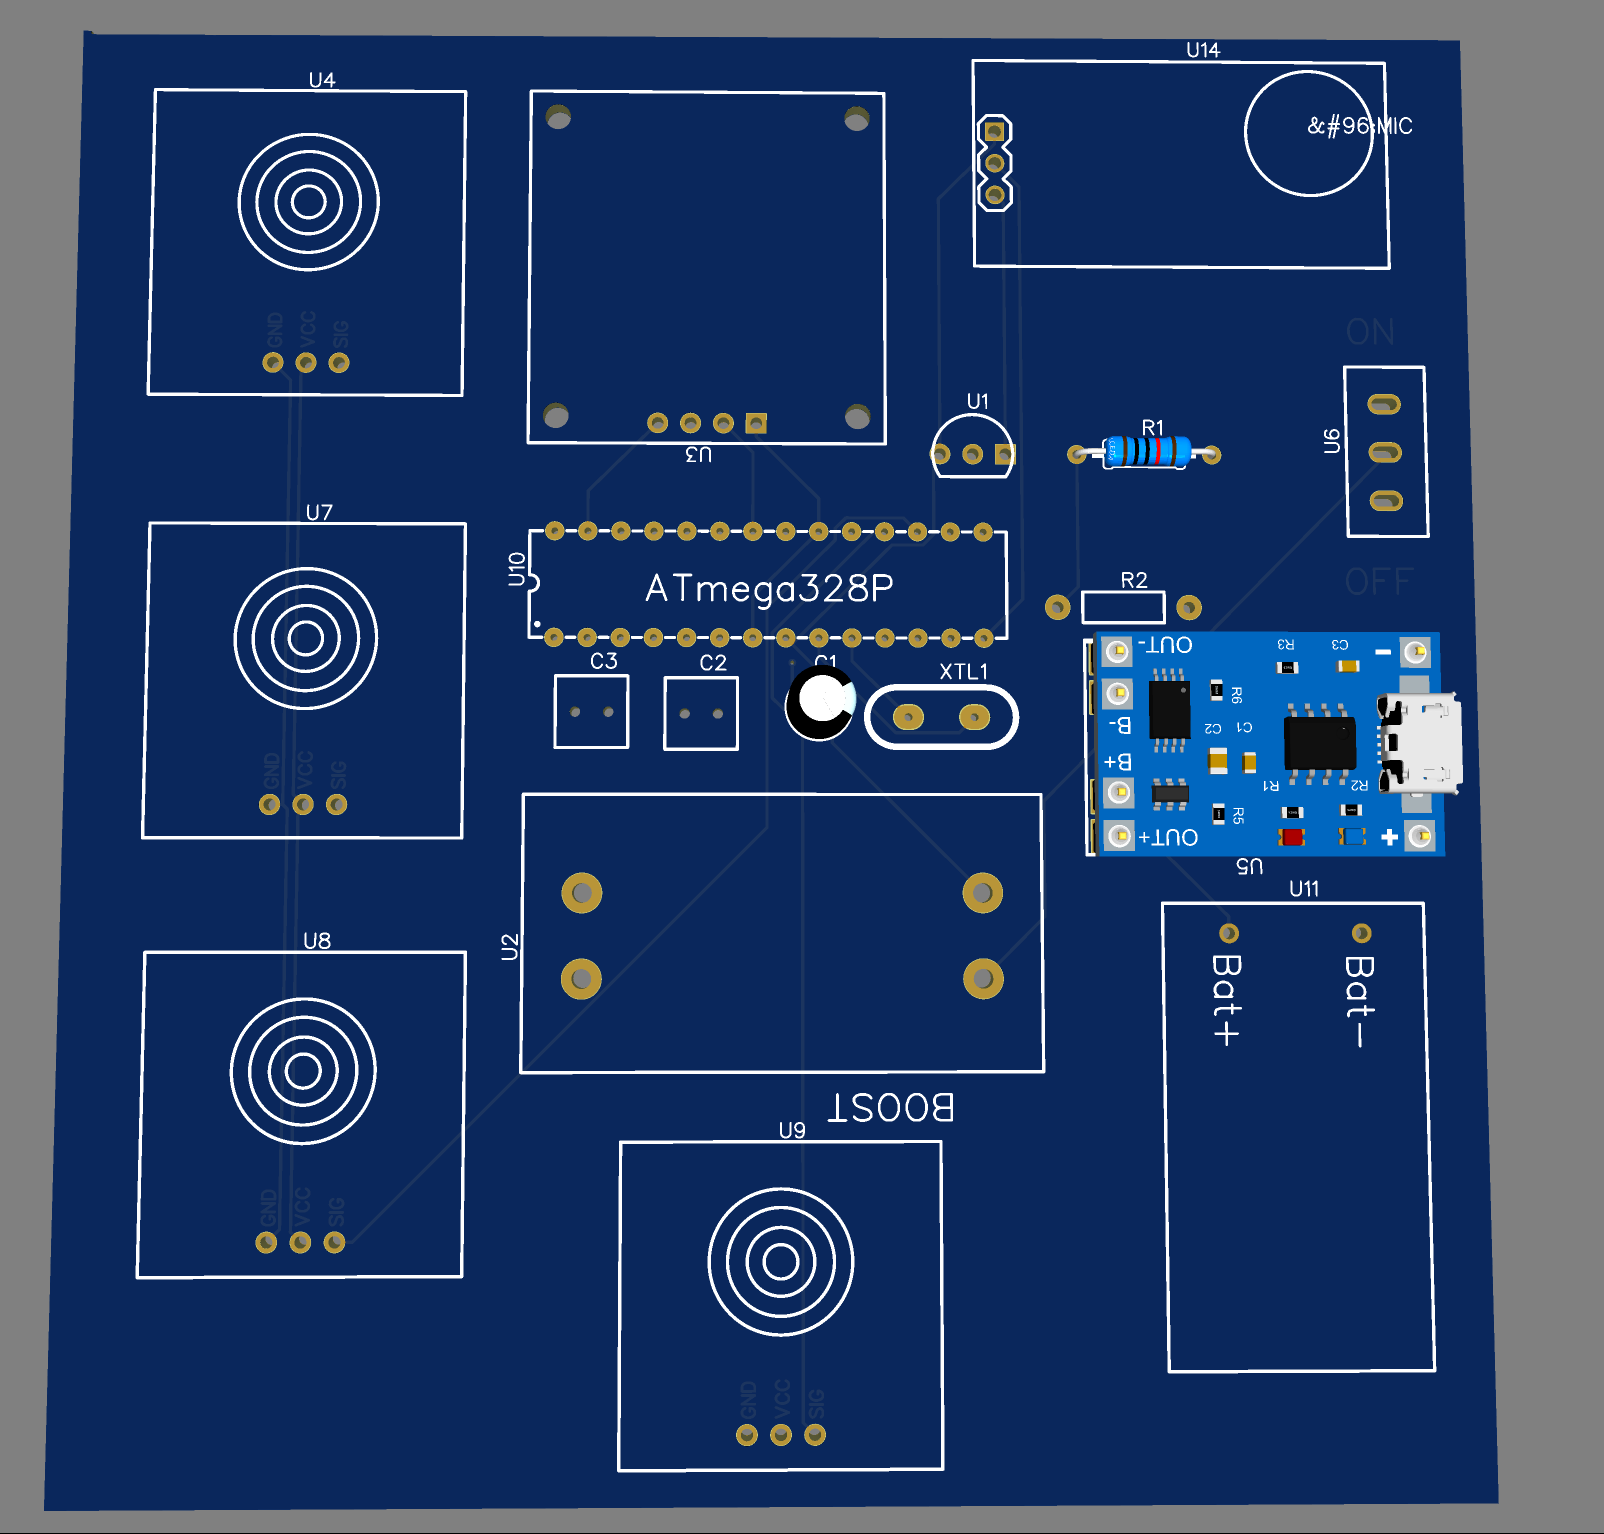
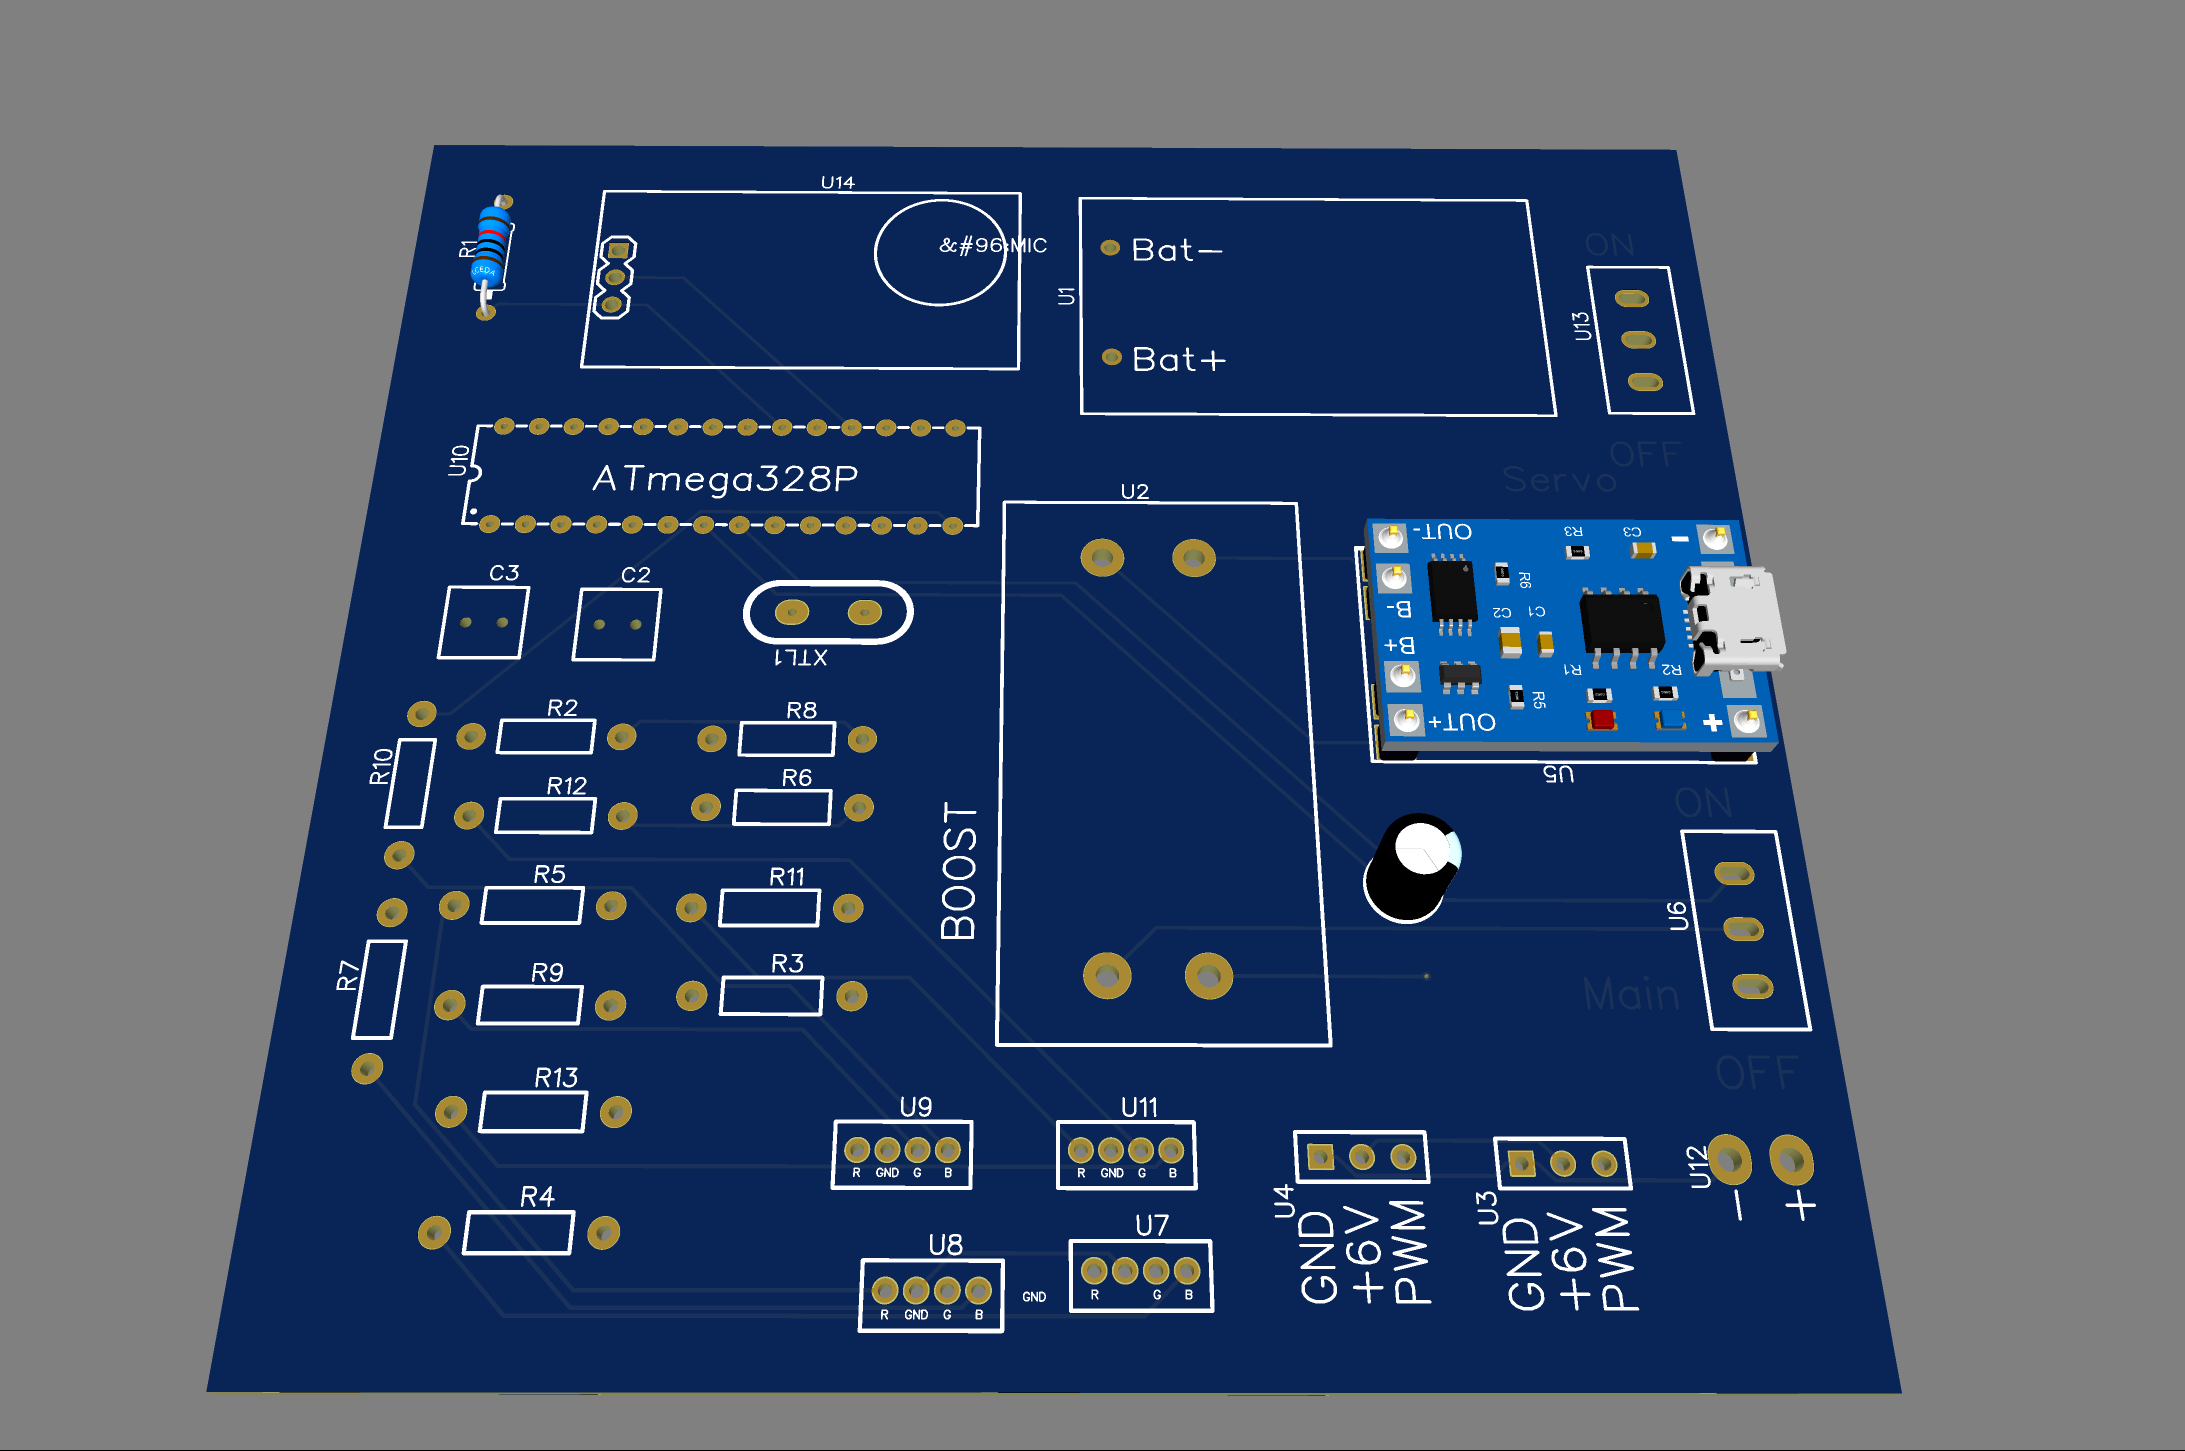
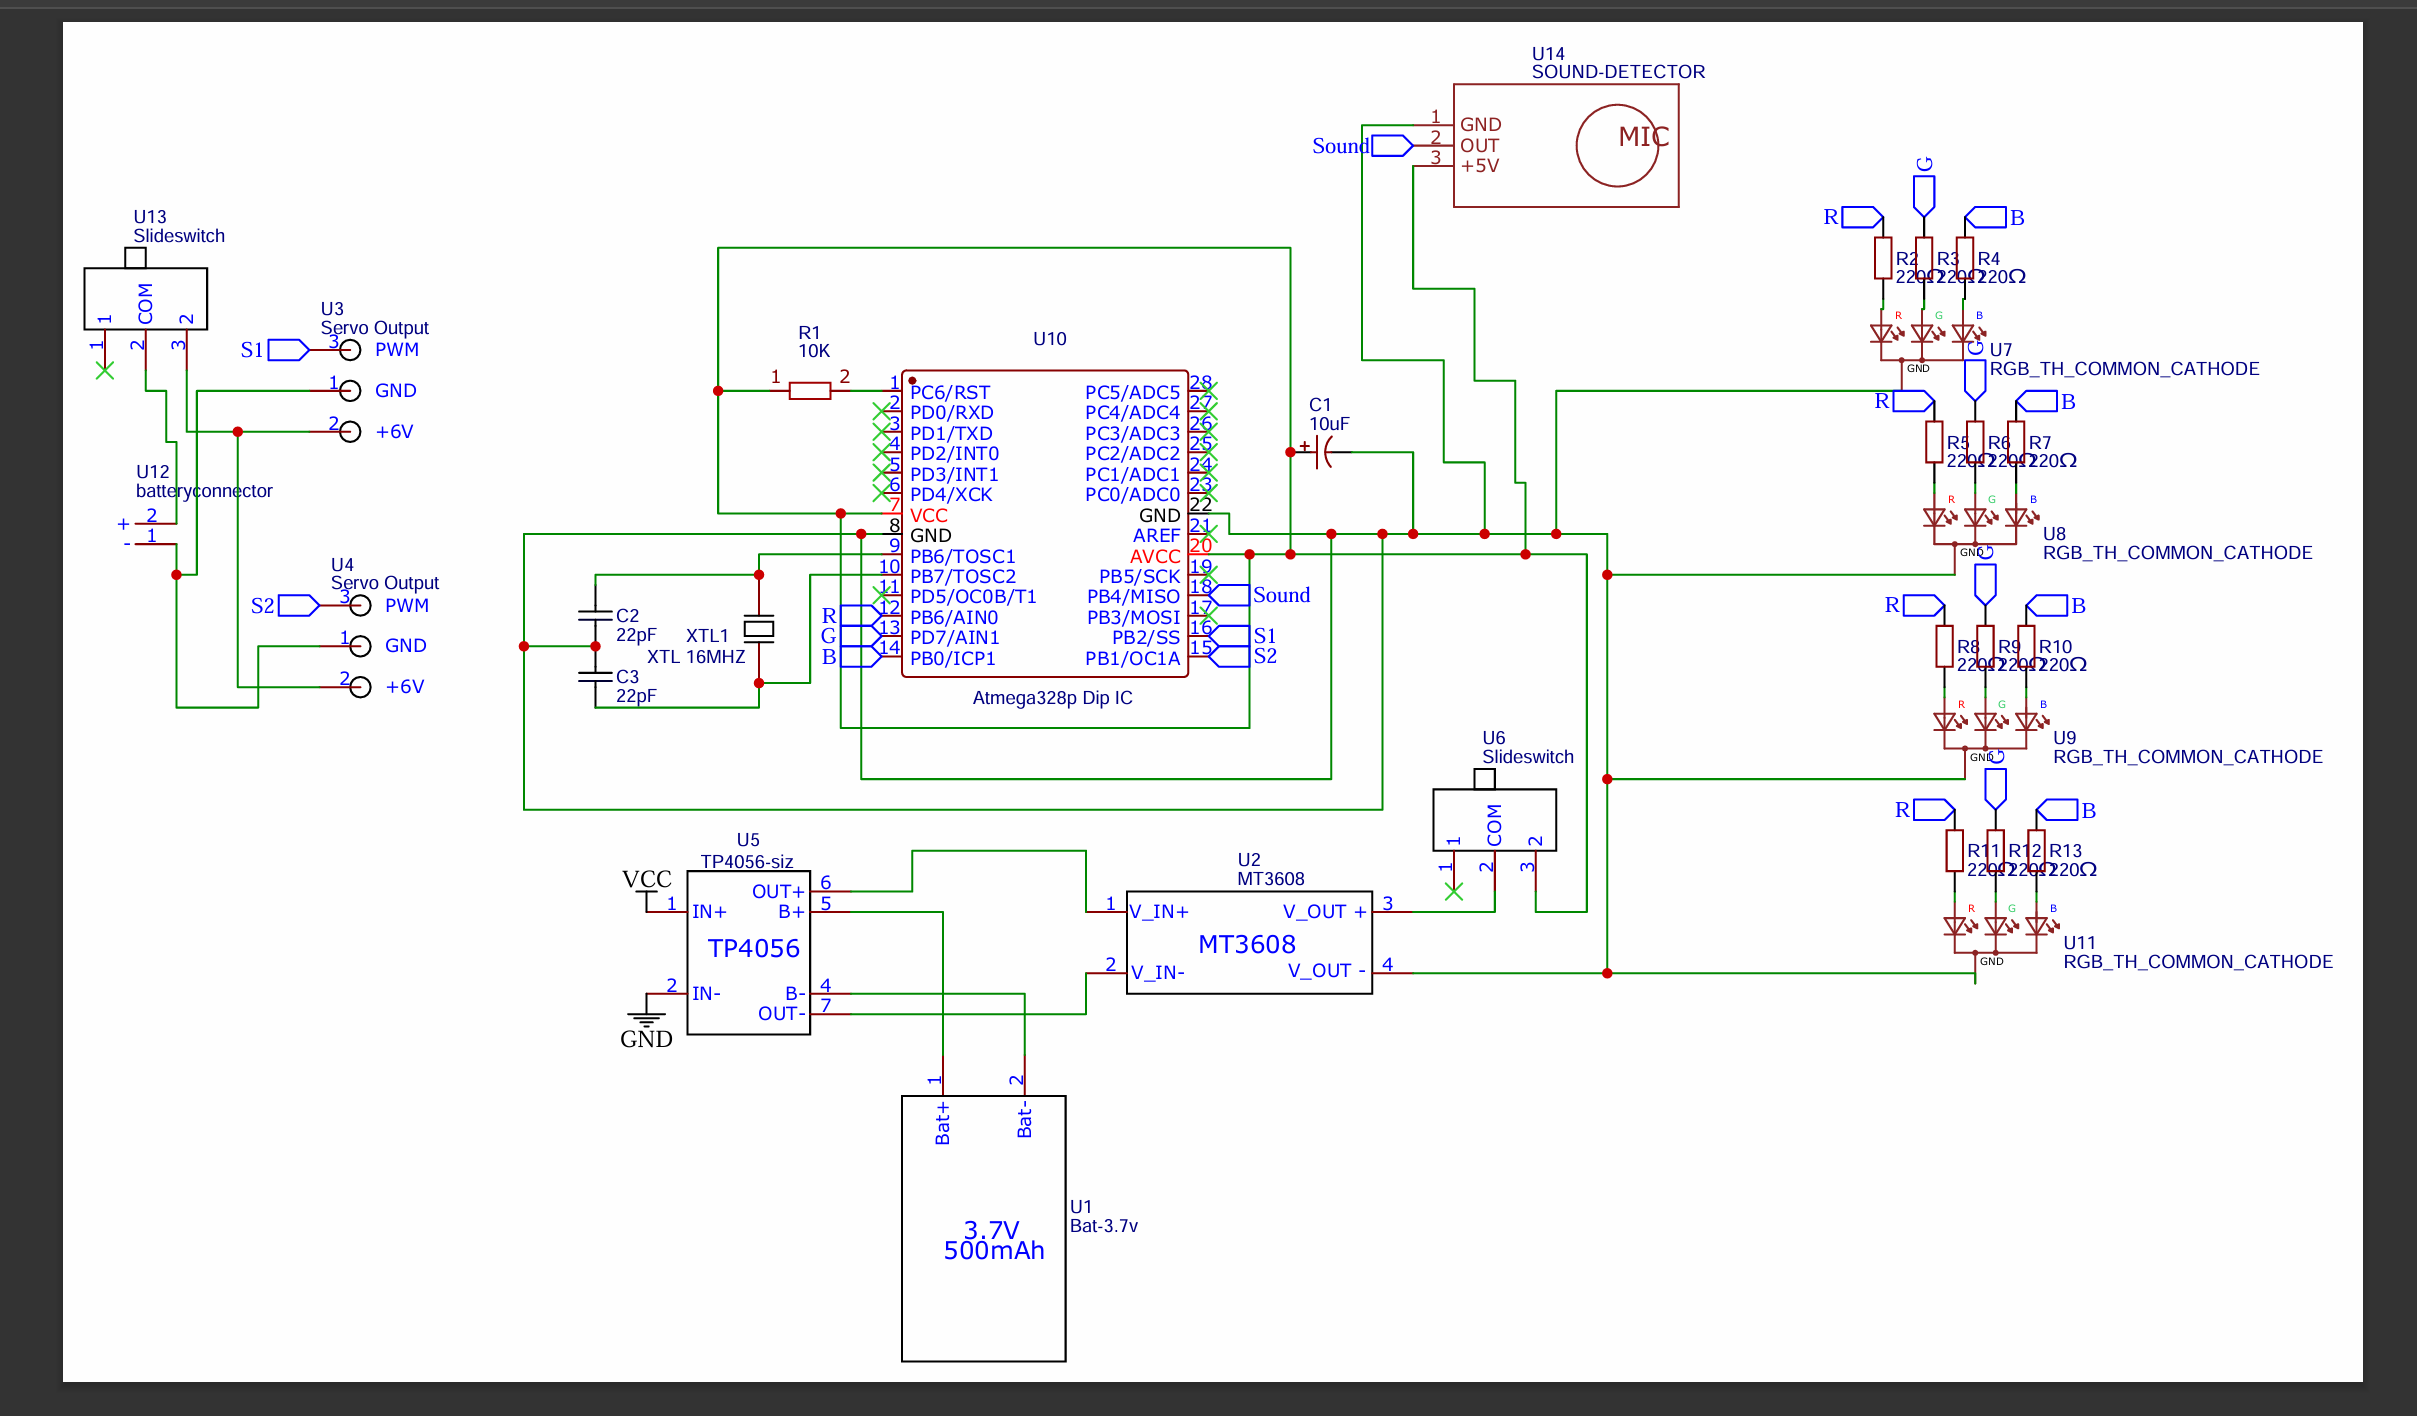
Step 1: PCB Design (EasyEDA)
-
Design schematic using ATmega328P, headers for VC02, OLED, sensors, and power regulation
-
Generate and order PCB & assemble components
-
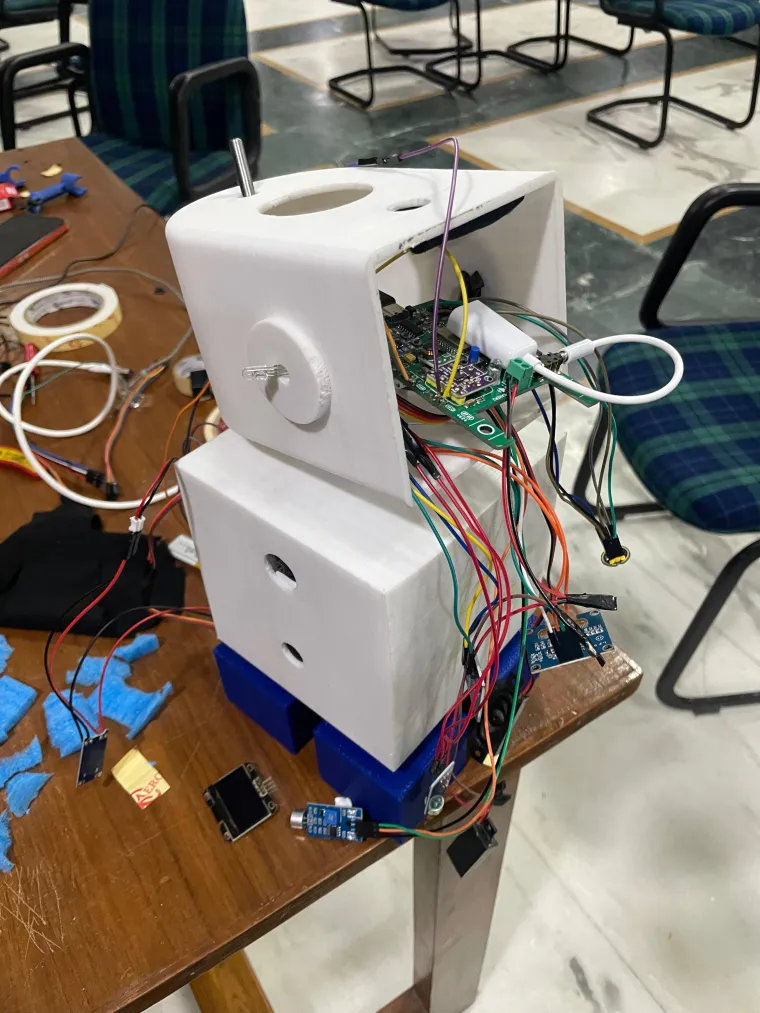
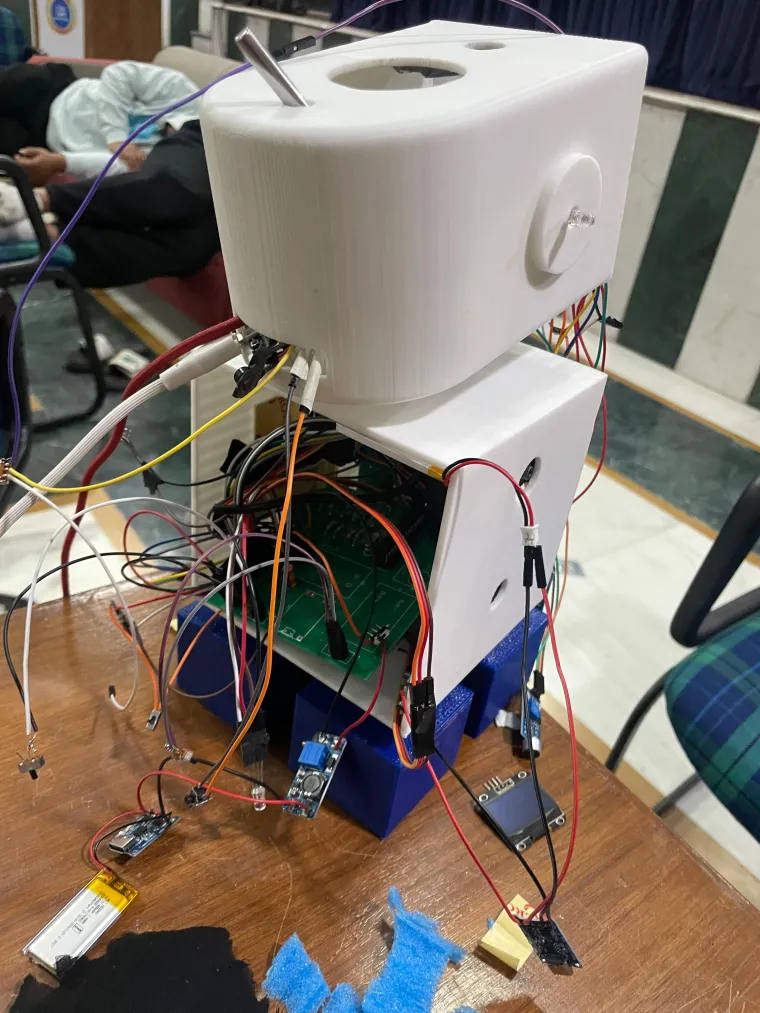
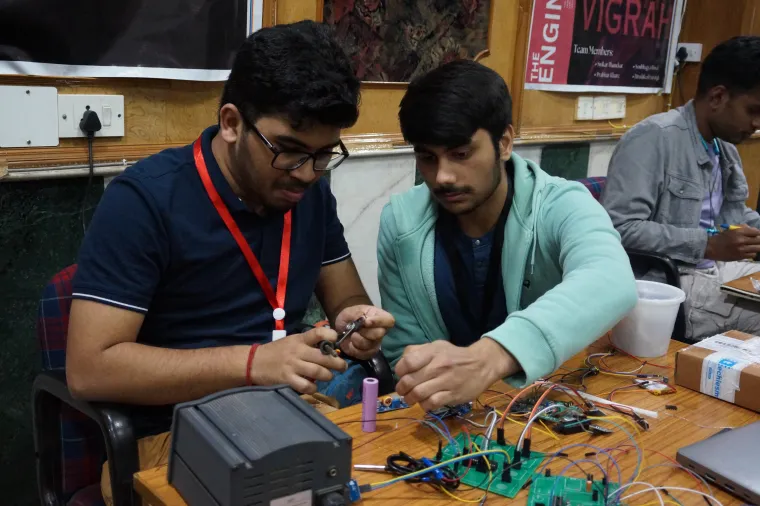
Step 2: Module Wiring
-
Connect VC02 via UART
-
I2C for OLED + sensors
-
PWM for servo + digital pins for touch/sound
-
-
Step 3: Integrate AI Thinker VC02
- Using The SDK Builder made the custom SDK and Firmware file for the Voice thinker , used the link given in the software part to make your's .
-
Step 4: Web Dashboard Setup
-
Build React frontend with charts and logs
-
Setup Node.js backend with REST API
-
Connect ESP32 via POST requests to the backend
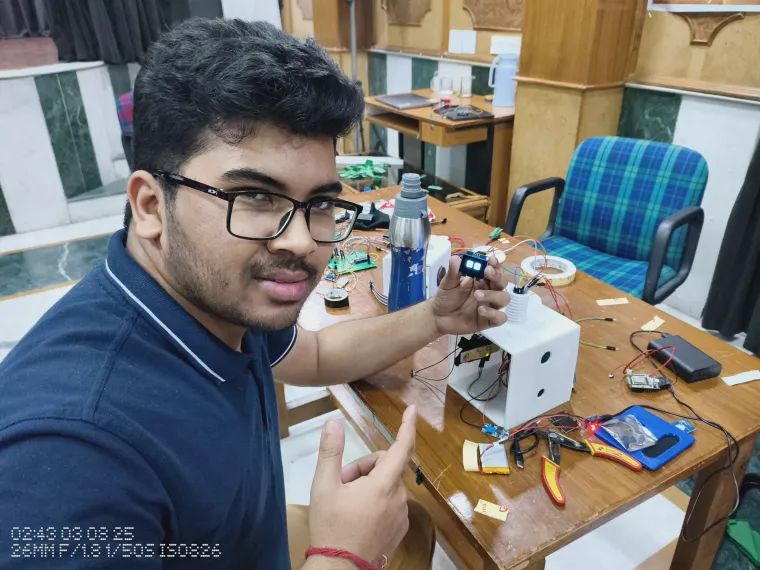
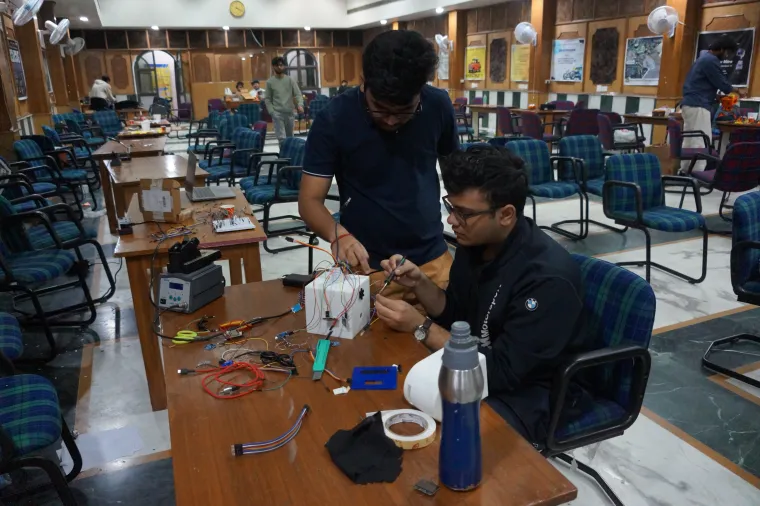
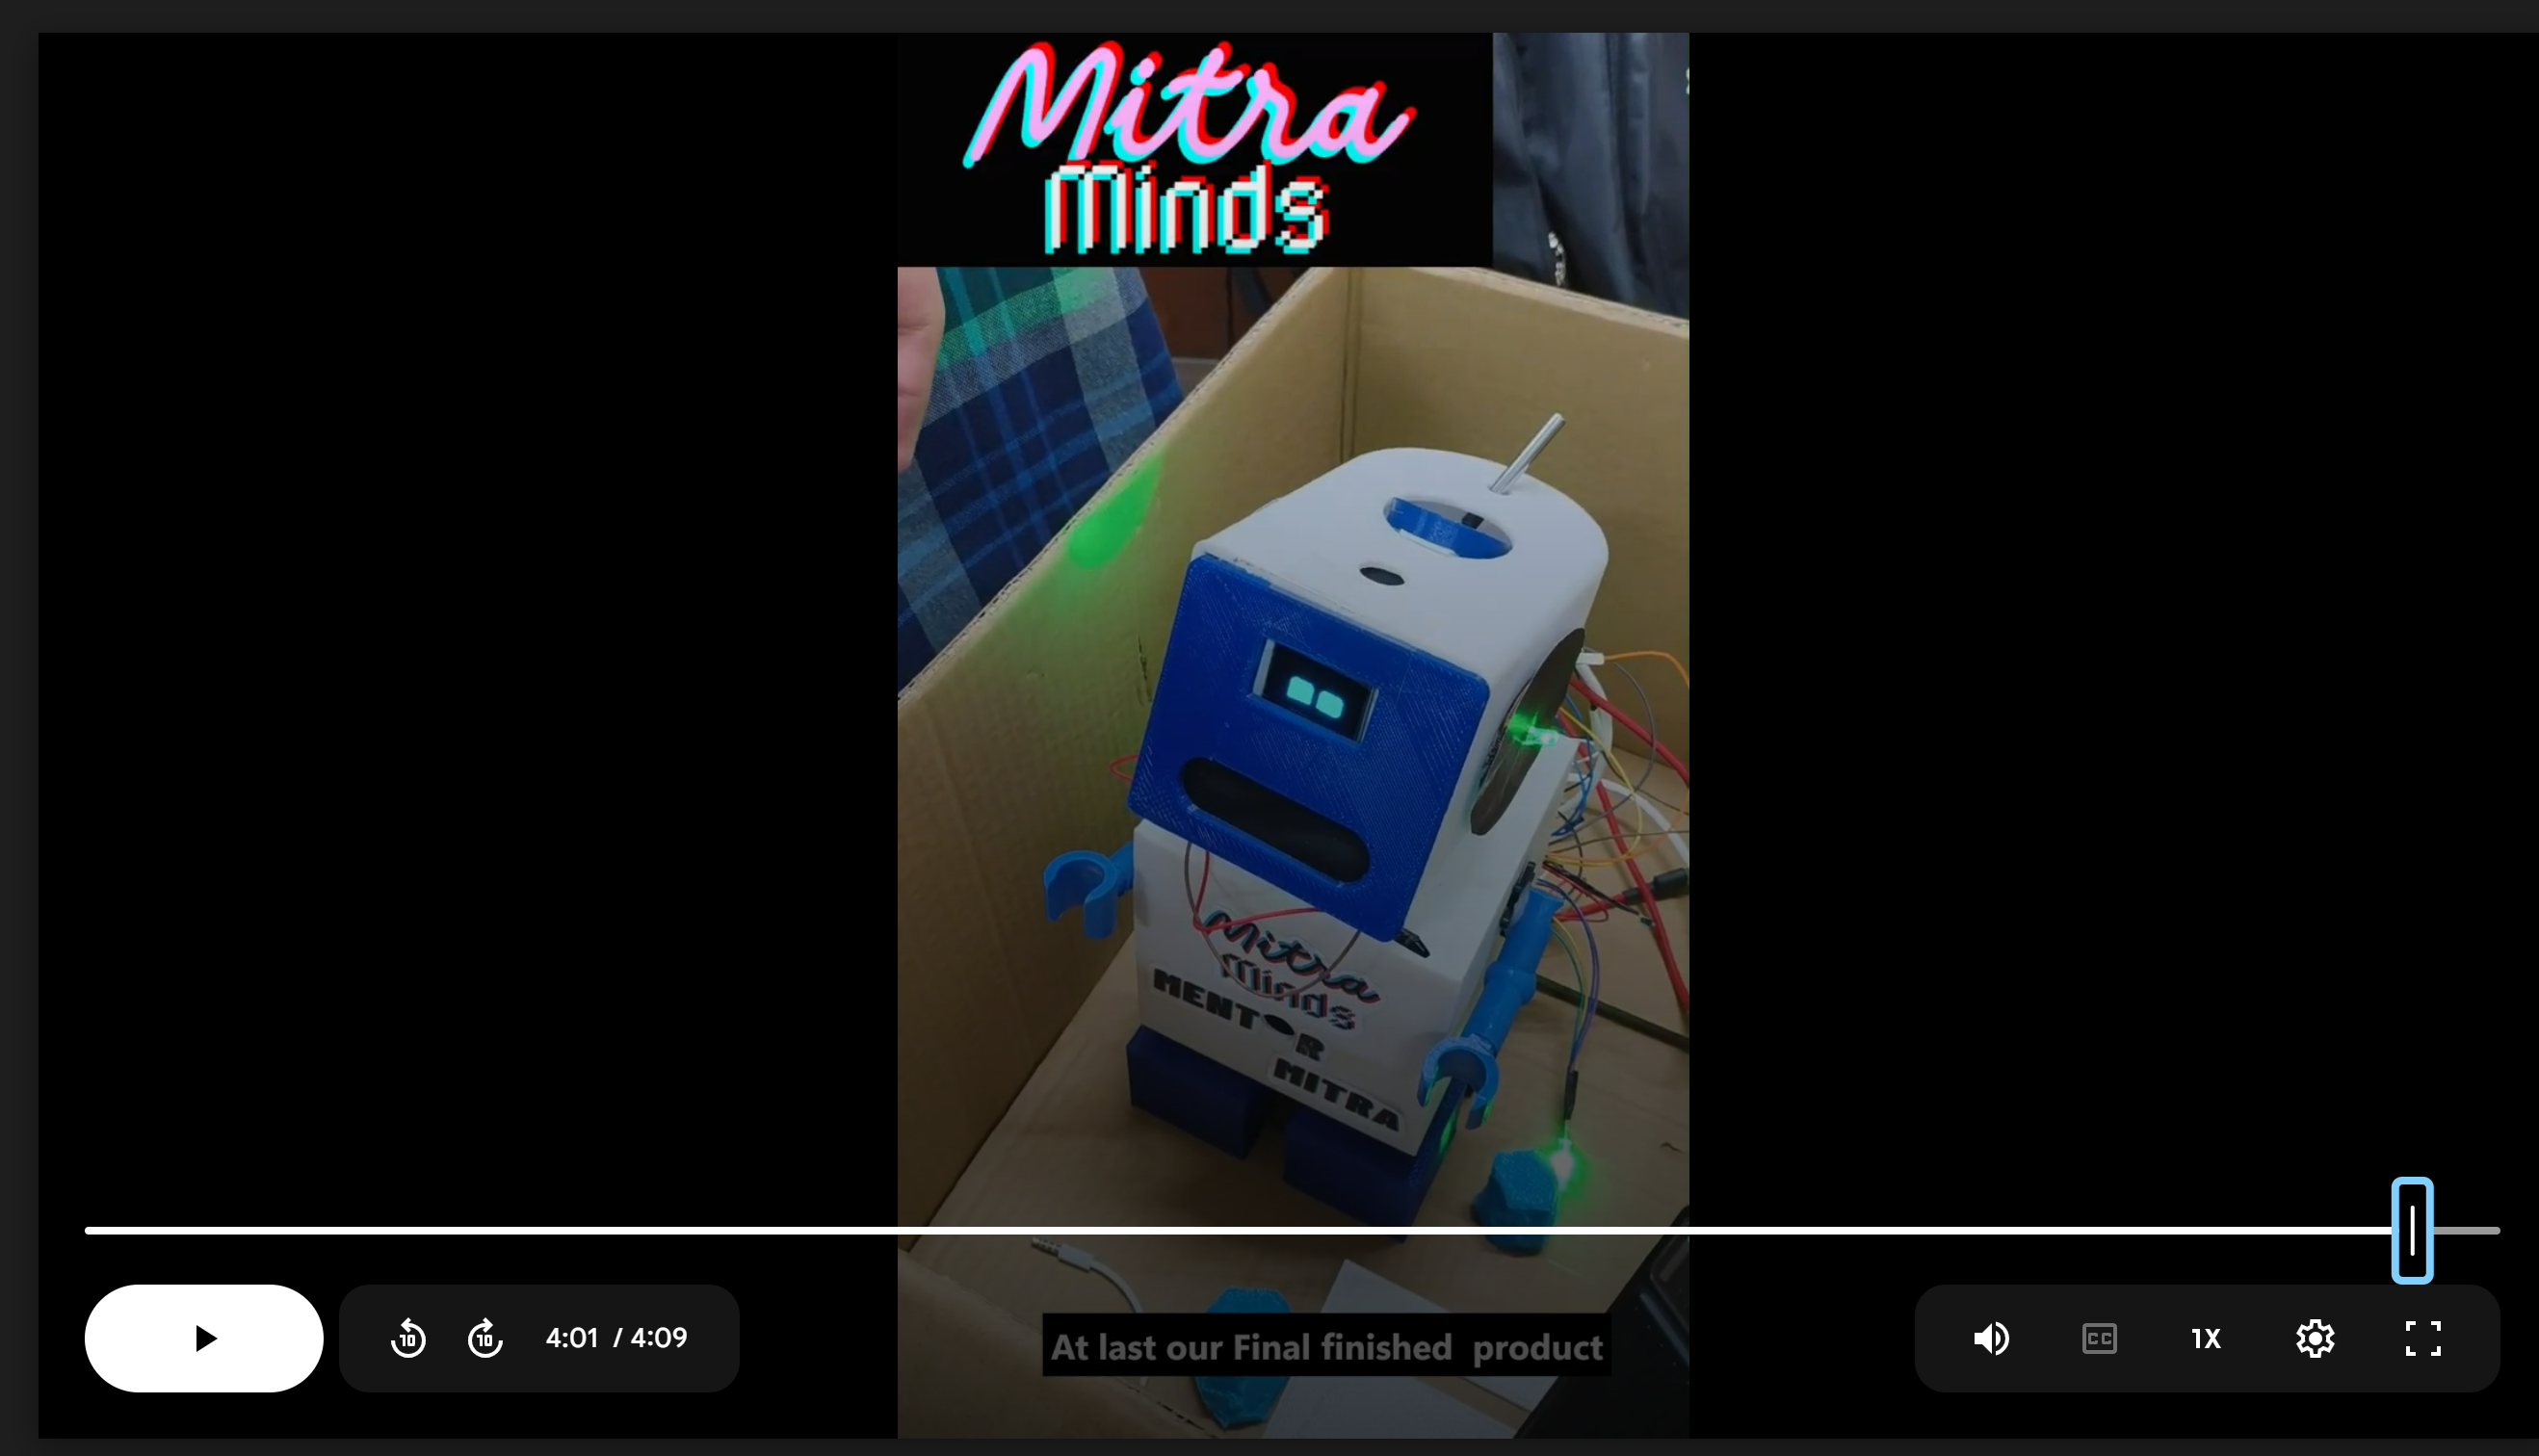
Step 5: Final Assembly
-
3D-print or build casing
-
Combine electronics and mount inside

-
Step 6: Testing and Calibration
-
Test all inputs, refine voice output timing, LED reaction, and data accuracy
-
Testing and Calibration Refer this Video https://drive.google.com/file/d/1AEFEz5XWi5ajWzWyZAeG_wYVmIOZi15E/view?usp=drive_link
-
Step 7: Also made a Custom Chat bot on Poe -
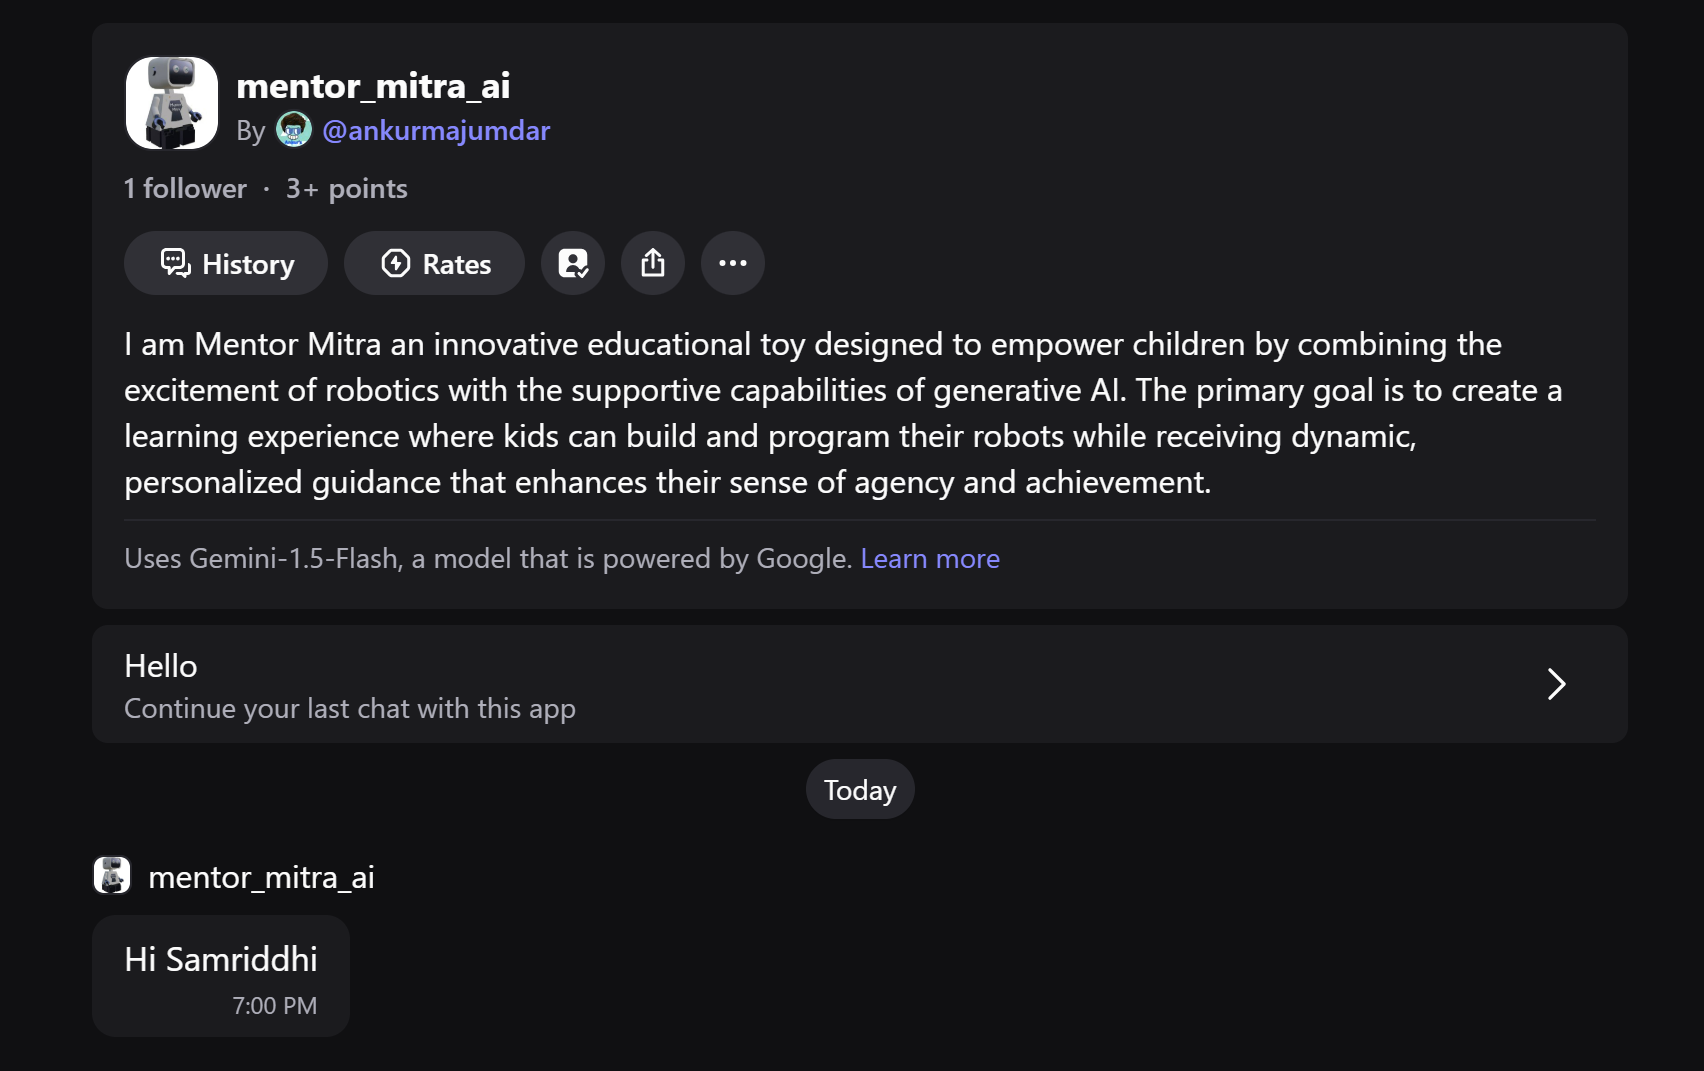
- Refer here - https://poe.com/mentor_mitra_ai
Step 8: Programming ATmega328P
-
Write firmware using Arduino IDE or PlatformIO
-
Control servo, display text, LEDs, and process input
#include <DS18B20_INT.h>
#include <DS18B20_INT.h>
#include <DS18B20_INT.h>
#include <Servo.h>
Servo servo1;Servo servo2;
const int redPin = 6;const int greenPin = 7;const int bluePin = 8;
const int soundPin = 12;
void setup() {servo1.attach(9);servo2.attach(10);
randomSeed(analogRead(A0));
pinMode(redPin, OUTPUT);pinMode(greenPin, OUTPUT);pinMode(bluePin, OUTPUT);
pinMode(soundPin, INPUT);}
void loop() {// Read sound sensorint soundDetected = digitalRead(soundPin);
if (soundDetected == LOW) {Serial.println("Sound Detected");unsigned long startTime = millis();while (millis() - startTime < 2000) {// Generate random angles for the servosint angle1 = random(0, 181);int angle2 = random(0, 181);
// Move each servo to a random angleservo1.write(angle1);servo2.write(angle2);
int color = random(0, 3);switch (color) {case 0: // ReddigitalWrite(redPin, HIGH);digitalWrite(greenPin, LOW);digitalWrite(bluePin, LOW);break;case 1: // GreendigitalWrite(redPin, LOW);digitalWrite(greenPin, HIGH);digitalWrite(bluePin, LOW);break;case 2: // BluedigitalWrite(redPin, LOW);digitalWrite(greenPin, LOW);digitalWrite(bluePin, HIGH);break;}delay(500);} else {
digitalWrite(redPin, LOW);digitalWrite(greenPin, LOW);digitalWrite(bluePin, LOW);}}#include <OneWire.h>
#include <DallasTemperature.h>#include <DHT.h>#include <SPI.h>#include <Wire.h>#include <Adafruit_GFX.h>#include <Adafruit_SH110X.h>
#define i2c_Address 0x3cunsigned int receivedValue = 0;#define SCREEN_WIDTH 128 // OLED display width, in pixels#define SCREEN_HEIGHT 64 // OLED dispay height, in pixels#define OLED_RESET -1Adafruit_SH1106G display = Adafruit_SH1106G(SCREEN_WIDTH, SCREEN_HEIGHT, &Wire, OLED_RESET);#include <FluxGarage_RoboEyes.h>roboEyes roboEyes; // create RoboEyes instance
void setup() {Serial.begin(9600);delay(250); // wait for the OLED to power updisplay.begin(i2c_Address, true); // Address 0x3C default
// Startup robo eyesroboEyes.begin(SCREEN_WIDTH, SCREEN_HEIGHT, 100); // screen-width, screen-height, max framerate
// Define some automated eyes behaviourroboEyes.setAutoblinker(ON, 3, 2);pinMode(9, INPUT);pinMode(10, INPUT);pinMode(11, INPUT);pinMode(12, INPUT);pinMode(8, INPUT);//sound sensor} // end of setup
void loop() {roboEyes.update();roboEyes.setMood(DEFAULT);roboEyes.setCuriosity(OFF);roboEyes.setAutoblinker(ON);roboEyes.setWidth(36, 36);roboEyes.setHeight(36, 36);roboEyes.setBorderradius(8, 8);roboEyes.setSpacebetween(10);if (digitalRead(8) == LOW) {int starTime = 0;while (starTime < 50) {roboEyes.setWidth(20, 20);roboEyes.setHeight(36, 36);roboEyes.setBorderradius(8, 8);roboEyes.setSpacebetween(20);starTime++;roboEyes.update();Serial.println("Sound Detected!");
}}if (digitalRead(9) == HIGH) {Serial.println("Sensor on pin 8 touched");roboEyes.setMood(TIRED);}if (digitalRead(10) == HIGH) {Serial.println("Sensor on pin 9 touched");roboEyes.setMood(HAPPY);}if (digitalRead(11) == HIGH) {Serial.println("Sensor on pin 10 touched");roboEyes.setMood(ANGRY);}if (digitalRead(12) == HIGH) {Serial.println("Sensor on pin 11 touched");roboEyes.anim_laugh();
}
}
-
🎯 Why this project matters
This project makes AI approachable, embedded design exciting, and education fun. With open documentation, low-cost components, and step-by-step guidance, it encourages:
-
Kids to learn with joy
-
Students to build real-world systems
-
Educators to adopt AI-driven feedback
It’s not just a toy—it’s a platform to introduce AI, electronics, and empathy into learning.
🙌 What others can learn from your experience
-
How to prototype complex systems step by step
-
Building and flashing a custom PCB with microcontrollers
-
Integrating cloud AI in embedded systems (ESP32 + VC02)
-
Designing dashboards with real-time data updates
-
Creating impactful educational technology from scratch
- Refer here - https://poe.com/mentor_mitra_ai
-
-
-