


Story
A kitchen timer is a simple, user-friendly device that counts down a set time and alerts the user with an audible or visual signal when cooking or baking tasks are complete.
Most commercial kitchen timers are relatively complex to set up and operate, as more attention is paid to many unnecessary options and functions, while neglecting the simplicity of operation that should be a basic feature for a timer with this purpose.
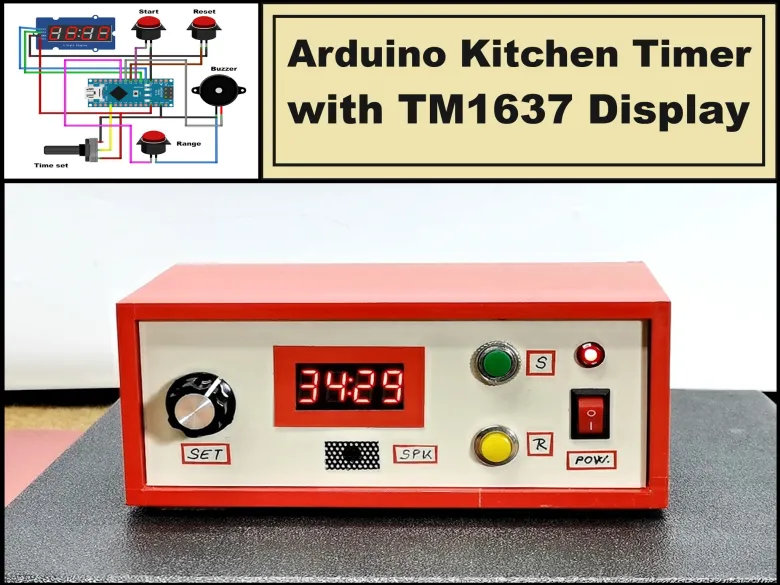
In this project I will show you a very simple way to make a kitchen timer that is extremely easy to operate, yet has almost all the features of a modern commercial timer.
Detailed video description at: https://youtu.be/Ml7XeU9oe6c
To make the device, you only need a few components:
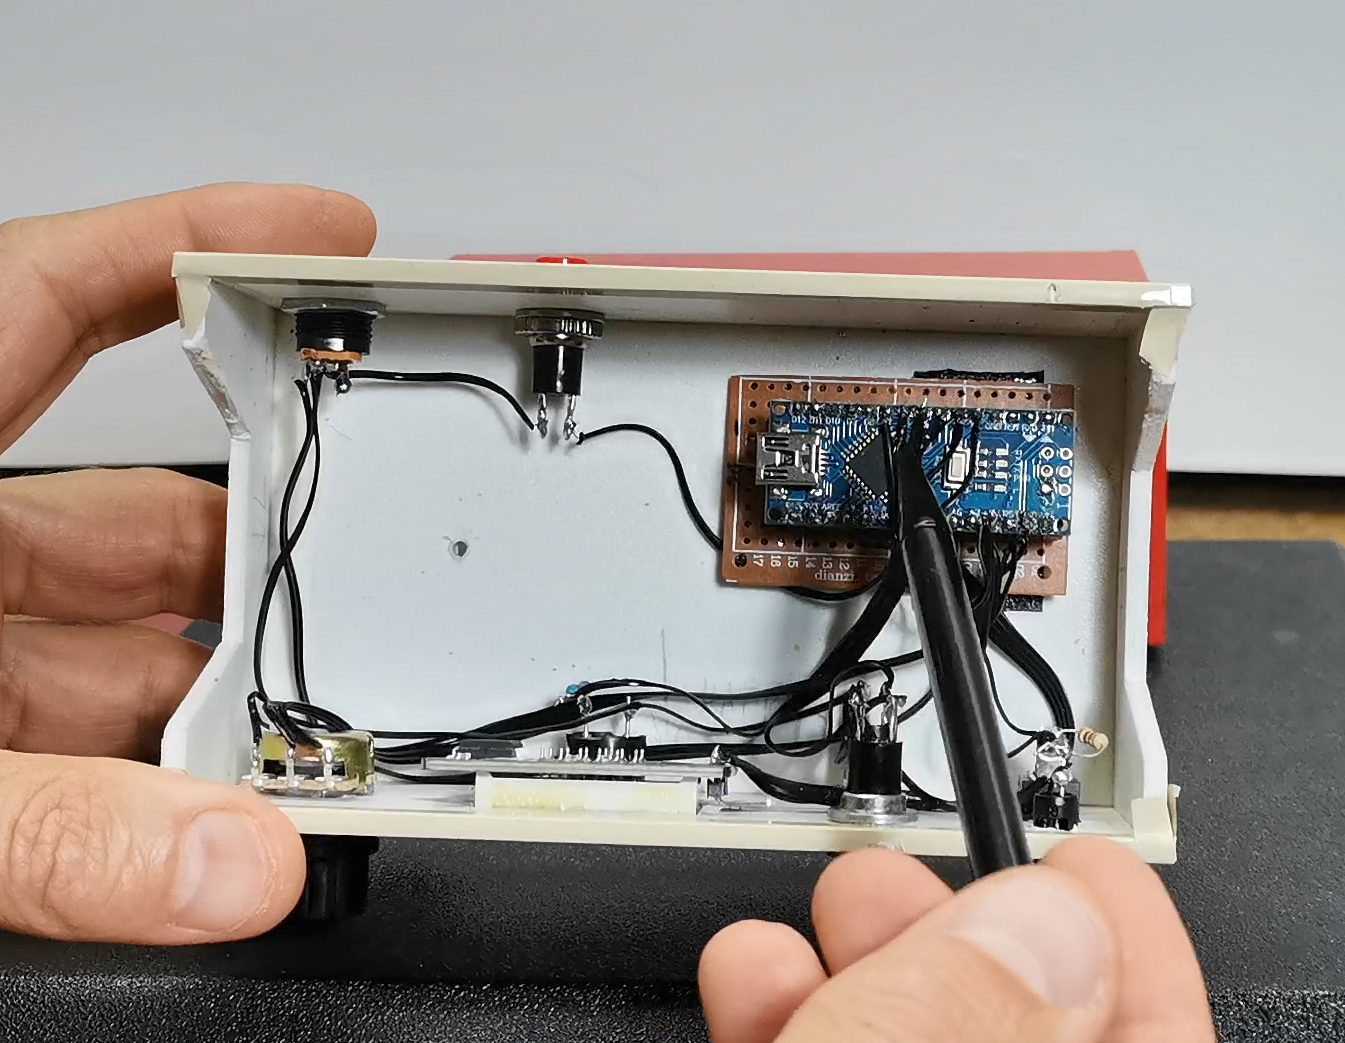
- Arduino Nano microcontroller board
- TM1637 - 4 digits, 7 segment display
- 10K Potentiometer
- Three buttons
- and Buzzer
First, I will explain how to operate the device and its functions and capabilities. For simplicity, the time is set with a simple potentiometer, in three ranges - 0 to 60 min, 0 to 30 min, and 0 to 10 min range. The green button starts the countdown, the yellow button resets the device at any time, and the red button selects the desired range.
When the device is turned on, the time appears on the screen, which is determined by the position of the potentiometer.
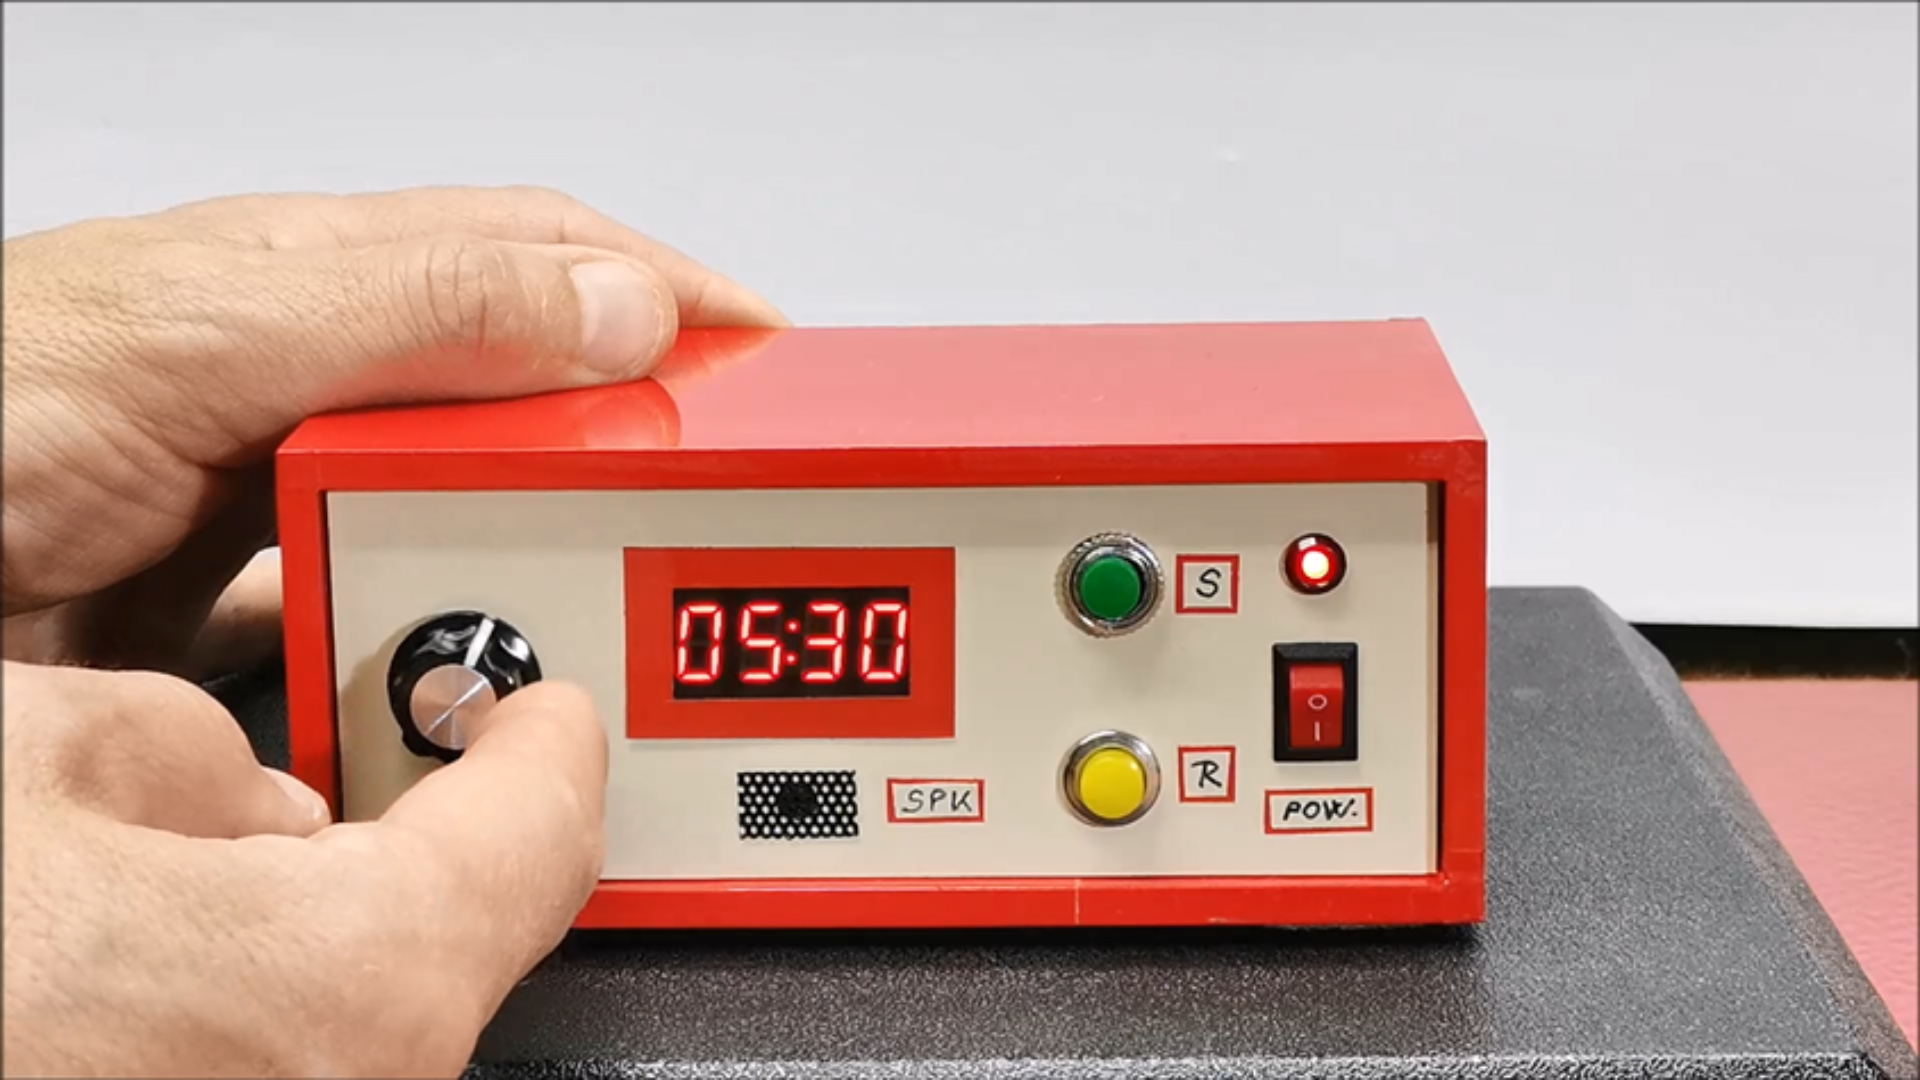
The default range when turned on is 60 min. Now simply and quickly set the desired time with the potentiometer, for example 7 min and press the start button. The timer starts counting down and the two dots in the middle of the display start flashing. If at any time during the process we press the reset button, the time returns to the original set state. The end of the set time is signaled by an intermittent tone of the buzzer, as well as alternating flashing of the numbers (in this case four zeros) on the display. This lasts until we press the reset button, after which the device is ready for operation again. Let's also see the function of the RANGE button.
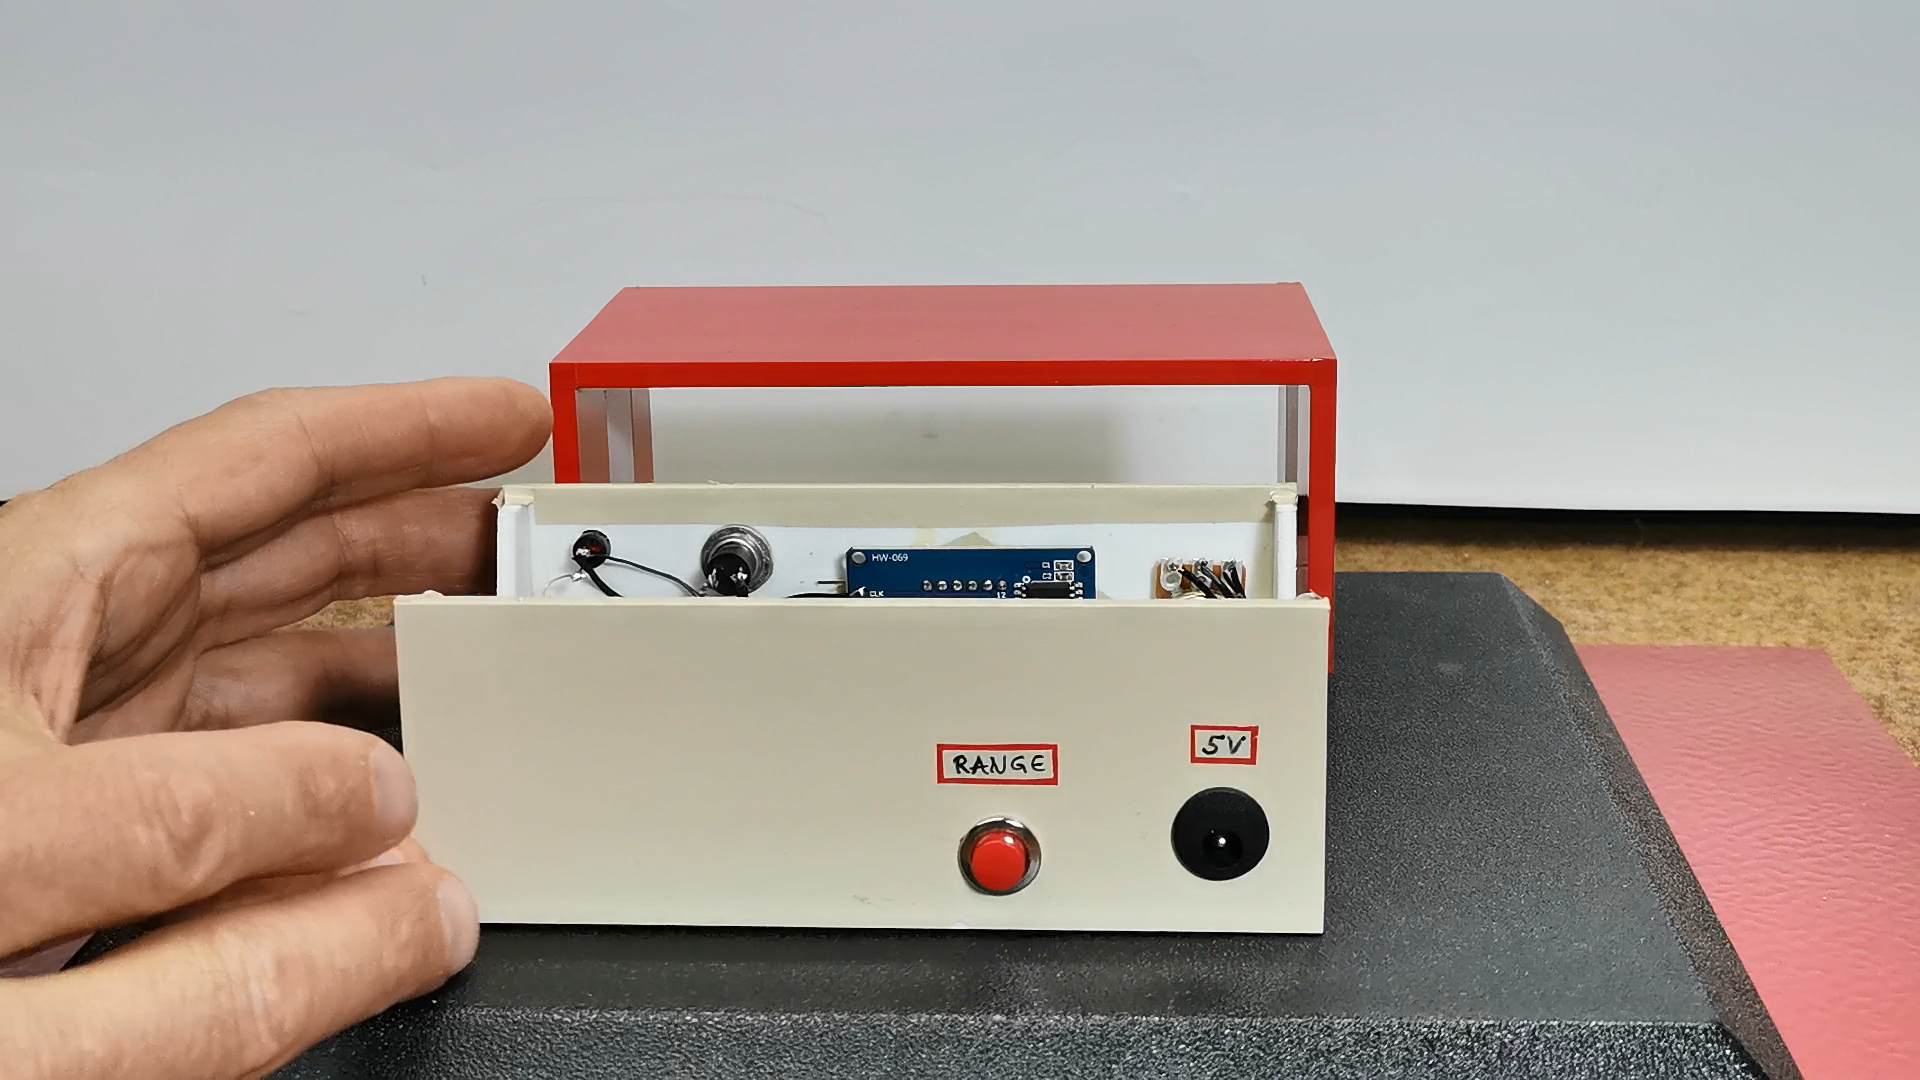
By pressing the button, the set range appears on the screen for two seconds and then the timer value in that range is displayed. With this option, we can set shorter intervals much more precisely and easily. As you can see, in the explanation, the resolution for setting this timer is currently 30 seconds, because for a kitchen timer that is quite enough. However, depending on the needs, it can be 10, 5 or even one second and is set in the code in the line:
#define QUANTIZE_INTERVAL 30 // (1 to 60 sec)
As for the code, I tried to make it as flexible and easy to modify as possible, so with minimal changes we can create a custom timer to suit our own requirements.
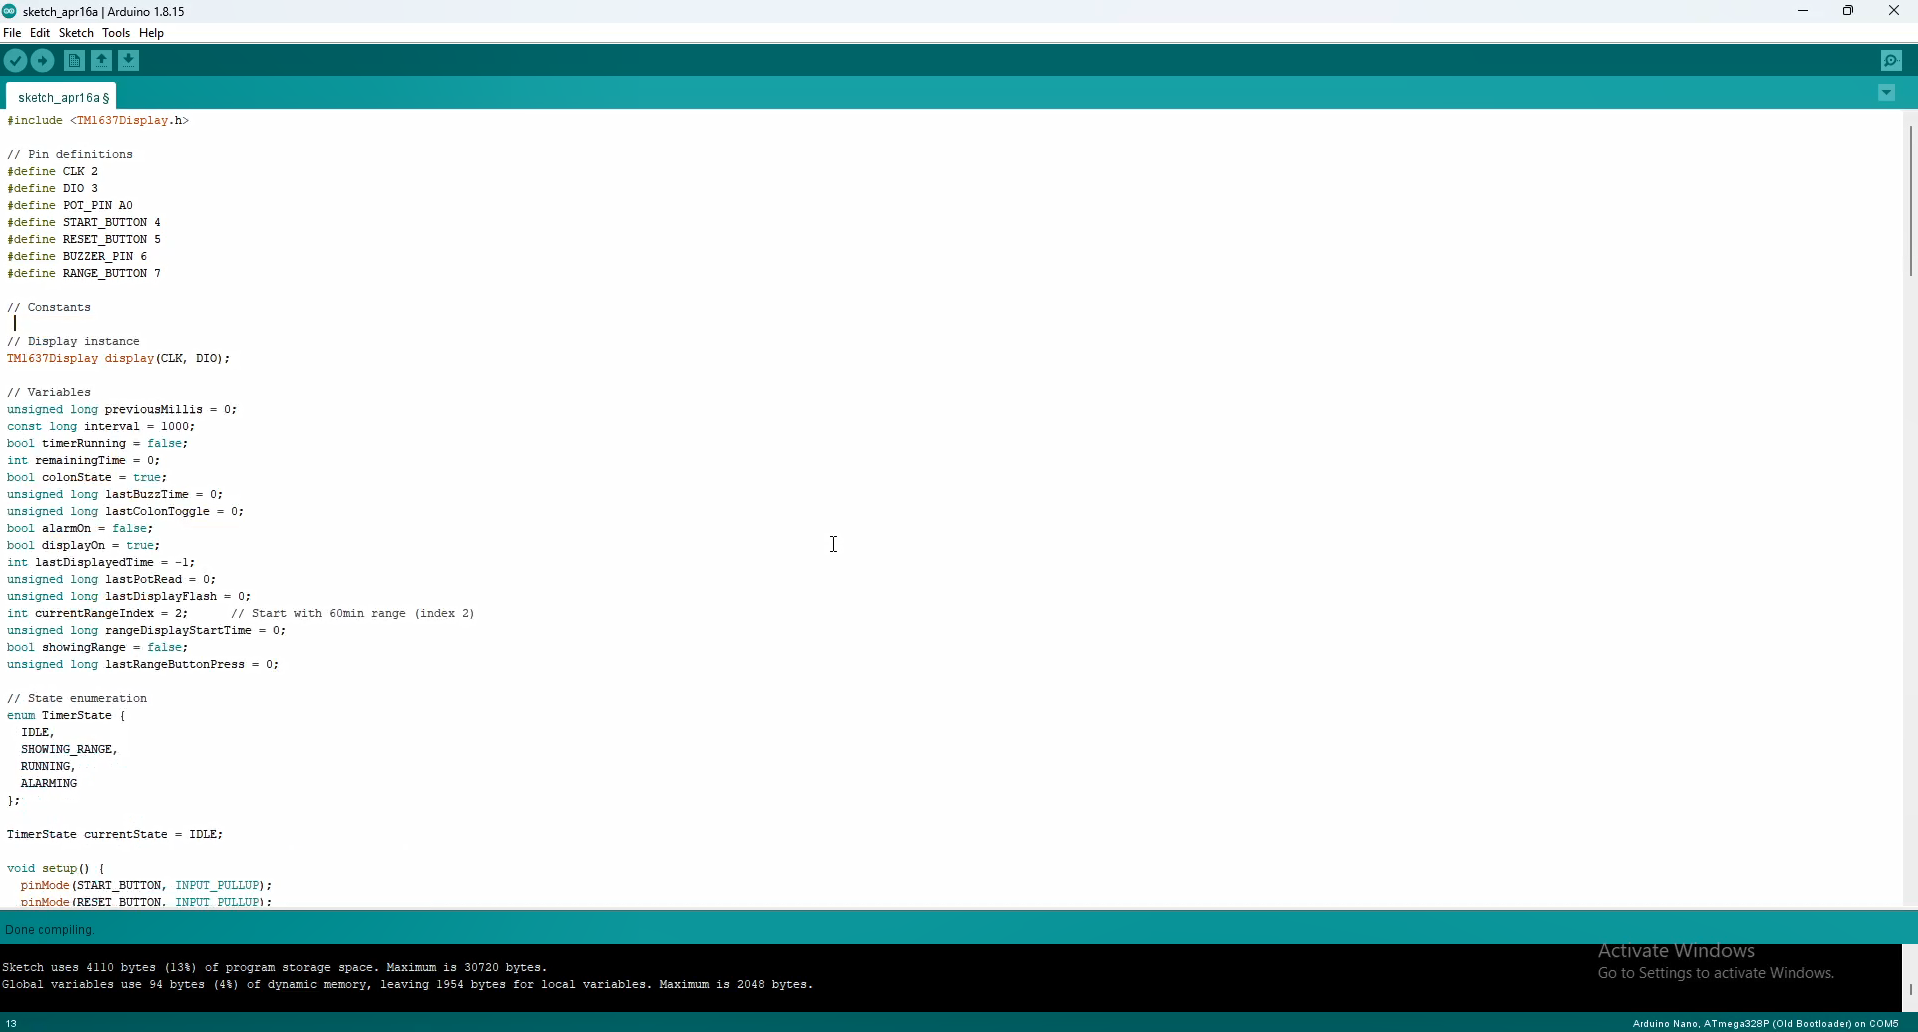
In short, as you can see, all the timer parameters can be changed. For example, the previously mentioned QUANTIZE_INTERVAL, POT_SMOOTHING, POT_READ_DELAY, Alarm Frequencies as well as ON/OF time, number and duration of timer ranges, and even the brightness of the display.
And finally a short conclusion. In summary, this Arduino project delivers a user-friendly, highly customizable kitchen timer with all essential features, proving that effective timekeeping doesn’t require unnecessary complexity.


