Currency
Toggle Nav

How to Build a Solar Meshtastic Node?
August 26, 2025
Build a "Set-and-Forget" Solar Meshtastic Node
Meshtastic is a revolutionary open-source project that enables long-range, off-grid communication using low-power LoRa radios. It creates a decentralized mesh network, perfect for hikers, remote communities, or emergency situations where cellular service is unavailable. A solar-powered node takes this a step further, offering a "set-and-forget" solution that can operate autonomously for months or even years.
While you could source individual components—a LoRa board, a GPS module, a solar charge controller, batteries, and a waterproof enclosure—the process can be complex, involving soldering, custom wiring, and extensive weatherproofing.
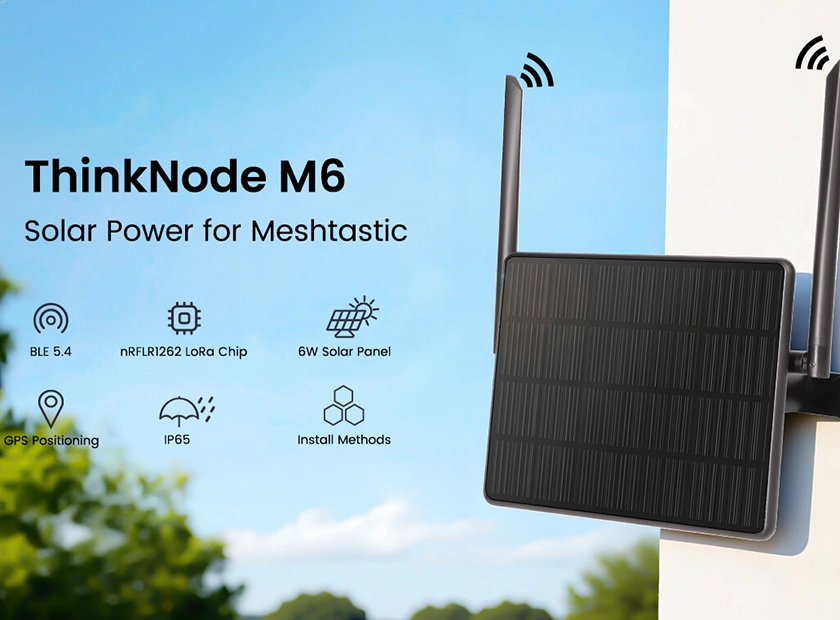
Fortunately, there's a much simpler way to "build" a robust, reliable solar node: by using an all-in-one, purpose-built device. Let's walk through how to deploy a solar Meshtastic node using the Elecrow ThinkNode M6 as our foundation.
Why Choose a Pre-Built Solar Node? The ThinkNode M6 Advantage
Building a node isn't just about soldering; it's about creating a system that works reliably in the field. The ThinkNode M6 is engineered specifically for this purpose, integrating all the necessary components into a single, rugged unit.
- All-Weather Reliability: It features a 6W high-efficiency monocrystalline solar panel paired with MPPT smart charging and a large 7000mAh battery capacity. This ensures continuous 24/7 operation, even during extended periods of cloudy or rainy weather.
- Rugged and Ready for the Outdoors: With an IP65-rated waterproof housing, it's designed to withstand harsh environments, operating in temperatures from -20°C to 60°C.
- Powerful Core and Connectivity: At its heart is the powerful and energy-efficient nRF52840 processor, managing both LoRa (via the SX1262 chip) and Bluetooth 5.4 connectivity. This allows for long-range communication and easy configuration from your phone.
- Effortless Setup: The device comes with Meshtastic firmware pre-installed. There's no need for flashing or complex initial setup. It’s ready to use right out of the box.
Step-by-Step Guide to Deploying Your Solar Node
Deploying the ThinkNode M6 is straightforward. Here’s how you can get your solar-powered Meshtastic node online in minutes.
What You'll Need:
- ThinkNode M6 unit
- Included LoRa Antenna
- Included GPS Antenna
- A smartphone with the Meshtastic app installed (available for Android and iOS).
- Mounting hardware suitable for your location (e.g., U-clamps for a pole).
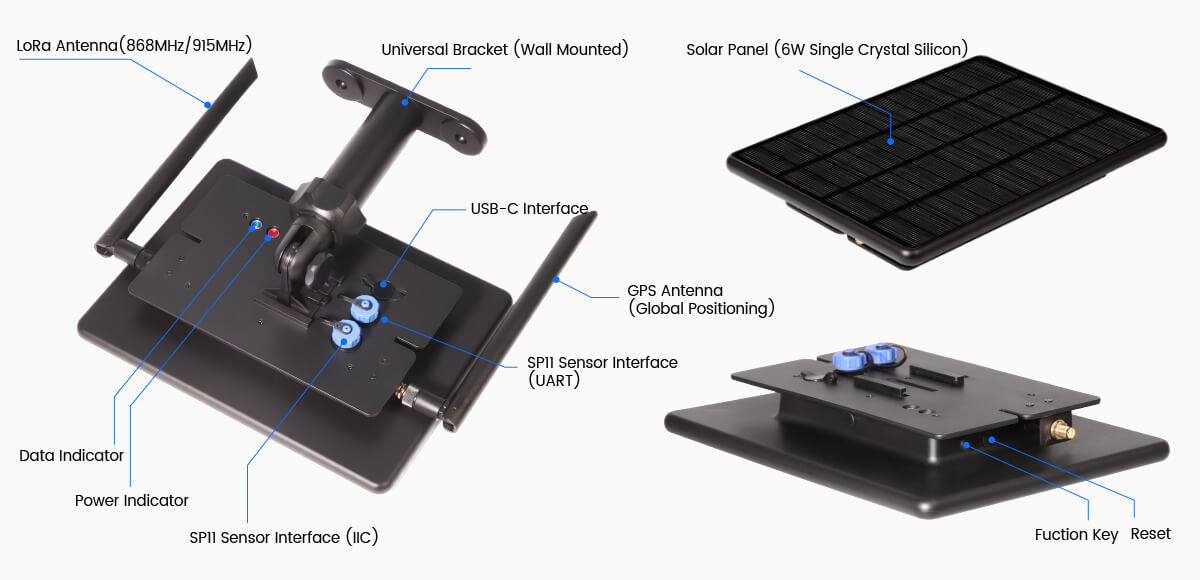
Step 1: Unboxing and Antenna Assembly
First, unbox the ThinkNode M6 and its accessories.
- Locate the two antenna connectors on the device. They are typically labeled for LoRa and GPS.
- Screw the LoRa antenna onto its corresponding RP-SMA connector.
- Screw the GPS antenna onto its connector.
Hand-tighten them until they are snug.
Step 2: Power On and Initial Configuration
Power on the device using its dedicated switch. Since Meshtastic is pre-installed, the node will immediately begin broadcasting. Now, let's connect it to your phone.
- Open the Meshtastic app on your smartphone.
- Enable Bluetooth on your phone.
- The app will scan for nearby Meshtastic devices. Your ThinkNode M6 should appear in the list.
- Tap on the device to pair with it. The Bluetooth connection allows you to configure all settings wirelessly.
Step 3: Configure Your Node in the Meshtastic App
Once paired, you can customize your node's settings. Key settings include:
- Region: Set this to your geographical location (e.g., US, EU, AU) to use the correct LoRa frequencies.
- Channel: To communicate with other devices, they must all be on the same channel. You can accept the default or create a custom one with a unique name and encryption key for privacy.
- Device Name: Give your node a unique name for easy identification in the mesh network.
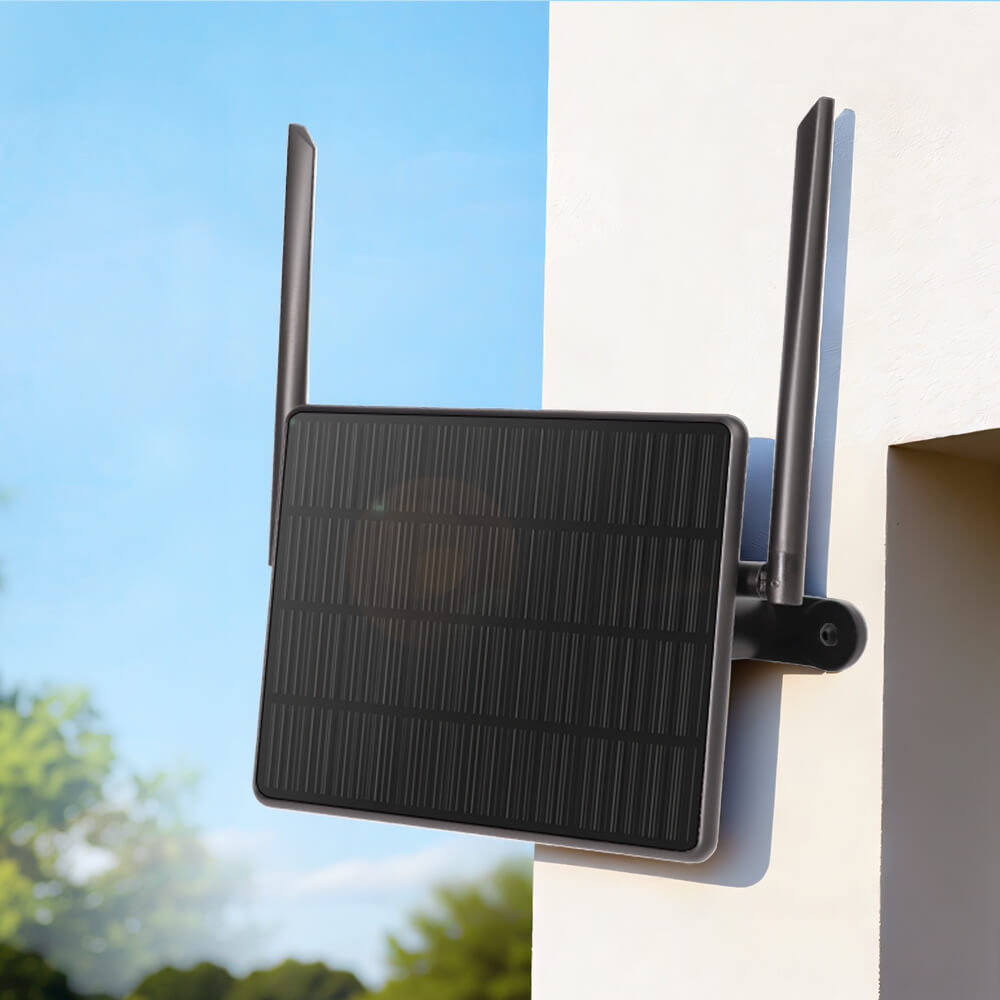
Step 4: Mounting Your Node for Optimal Performance
The final step is to install your node outdoors.
- Location: Choose a location with a clear view of the sky. This is crucial for both maximum sun exposure for the solar panel and an unobstructed line of sight for the LoRa antenna to achieve the best range.
- Mounting: Use the flexible mounting options (wall mount, pole mount, or U-clamps) to securely fasten the device.
- Orientation: Angle the solar panel to face the sun for most of the day (facing south in the Northern Hemisphere, and north in the Southern Hemisphere).
Once mounted, your solar-powered Meshtastic node is officially built and deployed! It will now operate autonomously, relaying messages and location data for the entire mesh network.
Expanding Your Node's Capabilities
The ThinkNode M6 is more than just a communication relay. It features two waterproof SP11 aviation connectors that expose IIC and UART interfaces. This allows you to connect a wide variety of external sensors, transforming your node into a remote monitoring station for:
- Weather: Temperature, humidity, and barometric pressure sensors.
- Agriculture: Soil moisture and temperature sensors.
- Environmental: Air quality and gas sensors.
Data from these sensors can be broadcast over the Meshtastic network, creating a powerful, off-grid environmental monitoring system.
Technical Specifications at a Glance
| Feature | Specification |
|---|---|
| Main Processor | Nordic nRF52840 (32-bit Arm® Cortex™-M4 @ 64 MHz) |
| Memory/Storage | 256 KB RAM, 1 MB Flash |
| Wireless | Bluetooth 5.4 (BLE), LoRa (Semtech SX1262, 150-960MHz) |
| GPS Module | L76K High-Precision GPS |
| Solar Panel | 6W Monocrystalline Silicon with MPPT Charging |
| Battery | 2x 18650 Lithium-ion batteries (7000mAh total capacity) |
| Expansion Interfaces | 1x UART (SP11), 1x IIC (SP11) |
| Enclosure Rating | IP65 Waterproof |
| Operating Temperature | -20°C to 60°C |
| Dimensions | 210 x 156 x 42mm (excluding antennas and bracket) |
What's more?
Building a solar Meshtastic node doesn't have to mean starting from scratch. By leveraging a well-engineered, all-in-one device like the ThinkNode M6, you can deploy a highly reliable, weather-resistant, and autonomous communication hub in under an hour. This approach saves you time and effort, allowing you to focus on what truly matters: expanding your off-grid network and exploring the incredible potential of the Meshtastic project.