Story
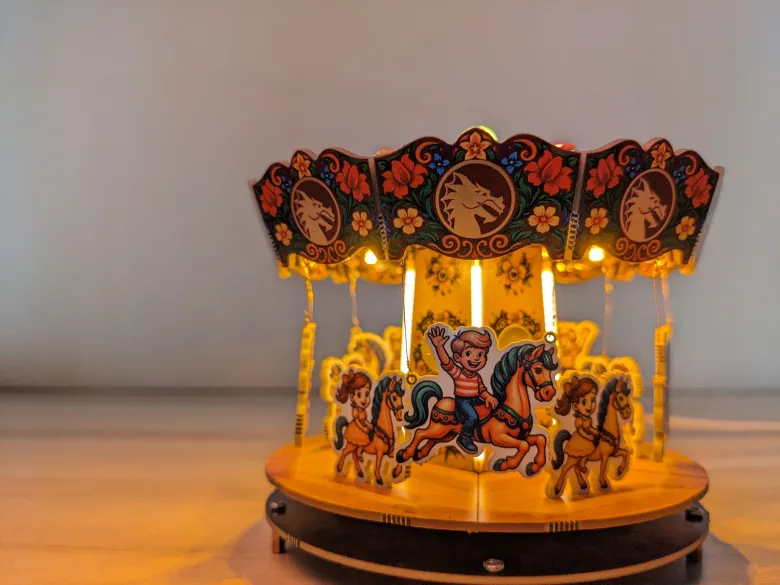
I bet you wouldn’t have guessed this Colorful Carousel was made entirely using PCBs
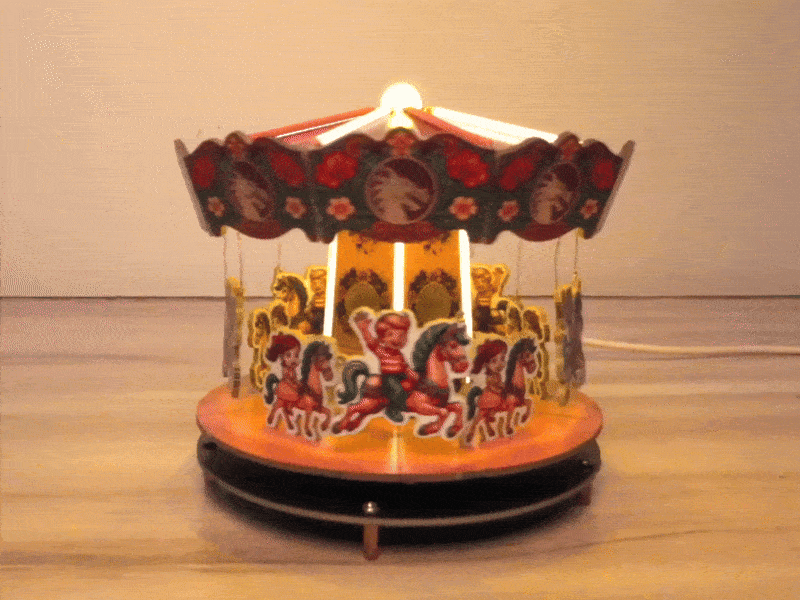
This is one of those projects that looks better in real life than it does in the computer renders.
Highlights:
- All‑PCB assembly: No 3D print or wood - just PCBs soldered together.
- Colorful graphics: The typical green color would make it obvious that it’s a PCB, so I’ve used multicolor silkscreens.
- Functional: It’s not just for show - the LEDs blink, and the carousel spins
Project origins:
I was interested in trying out the color silkscreen PCBs. Since I usually make functional boards for RC models, I never found a use for colorful silkscreens.
I always wanted to build a miniature amusement park ride. Instead of 3D printing it, I decided to make it using colorful PCBs. Even the stator for the base motor is designed with PCB coils. Designing this was a new and "fun" experience.
This project took two full weeks to design. The schematic was simple, but creating the panel templates and graphics took most of the time.
How it went:
- It was a back-and-forth process between Onshape, Inkscape, and EasyEDA.
- Luckily, this project went much smoother than I expected. Every part fit perfectly into place, and the tolerances were right on.
- This was my first time using colorful boards, and they turned out looking highly detailed.
- The two weeks of design work were worth it, as everything went better than I had hoped.
With that optimism, let’s dive into the specifics
Assembly is the easiest part; but in this project, I will focus on the design process so you can understand how a project like this can be designed from scratch.
- Not everyone is a CAD or PCB designer, so I’ve added hyperlinks for terms that might be unfamiliar.
- Design Process -
Software:
You will need these tools for designing, but you can use similar alternatives if you prefer.
CAD & Graphics
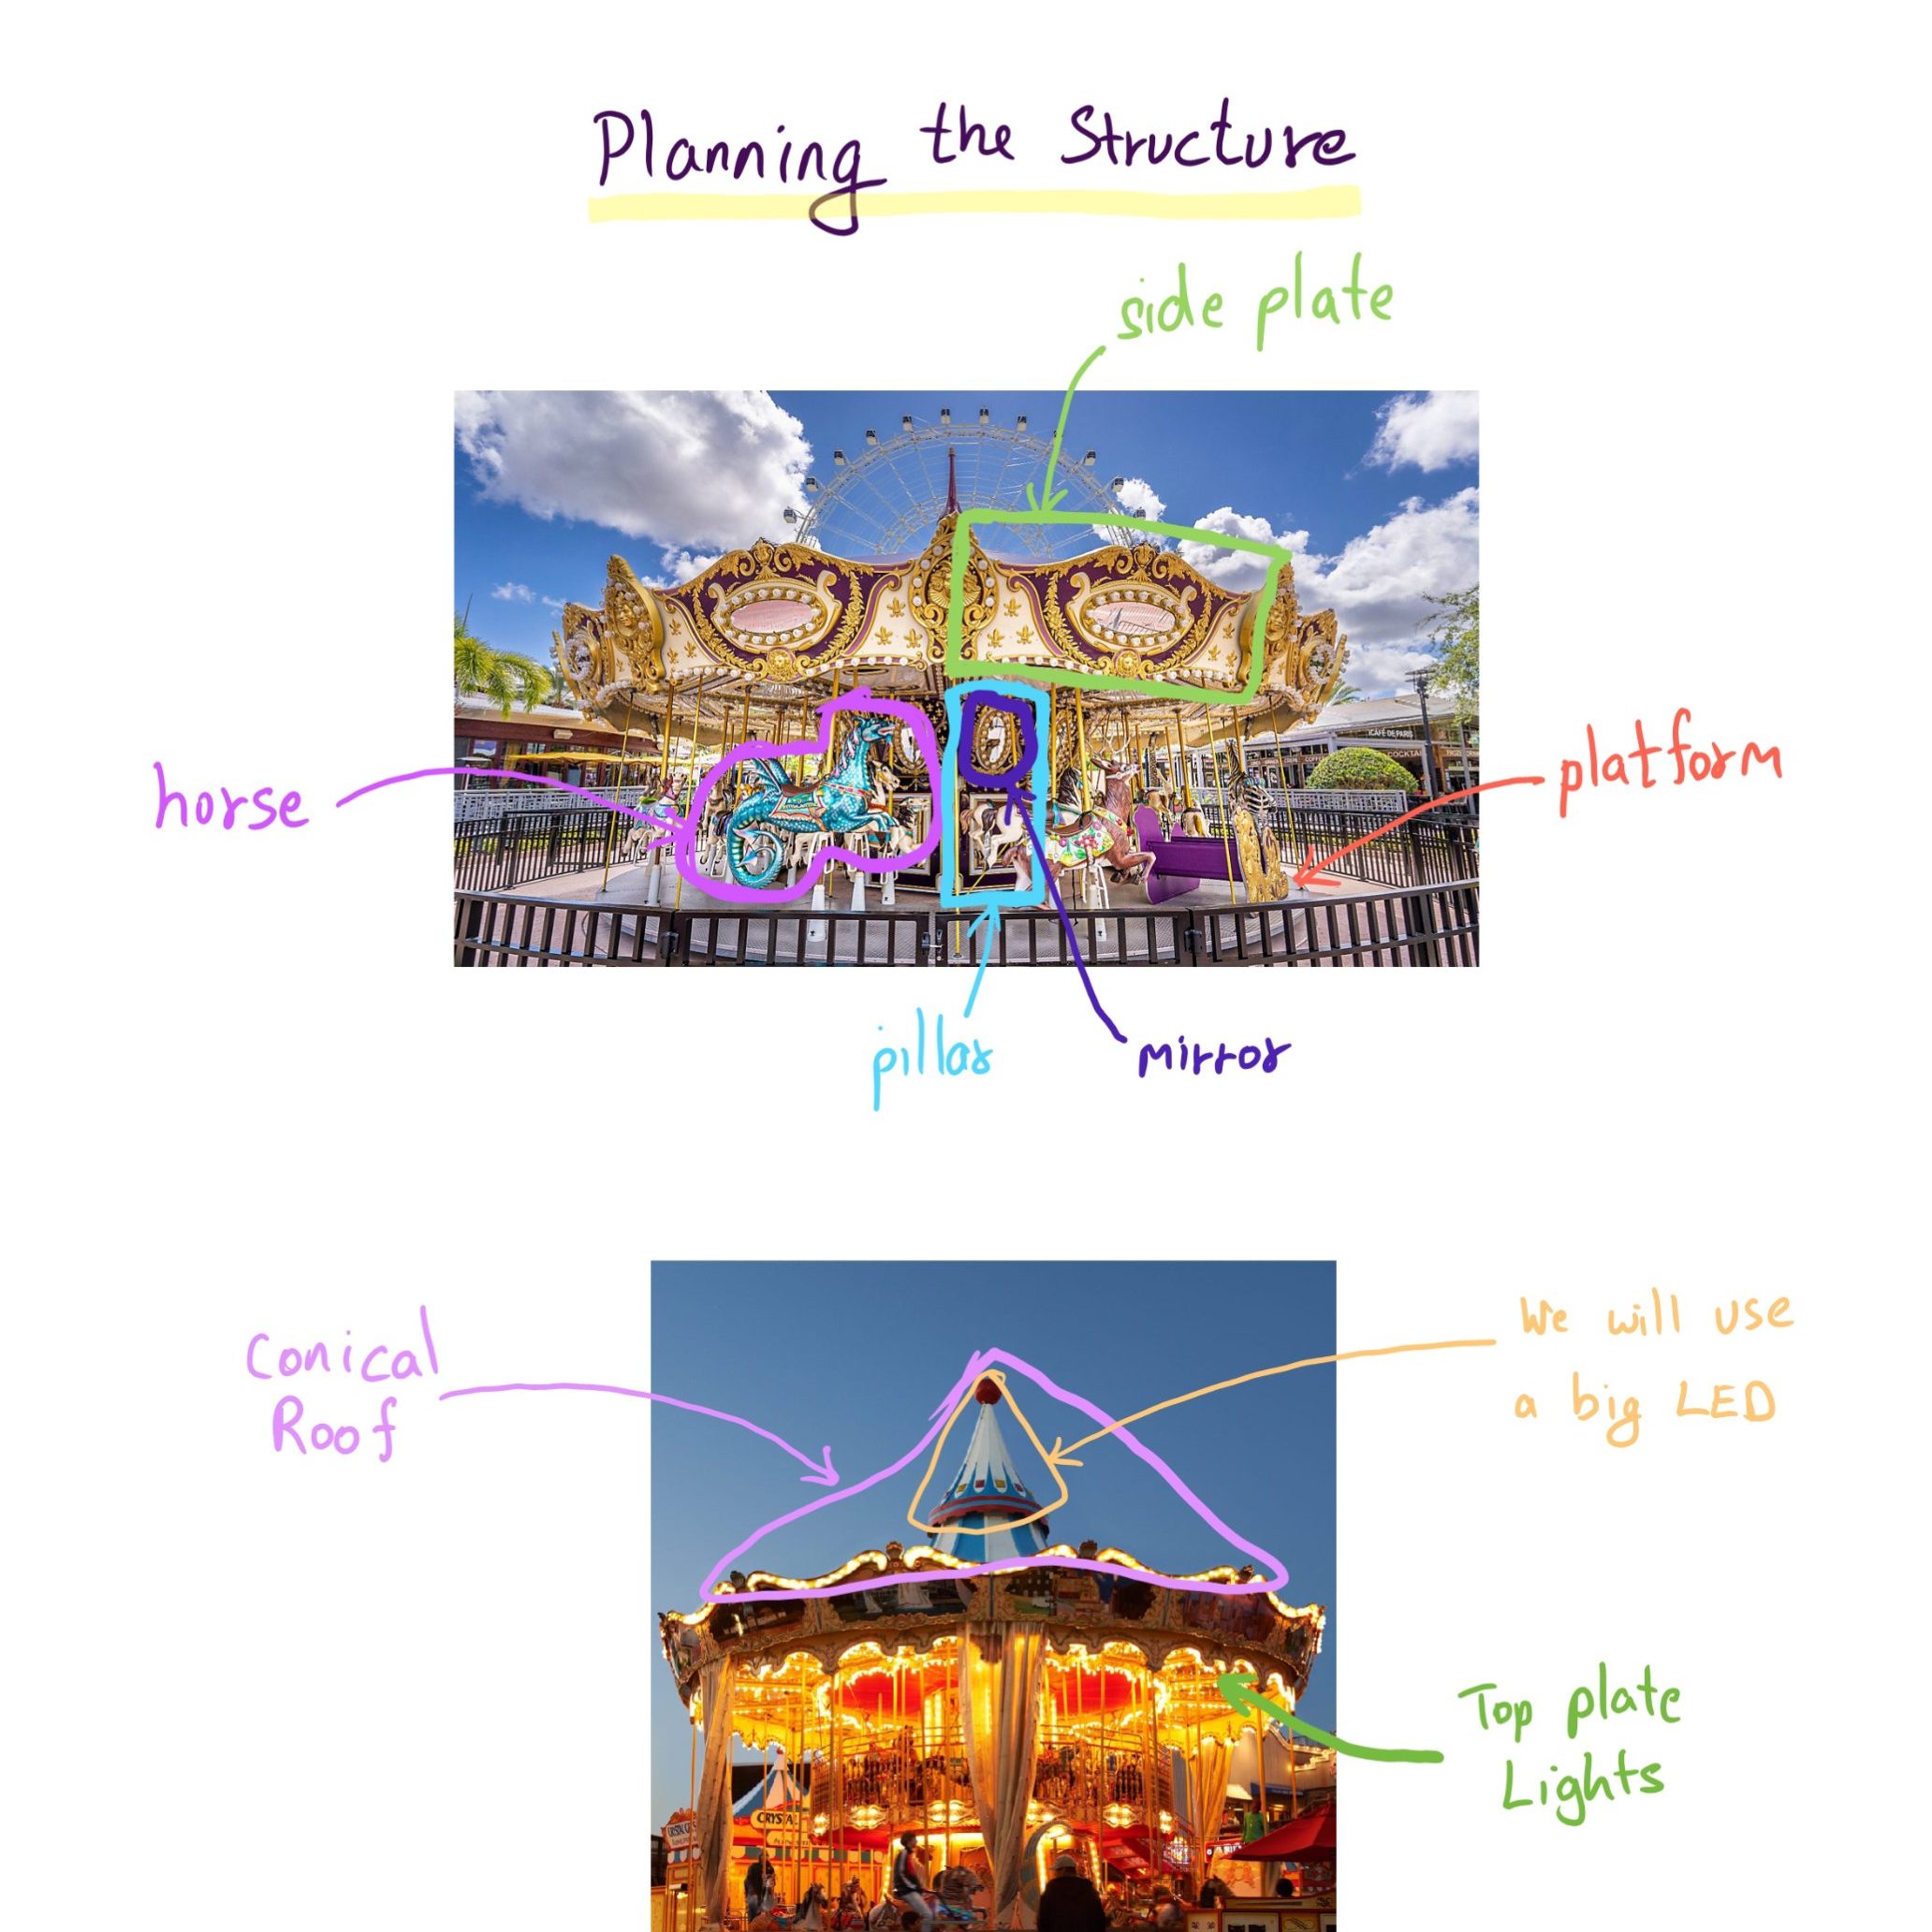
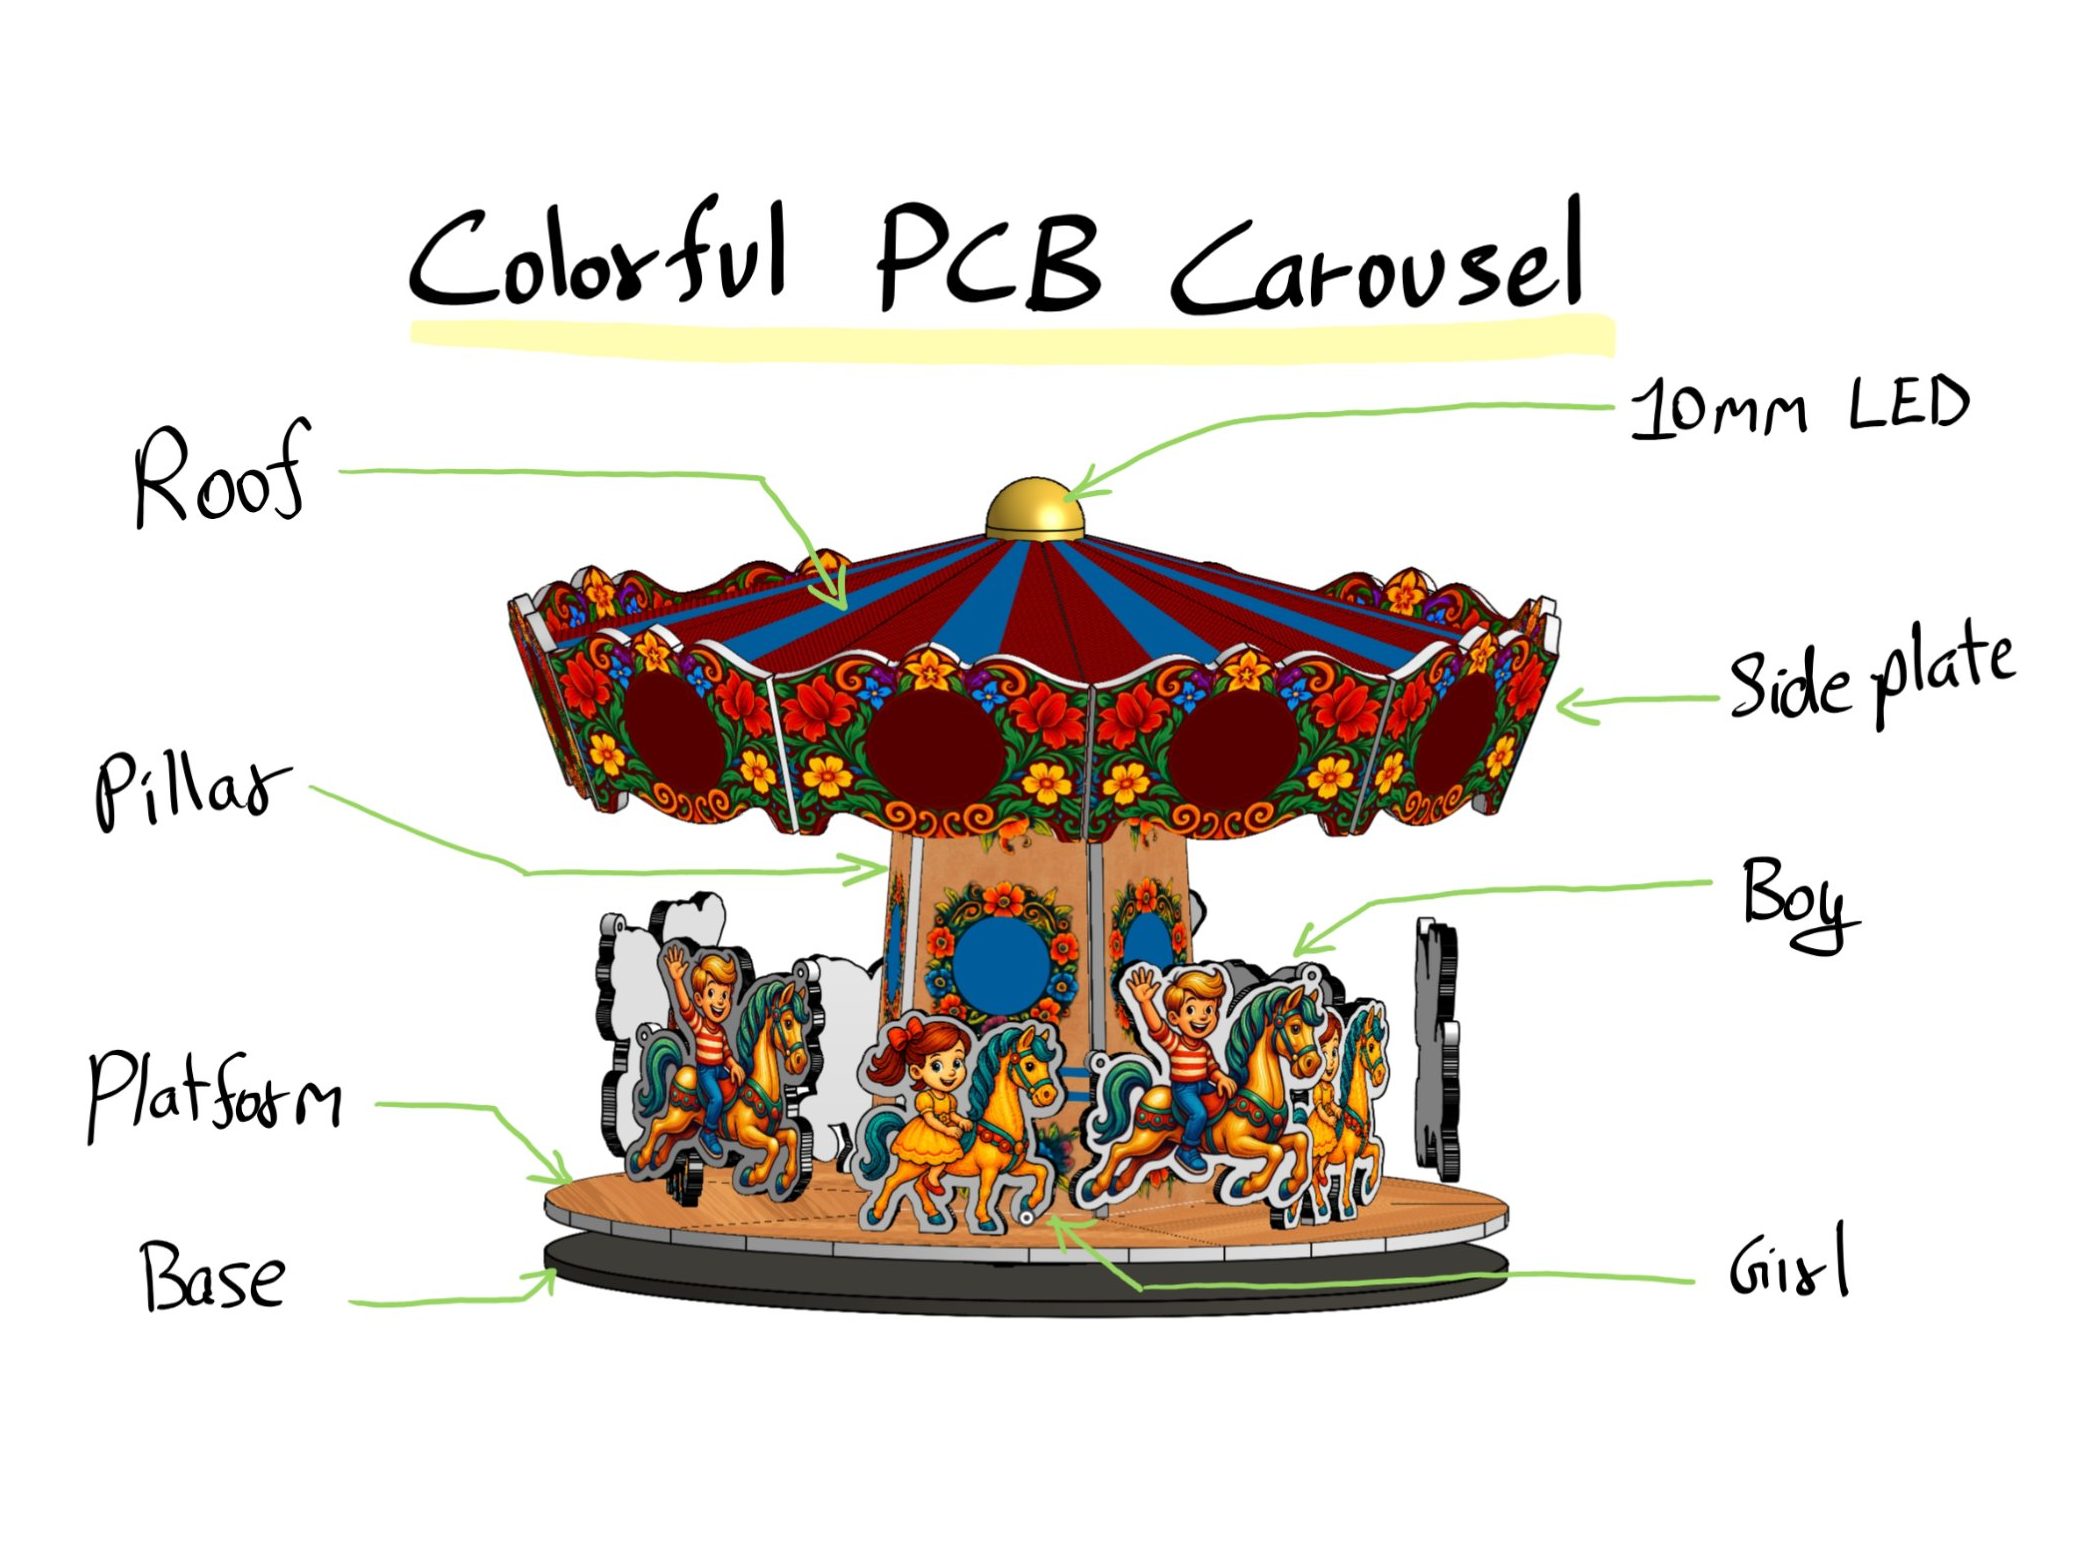
First, I decided on the size of the carousel. The base diameter is 100 mm. Then, I created a rough shape to plan the structure of the Carousel. After that, I added extra details like curves, holes, and cutouts for the assembly.
I planned the structure to allow pad placements for electrical connections, so that no extra wires will be required during assembly.
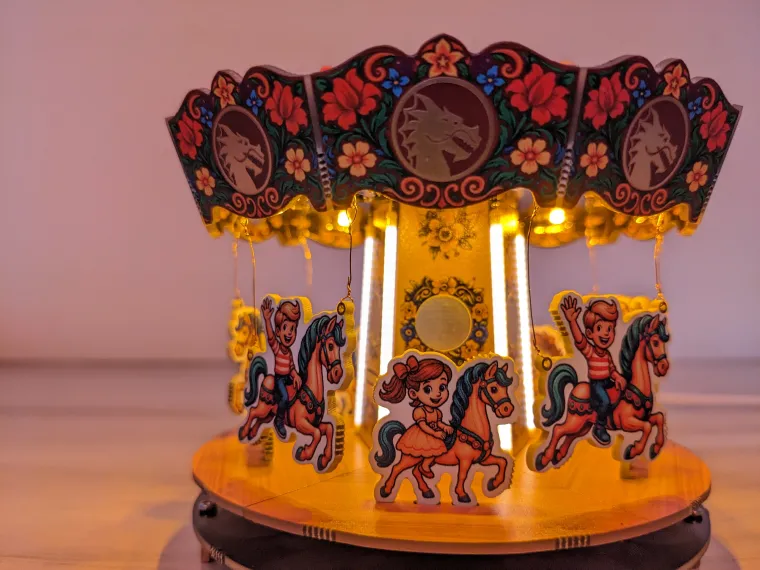
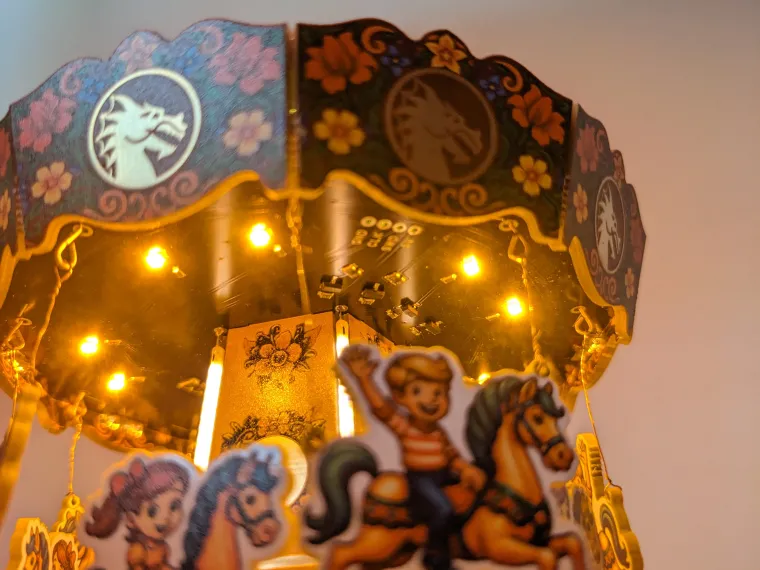
Through hole pads were also added for placement of Filament LEDs, these were strategically placed to cover the gaps between the plates of the pillar and the roof.
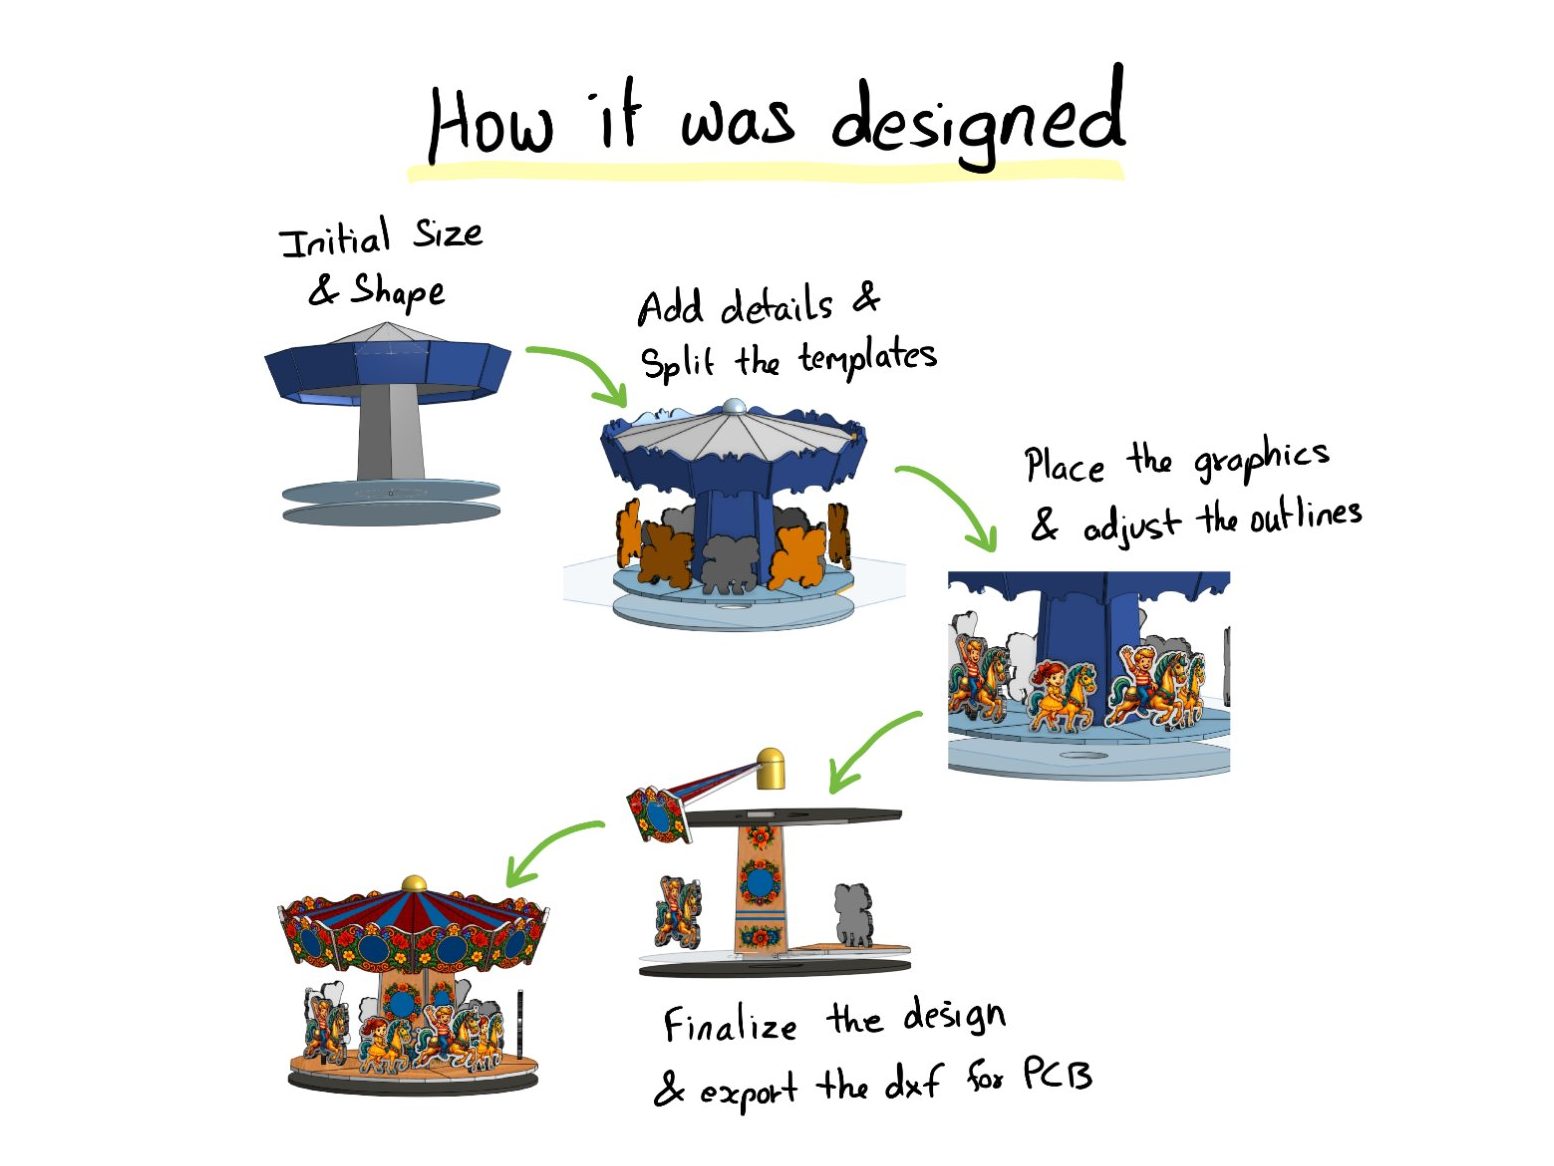
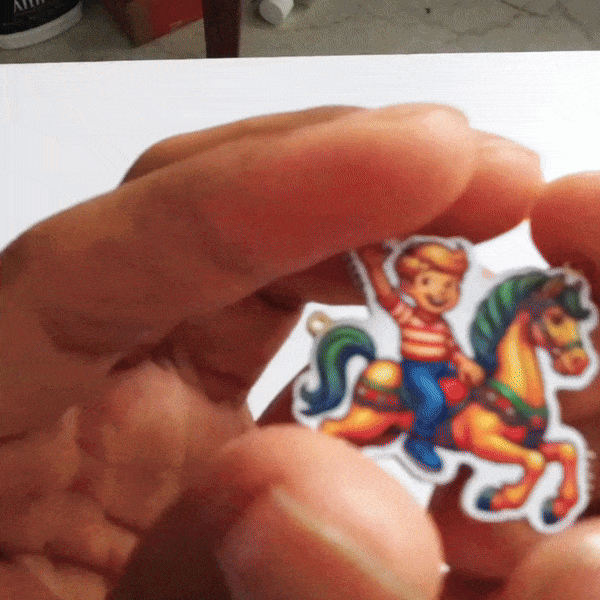
Once the shapes were ready, I exported the DXFs from Onshape and imported them into Inkscape to create the graphics. For the boy and girl figures, I also exported and imported the DXFs back into Onshape to create the templates.
Finally, I imported all the graphics back into Onshape to check how the carousel would look visually before moving to fabrication.
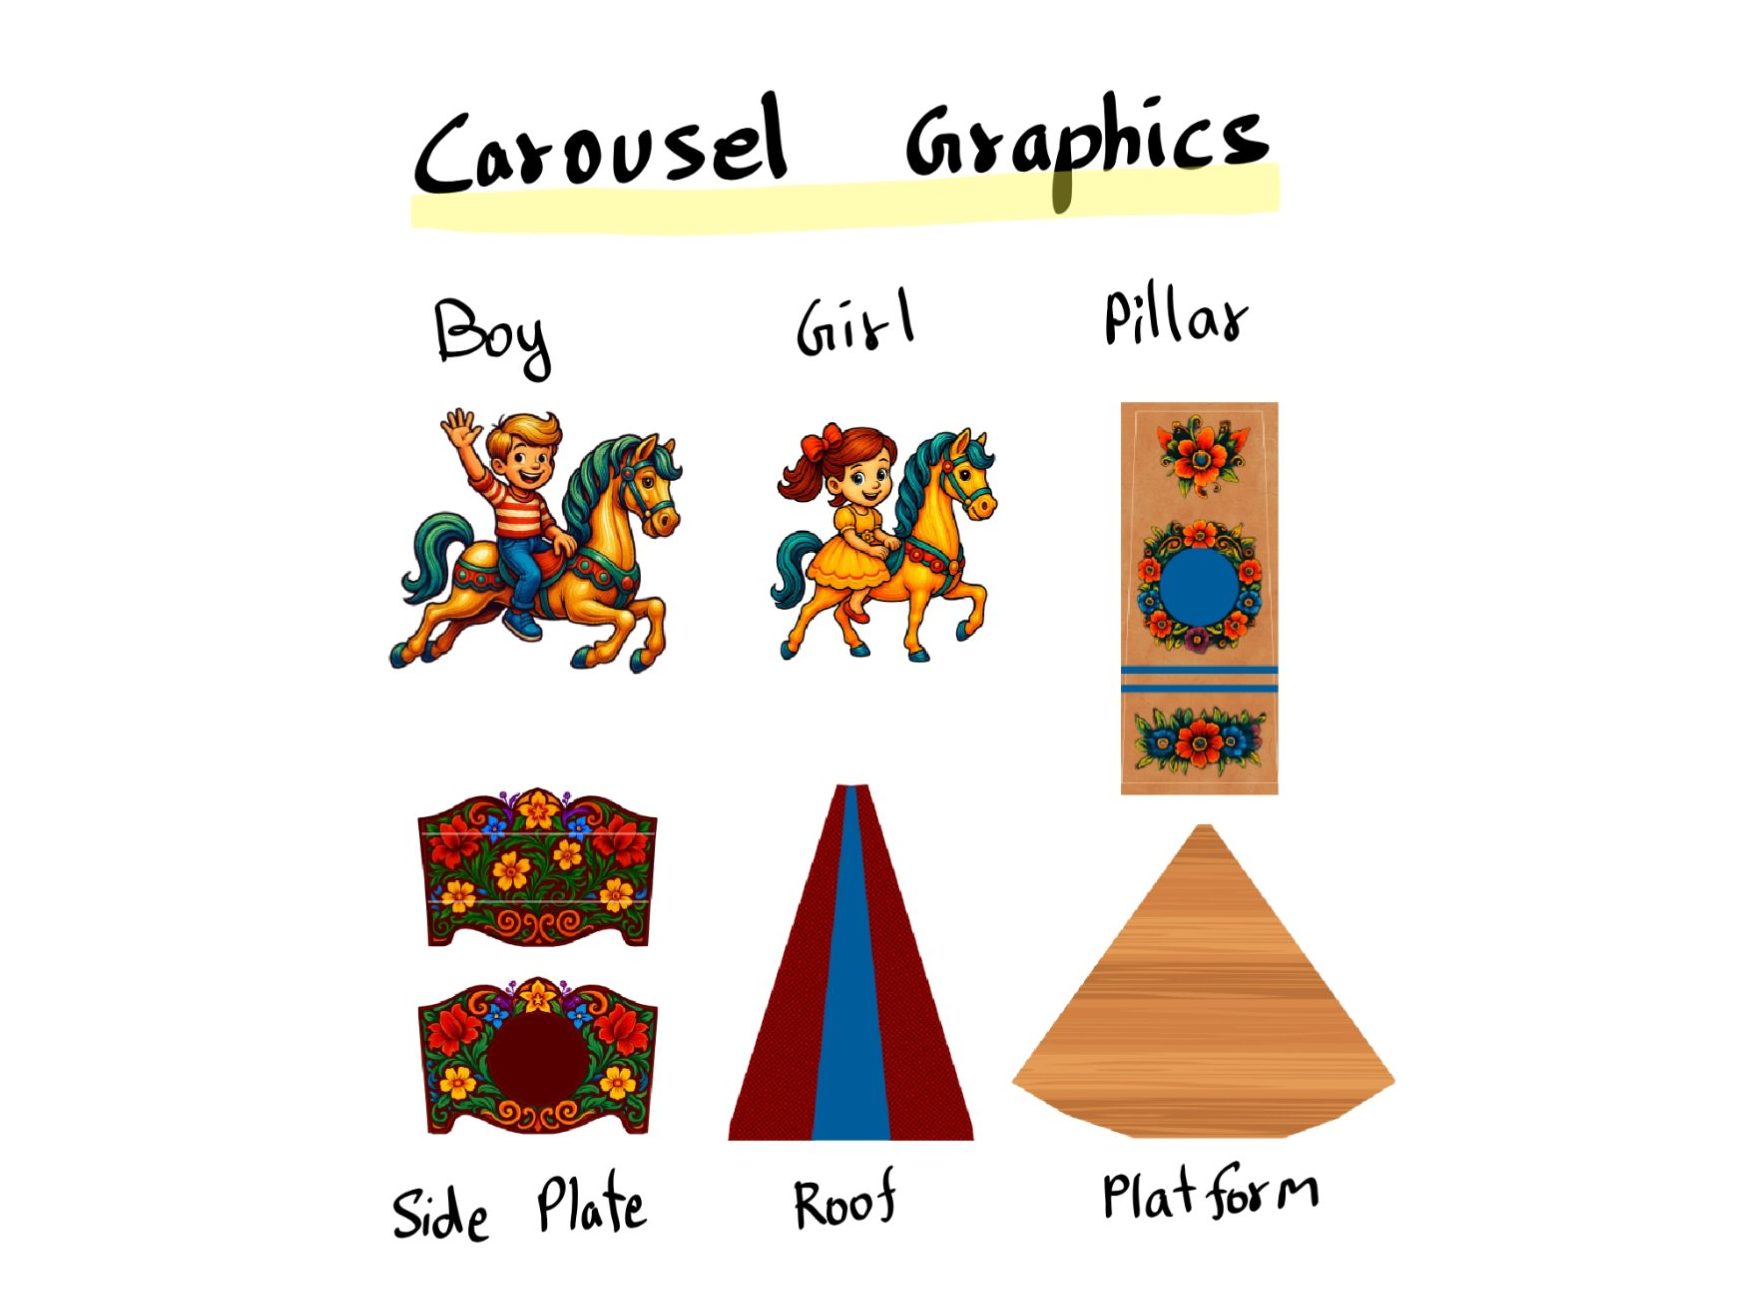
Disclosure: kids and flowers were first ai generated, then edited in inkscape.
- I have oversimplified the process here. In reality, it was a continuous loop between Onshape, Inkscape, and EasyEDA to get everything perfected.
- This is my first time designing something like this, so it took extra time to figure out the workflow.
Electronics & PCB Design
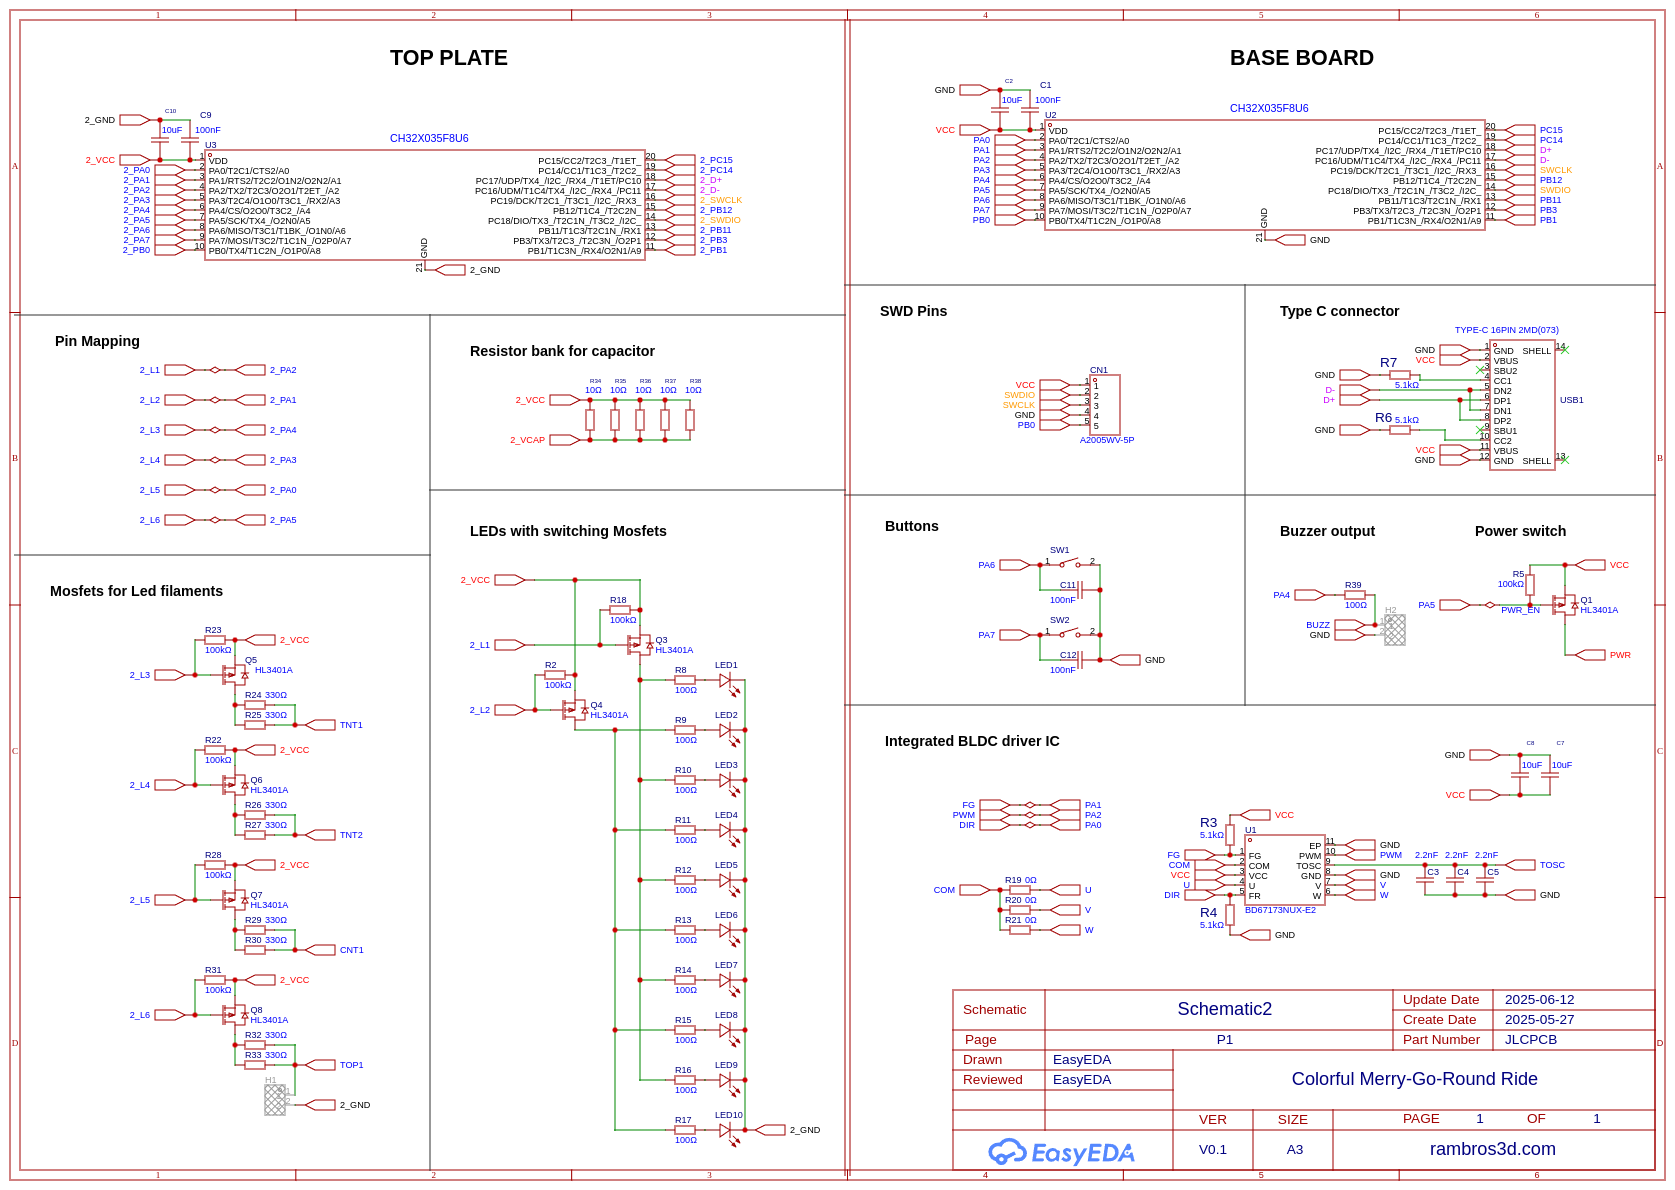
The dxf board templates were exported from Onshape and imported into EasyEDA. The boards were combined into two separate panels.
Mouse bites were chosen for panelization due to the irregular board shapes. Learn more about mouse bites - Sparkfun
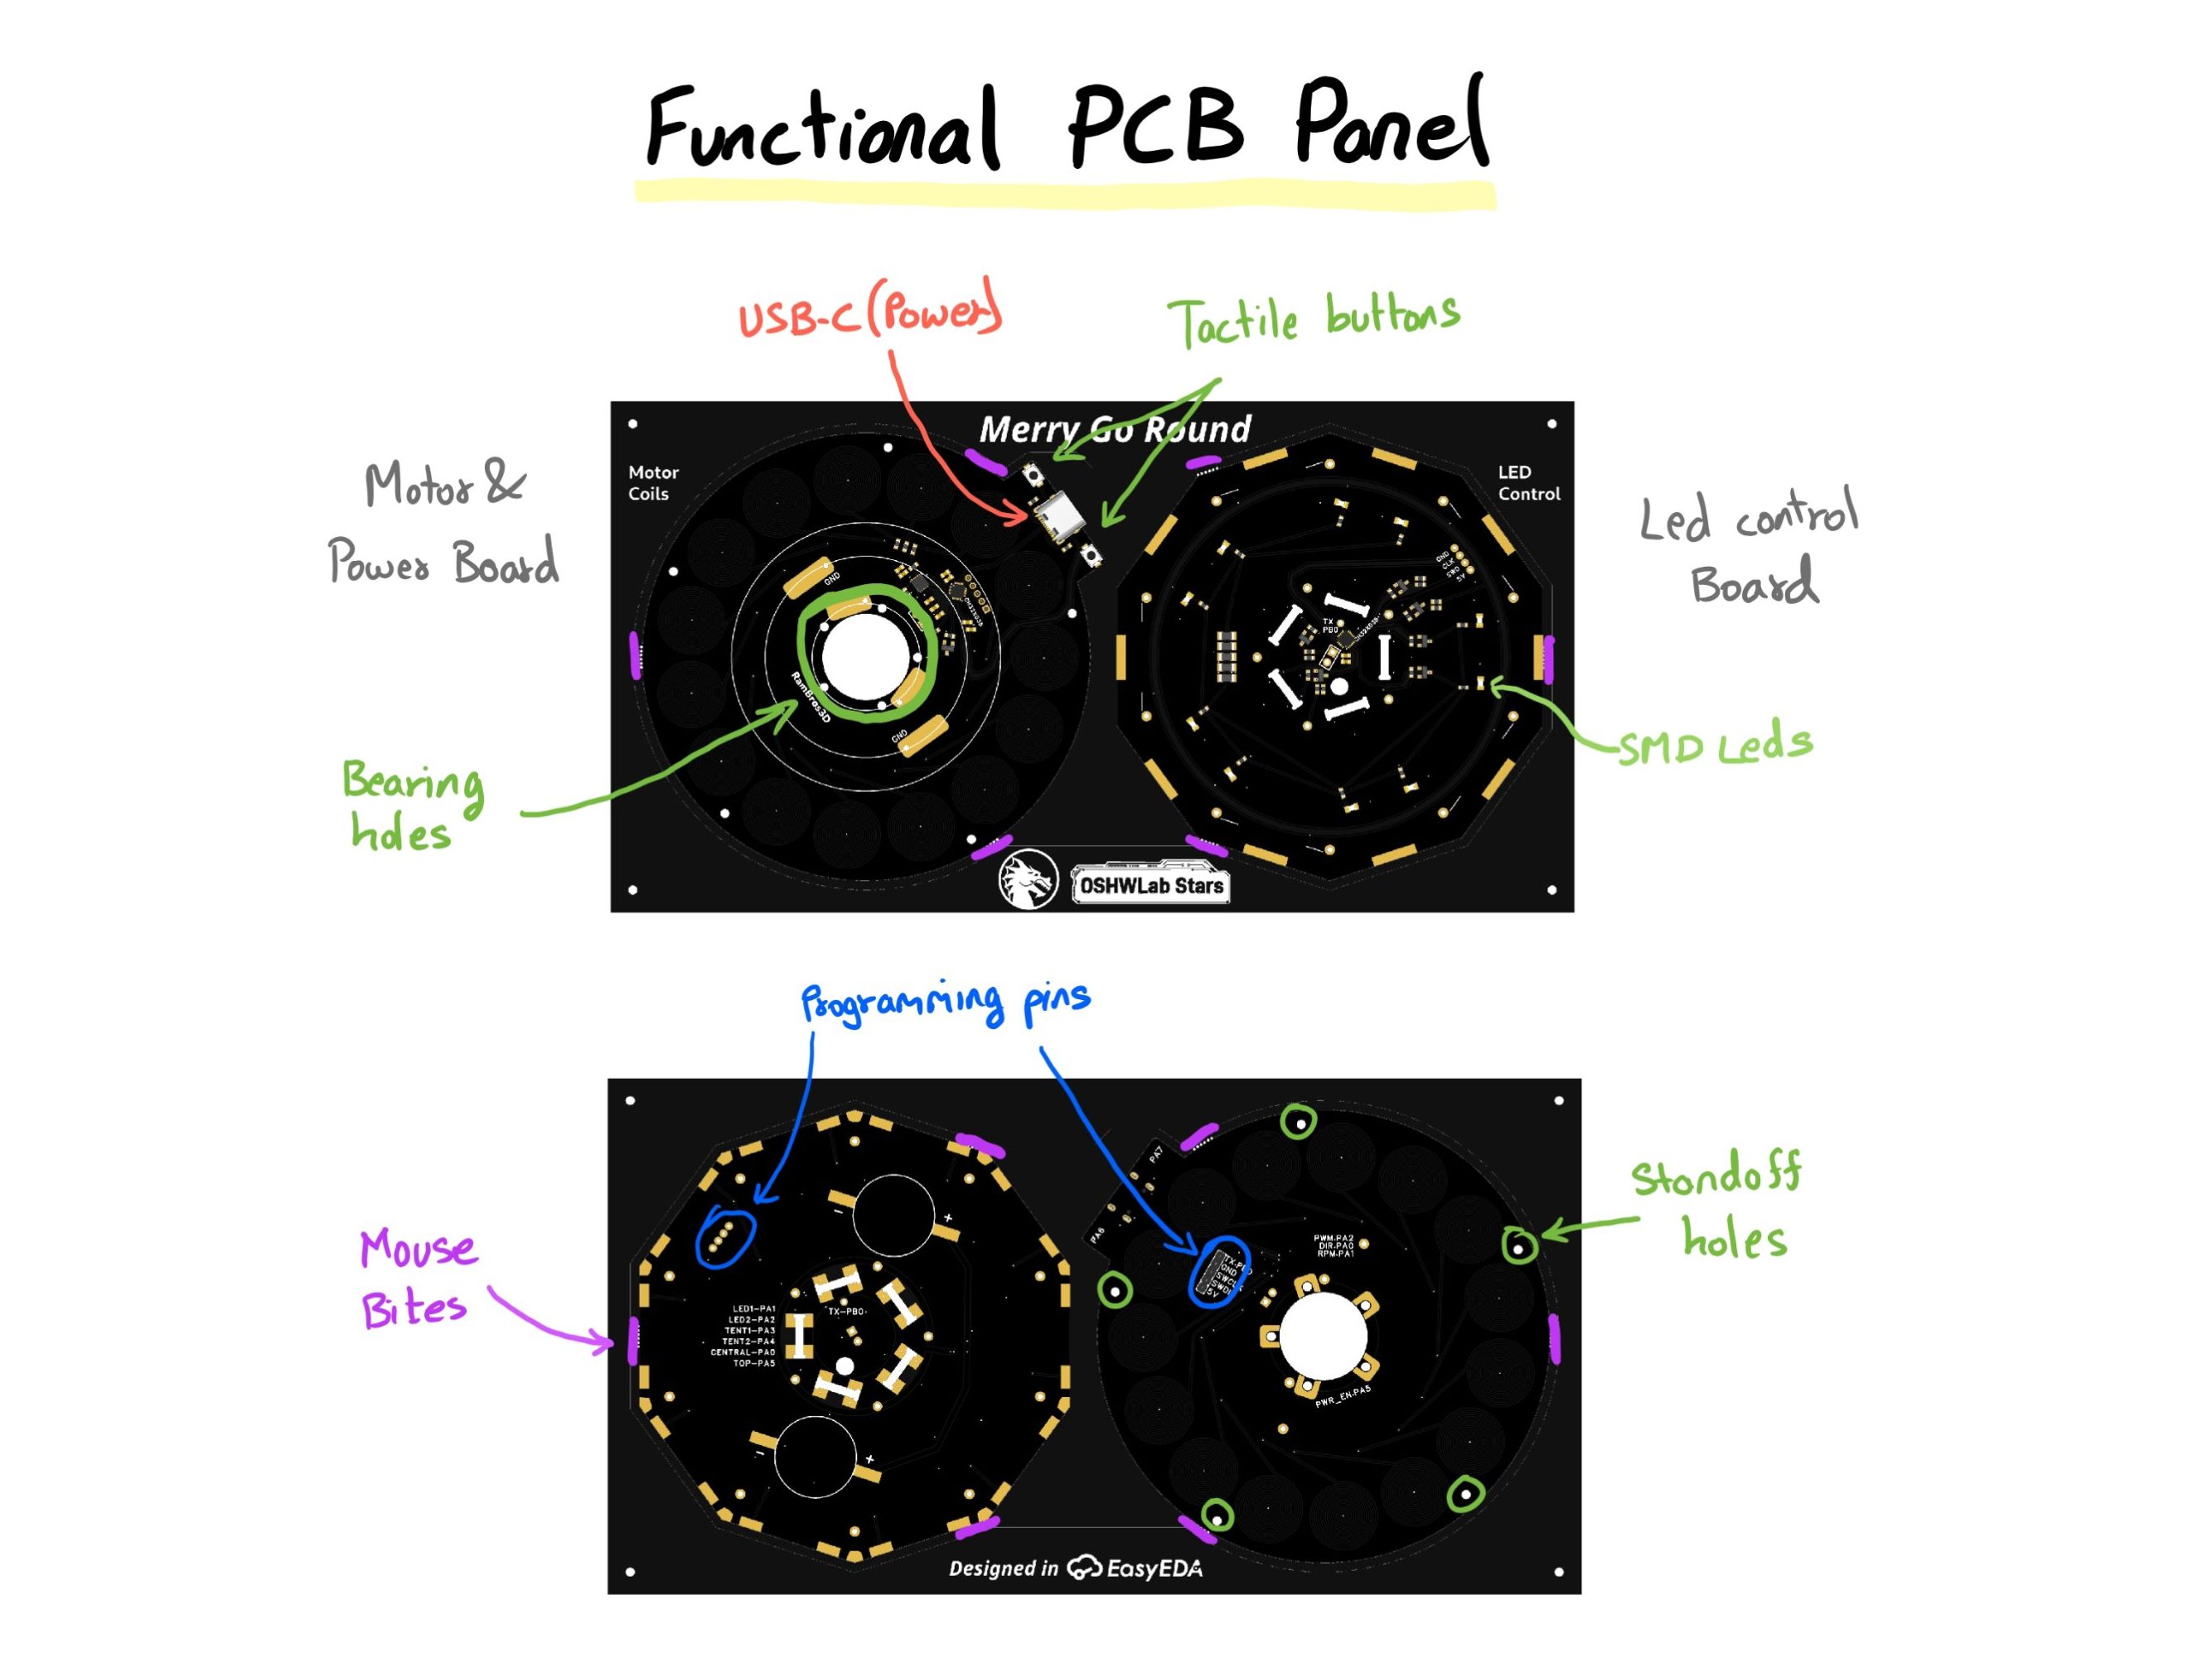
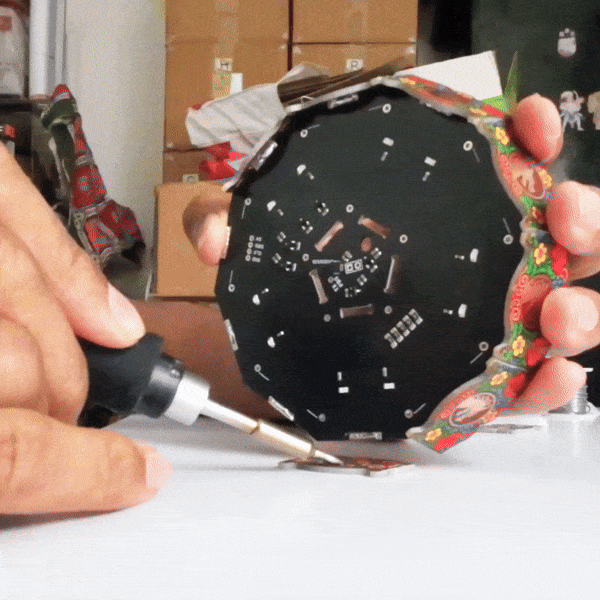
1) Functional panel:
These boards with a functional circuit, this panel comes assembled with the SMD components.
Only the top plate and base board are in this panel. Relatively speaking the Schematics was the easiest part. Both the boards have a CH32X035 MCU, they are programmed using Arduino IDE with the WCH-LinkE adapter.
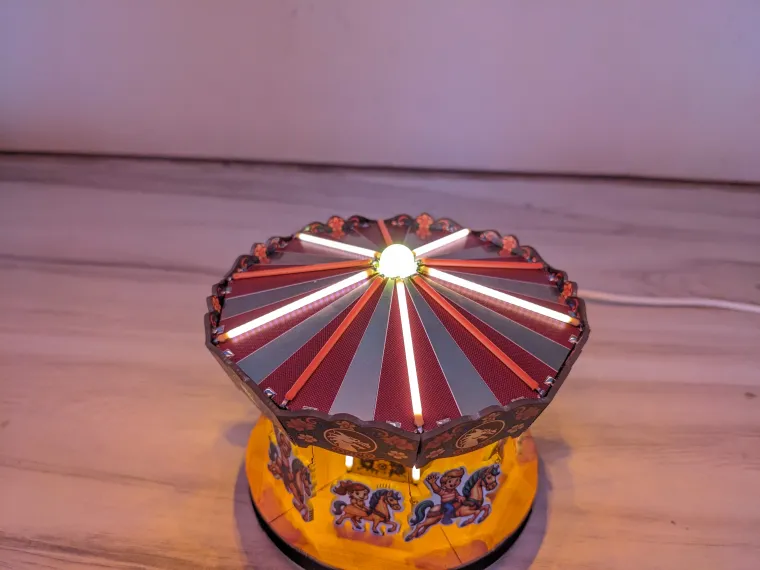
a) Top Plate:
Its just a few transistors for a bunch of blinking LEDs.
b) Base board:
This board has USB-C for power, two buttons for switching the LED and a PCB motor.
- The PCB motor is not yet tested. Still have some work to do

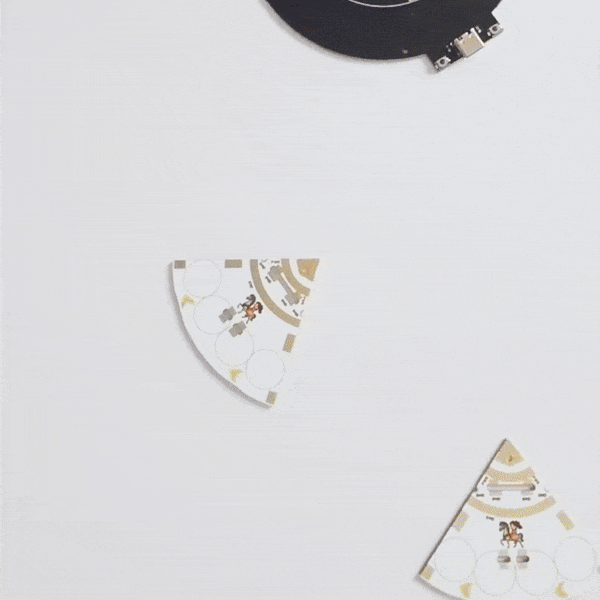
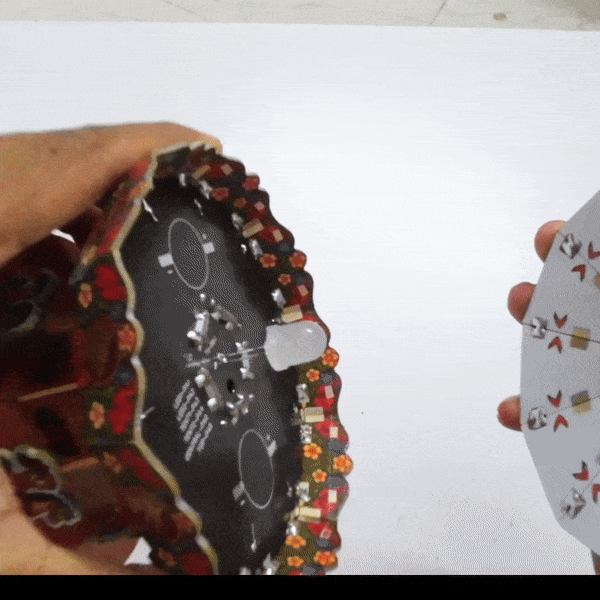
2) Colorful panel:
This panel contains all the boards with a color silkscreen, these boards do not have any components assembled onto them. The schematic is literally empty, no components.
There boards only have pads and traces to provide power for the top plate and connect filament leds.
It was planned this way to reduce the fabrication cost.
Assemble and Solder
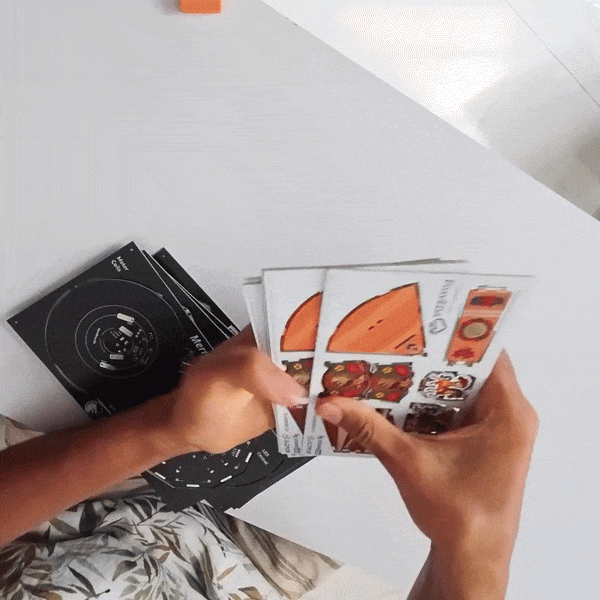

Needless to say, this is the most satisfying step. The feeling of everything fit together never gets old.
First, de-panelize the boards from the panels. Be careful if you're doing this with bare hands, it left a few scratches in my fingers.
Then its just soldering work. Arrange the PCBs and solder it as per the 3D model. While soldering the LEDs, make sure to check correct polarity.
- Designer's Thoughts -

- Designing a PCB in EDA software is easy, Making a 3D model in CAD software is easy.
- But designing a 3D model with PCB requires a lot of thought, especially planning the electrical connections.
Its not like making a enclosure for PCB, or designing a PCB to fit in an enclosure; too obvious in hindsight.
Improvements:
Currently, this project is not beginner-friendly since it was not designed with replicability in mind.
- The side plates and roof boards were aligned manually and soldered. Adding alignment tools or slots in the panels would guide assembly and make it easier.
- During testing, I found that the slip ring performance is questionable, I used brushes from a small DC motor. Using wireless power transfer would be a better option, but it would increase complexity.
- The CH32X035 microcontroller doesn’t have complete Arduino framework support. I managed with a simple blink code to get it working. Using ch32fun looks like a better option for these MCUs.
Initially, I just wanted to make a simple project to test the color silkscreen, but I ended up getting deeply involved and spent two full weeks on this design. It would have been a bummer if something hadn’t fit or worked after all that effort.
Luckily, everything turned out better than I had ever expected. It’s visually an exotic project, to say the least.