

Story
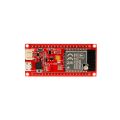
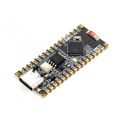
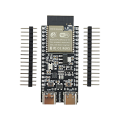
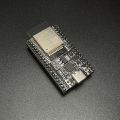
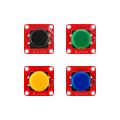
A joystick you can print with a 3D printer and develop at home. I used an Arduino Nano ESP 32 in my design. You can use only the ESP32 or other microprocessors of your choice. However, for my code, a board with Bluetooth integration must be selected. This Arduino code works with the BleGamepad library. You need to install this library in the Arduino IDE. This code will establish the Bluetooth connection and define it as a joystick. In my design, I used two joysticks and four buttons. Using more is your choice. I wanted to create a product with the materials I had on hand.
I used 3 rechargeable batteries to power the system. However, you can use 2 batteries if needed. The Arduino Nano ESP32 requires at least 6V input through the Vin pin because it has a built-in voltage regulator. If you want to power it via the 5V pin, you can use a single battery with a boost converter. My recommendation is to use the Vin pin for stable operation.
I have added different Turkish microprocessors to the list that you can use. The important thing is that it supports Bluetooth.
bleGamepadConfig.setButtonCount(16);
bleGamepadConfig.setHatSwitchCount(0);
bleGamepadConfig.setWhichAxes(true, true, false, true, true, false, false, false); // X, Y, Z, rZ active
With these codes, you select the desired axes for your joystick to move. You can observe the results by changing this to true or false and act accordingly.
if (joy1Btn == LOW && joy1BtnPrev == HIGH) {
Serial.println(F("Left Joystick Button"));
bleGamepad.press(BUTTON_10);
delay(debounceDelay);
} else if (joy1Btn == HIGH && joy1BtnPrev == LOW) {
bleGamepad.release(BUTTON_10);
}
With these codes, you select which of the default gamepad buttons you want to use. The text BUTTON_10 here can be changed between BUTTON_1 and BUTTON_17. You can activate the desired buttons by changing it in the same way.
The joystick and button connections are defined at the beginning of the code for the Arduino Nano ESP32. You can use them or change them if you wish.