


Story
This advanced environmental monitoring station is built on the CrowPanel Advance platform (5-inch or 7-inch version) and uses the EnSens Add-on with a Bosch BME688 sensor to provide a comprehensive view of both indoor air quality and outdoor weather conditions.
Requirements
1. CrowPanel Advance 5” or 7”
2. EnSens Add-on for local sensing of temperature, humidity, pressure, VOC, CO₂, and IAQ

Main Features
The user interface features two main tabs (Indoor and Forecast) and an additional Settings tab.
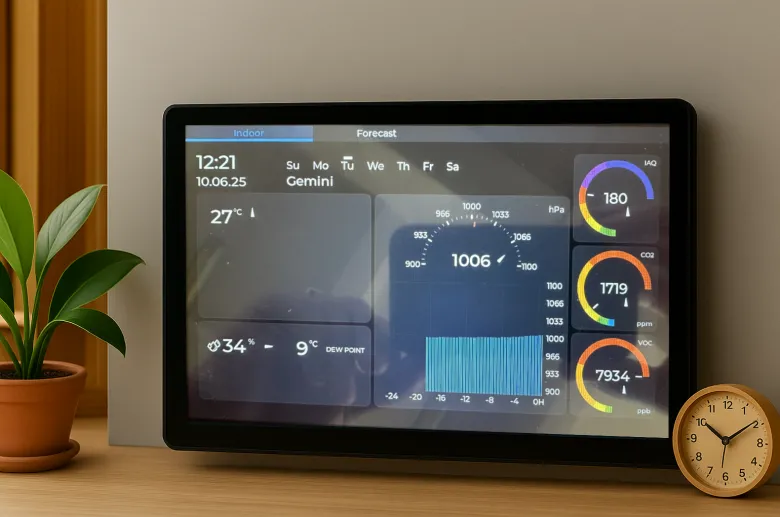
1. Indoor Tab – Real-Time Local Monitoring
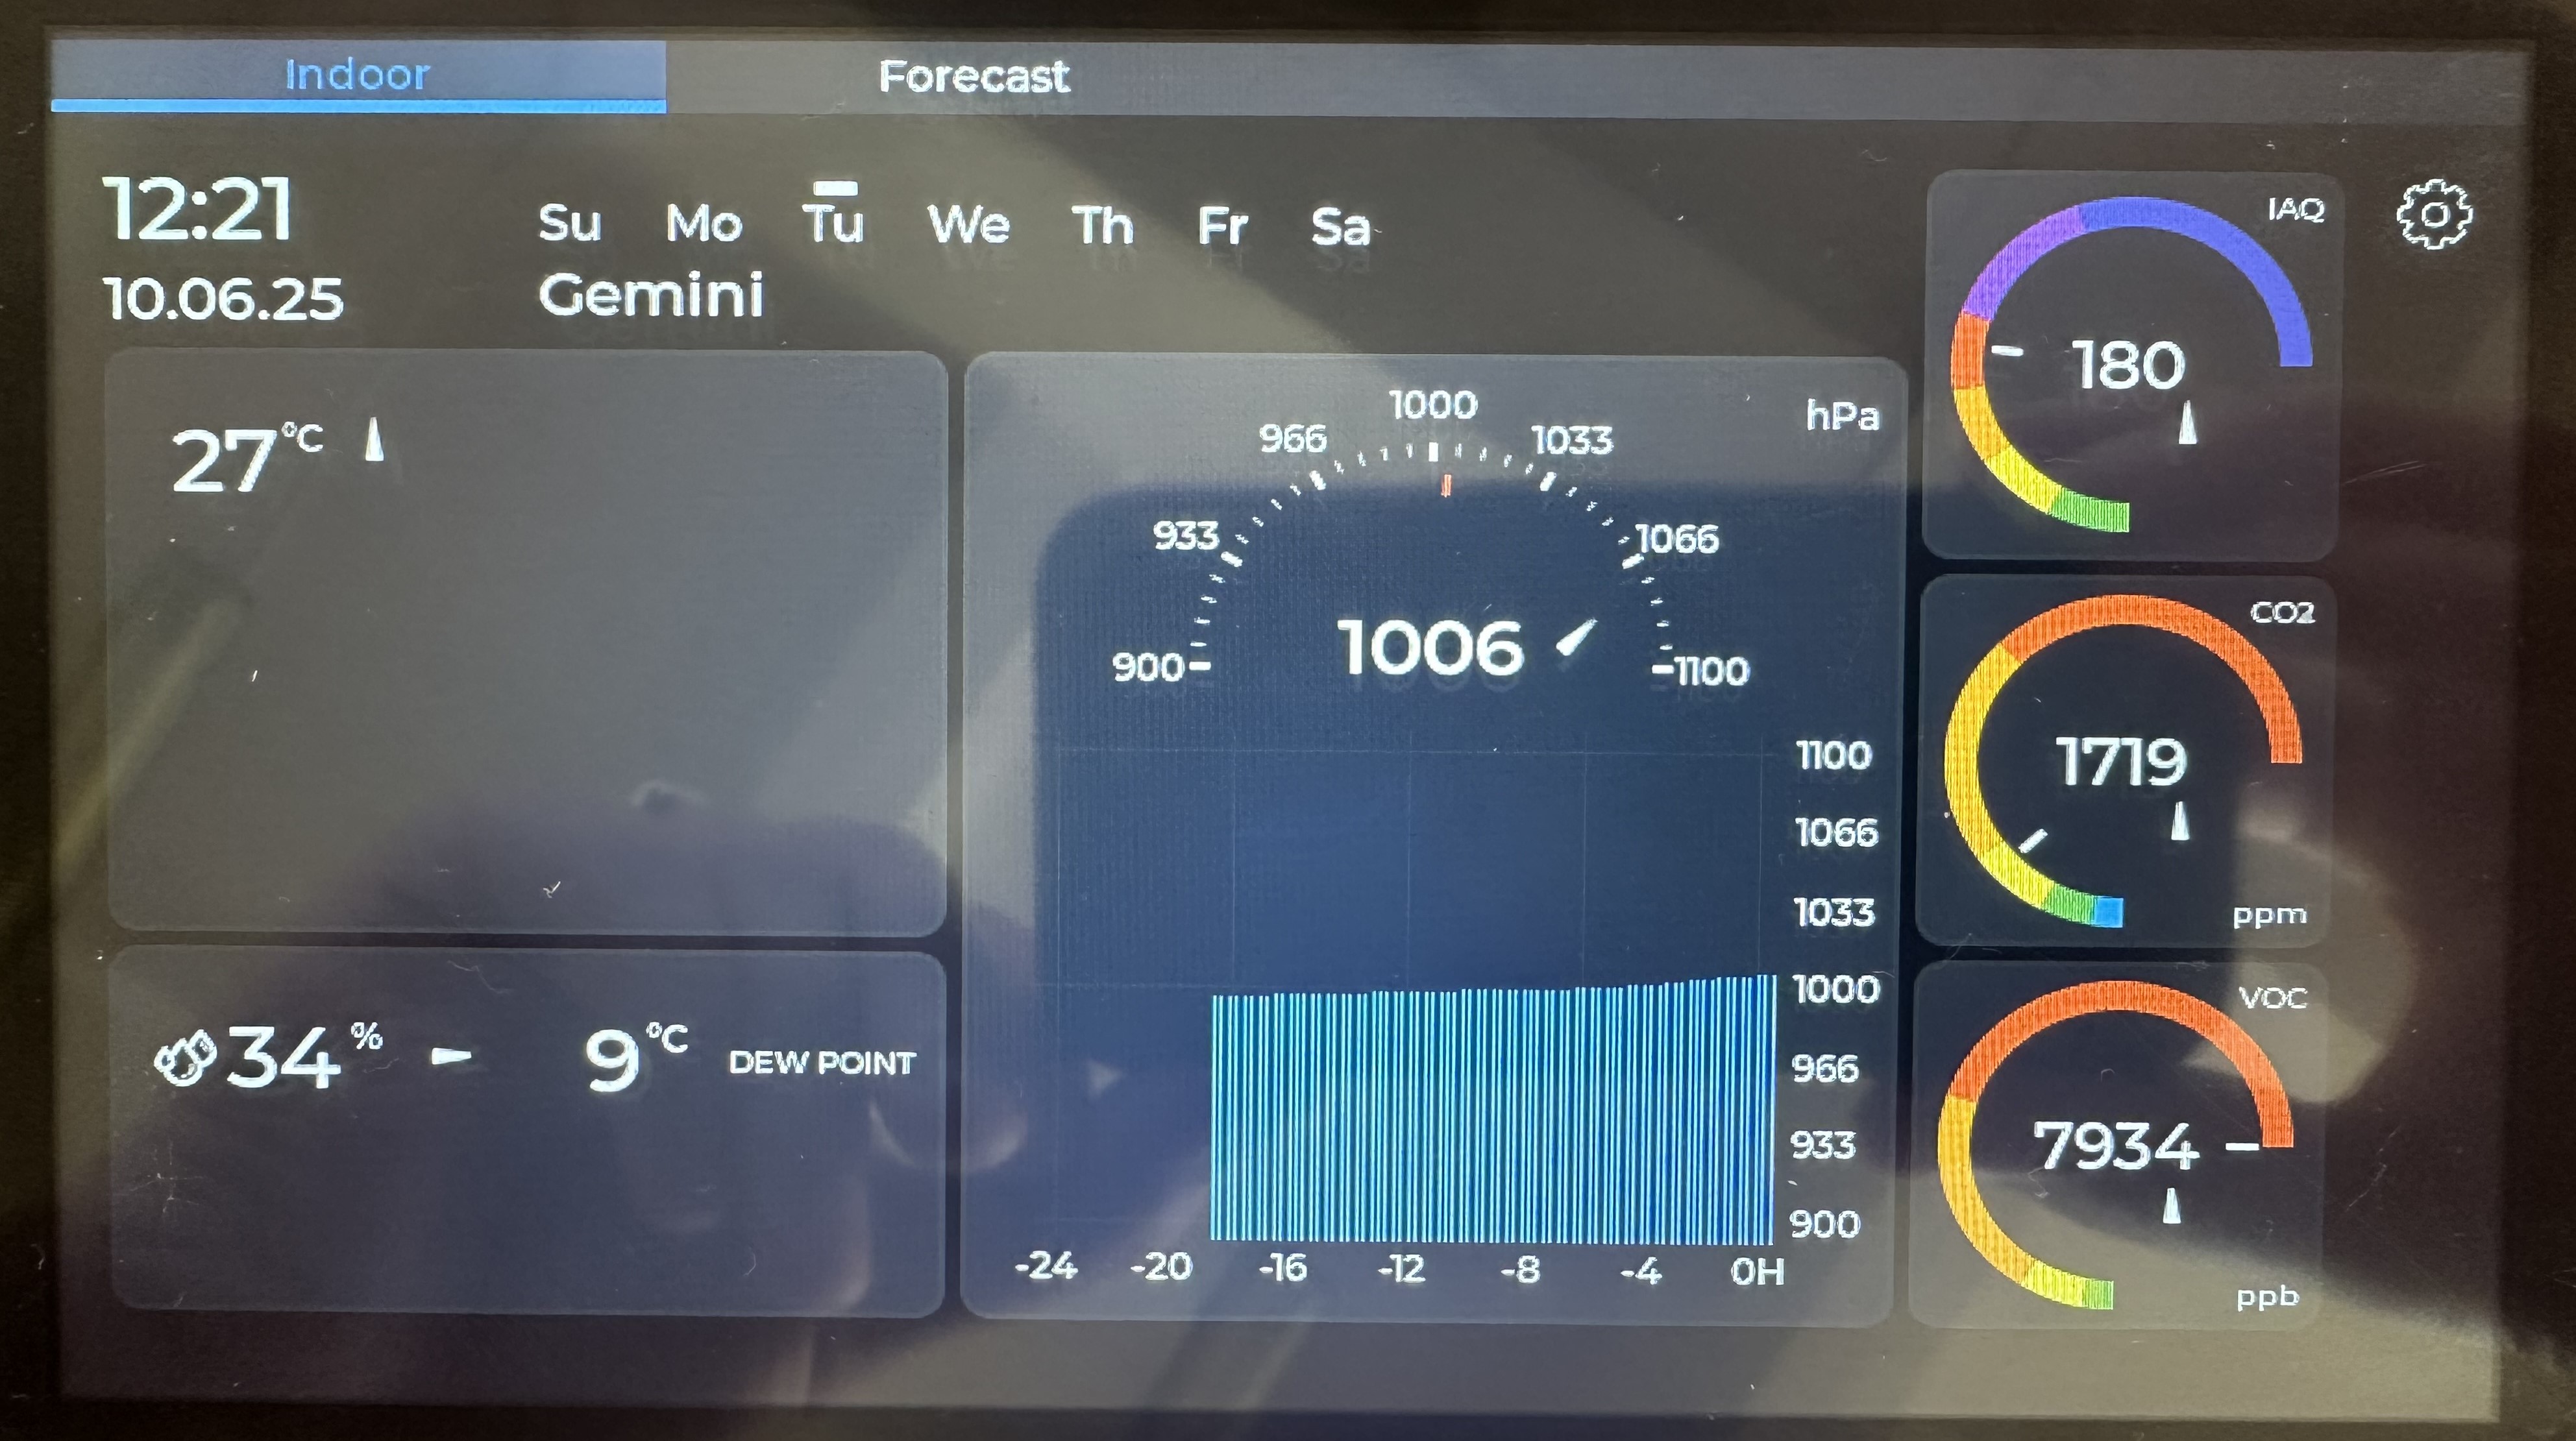
Displays detailed sensor data from the EnSens Add-on:
- Time and Date: Full clock, calendar, and day of the week
- Temperature: Current value with dynamic trend arrow
- Humidity: Live reading, trend, and dew point calculation
- Pressure: Measured value, trend indication, and 24-hour graph
- Air Quality Parameters:
- IAQ (Indoor Air Quality Index): Visual scale from 0 (clean) to 500 (hazardous)
- CO₂ Levels: Monitors indoor carbon dioxide with warning levels
- VOC Levels: Indicates presence of airborne organic compounds (e.g., from paint, furniture, or people) with a colored status bar
All indicators are presented with intuitive visual aids for quick assessment of trends and health-related concerns.
2. Forecast Tab – Online Weather
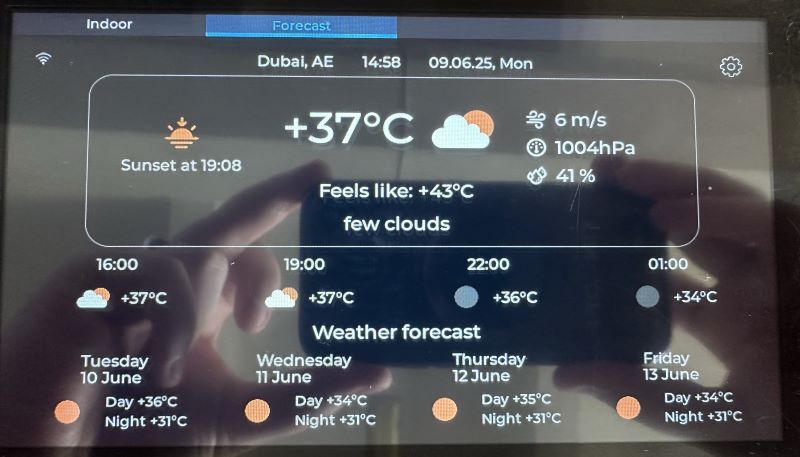
Fetches weather data from OpenWeatherMap, including:
- External temperature, humidity, and pressure
- Weather condition icons and daily forecast summaries
- Location-based automatic updates
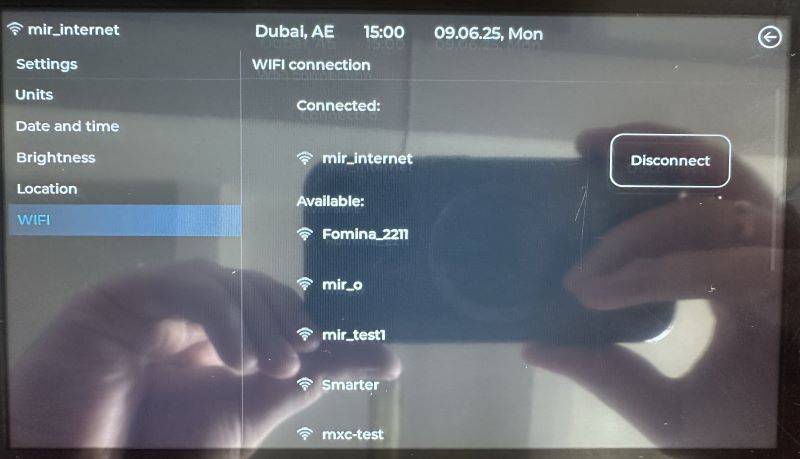
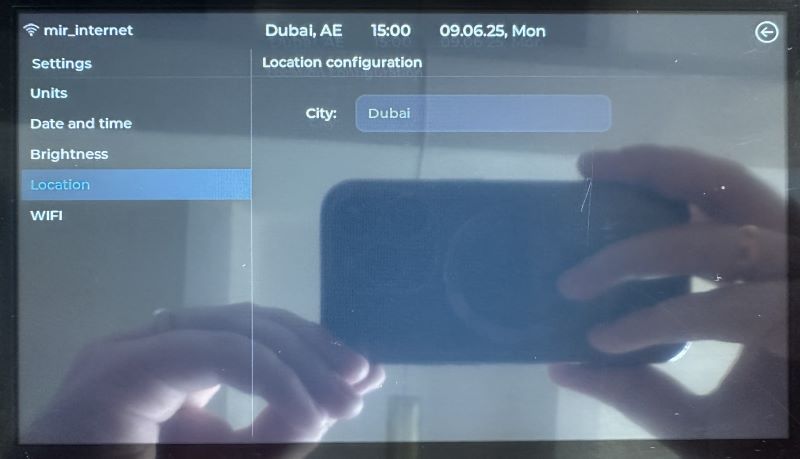
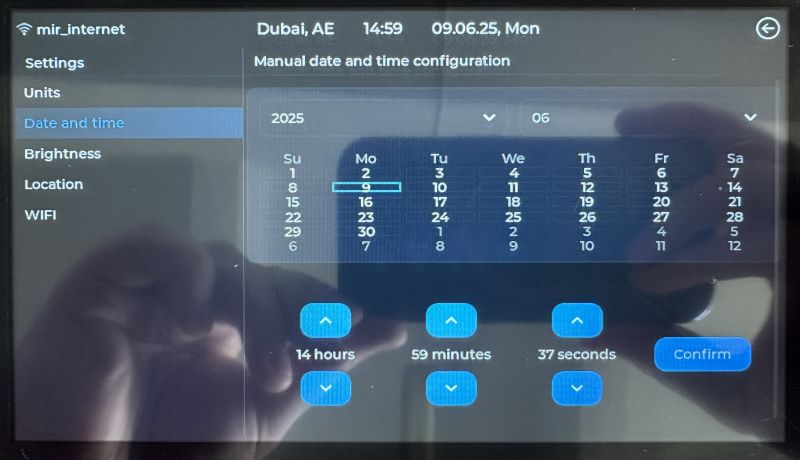
Settings Menu
The system provides a full configuration interface:
- Wi-Fi setup
- Location settings (for weather forecast)
- Manual or automatic screen brightness
- Manual time and date adjustment
- Measurement unit selection: °C / °F, hPa / mmHg


Customizable and Expandable
The firmware for both CrowPanel and EnSens Add-on is open-source and can be modified for advanced use cases. Easily expand the station’s capabilities or integrate it into broader environmental monitoring systems.
Installation & Firmware Guide
Step 1: Installing the EnSens Add-on Module
Simply plug the EnSens Add-on into the dedicated expansion port on the back of the CrowPanel Advance.
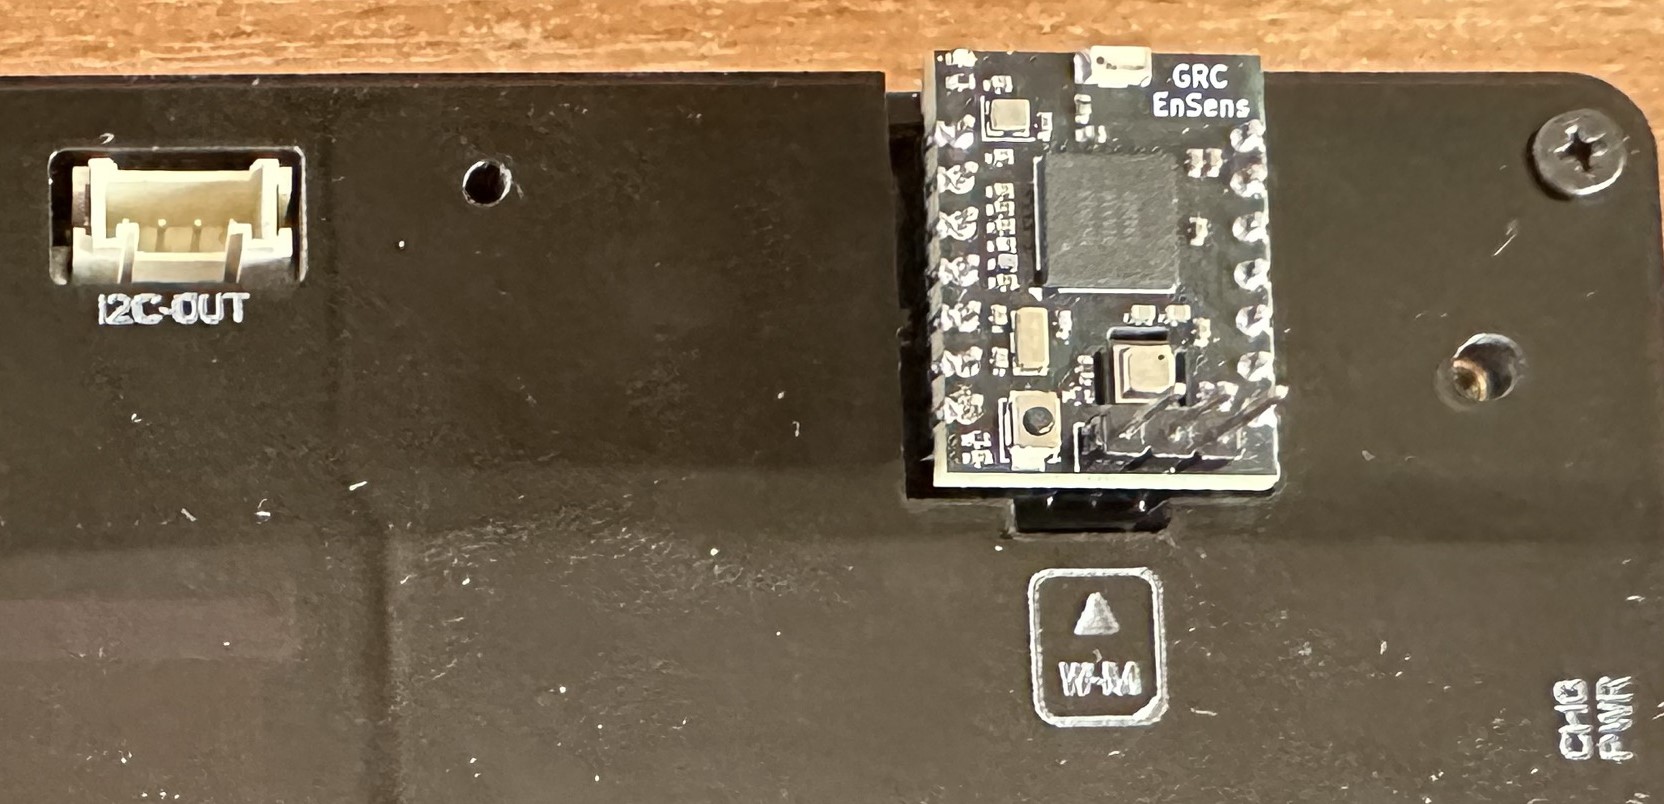
Refer to the product photos — no tools or configuration needed. The module will be automatically recognized after firmware upload.
⚠️ Don't forget to move the jumper on the back of the panel to the WM (wireless module) position.

Step 2: Flashing the Firmware
Option A: Use Prebuilt Firmware (Recommended for Beginners)
1. Download the precompiled firmware archive:
https://github.com/Grovety/ensens_addon_crowpanel_meteo/blob/main/grc_ensens_release_1.5.7z
2. Unpack the archive.
3. Connect your CrowPanel to your PC via USB-C cable.
4. Launch FlashTool.exe from the unpacked folder — it will auto-detect the COM port and flash the firmware automatically.
5. Wait for flashing to complete — the system will reboot and start showing data immediately.
Option B: Build from Source (For Developers)
1. Install Development Tools:
o Install Visual Studio Code
o Install ESP-IDF Extension for VSCode
o Install ESP-IDF v5.4.1 through the extension
2. Open the Project:
o Open a terminal and navigate to the root of the project folder
o Run code . or open the folder in VSCode manually
3. Connect the Panel via USB-C
Ensure your CrowPanel is connected and powered.
4. Flash the Project:
In VSCode:
o Select ESP-IDF version v5.4.1
o Set Flash Method: UART
o Choose the correct COM port
o Target Device: esp32s3
o Click "Build, Flash and Monitor"
You now have a fully functional smart station with both Indoor and Forecast tabs enabled.