Currency
Toggle Nav

What Can I Make Using an ESP32 HMI Display?
August 12, 2025
Three Inspiring ESP32 HMI Display Projects
In the exciting world of embedded systems, the journey from a brilliant idea to a functional prototype is often blocked by an invisible yet formidable wall. This barrier is built from numerous technical challenges, especially in traditional Graphical User Interface (GUI) development, where developers must independently tackle multiple layers of complexity: from tedious hardware selection and PCB layout, to complex low-level driver porting, before finally beginning application logic. This process is not only time-consuming, but the hardware debugging and driver adaptation phases often consume the bulk of a project's timeline, significantly reducing development efficiency.
But what if there was a way to break down that wall?
1. The Solution: An Architectural Look at All-in-One HMI Platforms
The rise of all-in-one HMI (Human-Machine Interface) platforms is the direct answer to these development challenges. The Elecrow CrowPanel 7.0" serves as a prime example, with a core design philosophy centered on pre-integrating and standardizing the hardware and driver layers.
Core Hardware Components:
- Core Processor: An ESP32-S3-WROOM-1-N4R8 module, featuring a dual-core 32-bit LX6 microprocessor (up to 240MHz), 4MB Flash, and 8MB PSRAM. This provides ample computational and memory resources for graphics processing and complex application logic. Integrated 2.4 GHz Wi-Fi (802.11 b/g/n) and Bluetooth 5.0 offer essential connectivity for IoT applications.
- Display and Touch Unit: A 7.0-inch, 800x480 resolution TFT-LCD with a capacitive touchscreen, driven by EK9716BD3 & EK73002ACGB ICs. Unlike traditional SPI screens, its RGB interface enables higher refresh rates and superior visual quality, while the capacitive touch supports multi-touch and more responsive interactions.
- Integrated Peripherals:
- Power & Programming: A single USB-C port for 5V power and firmware flashing.
- Storage: An onboard TF card slot for storing UI assets, firmware updates, or data logs.
- Audio: A standard 2.0mm pitch speaker connector.
- Expansion: Standardized UART, I2C, and GPIO interfaces using HY2.0-4P connectors for easy, plug-and-play integration of sensors and actuators.
This high degree of integration allows developers to bypass the hardware selection and circuit debugging stages entirely, treating the platform as a feature-complete "black box."
Get Started with ESP32 7inch HMI Display
2. The Software Ecosystem and Development Environment
The platform's usability is further enhanced by its robust software support:
- Multi-Environment Support: Compatibility with Arduino IDE, Espressif IDF, PlatformIO, and MicroPython ensures that developers from various technical backgrounds can get started quickly.
- Graphics Library Support: Deep compatibility with LVGL (Light and Versatile Graphics Library), a powerful open-source GUI library designed specifically for embedded systems.
- Visual UI Design: Support for SquareLine Studio, which enables developers to design complex UIs on a PC via a drag-and-drop interface and export ready-to-use LVGL project code, decoupling UI design from embedded development.
3. Project Case Studies: What Can You Actually Make?
So, with such a powerful platform at your disposal, what kind of projects can you build? Here are a few real-world examples from the community to inspire you.
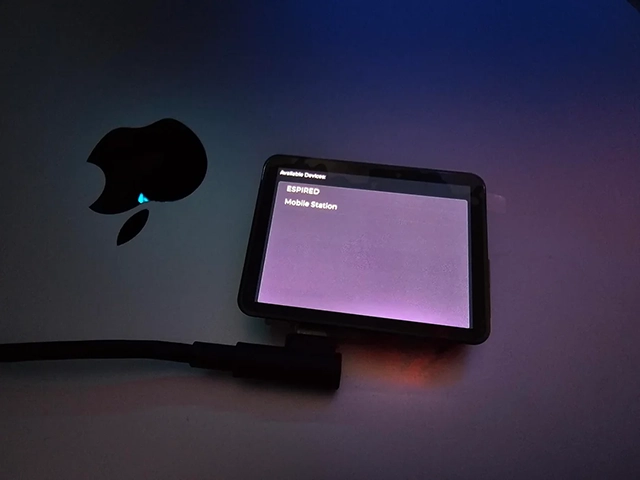
Case Study 1: IoT Spotify Remote Controller
- Goal: To create a standalone, touchscreen Spotify remote that displays current track information, provides playback controls, and allows switching between playback devices.
- Community Reference:
- Project Source: Reddit user u/espired shared their project in the r/esp32 community: "ESP32-S3 Spotify remote controller". Despite having 14 years of software experience, this was their first embedded project, and they successfully implemented the core features.
- Source Code: The author generously shared the complete Arduino code on GitHub Gist.
- Platform Advantages & Improvement Opportunities: The original author noted a key challenge: they were unable to implement album art display due to issues with SPIFFS. This is where the CrowPanel platform excels:
- Memory & Storage: With 8MB of PSRAM, the CrowPanel can easily decode high-resolution album art in memory. The onboard TF card slot provides a reliable alternative to SPIFFS for caching images and other assets.
- Large Screen Real Estate: The 7.0-inch display allows for a much richer and more aesthetically pleasing UI, with plenty of space for album art, lyrics, and other information.
ESP32 Spotify Remote Controller Project
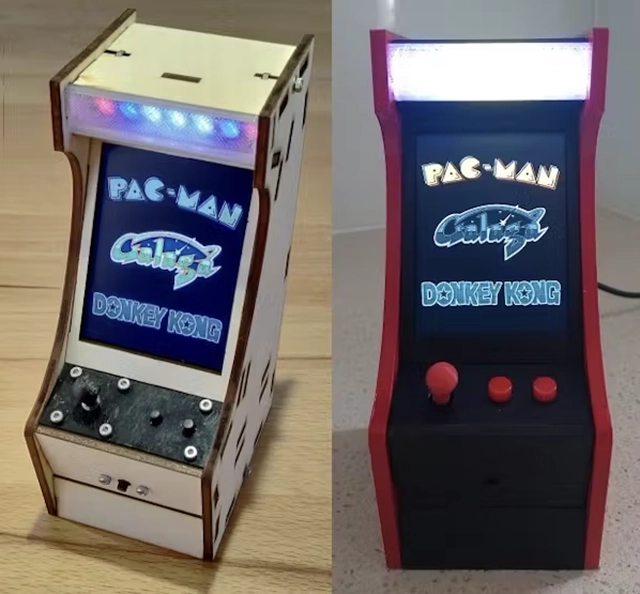
Case Study 2: ESP32 Mini Arcade Emulator
- Goal: To build a miniature arcade cabinet that perfectly emulates classics like Pac-Man and Donkey Kong, complete with physical controls and sound.
- Community Reference:
- Project Source: John Bradnam's highly detailed project on Hackster.io, "Galagino - ESP32 Arcade," covers everything from 3D printing the case to final assembly.
- Core Software: The project is based on Till Harbaum's Galagino emulator firmware.
- The CrowPanel Simplification: The original tutorial involves sourcing multiple components (ESP32, screen, amplifier, speaker) and fabricating custom PCBs, an estimated 12-hour build. The CrowPanel platform streamlines this process dramatically:
- Integrated Core Hardware: The ESP32, screen, and speaker interface are already integrated, eliminating the need to source and wire them separately.
- Simplified Wiring: The project is reduced to connecting a 5-way switch and a few buttons to the pre-existing GPIO headers.
- Focus on Software: The developer's task shifts to configuring the correct pin definitions in the Galagino firmware.
- Advantage Analysis: CrowPanel transforms a complex, 12-hour "hardcore" project into a manageable "lightweight" one focused on software configuration, making this incredible arcade build accessible to a much wider audience.
Galagino Cabinet Project
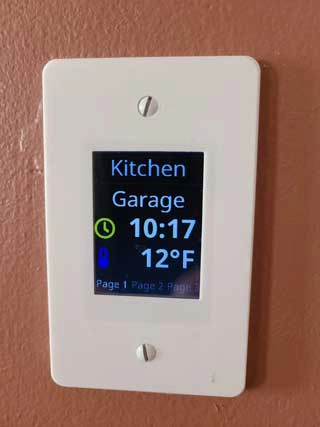
Case Study 3: A Cost-Effective Touch Panel for Home Assistant
- Goal: To solve a common problem for smart home DIYers: finding an affordable, dedicated touchscreen controller for each room without resorting to expensive commercial panels or repurposed tablets.
- The Community Pain Point:
- In a popular thread on the Home Assistant Community Forum, "Touch screen for a reasonable price," user `phier` asks for a solution, noting that most options "are more than 100usd, which seems to be pointless as one can buy amazon fire for much more cheaper..."
- The CrowPanel Solution: The CrowPanel is the ideal answer. It delivers the functionality of a commercial panel at a fraction of the cost and with far more flexibility than a locked-down tablet.
- Implementation via openHASP: By flashing the mature open-source firmware openHASP, the device seamlessly integrates with Home Assistant via MQTT.
- Centralized Management: No embedded C++ coding is required. All UI layout and automation logic is handled centrally in Home Assistant's YAML configuration files.
- Superior Reliability: Compared to an Android tablet, a dedicated ESP32-based panel offers greater stability, lower power consumption, and instant-on responsiveness.
- Advantage Analysis: The CrowPanel + openHASP combination directly addresses the community's pain point, offering a cost-effective, highly customizable, and reliable open-source solution for smart home control.
Cost-Effective Touch Panel for Home Assistant
Future Projects and Untapped Potential
All-in-one HMI platforms like the Elecrow CrowPanel 7.0" effectively solve the core bottlenecks in traditional embedded development by standardizing the complex underlying work. This allows developers to concentrate on what truly matters: application logic and user experience.
This not only means the projects mentioned here can be easily replicated and improved upon, but more importantly, it opens the door to countless ideas that were previously shelved due to hardware complexity. A portable oscilloscope, a 3D printer controller with a custom touch interface, an interactive learning tool for children—when the tool is no longer the obstacle, the only limit is your imagination. For any engineer or maker focused on development efficiency and product quality, this isn't just a powerful tool; it's a creative accelerator, waiting for you to bring the next great idea to life.