Currency
Toggle Nav


Eurorack Stripboard
$3.50
Availability:
In stock
SKU
CES50056P
Weight
52g
- Buy 2 for $2.50 each and save 29%
- Buy 4 for $2.00 each and save 43%
- Buy 5 for $1.90 each and save 46%
- Buy 10 for $1.70 each and save 51%
×
 Add to cart successfully!


Customers Who View This Item Also Bought
Protobard for your DIY Eurorack Synth module
Frequently Bought Together


Build your own module!
Description
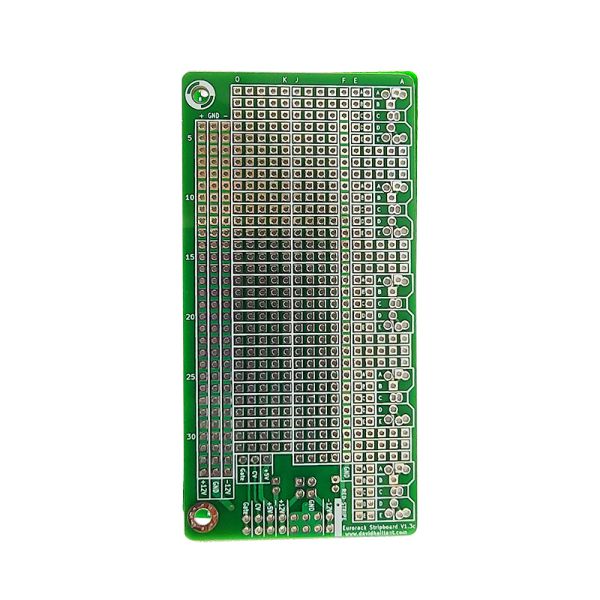
The Eurorack Stripboard is the most convenient way to build a simple DIY Eurorack synthesizer module.
It works like a standard protoboard, but with specific additions for the Eurorack format.
You can also use the Stripboard with the 4HP Front Panel.
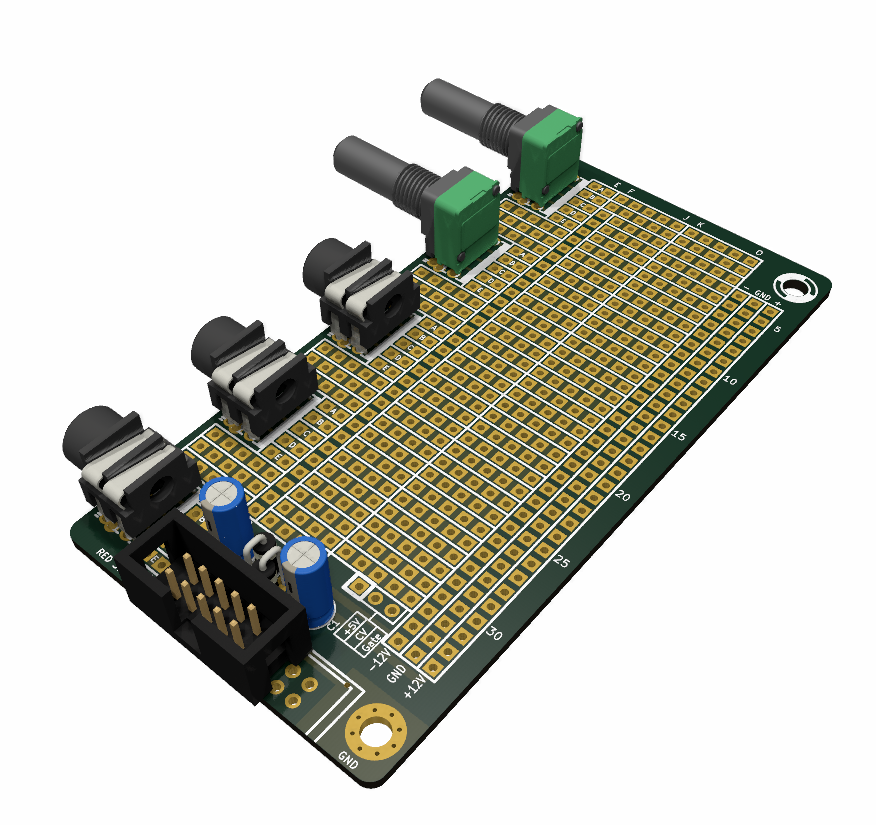
You can place up to 5 potentiometers or 5 jack connectors on the dedicated locations. The potentiometers can be any of 9 or 16 mm types, Alpha PKN160 for example. The Jack connectors are Cliff S6/BB mono style.
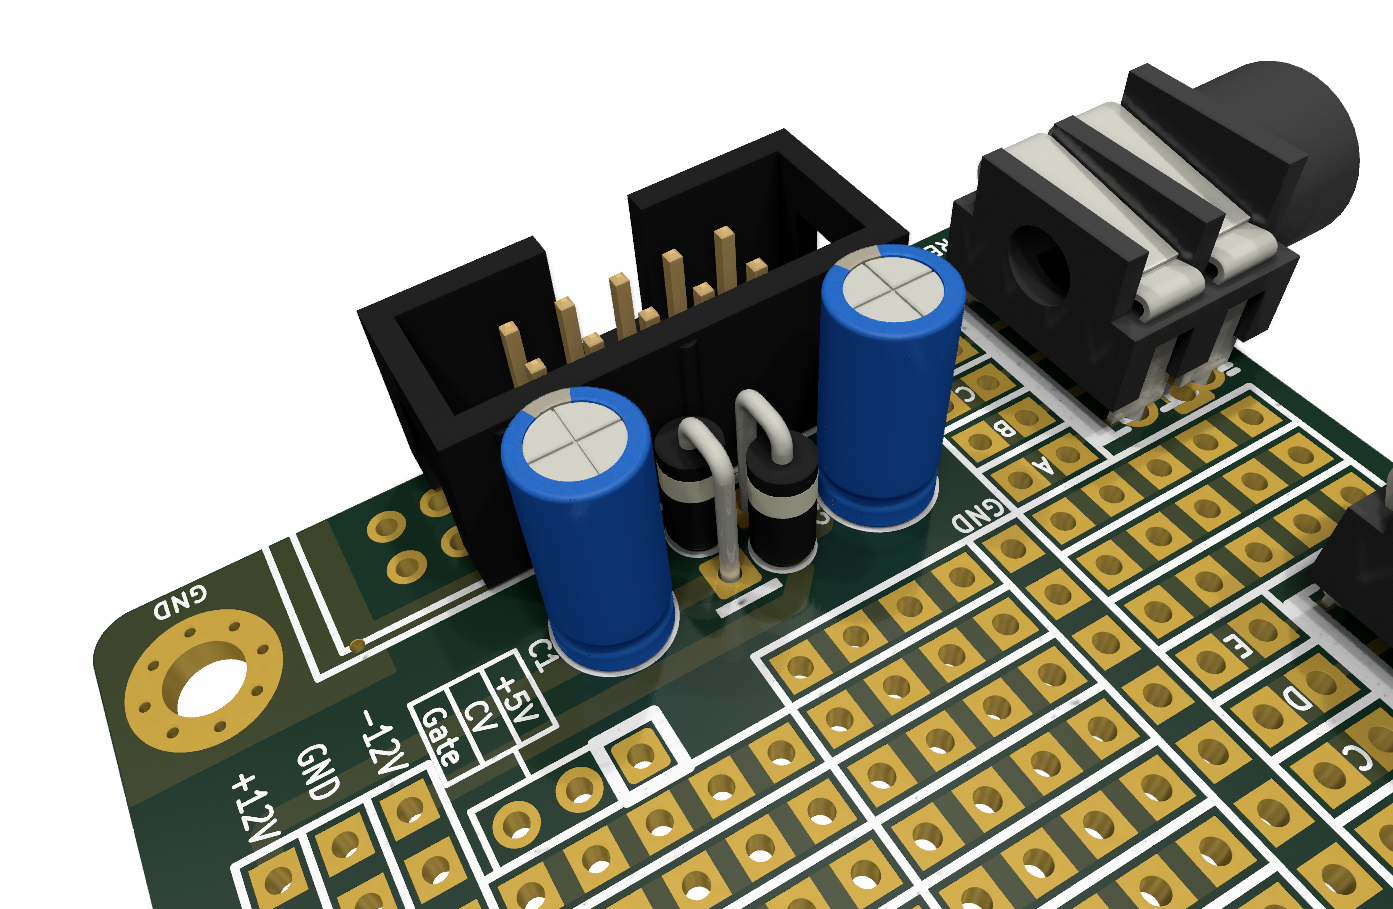
With the Eurorack power supply interface, it's extremely easy to connect either a 16-pin or a 10-pin Eurorack power connector.
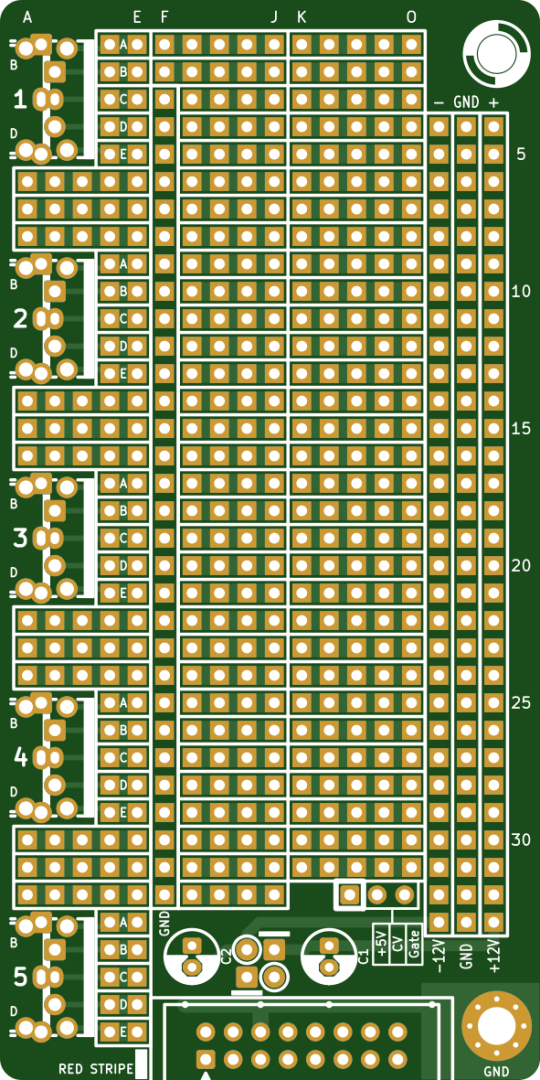
The clear and detailed silkscreen labels indicate where the different voltages are located on the PCB. You can also add 2 filtering capacitors and 2 protection diodes.
Software Editor available
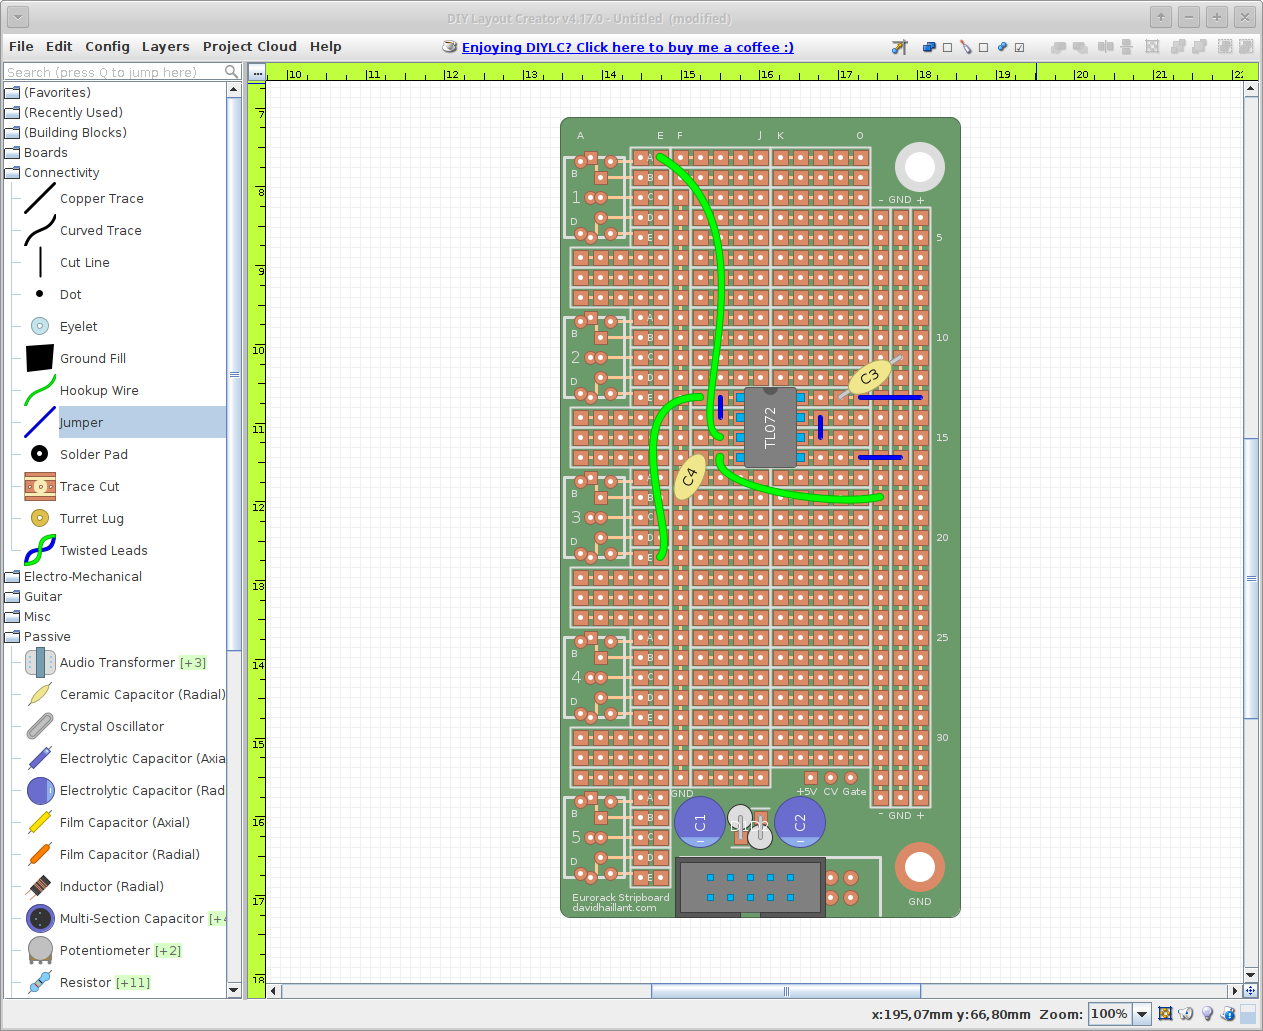
The open source program DIY Layout Creator can help you design your module.
You can download it freely at https://bancika.github.io/diy-layout-creator
How to connect jacks and potentiometers
The jack connectors are Cliff CL1384. They use the strips A, B, D and E.
A and B are switched open when the male jack connector is inserted. D and E are the contacts to the male connector.
-
E is Tip (the signal)
-
and D is Ring (usually the 0V reference, often designated as “ground”).
Note that Cliff jacks are insulated from the panel.
The potentiometers are 9mm (2.5mm pin pitch) or 16mm (5mm pin pitch). Alpha 9mm are a good choice. They align pretty nicely with Cliff jacks on the front panel. They connect to strips B, C and D.
-
B is Counter Clock Wise pole.
-
D is Clock Wise pole.
-
And C is Wiper pole.
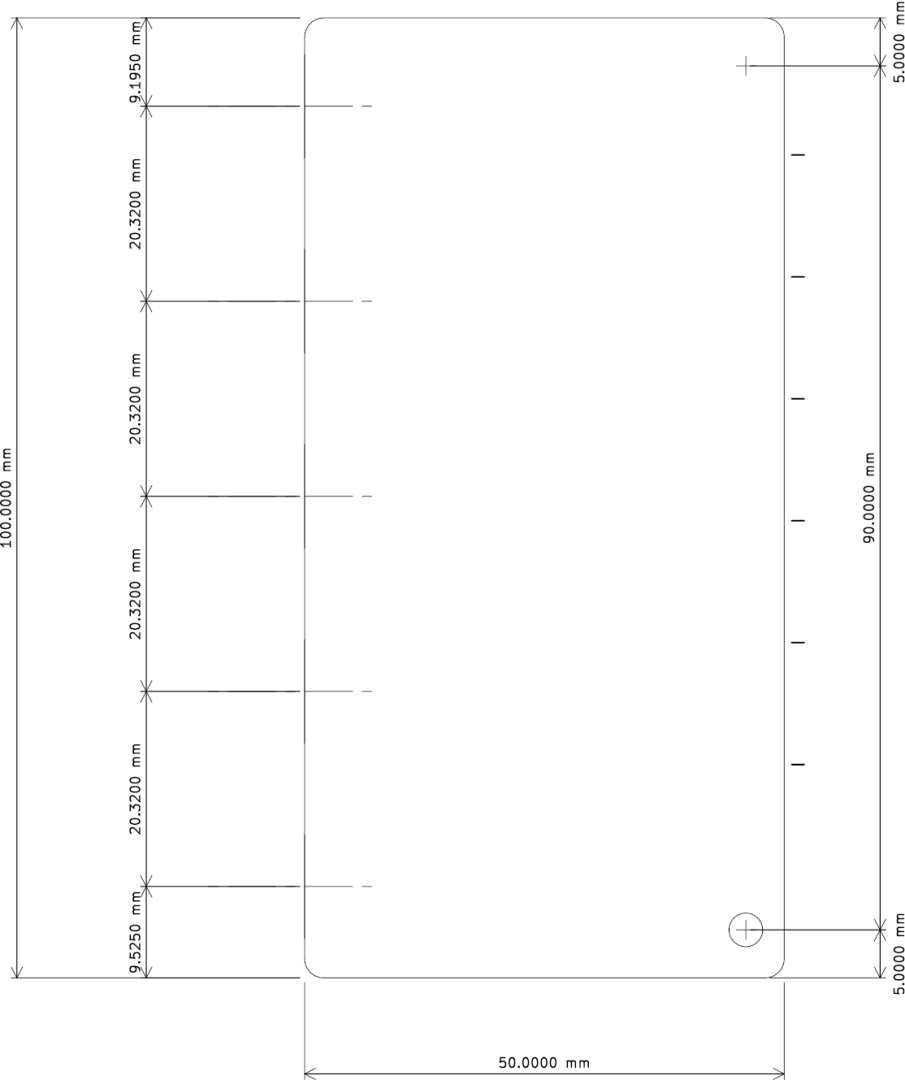
Dimensions
The PCB is 100 mm high and 50 mm wide. Thus, the depth for the Eurorack module will be 50 mm behind the panel.
External links
Please visit here for official documentation, examples and updates.
Write Your Own Review
Bestselling Products You May Like

New Products You May Want