


Story
I've recently posted a tutorial about this project on YouTube. You can watch it here.
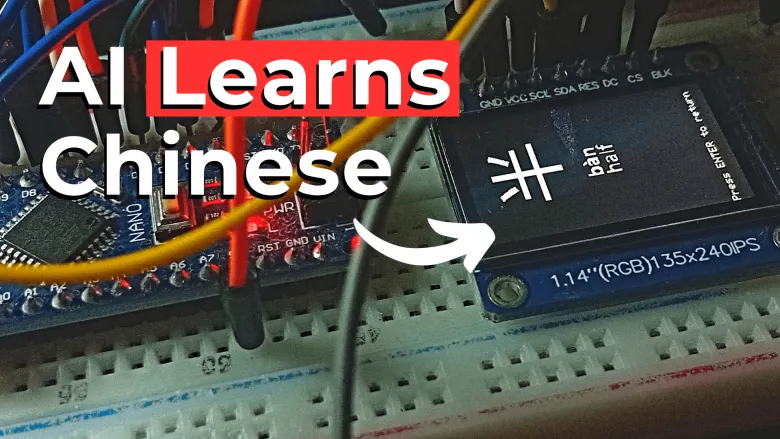
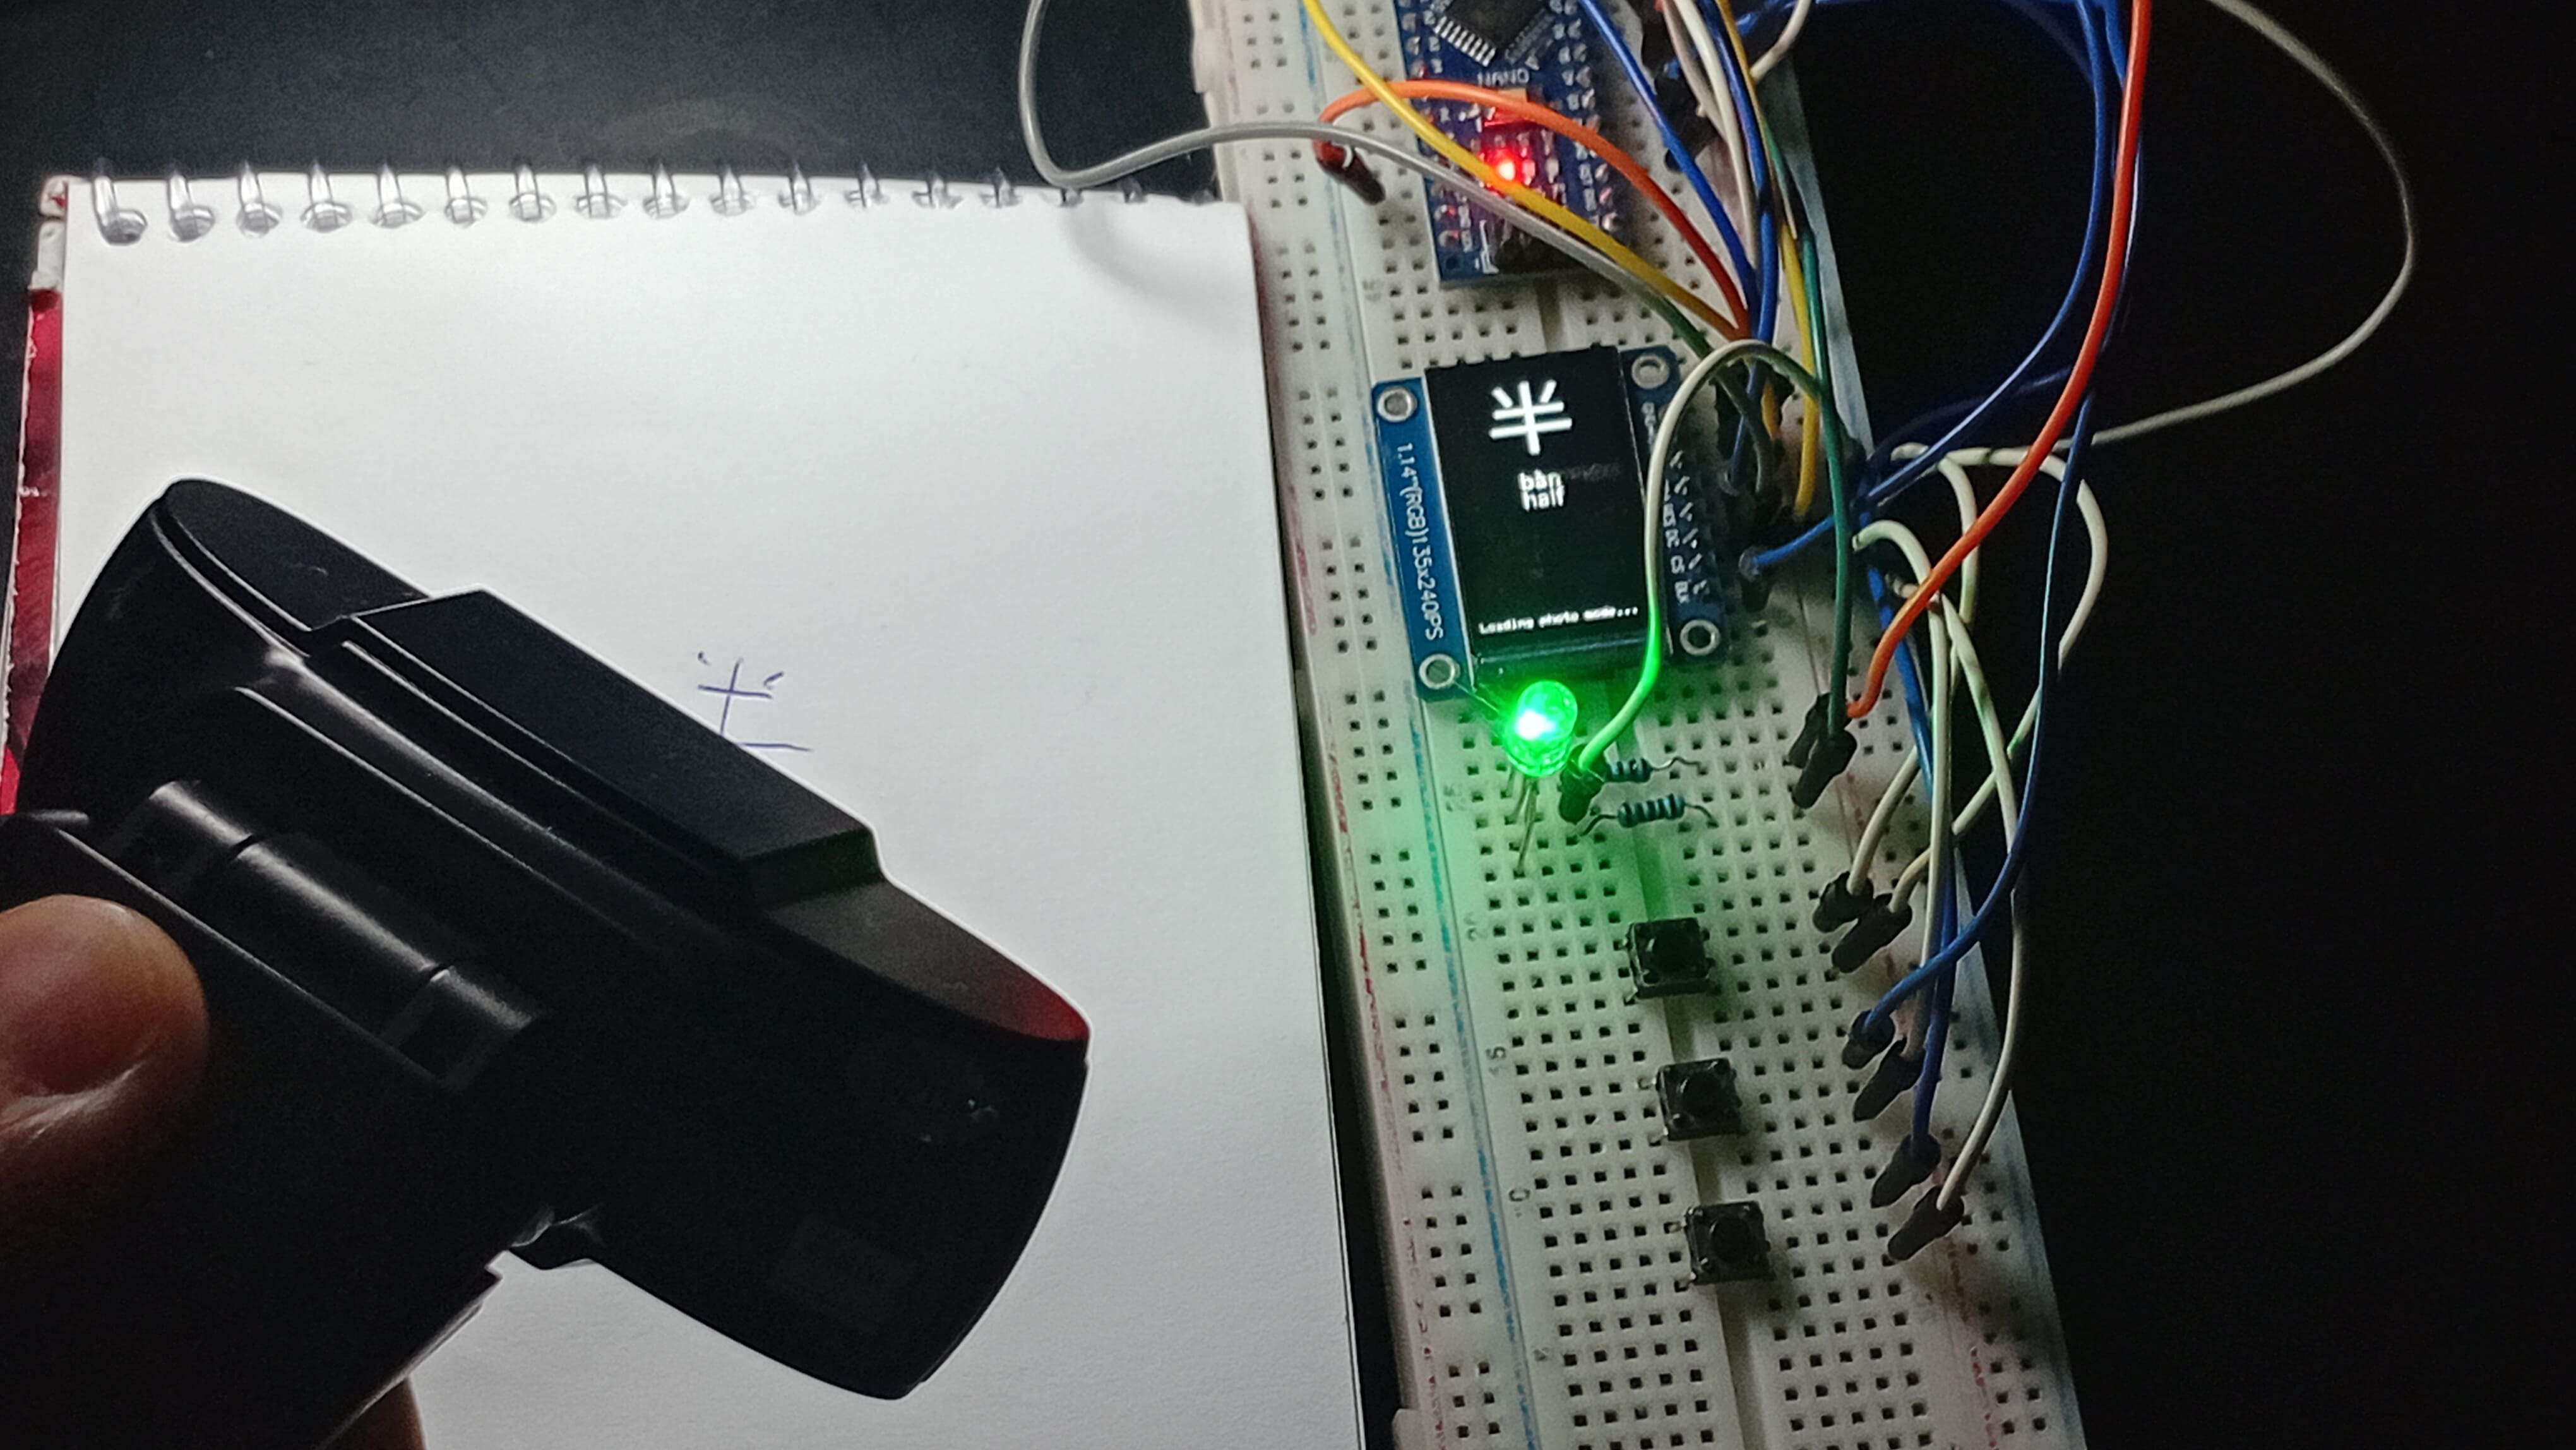
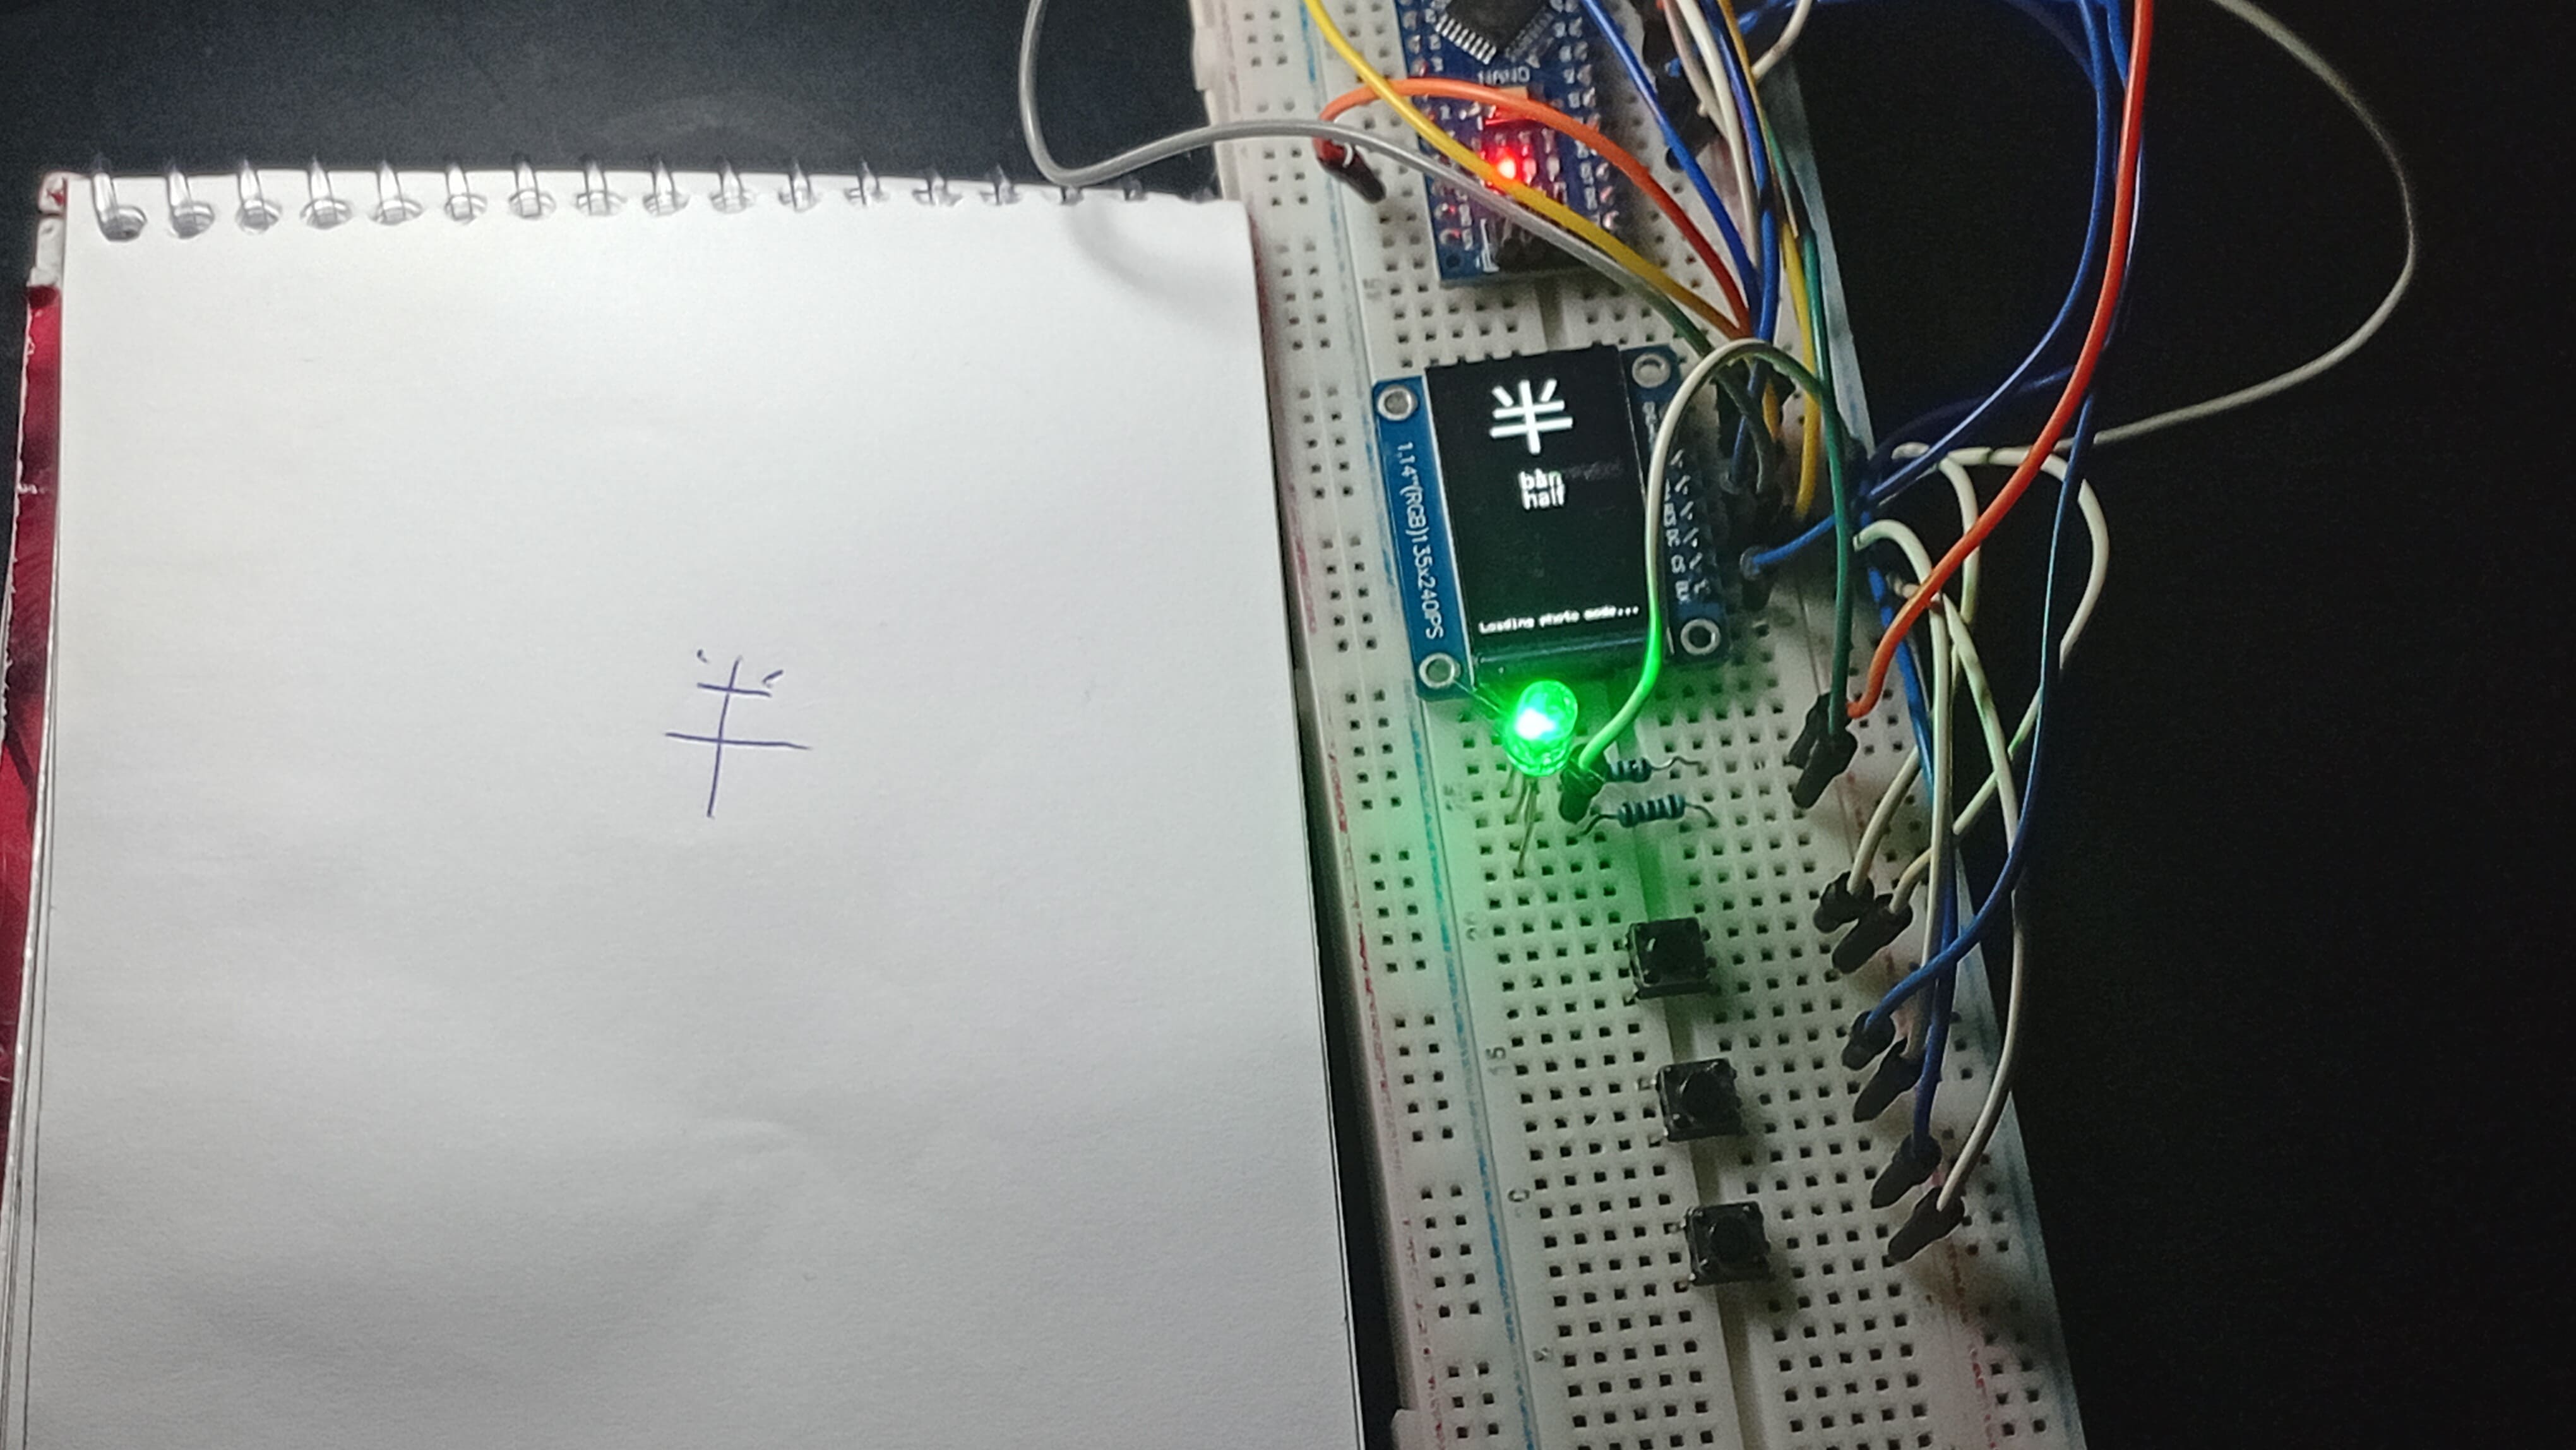
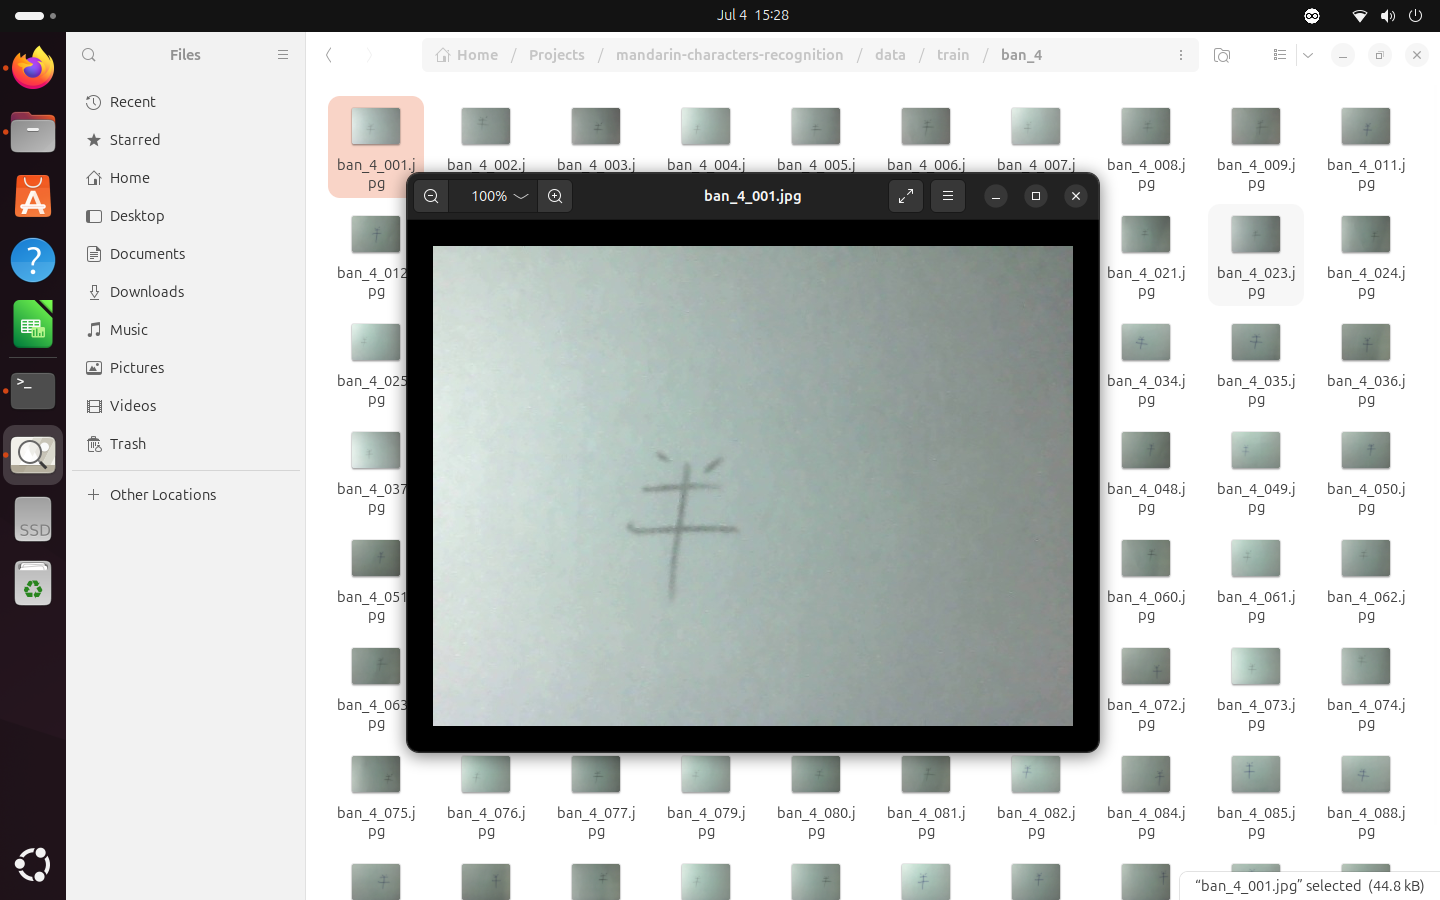
This is the Chinese character for half (半). What you’re in the images below is the result of a fascinating experiment: I trained an AI to recognize handwritten Mandarin characters using a dataset I created myself. Then, I connected everything to an Arduino to make it interactive.
Running inference with the Arduino controller.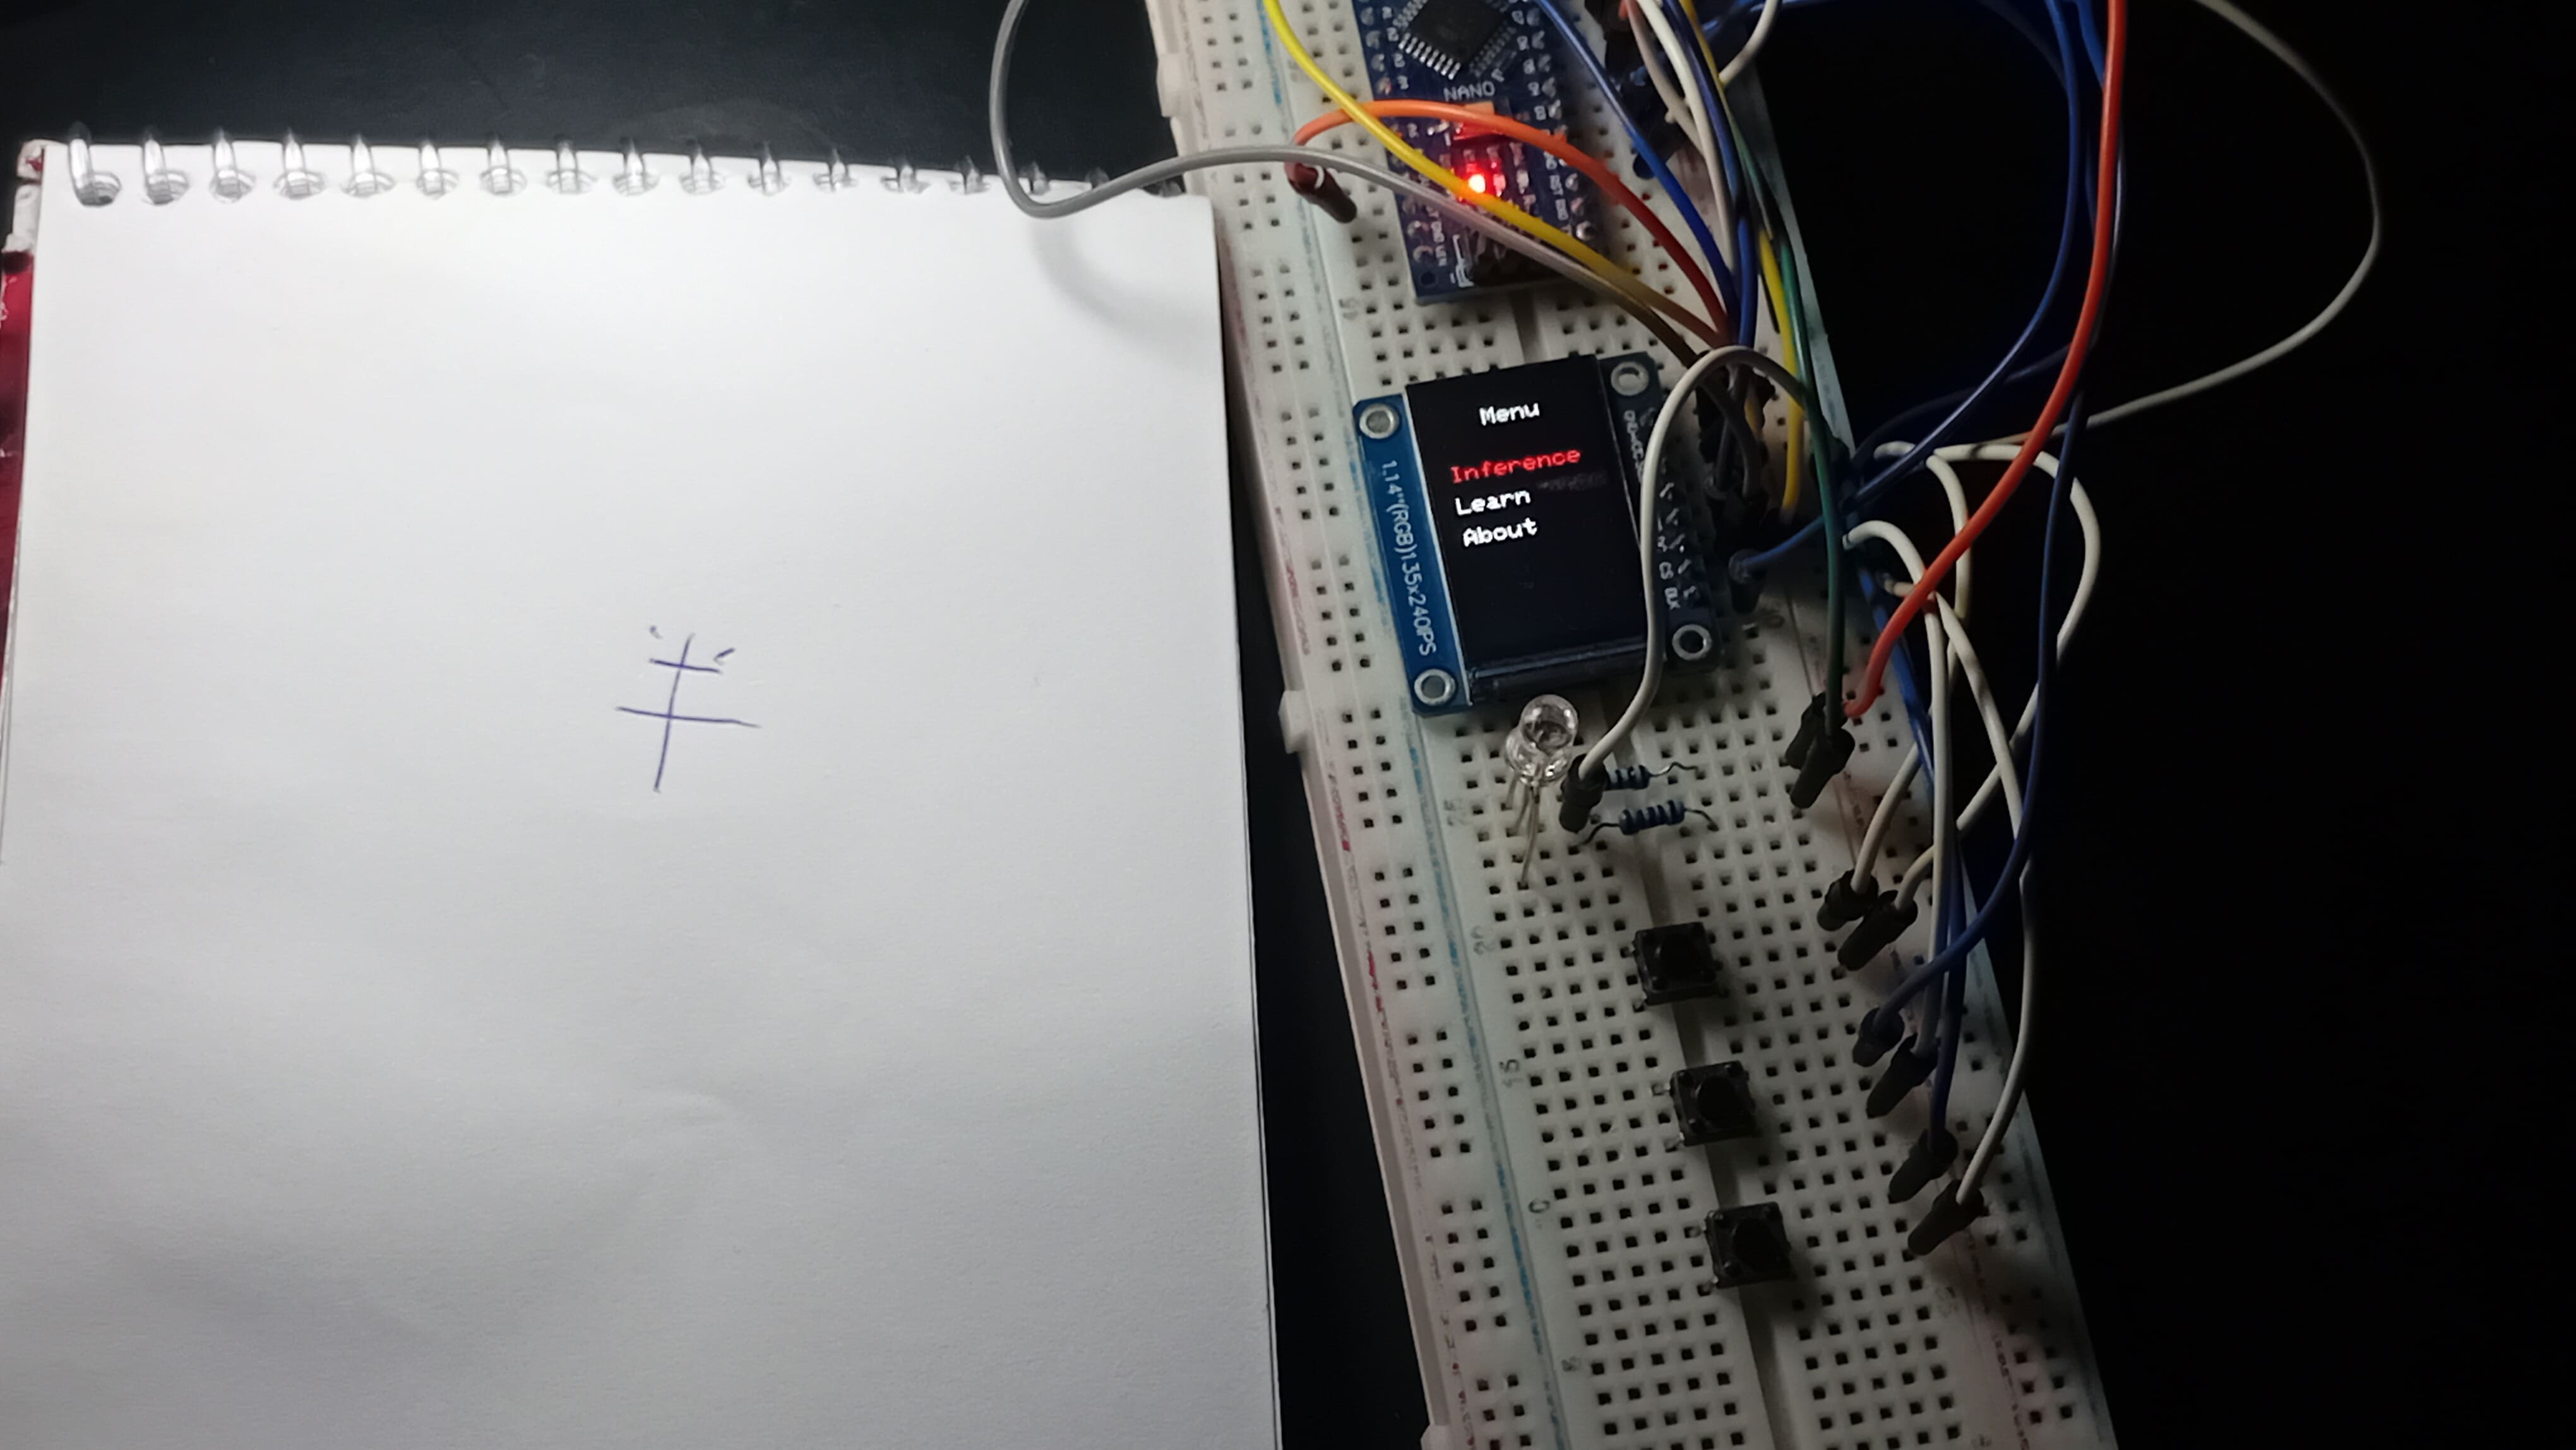
This entire system runs on a budget PC I built for under $300. The project combines data science, computer vision, coding, and electronics, and it started with a simple idea:
Could I teach a machine something I barely understood myself?
Let me walk you through how I made it happen.
Why I Built This
Some time ago, I started learning Simplified Mandarin. It’s been one of the hardest challenges I’ve taken on: the tones, the stroke order, memorizing characters - it’s a whole new way of thinking compared to my native language Portuguese.
And somewhere along the way, while struggling to memorize a character for the fifth time, I thought:
What if I tried to teach Mandarin to an AI?
I wasn’t just curious about whether it would work. I wanted to understand how an AI learns and whether its learning process could teach me something about my own. That’s when the idea took off.
The Plan: AI Image Classification
Firstly, I had to decide what kind of artificial intelligence I would build. From the dozens of options available, I focused on just one: image classification.
In a few words, image classification is the categorization of images based on specific rules. The central idea of this technique is that, instead of telling the computer what the rules are, it uses special algorithms to learn those rules by itself.
Let me give you an example. Imagine I have a task that requires me to build a computer program that classifies photos as either “dog” or “cat”. In this scenario, instead of explicitly telling the computer what a dog or a cat looks like, I show it a bunch of photos of these animals and let the program figure out the concepts of “dog” and “cat” by itself.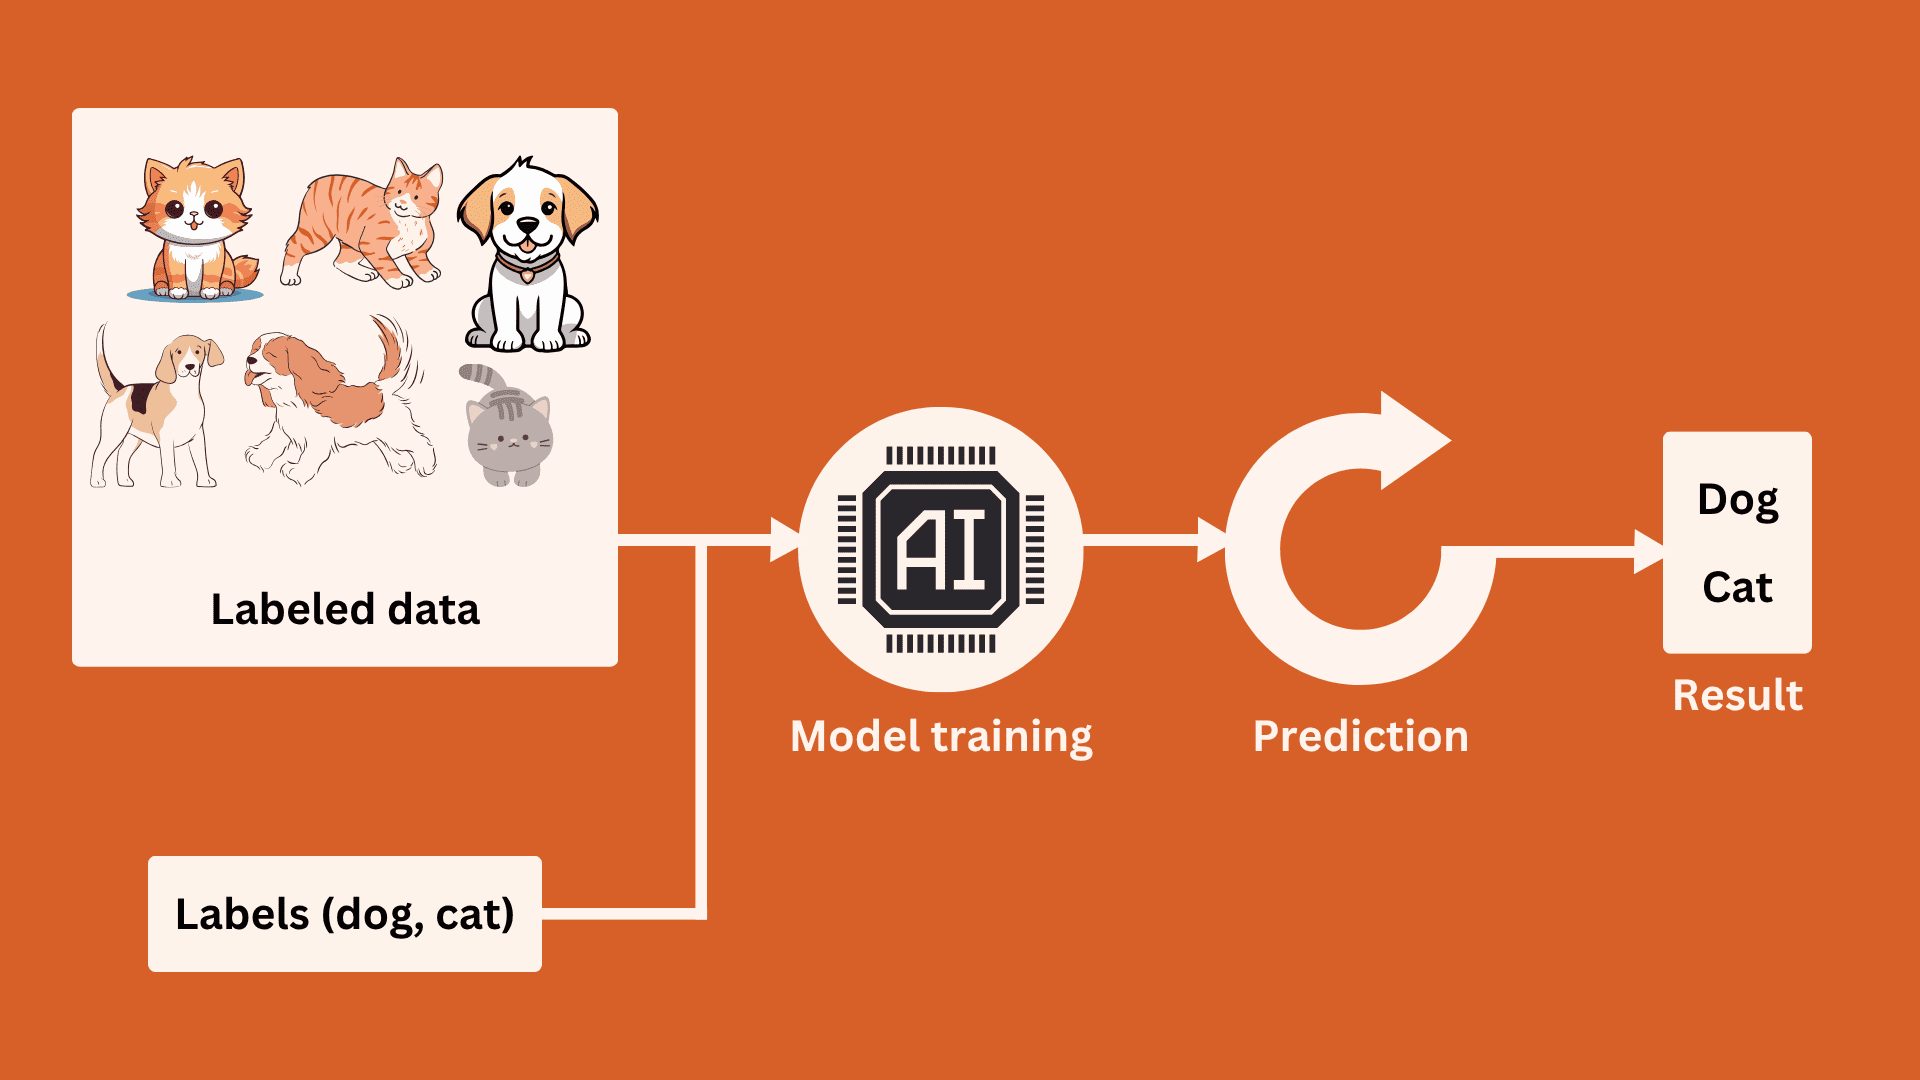
This special class of algorithms that allows machines to learn by interacting with data is called Machine Learning. My goal was to train an AI model that could recognize 10 different Chinese characters based on real-world photos.
But first, I needed data.
Collecting the Dataset
The first step towards building an AI model is data collection. The goals of your project will determine the kind of data you need. Sometimes, you can find open-source datasets on the internet that suit your necessities. This makes development faster since someone else has already collected the information.
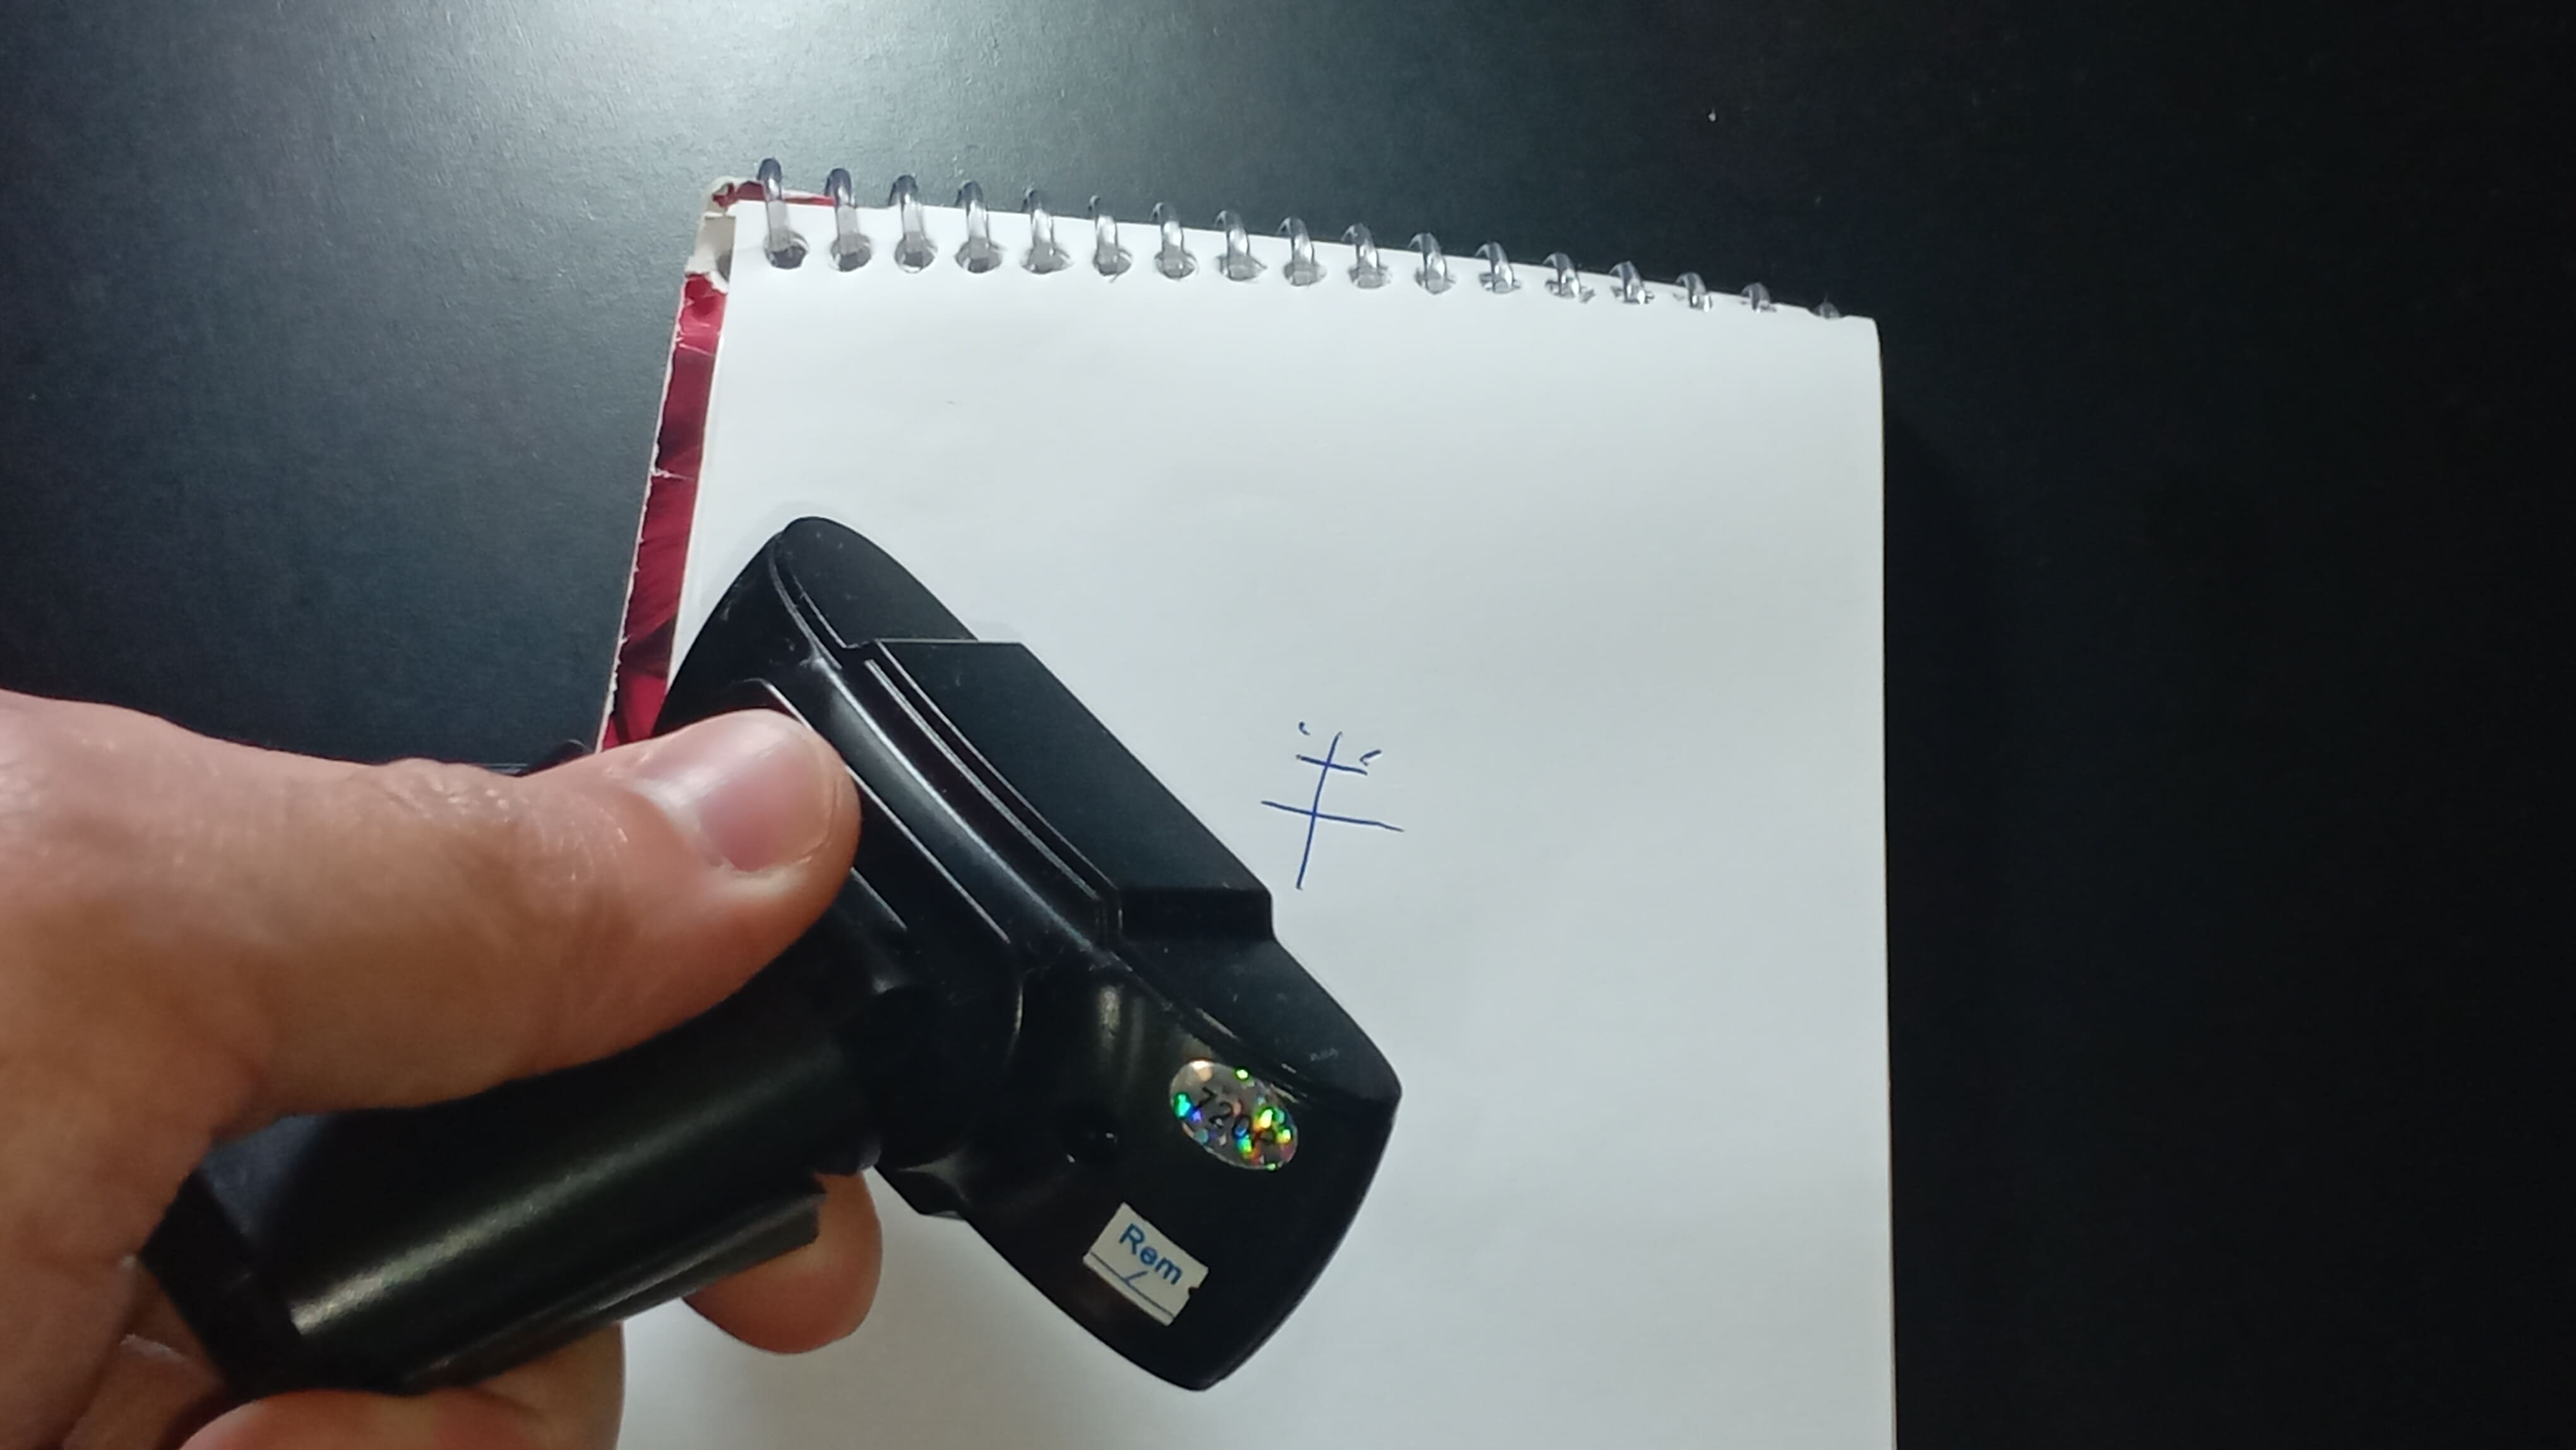
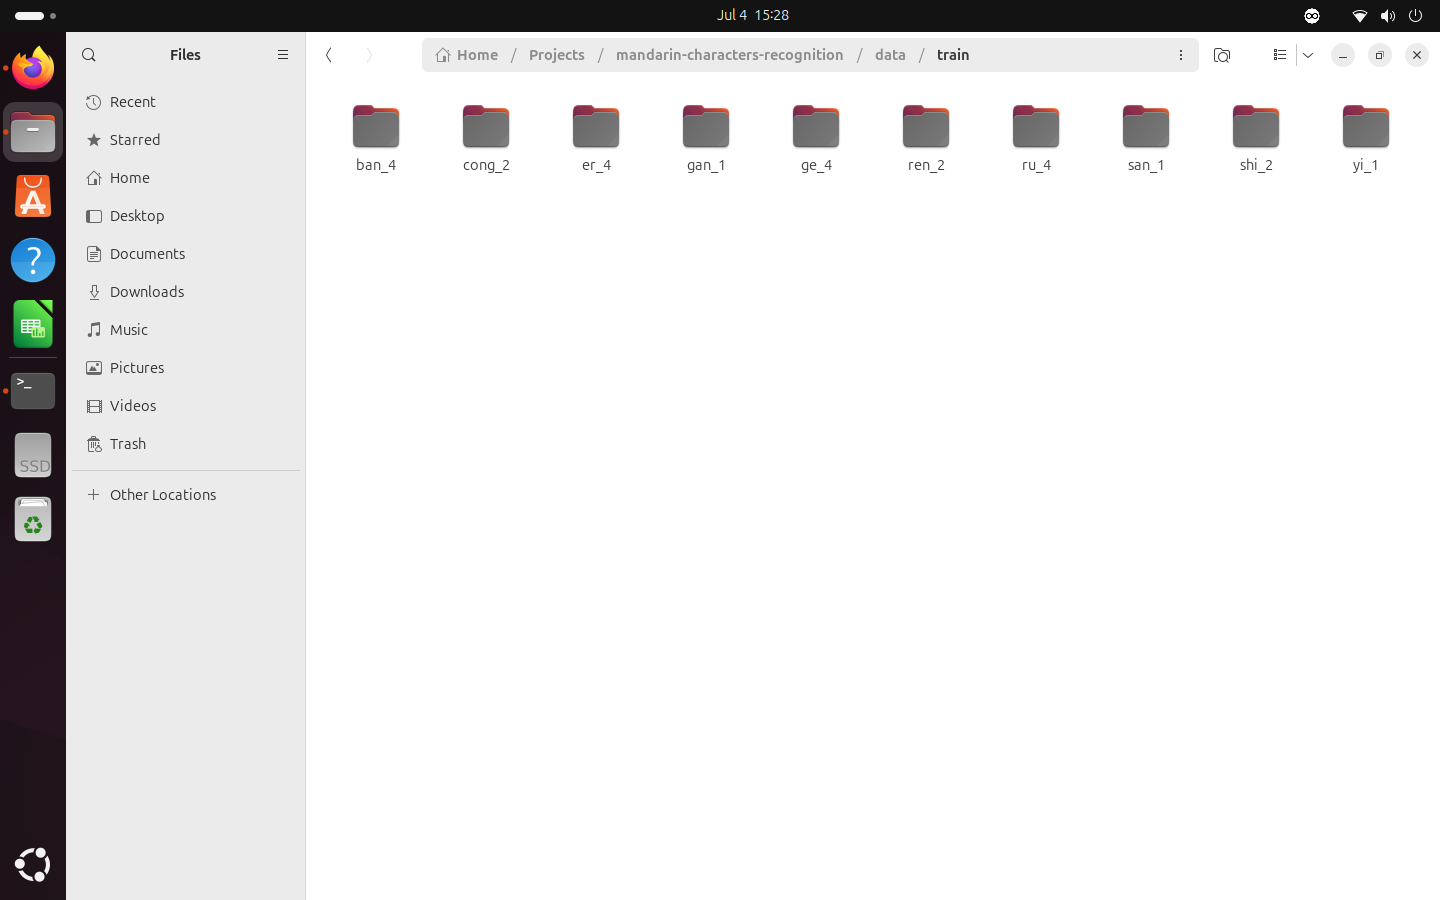
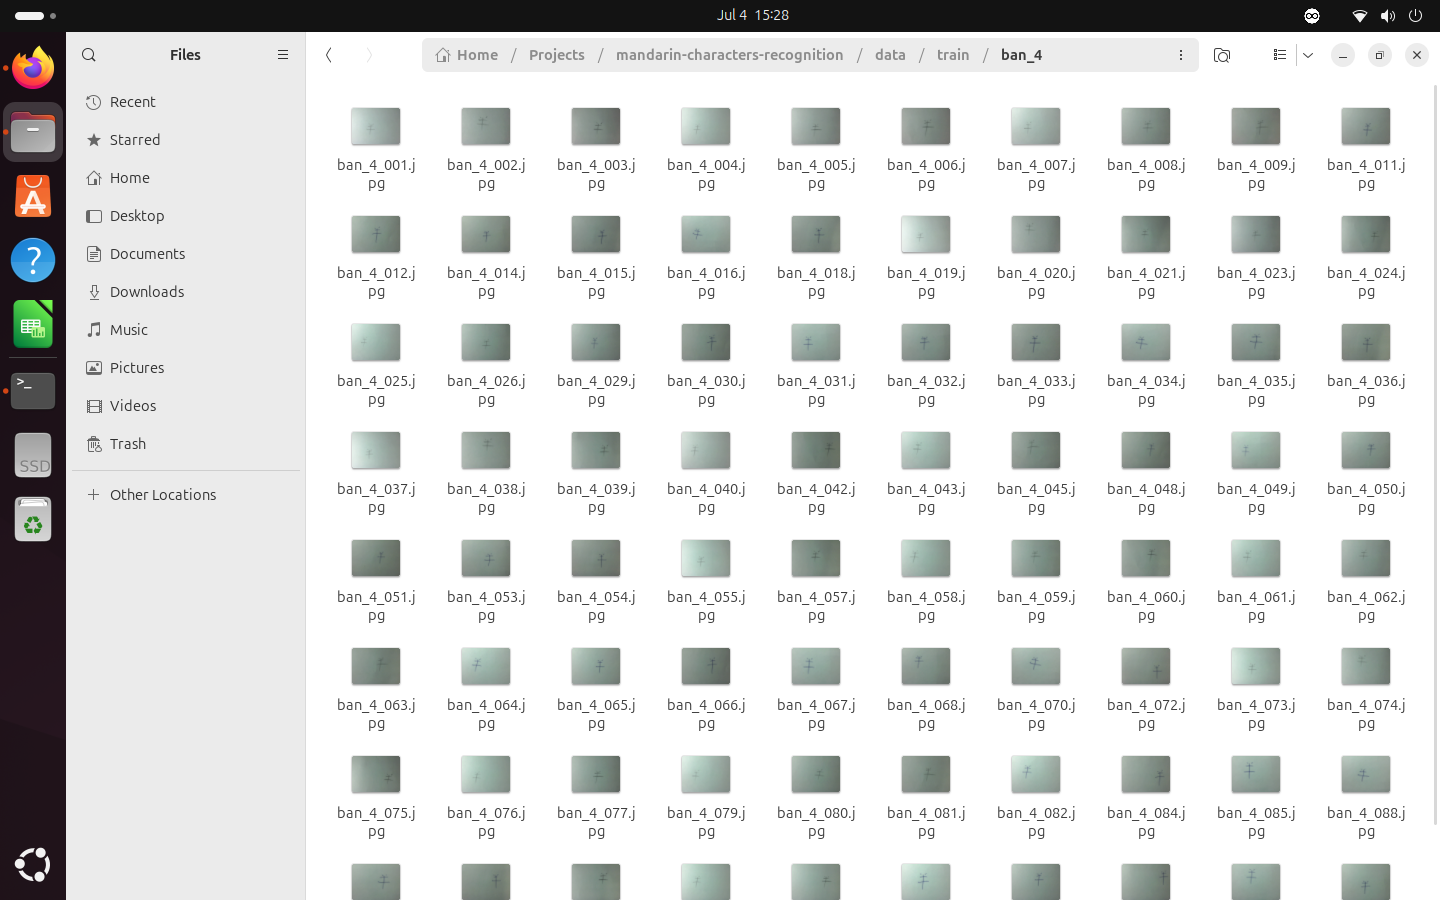
But in many cases, that's not possible. In my case, I had to build the dataset myself. To accomplish this, I wrote down each of the 10 Mandarin characters multiple times using pencils and pens. Then, I took 100 photos of each character using a standard USB webcam.
The result: a dataset of 1,000 images, with natural variations in lighting, angle, and handwriting.
I split the dataset into:
- 80% training data (to teach the model)
- 10% validation data (to evaluate during training)
- 10% test data (to evaluate after training)
Once the dataset was ready and organized, it was time to train the model.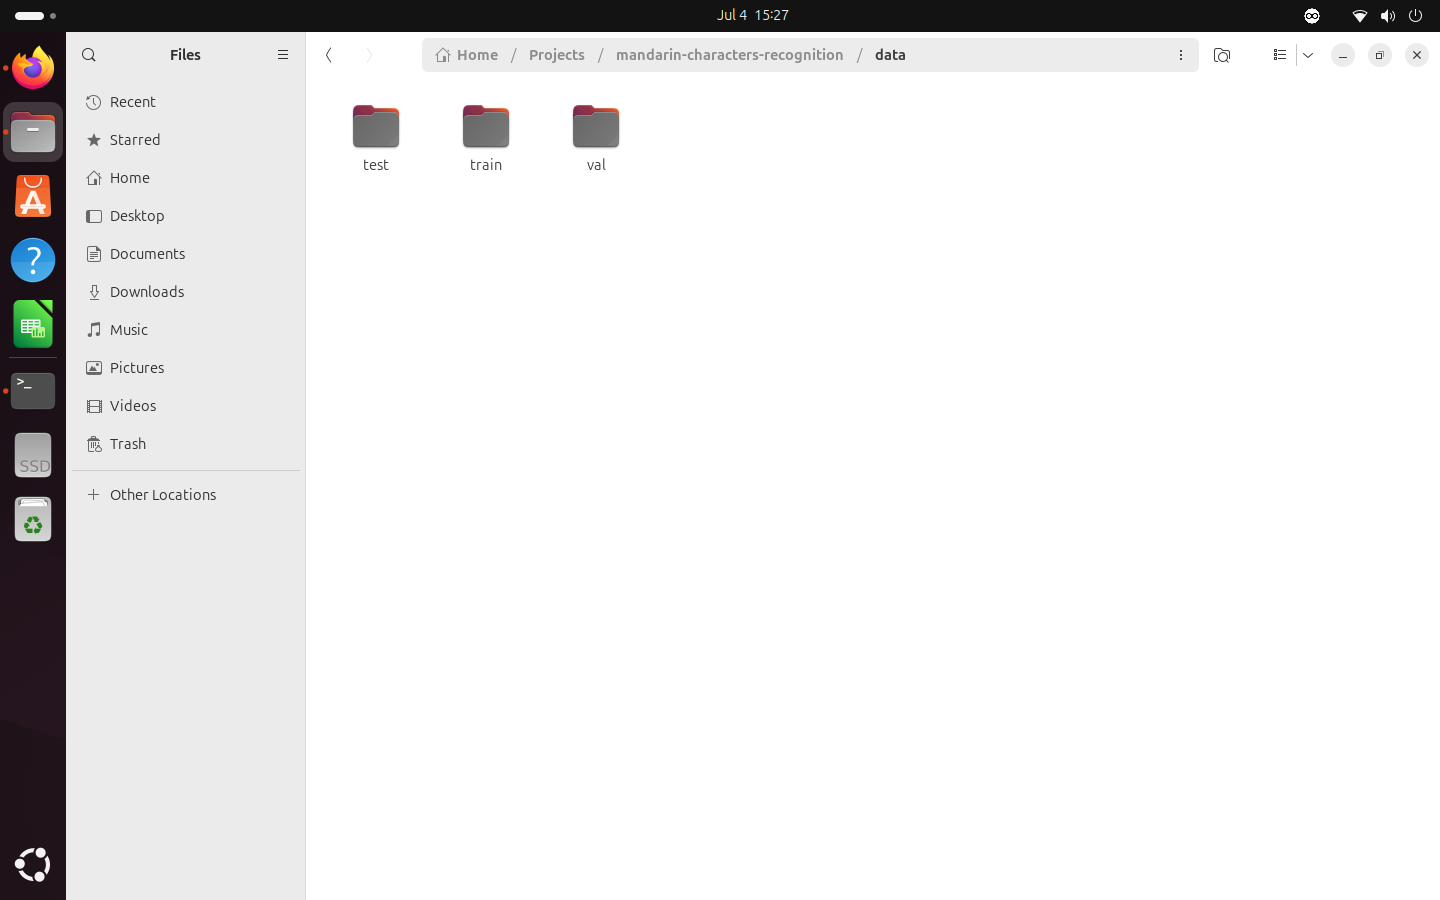
Training AI on a $300 PC
Training is the stage where the AI learns from data. There are a lot of technical details about this topic I'll skip because they deserve their own tutorial.
AI training usually happens in the cloud because it requires a lot of memory and processing power, but cloud services are expensive. To keep things simple (and cheap), I trained the model locally on a PC I built myself for under $300.
Here's the specs:
- CPU: Intel Xeon E5-2670 v3 @ 2.30GHz
- RAM: 16GB DDR4 @ 2133 MHz
- GPU: Nvidia GT 1030 (2GB)
- Storage: 512GB 2.5” SSD
- Power Supply: Corsair CV650 80 Plus Bronze, 650W
- Operating System: Ubuntu 24.04.2 LTS
It’s far from a top-tier workstation, but with the right optimizations, it got the job done.
If you are interesting in this PC, I posted a video on YouTube explaining how I built it.
To make this work, I needed a model that was fast and lightweight. From the countless algorithms that exist for training, I chose MobileNetV2.
MobileNet is a lightweight Convolutional Neural Network (CNN) designed to run AI on small devices with limited computational resources. But not only deployment, its training doesn’t require huge resources either, which makes it perfect for this project.
I installed CUDA and cuDNN to leverage my Nvidia GPU on Ubuntu. Setting up the environment was time-consuming, but eventually everything worked.
Then came the moment of truth.
I ran the training script, and to my surprise, the model reached 85% accuracy on the test set on the first try.
I expected way worse. I assumed the dataset was too small. But the model kept improving:
- Second run: 87%
- Third run: 89%
- With fine-tuning: nearly 100% test accuracy
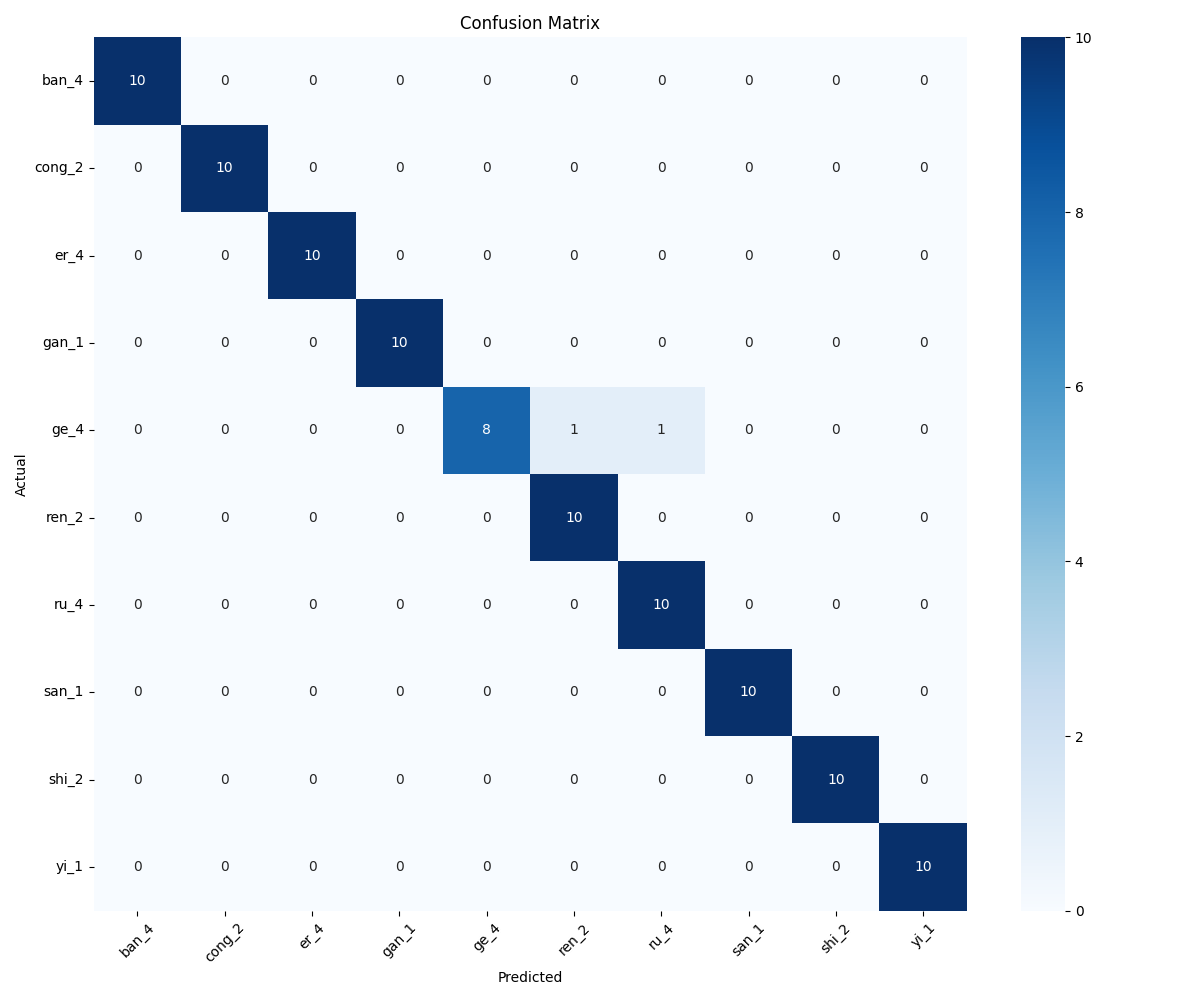
You can see the performance of the last training (with fine-tuning) on the training x validation accuracy and loss curves below. I also added the confusion matrix for reference as well.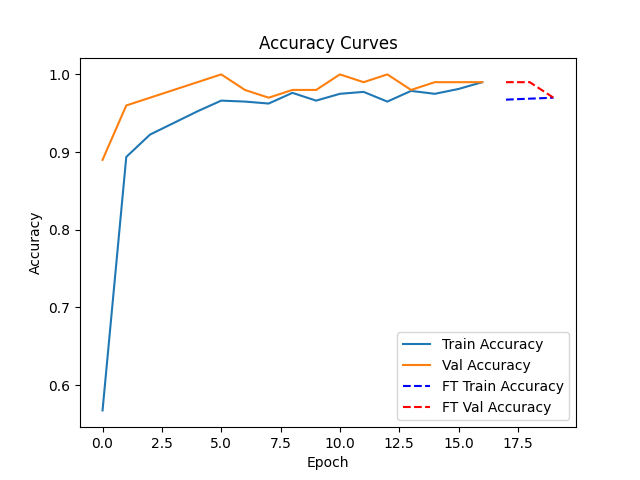
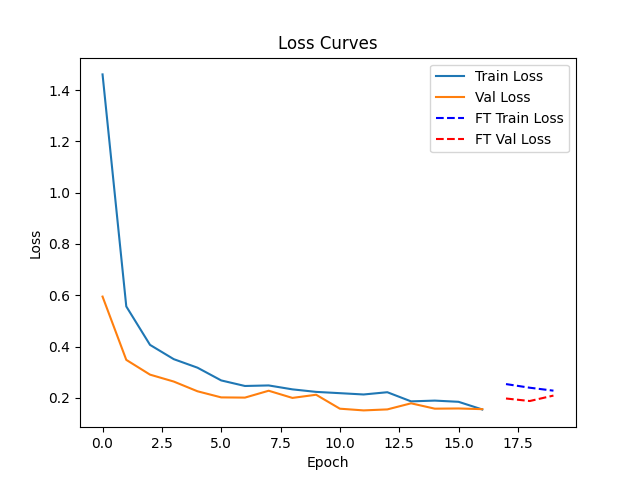
That shocked me. I was expecting much worse performance because of the limitations I discussed earlier. I thought I’d need to take hundreds - or thousands - more photos to even approach 80% accuracy. But somehow, it was already doing great.
This was fascinating and also a little scary.
Mandarin has been one of the hardest things I’ve ever studied. It’s completely different from my mother tongue. It felt like I was learning to speak again from scratch - like a baby.
Naturally, I assumed the AI would struggle just as much. But instead, it adapted quickly.
By the way, I’ve open-sourced this entire project. You can find the code, dataset, and everything else in this GitHub repository.
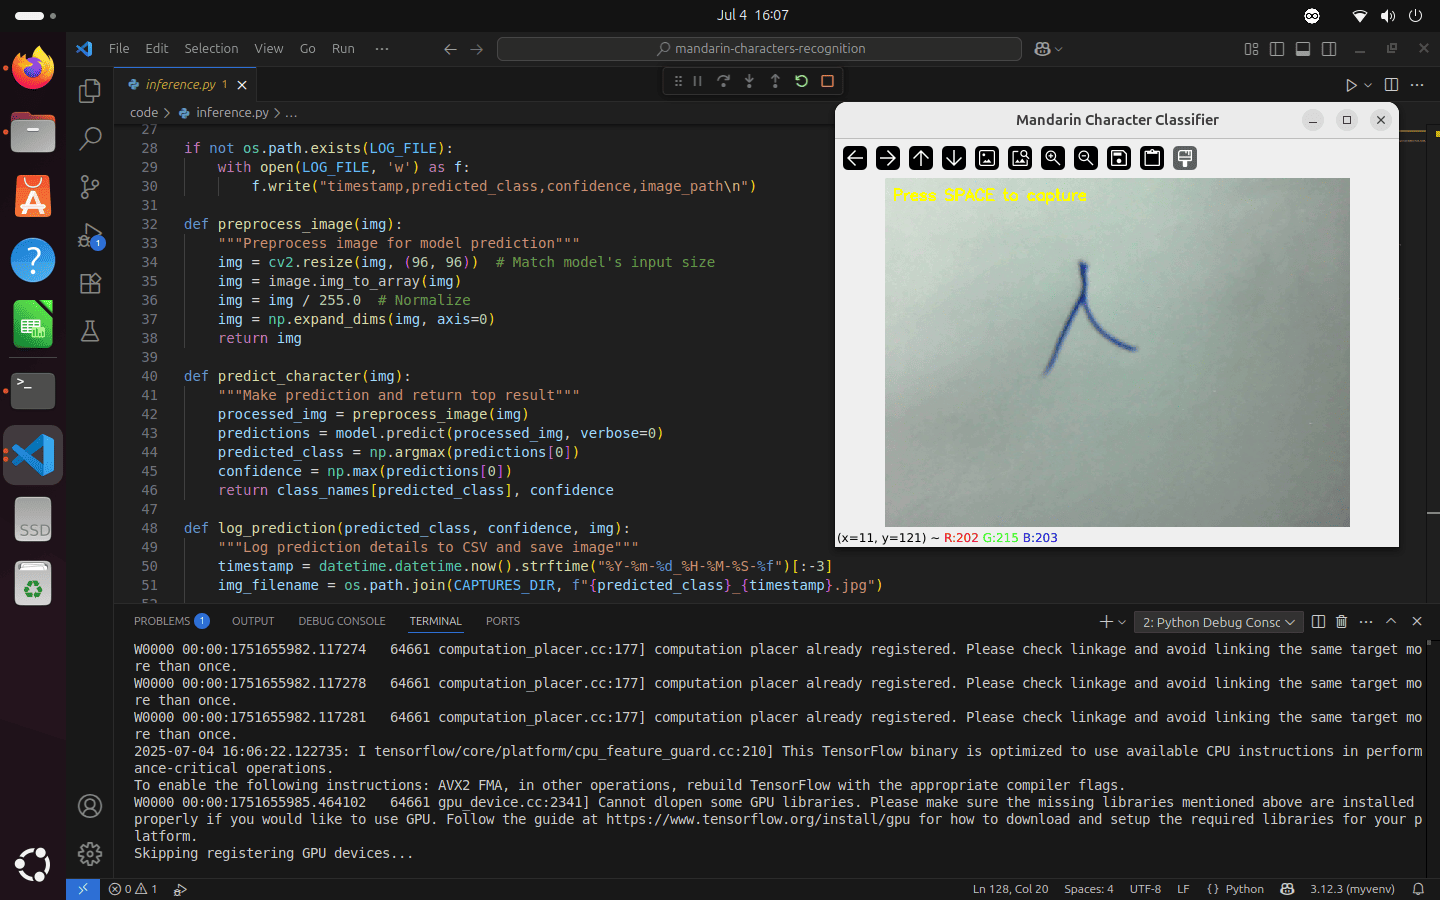
Real-World Testing
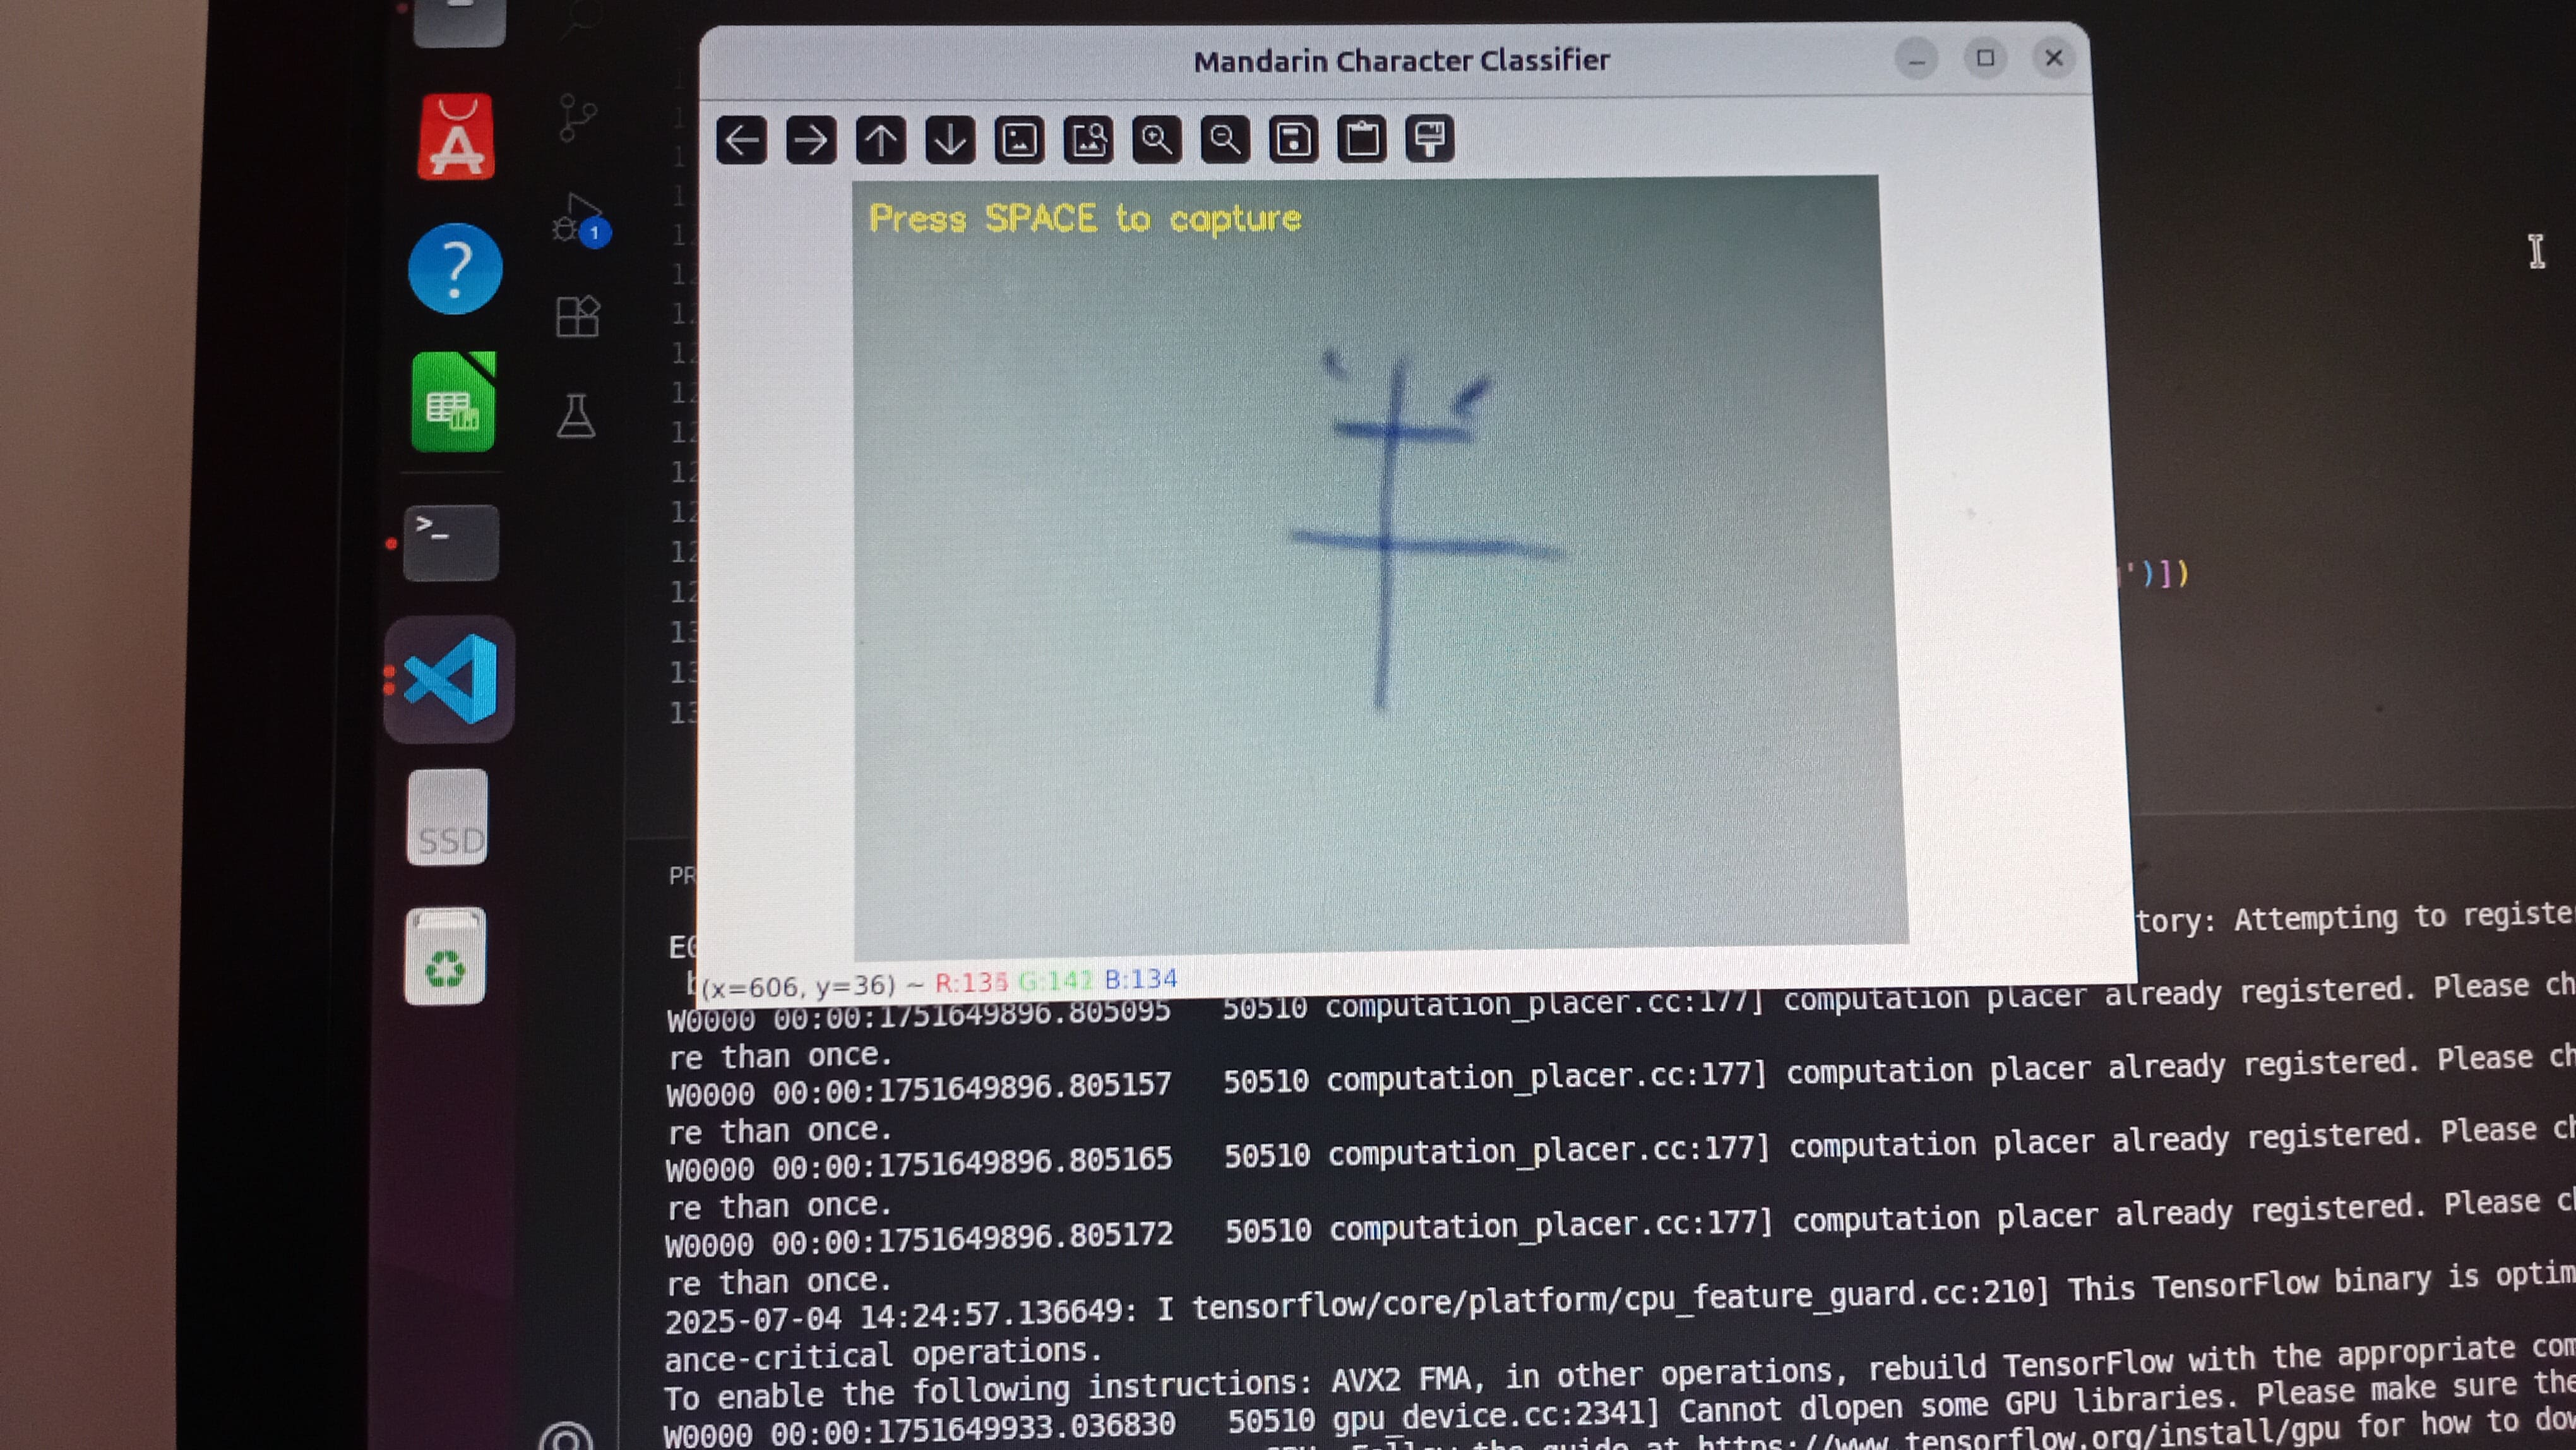
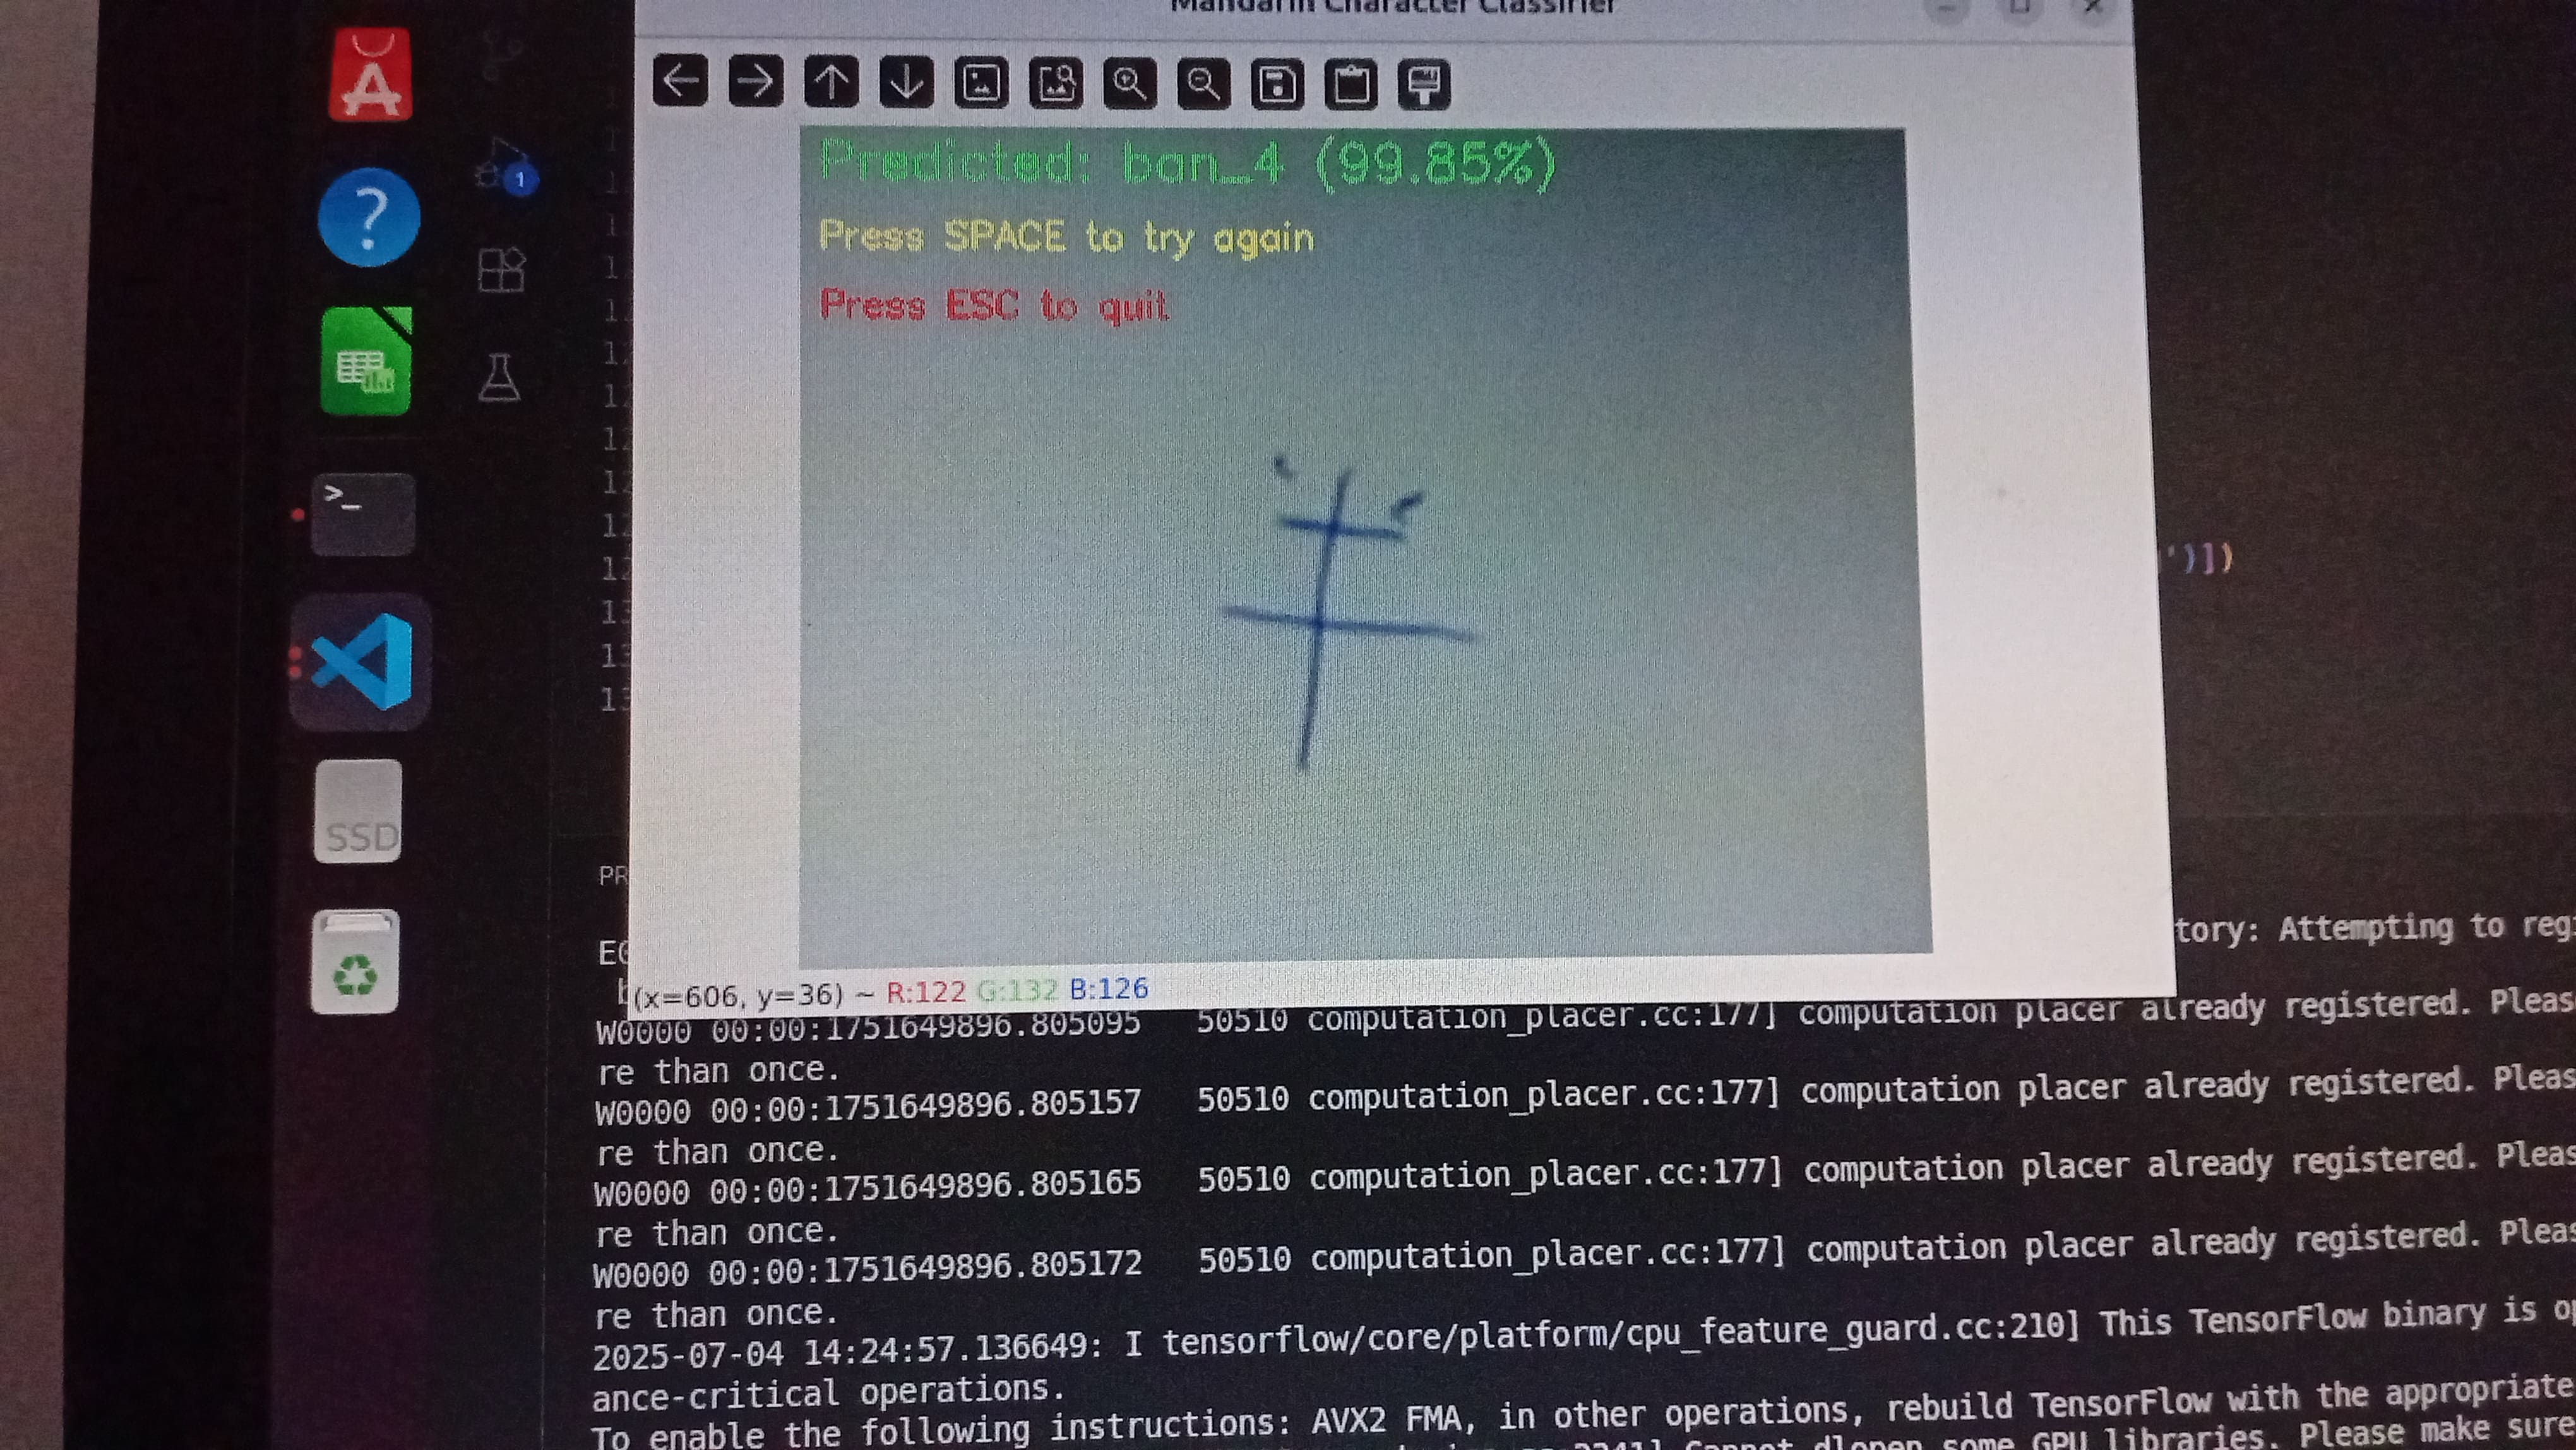
To evaluate the model in action, I wrote a Python script that:
- Loads the trained model
- Accesses the webcam
- Waits for user input
- Captures a photo
- Sends it to the model
- Displays the prediction on screen
And it worked beautifully.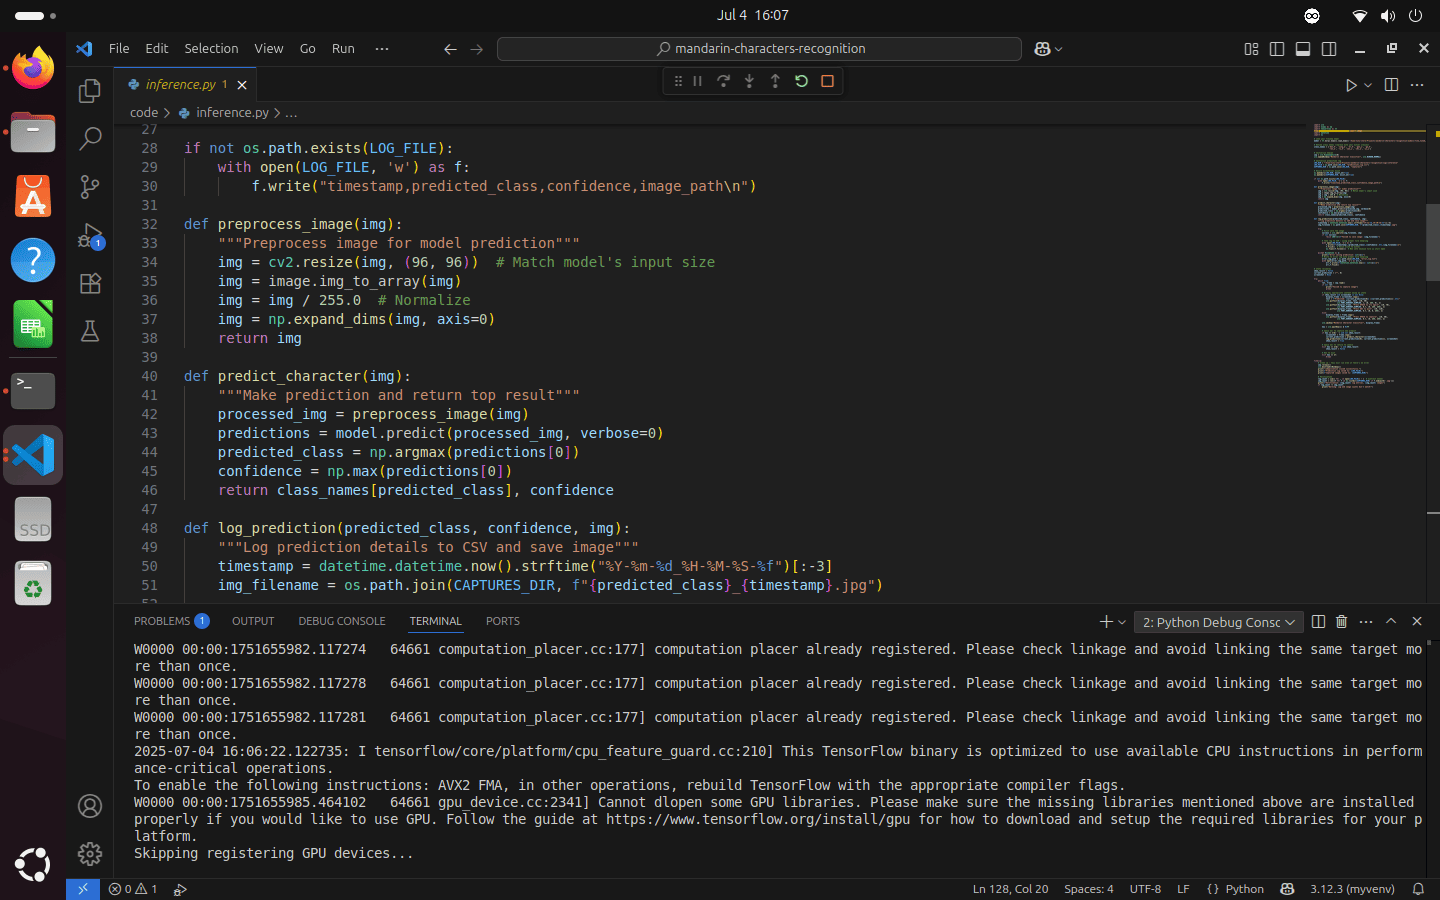

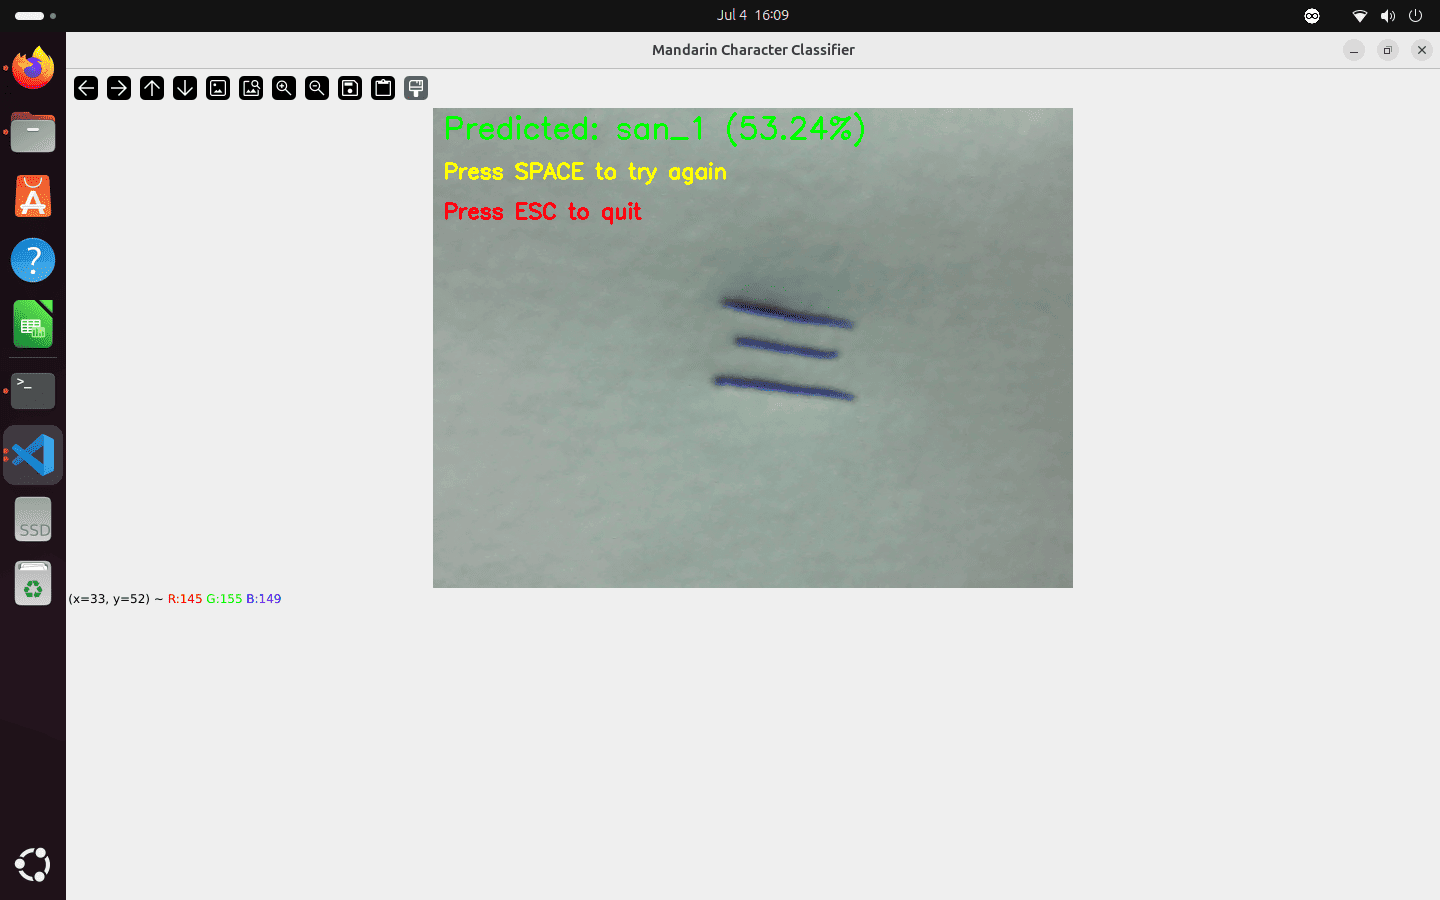
Pretty cool, isn’t it? Of course, the model doesn’t get everything right, because no model is perfect. Even though it reached nearly 100% during training, it still makes mistakes.
But the goal isn’t to be perfect. It’s to be useful.
Like George E. P. Box said:
“All models are wrong, but some are useful.”
Even though AI models are simplifications of reality - and they always carry some imperfections - they can still be powerful tools in the real world.
Bringing in Arduino
The project could’ve ended there, but I wanted to take it further.
I connected an Arduino Nano to control the AI system. The Arduino sent signals to the computer over USB, so instead of pressing keys, I could use push buttons to trigger inferences.
I also connected a ST7789 IPS screen to show the results. It’s a fast, colorful display that fits perfectly into small electronics projects.
If you need help at setting up this display, I recorded a tutorial about this.
Here’s what the Arduino controller can do:
- Trigger AI inference with a button press
- Show predictions on the IPS screen
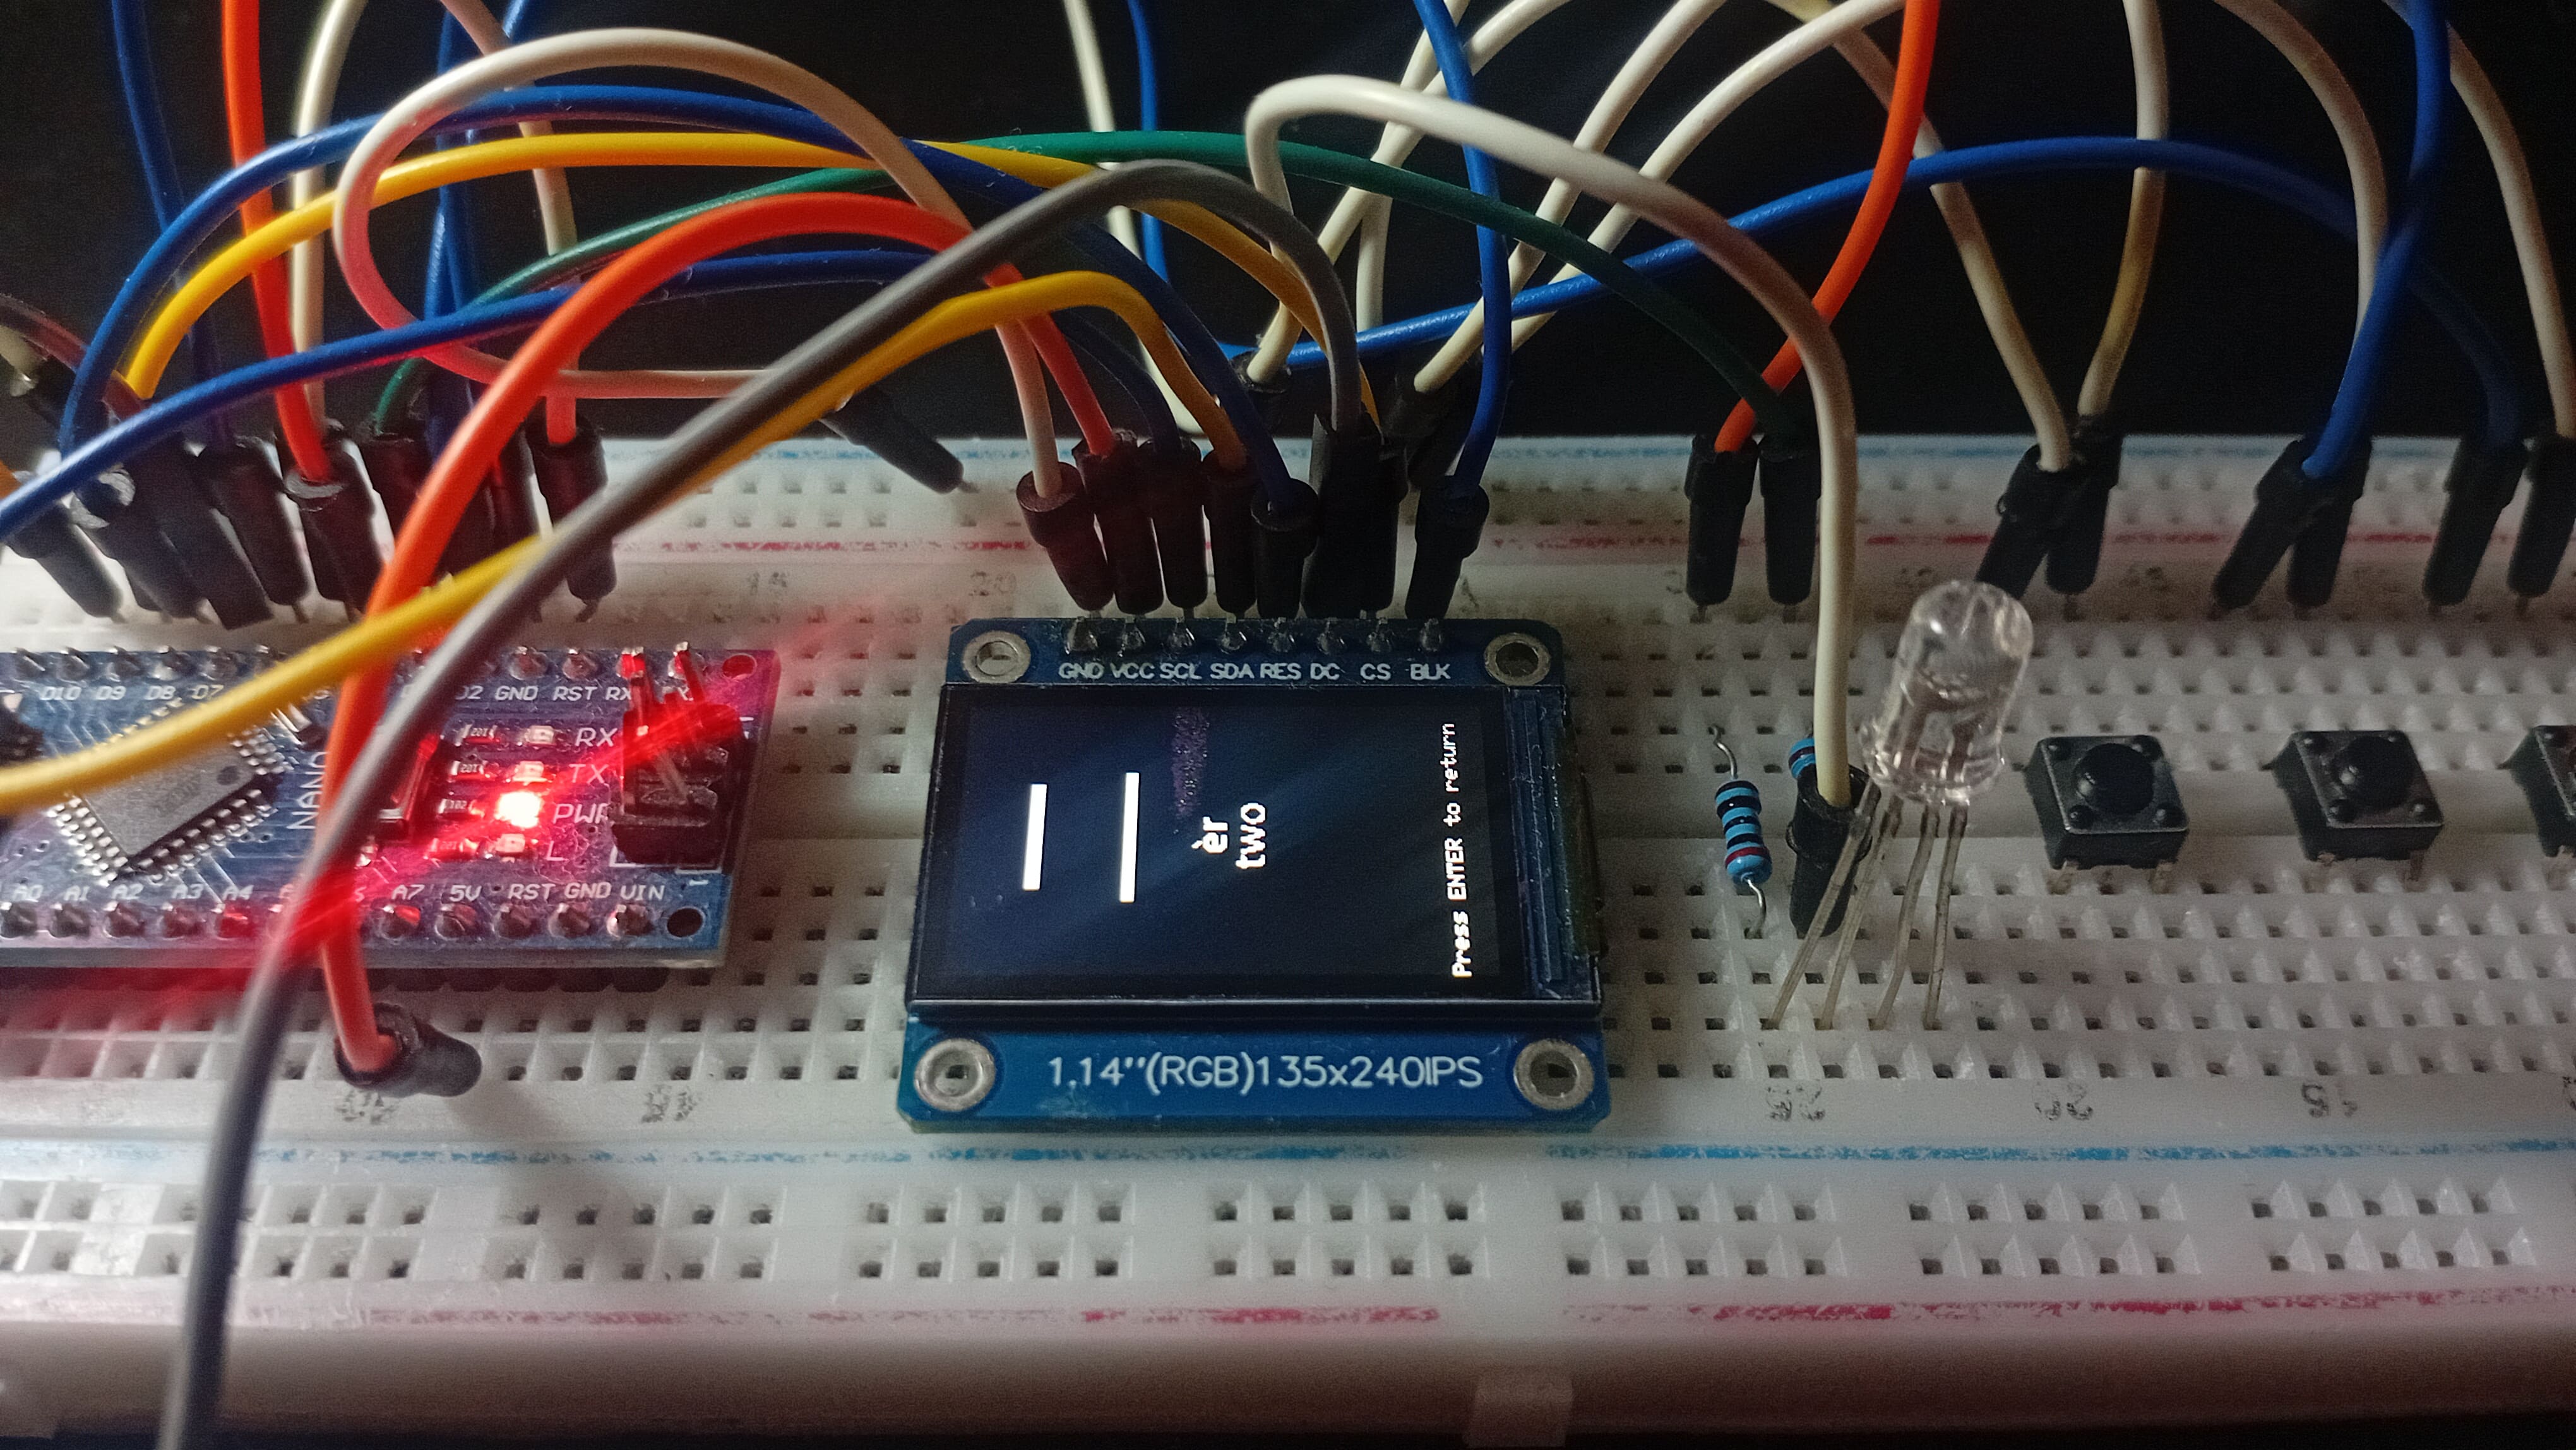
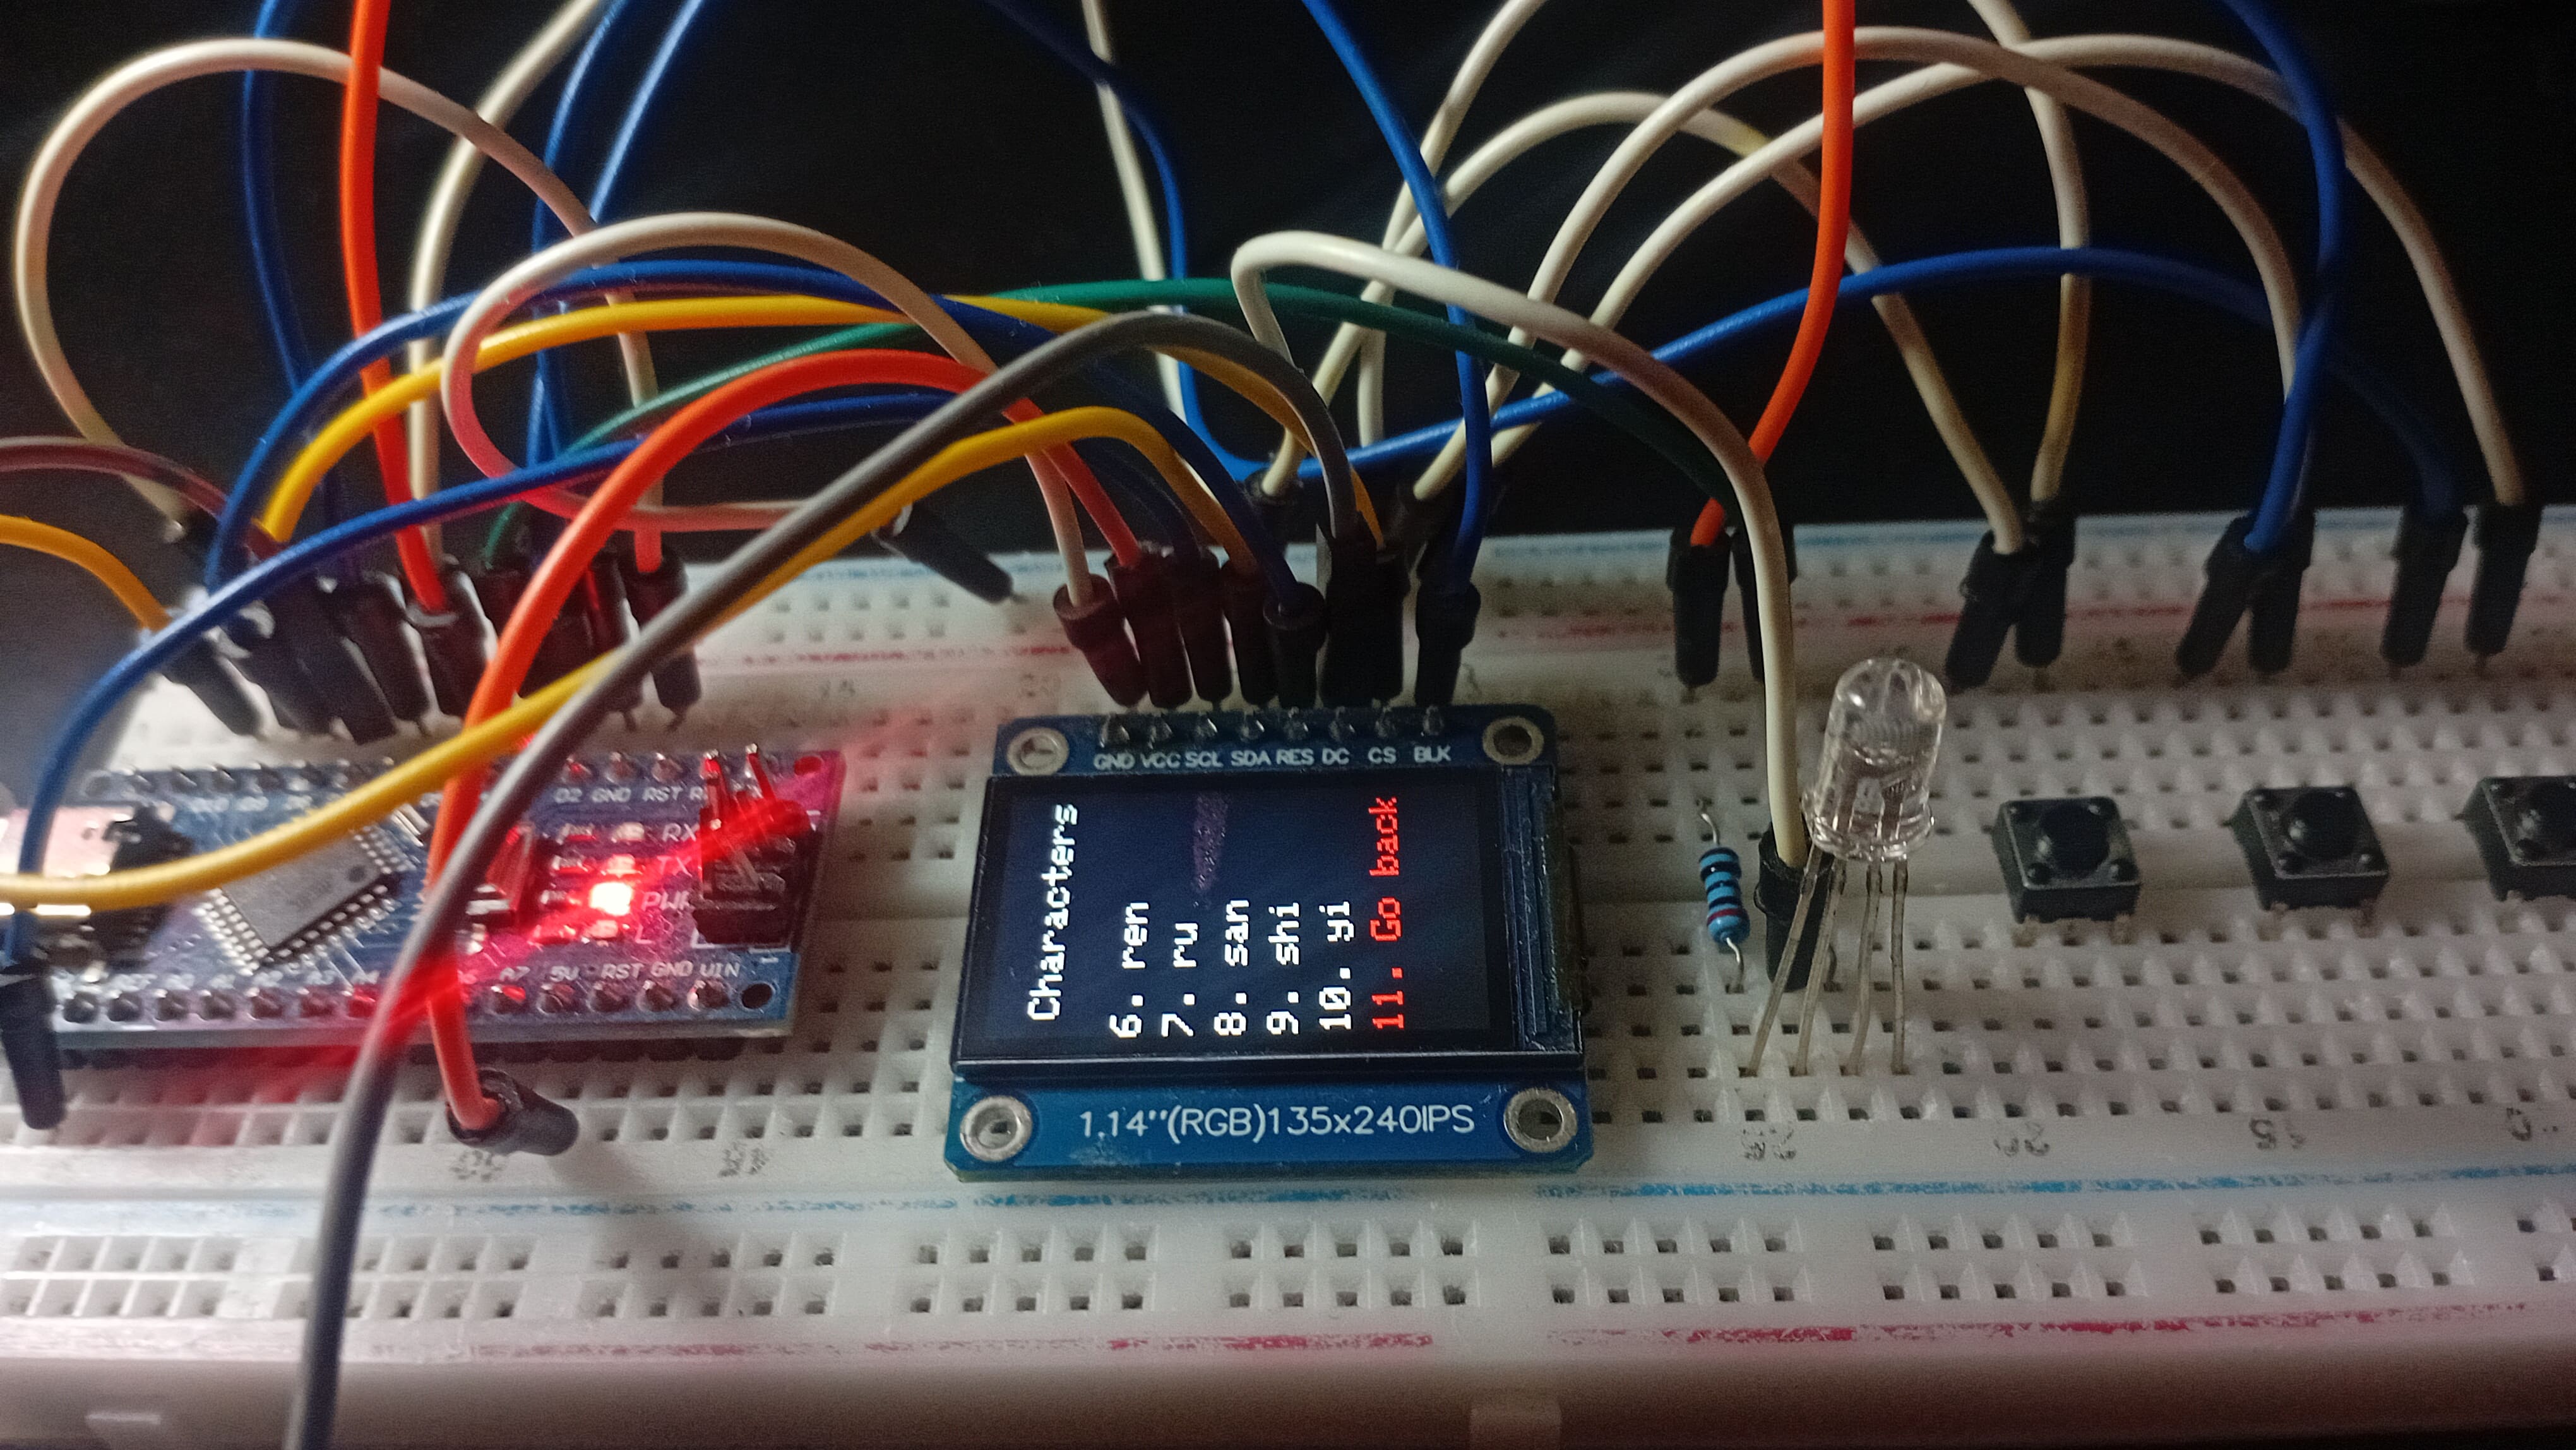
- Access a “Learn” mode that displays each character’s Hanzi, Pinyin, and English meaning
- Display an “About” screen with project info
To make this work, I wrote a second Python script to handle serial communication and inference logic. And as you can see below, it worked pretty well.
Main menu: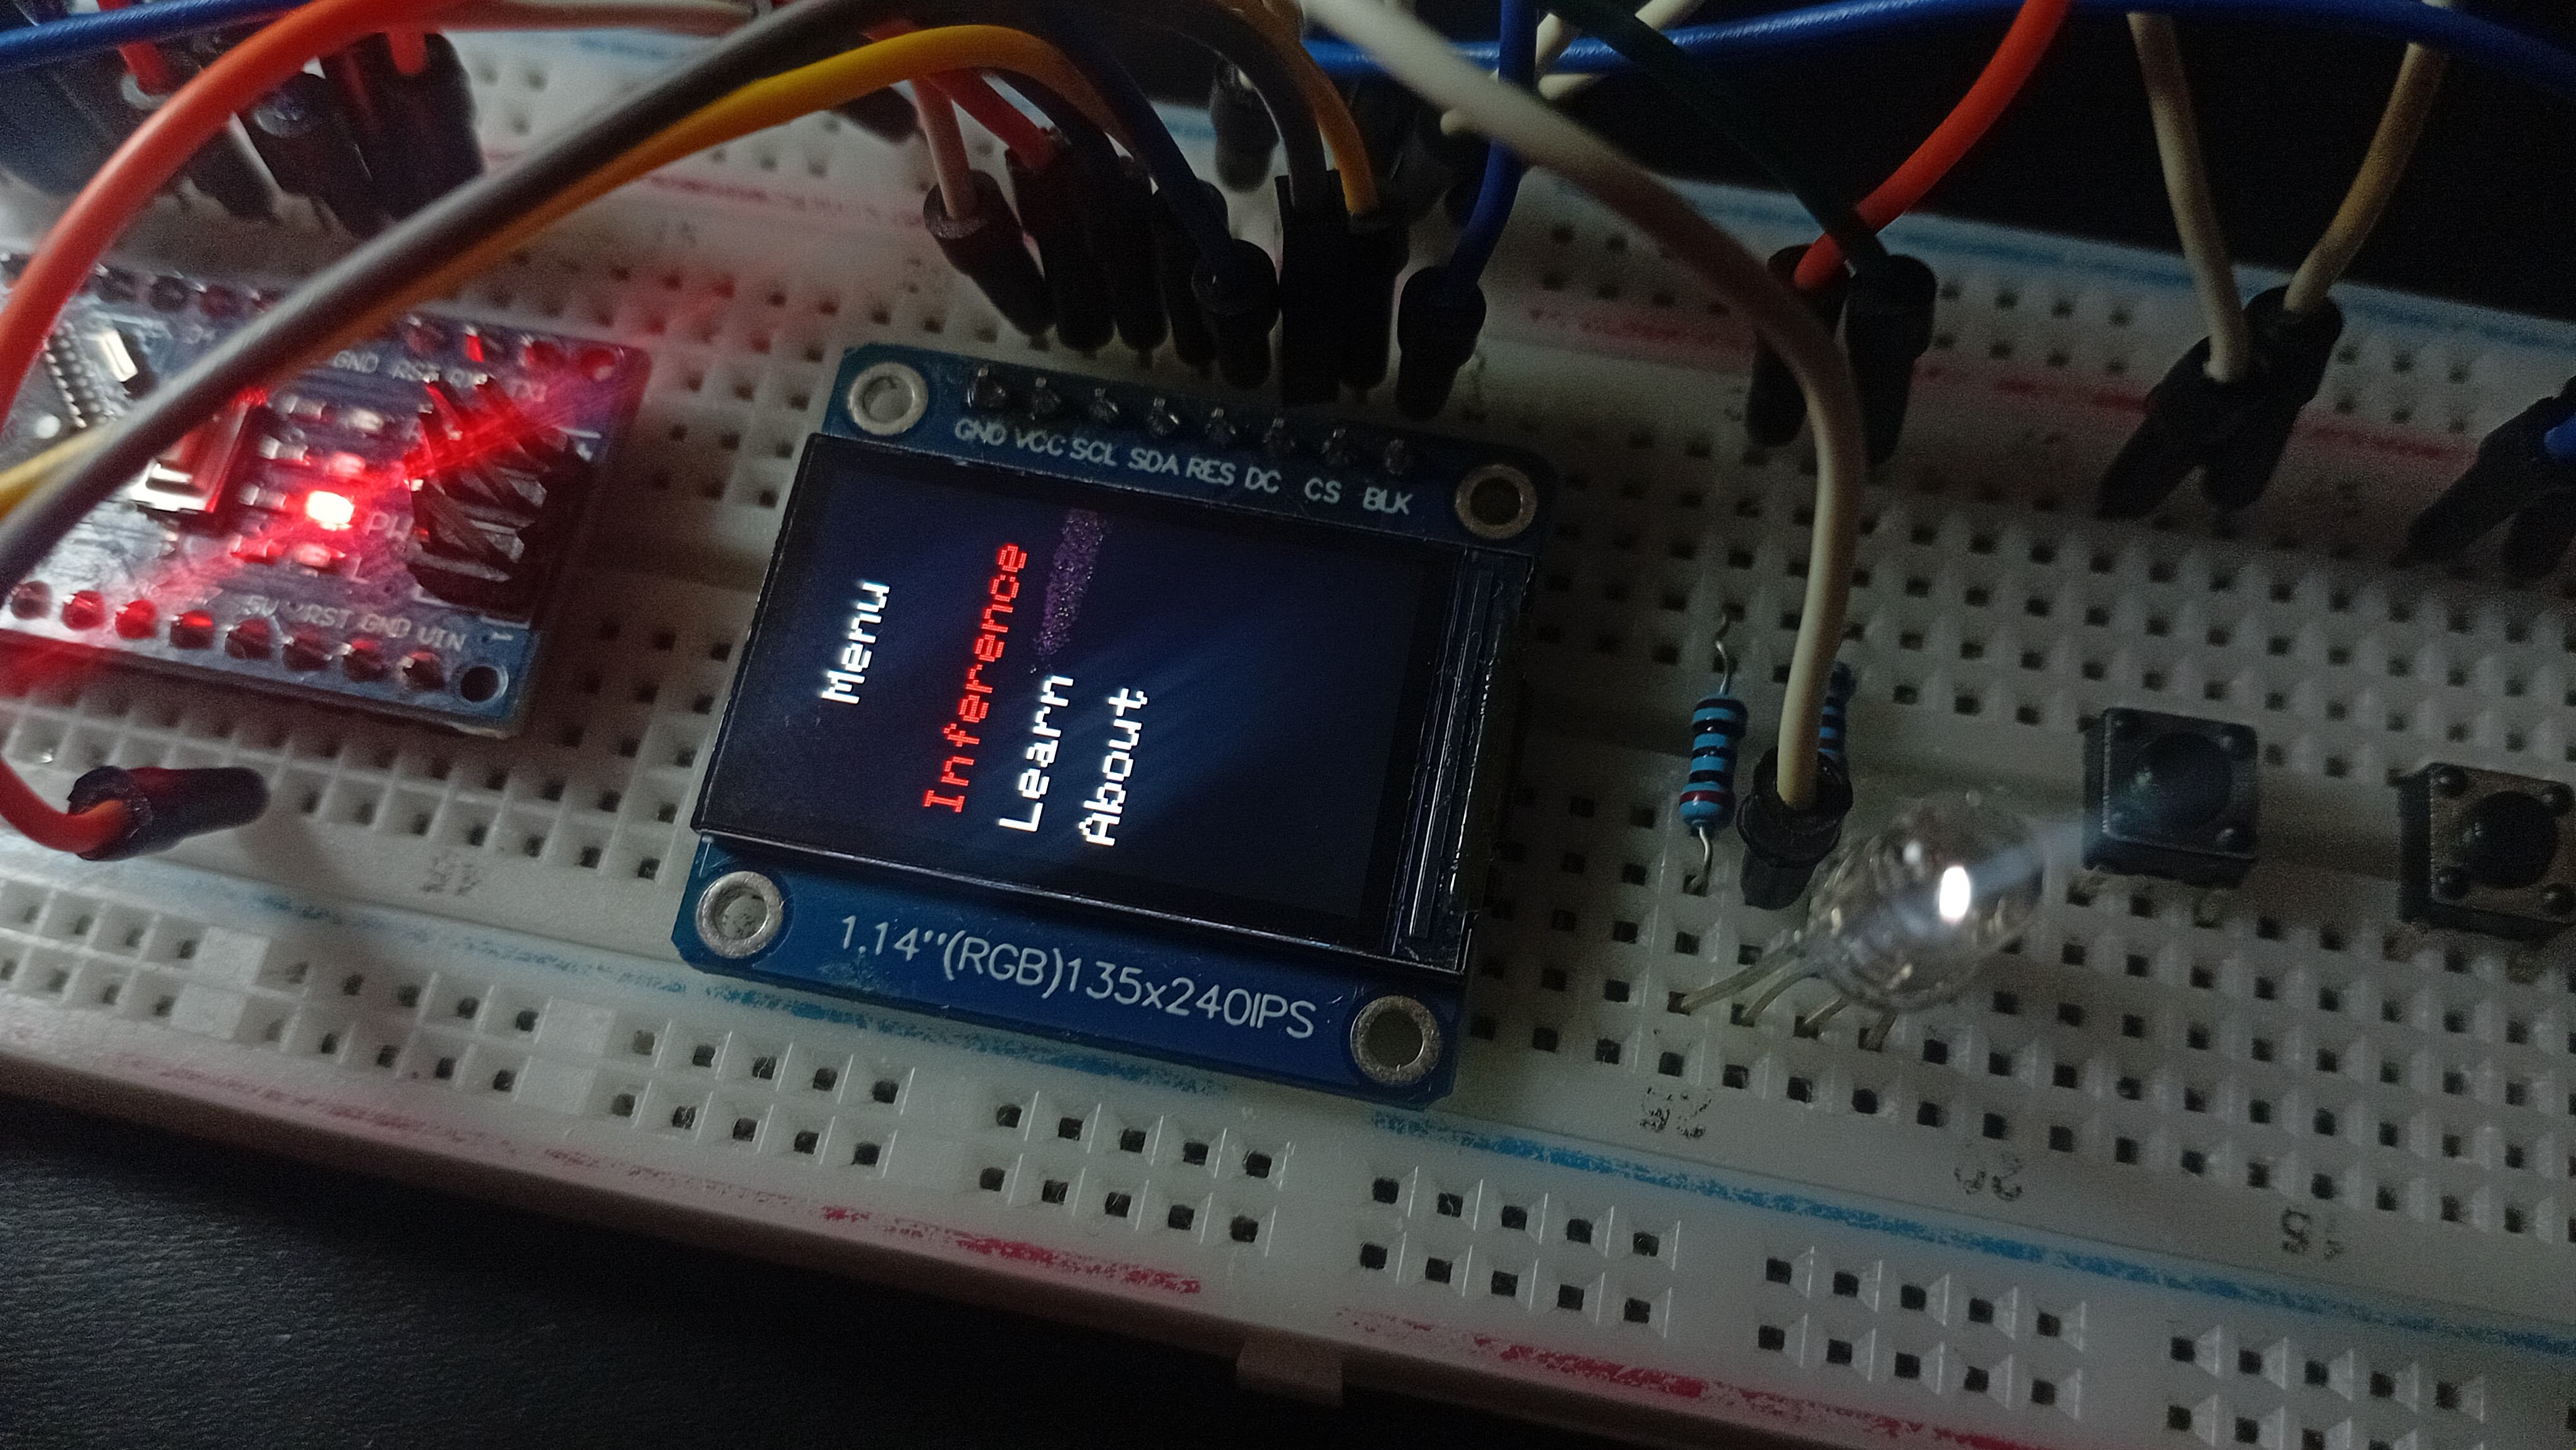
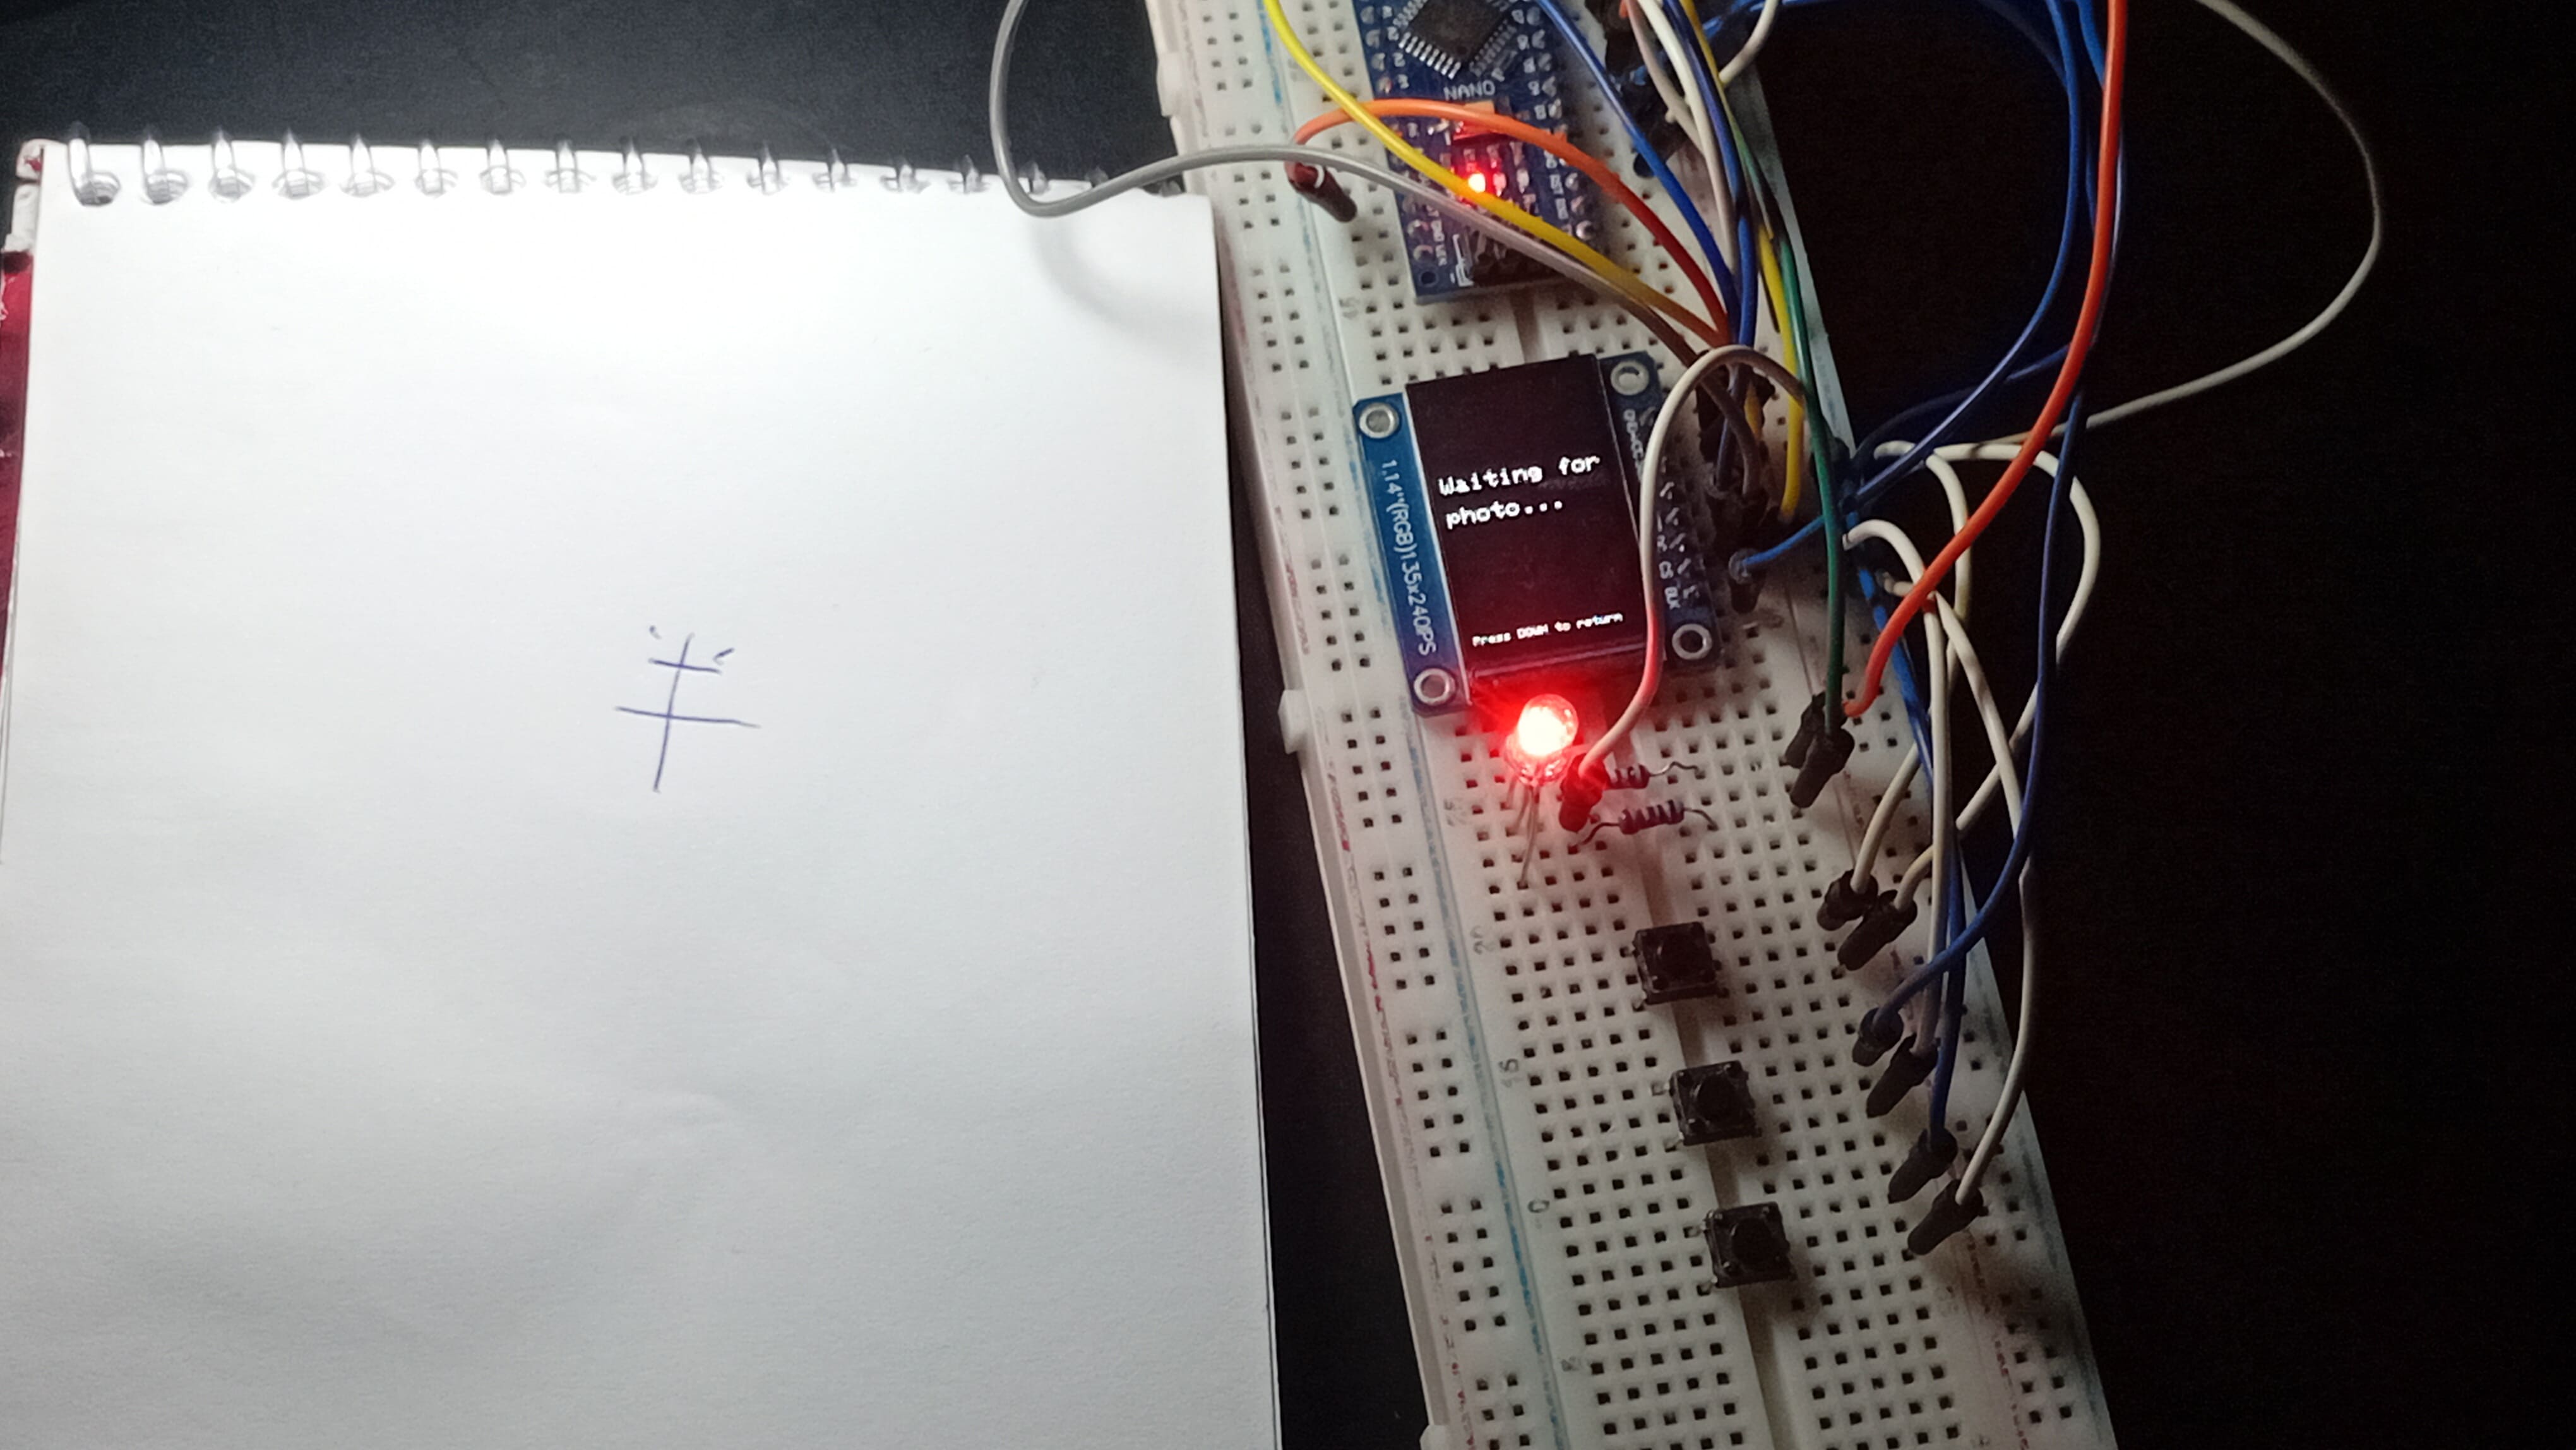
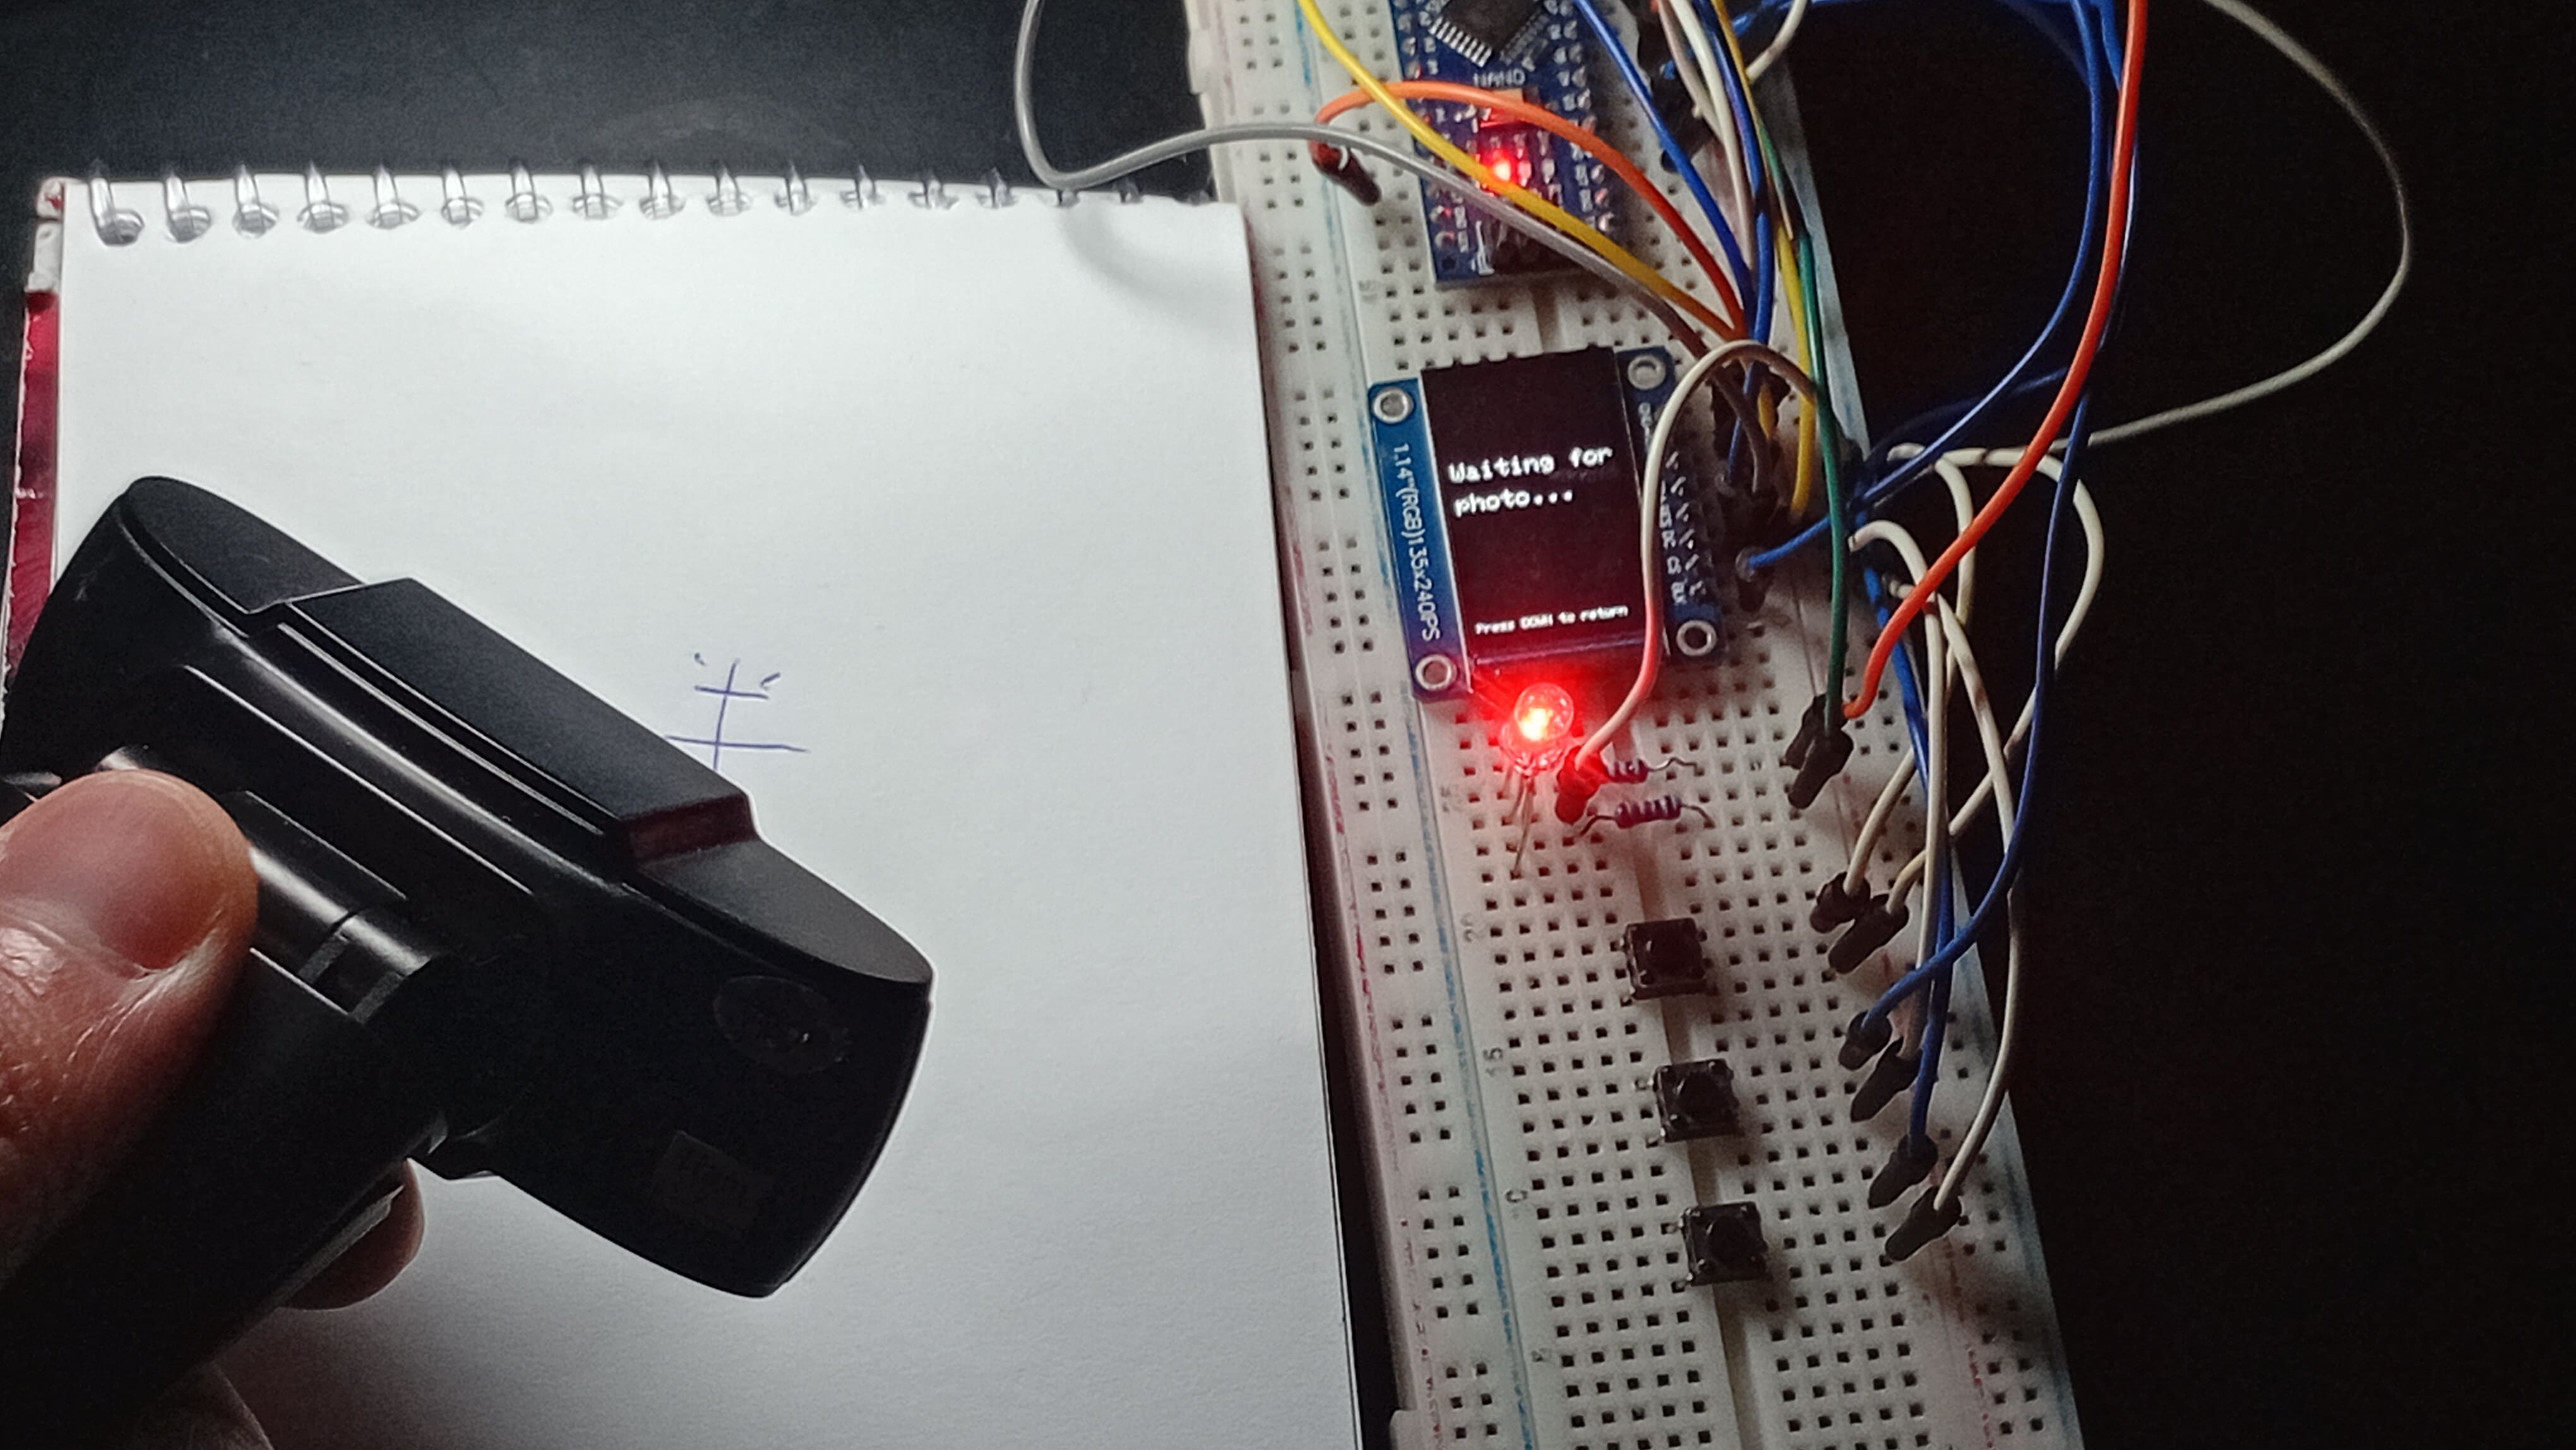
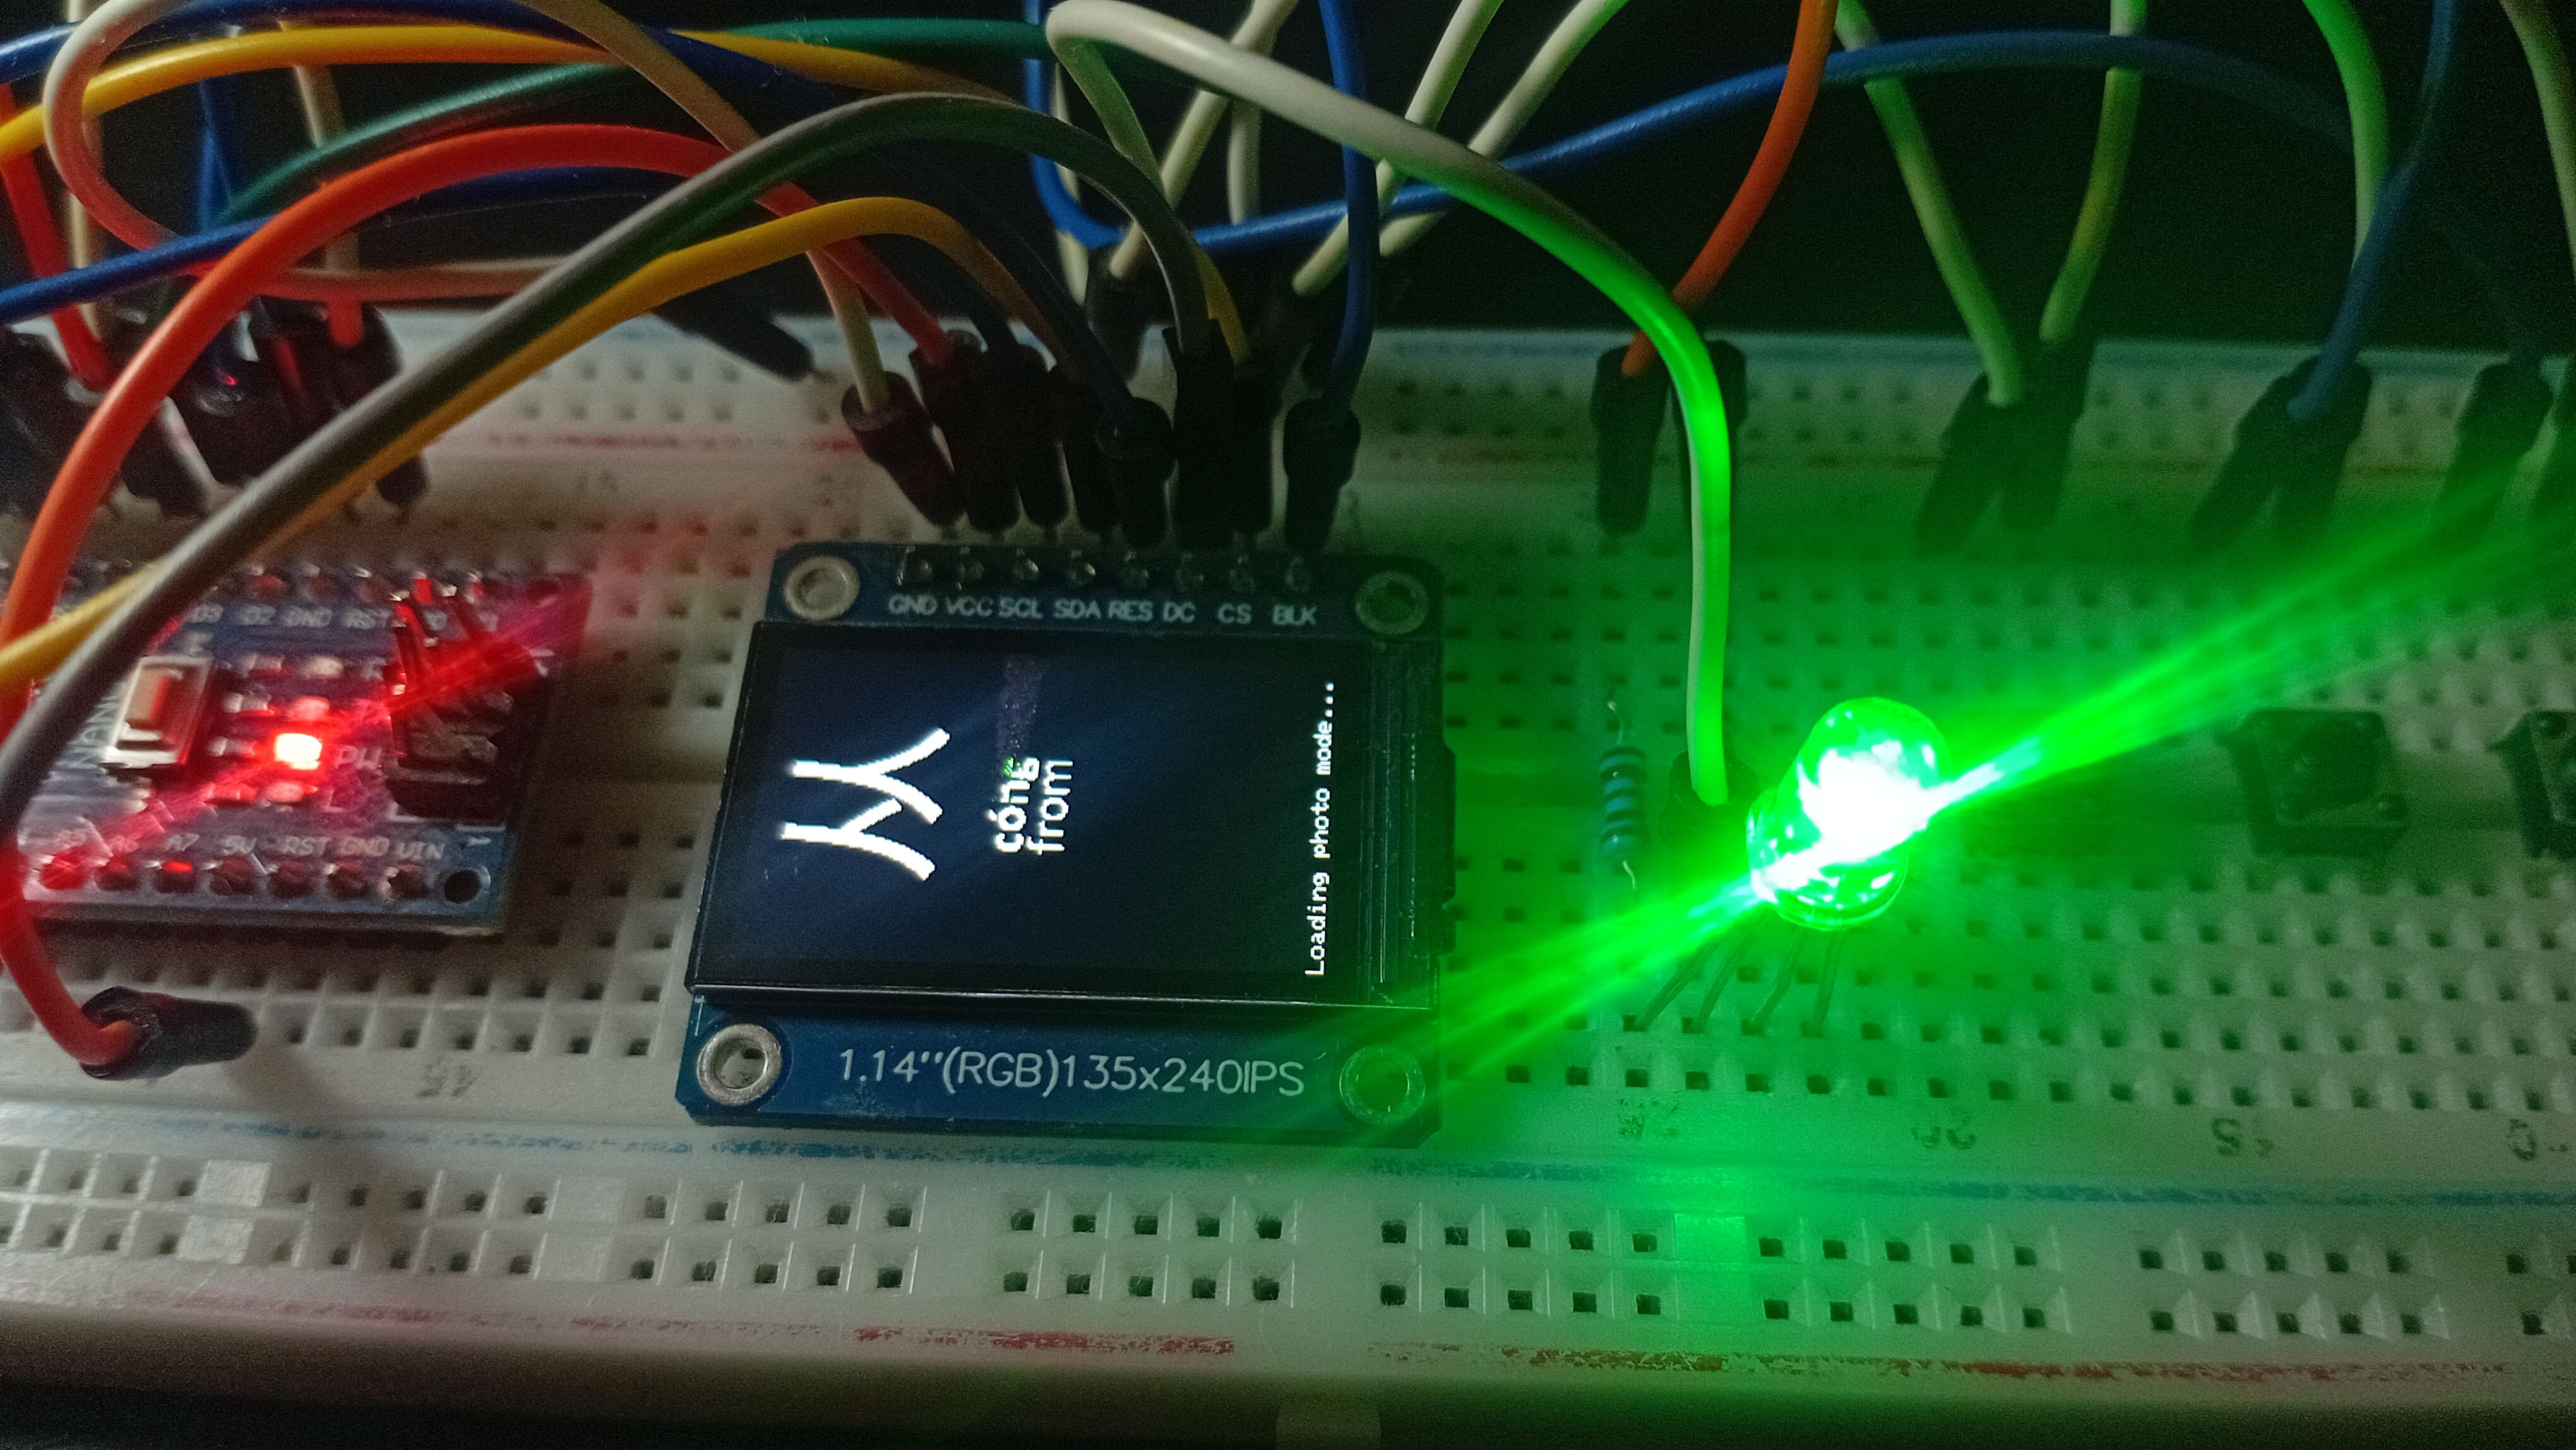
Inference option: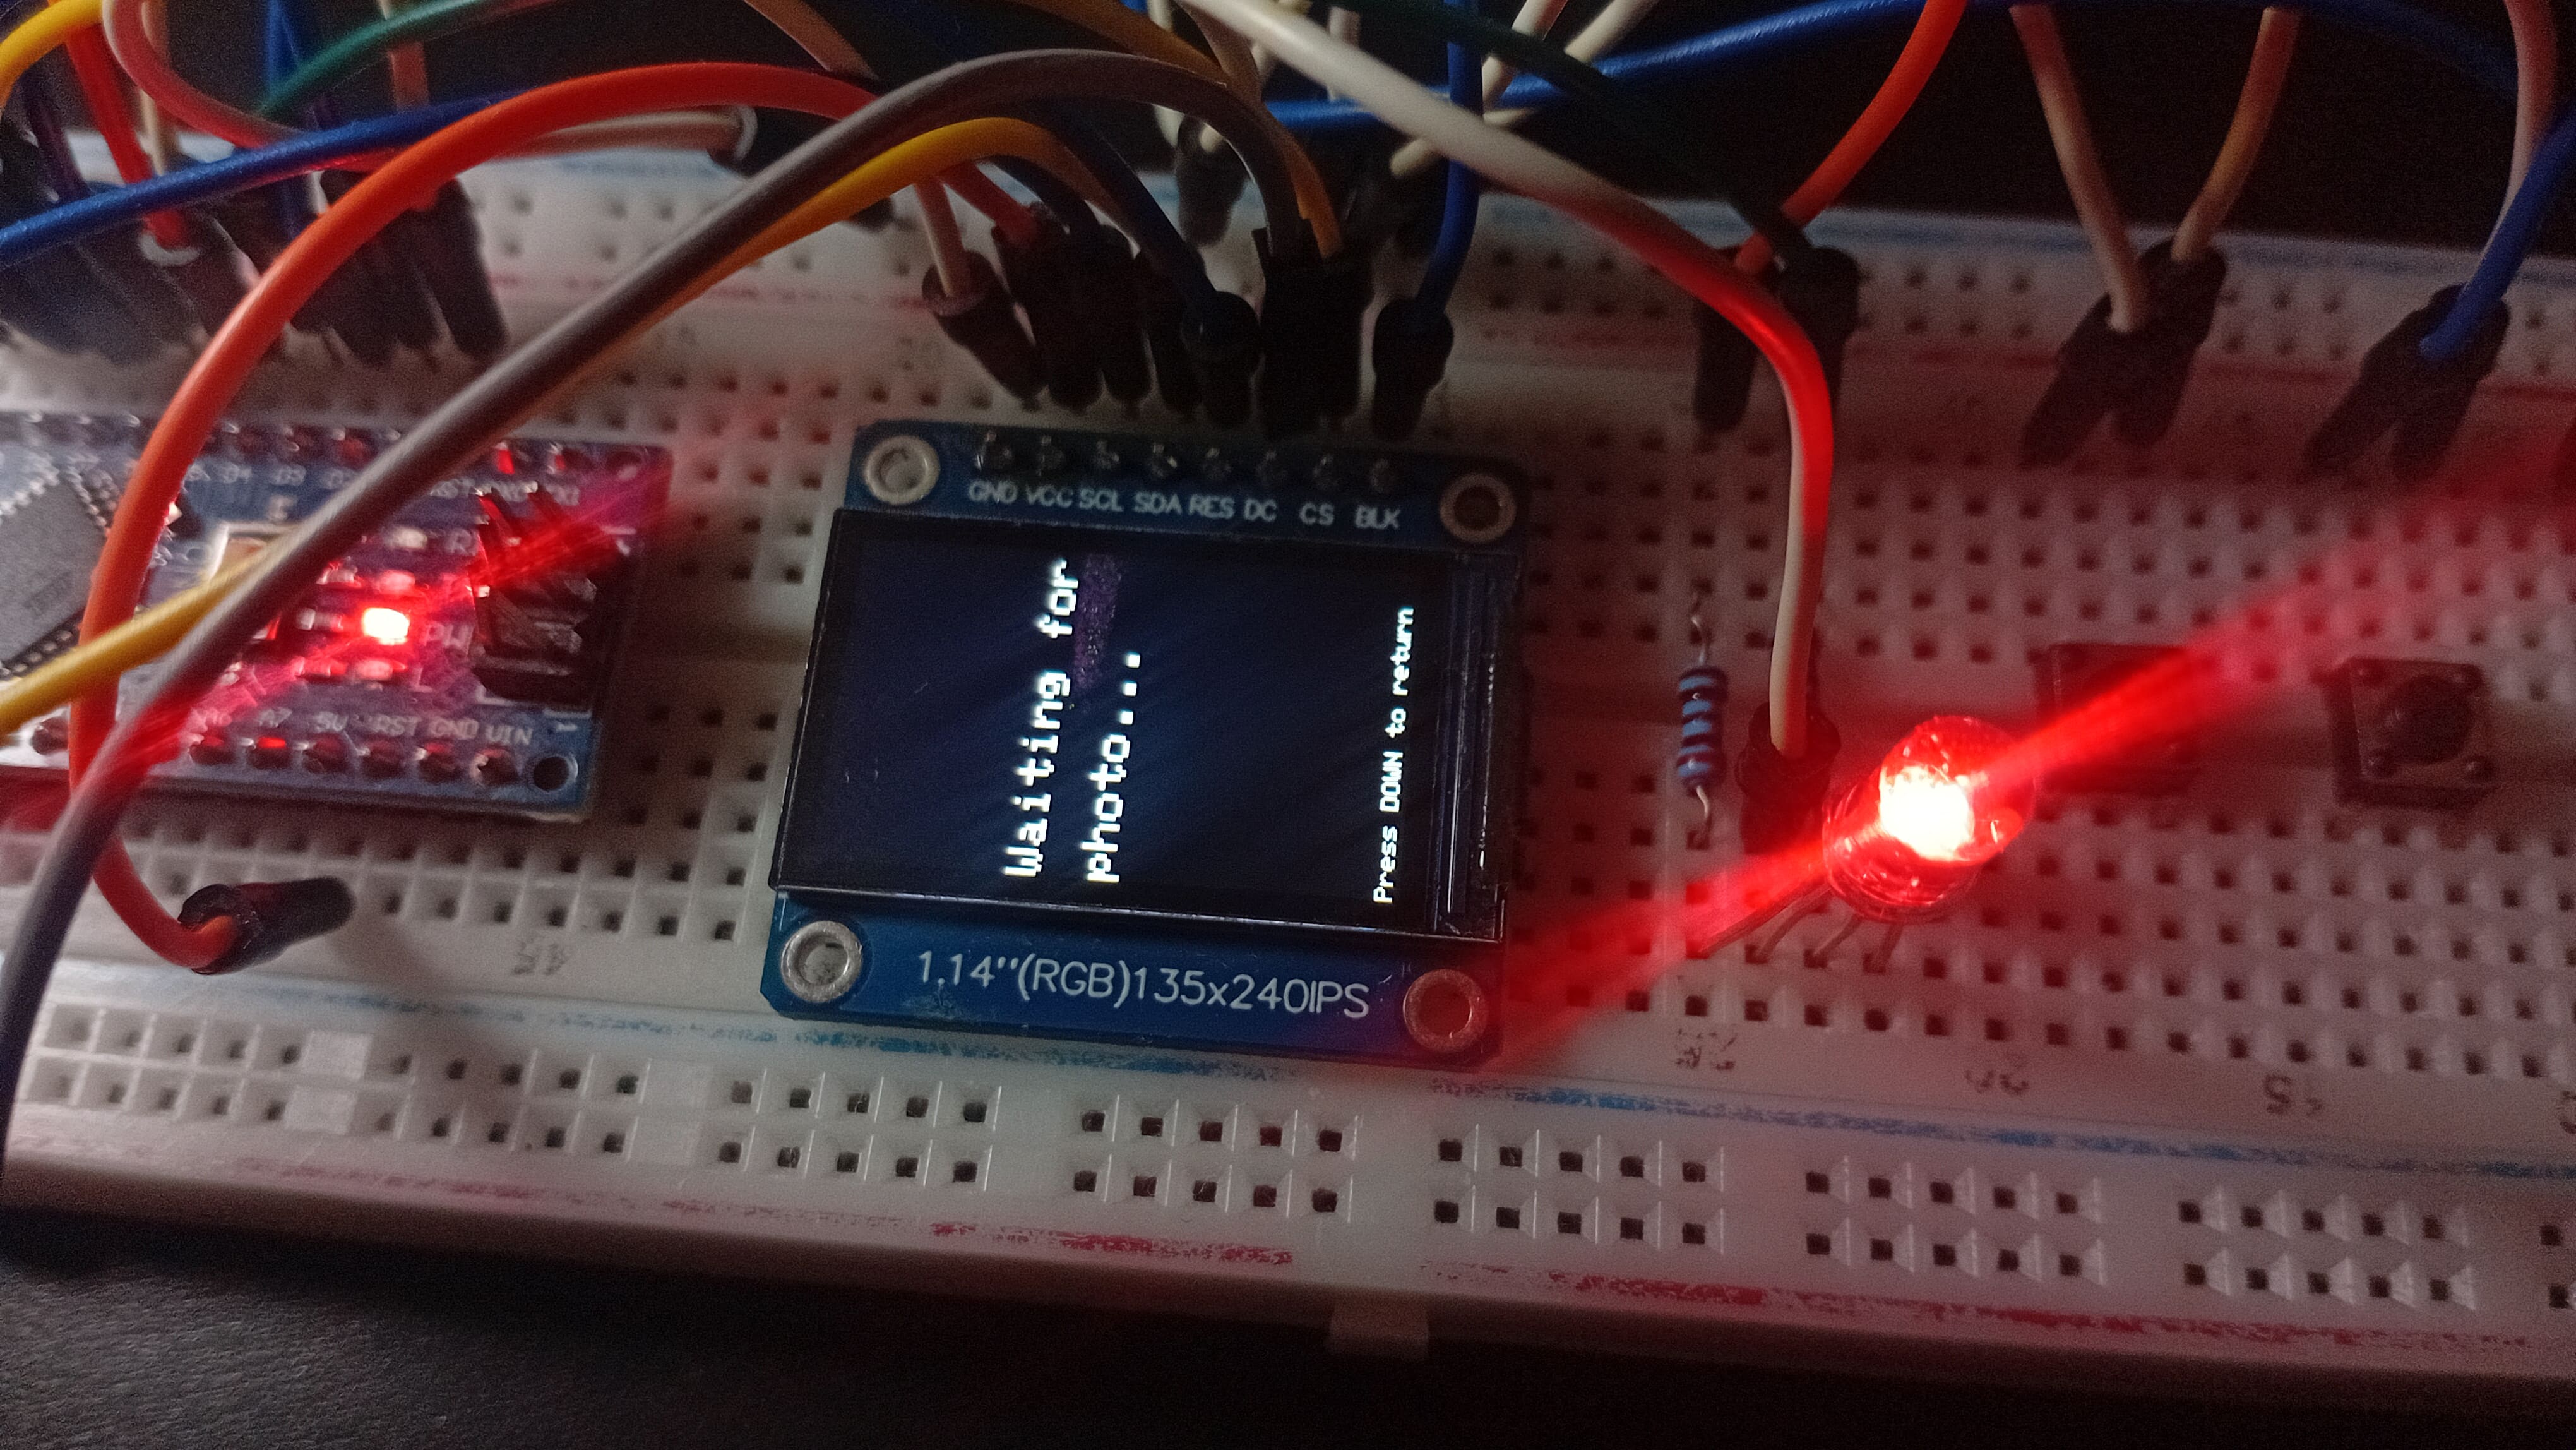
Learn option: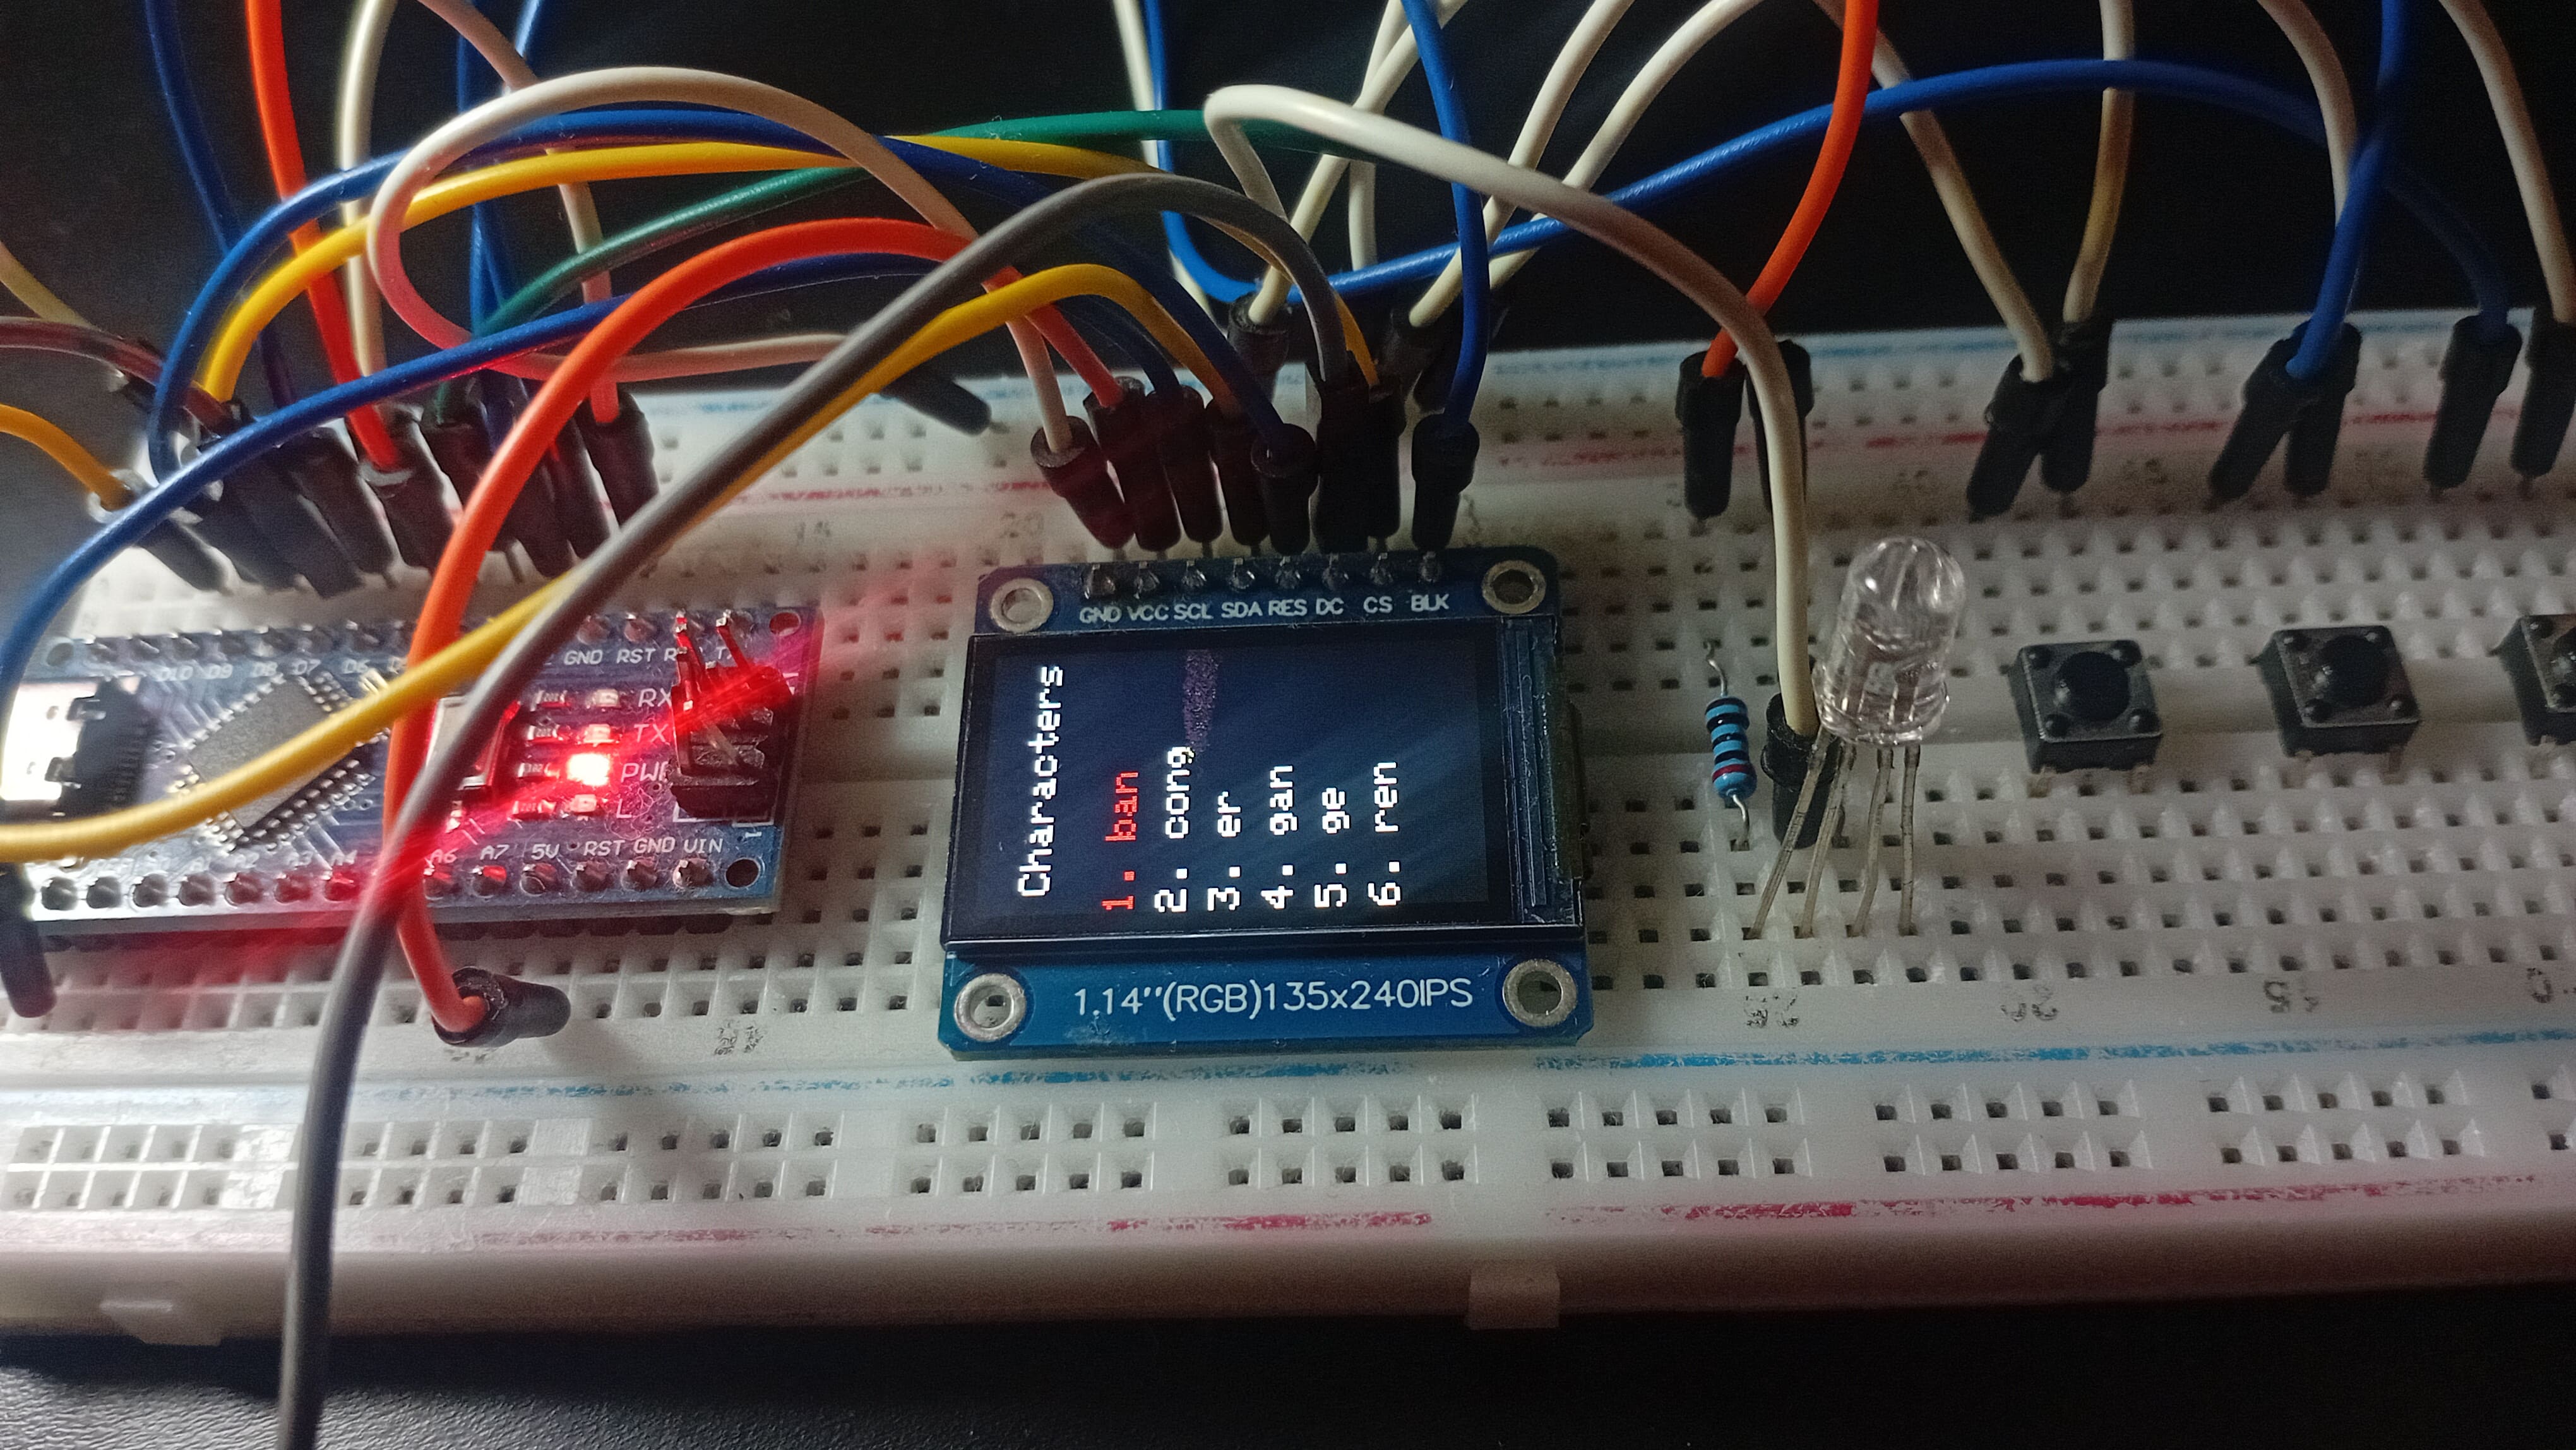
About option: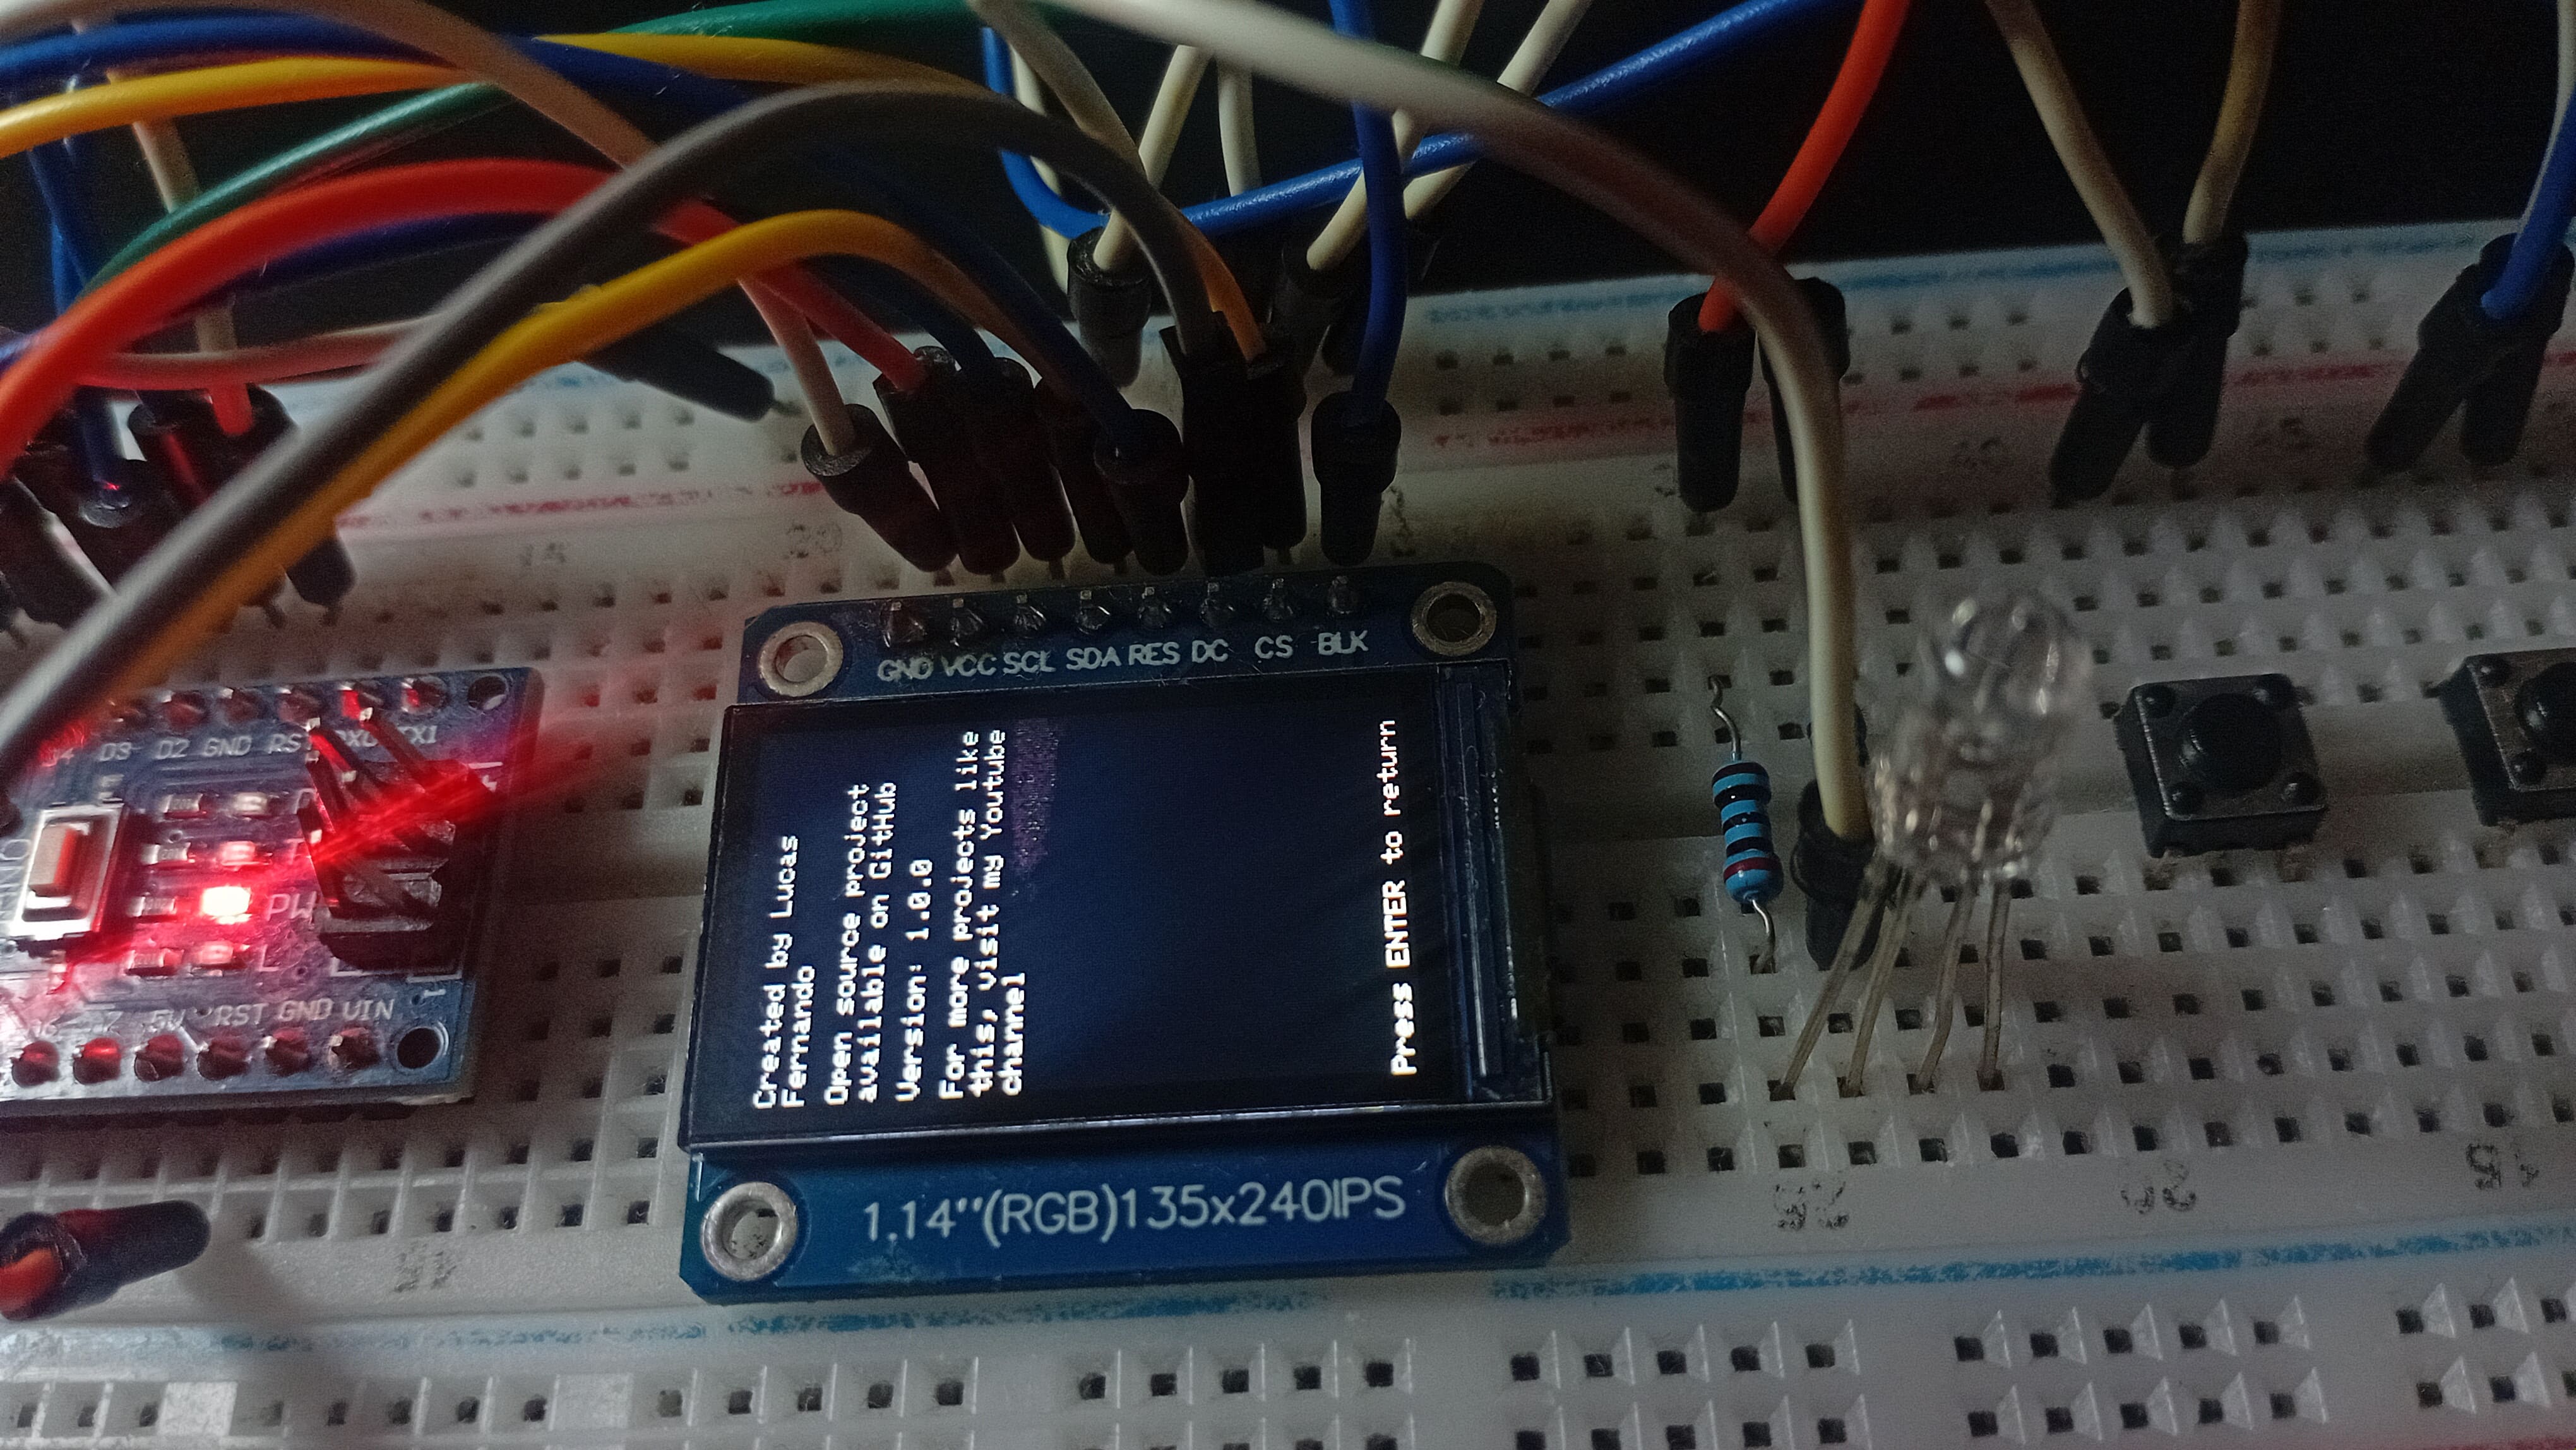
If you’re curious about the hardware setup, here’s the schematic: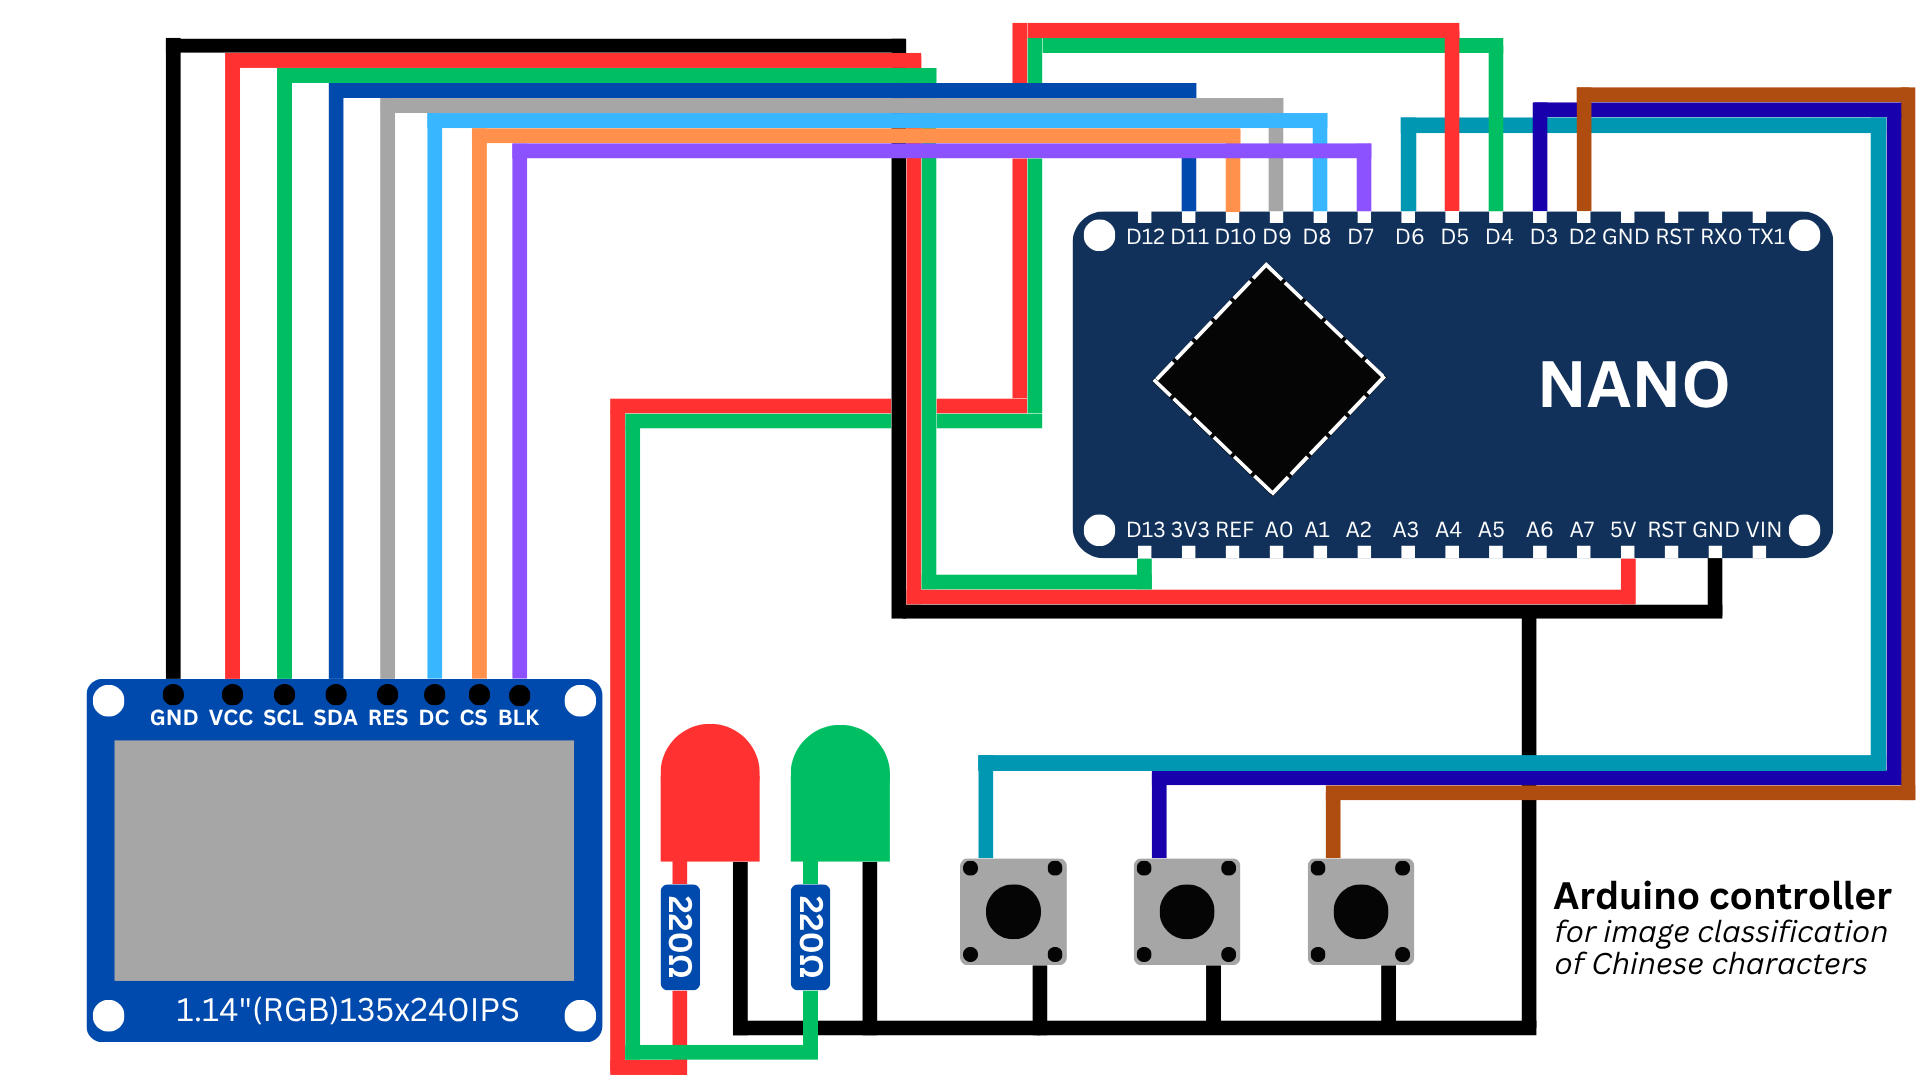
And here is the materials list:
- 1 x Breadboard
- 1 x Arduino Nano
- 1 x ST7789 IPS display (8 pins)
- 1 x Red LED (5mm)
- 1 x Green LED (5mm)
- 2 x 220Ω resistors
- 3 x push buttons
- Male-to-male jumpers wires
Just assemble everything on a breadboard, connect the components according to the diagram, upload the sketch to Arduino, and you're good to go.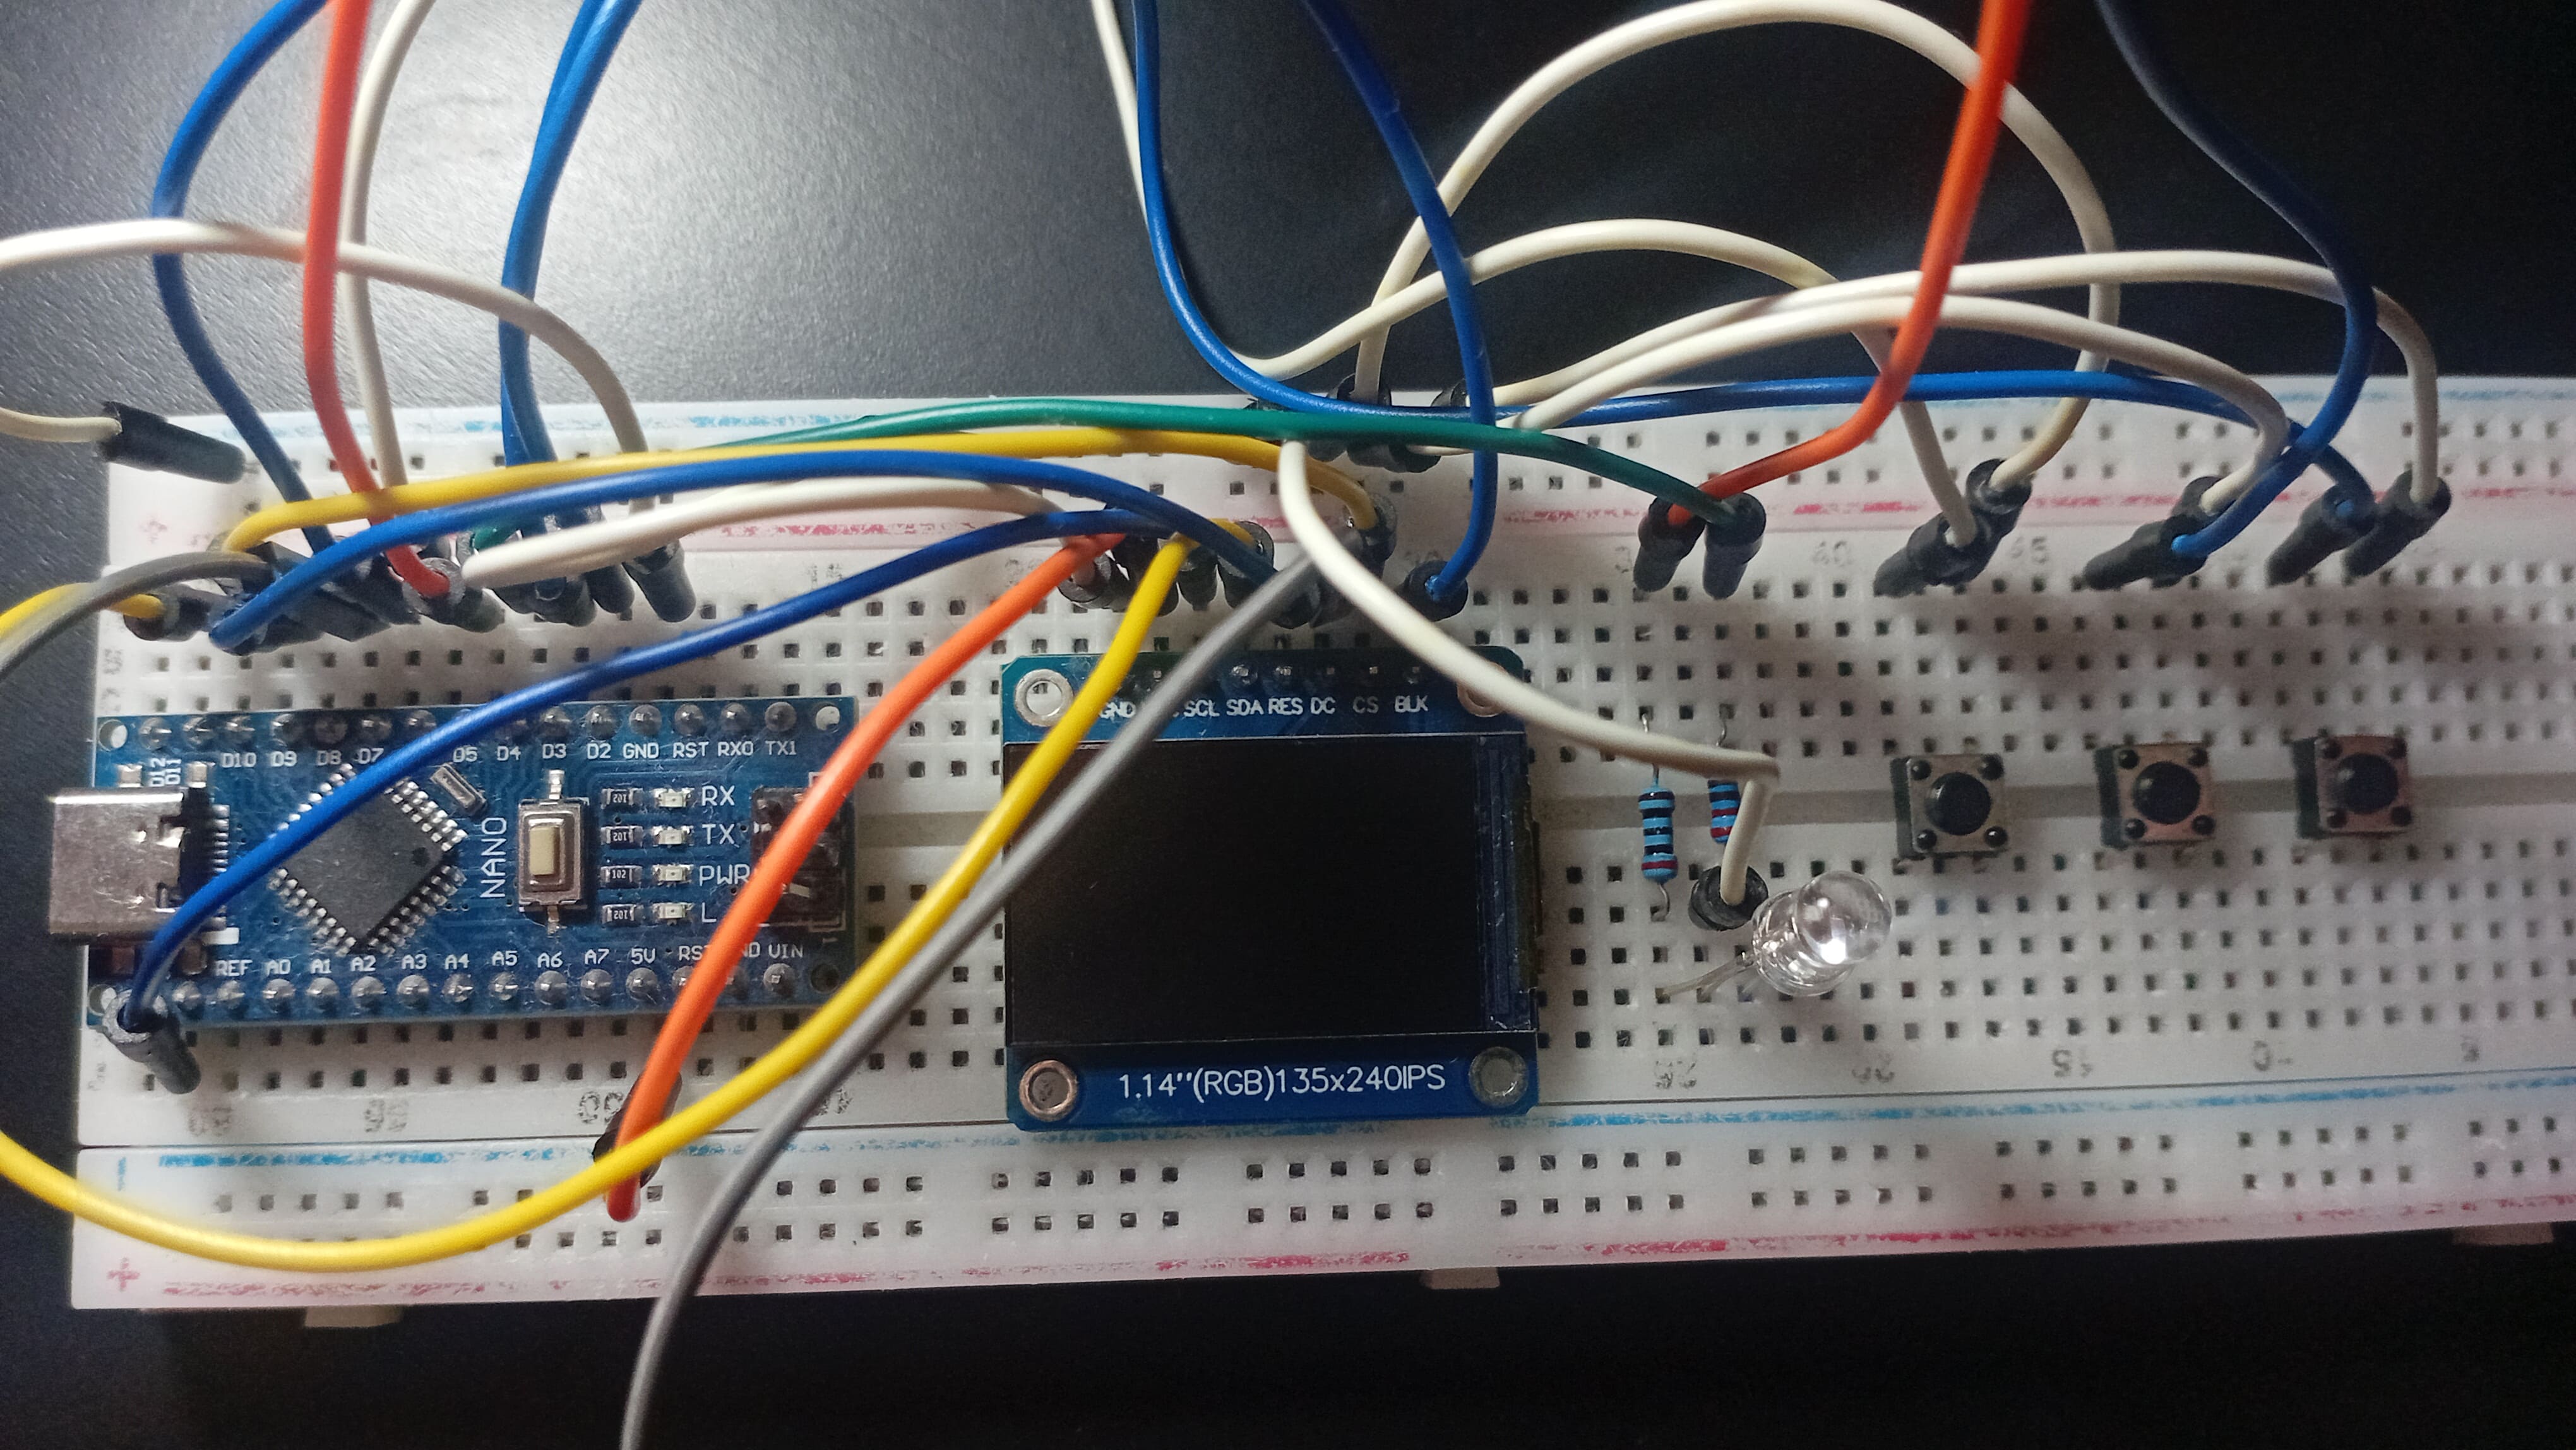
WHAT I LEARNED
This was the first time I built an end-to-end AI project, from collecting data to building a real-world interface. And it was one of the most satisfying accomplishments I’ve ever done.
I learned:
- How to create a dataset from scratch
- How to train and evaluate a deep learning model locally
- How to connect AI with physical computing through Arduino
But beyond the technical skills, this project helped me reflect on what Artificial Intelligence is really for.
In a time when AI is rapidly changing the world by automating jobs and reshaping industries, we need to ask ourselves:
Who is this technology being built for? And most importantly, how do we make sure it benefits everyone?
Learning about Machine Learning and creating AI tools are only meaningful if we use that knowledge to make the world better. Because if we build a future where AI concentrates power and wealth in the hands of a few - while everyone else struggles - then what was all this progress for?
If we’re not careful, AI might create a world where power is concentrated and inequality gets worse. However, if we do it right, it can empower people and solve humanity's greatest challenges.
That’s why projects like this matter. They show that AI doesn’t have to be some mysterious force on the hands of big corporations. It can be a great tool in the hands of makers, students, and dreamers of a better world.


")


