Currency
Toggle Nav

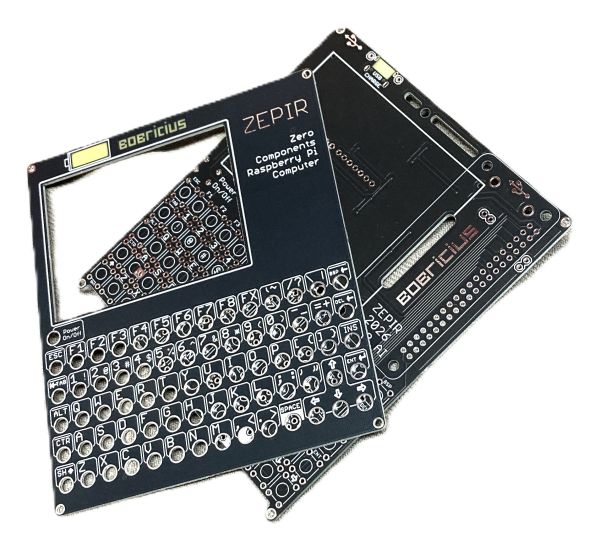


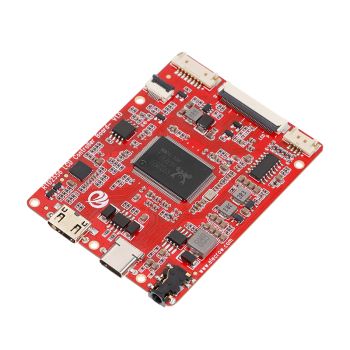
Zepir - Raspberry Pi Zero mini computer Handheld (PCB only)
$19.00
Availability:
In stock
SKU
CQA0814PZ
Weight
80g
Related Products:


Bare pcb only for DIY assembly no components.
Motherboard & Front panel
Frequently Bought Together

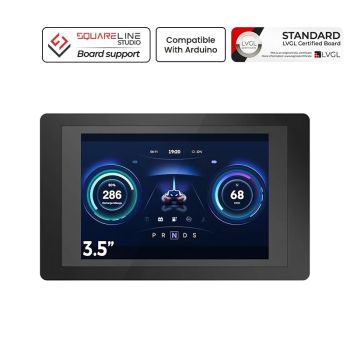
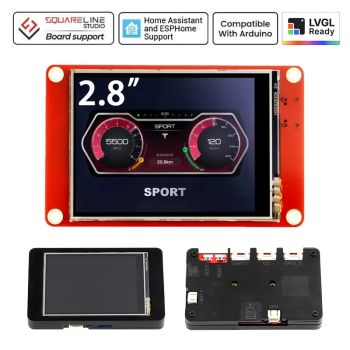
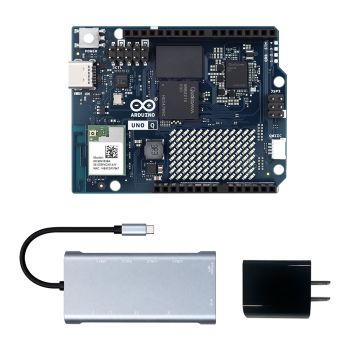
CrowPanel ESP Terminal - ESP32 3.5inch 480x320 Parallel RGB Touch Display
was
$33.90
Special Price
$28.90
ZEPIR — Raspberry Pi Zero Universal Linux Handheld HAT
Pi Zero + Zero extra chips. Fully transparent, fully yours.
📦 What You Receive (pictures in gallery are for assembly inspiration)
- bare PCB, front panel and mother board, no components
- Raspberry Pi is NOT included
ZEPIR is a minimal HAT that transforms a Raspberry Pi Zero (or Zero 2 W) into a complete pocket Linux computer — with a real keyboard, display, and speaker. No proprietary chips, no black boxes. Every component is standard, every line of code is visible and customizable. The perfect open foundation for handhelds, cyberdecks, and pocket terminals.
⚠️ This is not plug & play. It requires basic Linux experience — configuring overlays, editing config files, and running Python scripts. If you enjoy tinkering, you'll love it. When in doubt, feel free to ask!
✨ Why ZEPIR?
⌨️ Full 70-Key Keyboard — No Compromises, No Tricks
Most handheld Linux devices sacrifice the keyboard to save space. Not ZEPIR. You get a real 70-key matrix keyboard with dedicated keys for every letter, number, and the most common symbols - no Fn-layer gymnastics, no shift-mode switching to reach a number. You just type.
Compare that to competing handhelds: the uConsole keyboard is driven by a dedicated STM32 microcontroller running custom firmware - a black box you flash separately, that can require DFU mode to recover, with layer switching via chord combinations like LeftCtrl+RightCtrl+2. On ZEPIR, the keyboard driver is a plain Python script using evdev - open it, read it in five minutes, change any key with a text editor, done. Thumb-keyboard builds use 52 keys or fewer, leaving you fighting Fn layers just for basic punctuation.
What makes ZEPIR different:
- Pure software scanning - 7×10 GPIO matrix, no keyboard MCU, no proprietary firmware to brick or update
- Fully readable driver - ~100 lines of Python, remap anything, add macros, done with a text editor
- Display stays simple - SPI via mainline kernel overlay, configured in a few lines of
config.txt- no HDMI bridge chip - Audio stays simple - PWM over GPIO, no I²S DAC, no audio HAT, no extra chip to source or debug
- Reproducible by design - minimal passives, no complex SMD, no chips with custom firmware - the full BOM is a handful of standard jellybean components
- PCBWay project is public - order your own batch, fork the design, make it yours
- Pi 5 compatible - run Ollama and small local LLMs offline; when you outgrow the Zero 2 W, the board grows with you
This is the KISS philosophy applied to every layer of the stack: fewer chips means fewer failure points, fewer drivers to debug, and a device that is genuinely yours to understand, replicate, and modify.
📊 How ZEPIR Compares
| Feature | ZEPIR | uConsole | DevTerm | PocketTerm35 | Pi Slate | BBQ20 builds |
|---|---|---|---|---|---|---|
| Maker | Bobricius | ClockworkPi | ClockworkPi | Waveshare | CarbonComp. | DIY |
| Compute | Pi Zero / Zero 2 W / Pi 4 / Pi 5 | CM4 / CM5 / custom | CM3 / custom | Pi 4 / Pi 5 | Pi 5 | Pi Zero W |
| Keys | 70 keys | 74 (+ Fn layers) | 67, 65% layout | 67, silicone | full QWERTY | 52 (Blackberry) |
| Keyboard chip | none - GPIO matrix | STM32 (custom firmware) | STM32 (Cortex-M3) | RP2040 | dedicated MCU | I²C bridge chip |
| Keyboard driver | ~100 lines Python | binary firmware, DFU flash | Arduino/STM32 firmware | RP2040 firmware | proprietary | I²C library |
| Display | 2.8" IPS 320x240 SPI ST7789 | 5" IPS HDMI 720p | 6.8" IPS HDMI | 3.5" SPI touch 640×480 | 5" touch 1280×720 | 2.8" SPI 320×240 |
| Display config | config.txt overlay | kernel patch + HDMI bridge | kernel patch | SPI + RP2040 | HDMI | SPI overlay |
| Audio | PWM GPIO, no chip, mono speaker | 3.5mm + stereo speakers | dual speakers + 3.5mm | 2W stereo + 3.5mm | speakers + 3.5mm | none / external |
| SMD complexity | minimal passives only | complex multi-layer | complex multi-layer | complex | complex | moderate |
| Best for | hacking, learning, cyberdecks, replication | polished cyberdeck, expansion modules | retro aesthetic, thermal printer | plug & play terminal | high-end portable AI dev | ultra-compact pocketable |
- Zero mystery chips — No dedicated keyboard controller, no display bridge IC, no audio DAC chip. Everything is handled in software by the Pi itself.
- Completely transparent — Full schematic available, keyboard driver is a readable Python script, all source code is open.
- Software-scanned keyboard — 7×10 GPIO matrix, fully customizable Python driver. Change any key, any layout, any function.
- PWM audio — Sound output driven directly by Pi GPIO — no audio chip required.
- SPI display — ST7789 IPS panel connected via standard SPI — works with mainline Linux kernel overlays.
- Ideal base for handhelds & cyberdecks — Minimal, hackable, and yours to extend however you want.
- Optimized for Pi Zero 2 W — Quad-core ARM, enough RAM for real Linux tasks, Wi-Fi included.
- KISS philosophy — One board, one order, one device. No complexity theater.
🔧 Hardware Features
| Feature | Detail |
|---|---|
| Display | 2.8" IPS 320×240, ST7789, SPI |
| Keyboard | 7×10 GPIO matrix, ~70 keys, software-scanned |
| Audio | PWM mono amplifier + speaker (Zero 2 W, Pi 4) |
| USB-A | Optional — requires 2 wires soldered to D+/D− test points |
| Power | Integrated power supply, designed for powerbank use |
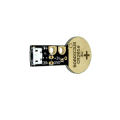
| Battery | Optional 18650 holder (Pi 4 requires GPIO extension) |
Compatible boards:
- ✅ Raspberry Pi Zero W
- ✅ Raspberry Pi Zero 2 W — RECOMMENDED
- ✅ Raspberry Pi 4 (without 18650 holder, needs GPIO extension)
- ✅ Raspberry Pi 5 (without 18650 holder, needs GPIO extension) - Audio not supported
🛠️ Bill of Materials for DIY assembly
| Component | Qty | Notes |
|---|---|---|
| ZEPIR main PCB (this product) | 1 | Display, buttons, header pre-soldered on assembled version |
| Raspberry Pi Zero 2 W | 1 | Recommended — optional add-on at checkout |
| MicroSD card (8 GB+) | 1 | For Raspberry Pi OS |
| 18650 Li-ion cell | 1 | Optional — for built-in battery operation |
| DTS63K | 71 | Tactile switches (7mm height, 1N) |
| MH-CD42 charge/boost module + USB-C connector | 1 | Optional — for battery power (AliExpress) |
| 2A charge/boost module with USB-C connector (No welding USB-A) | 1 | Optional — for battery power (AliExpress) |
| 2.8 inch LCD IPS full angle SPI screen ST7789 18PIN display | 1 | HP28010-D IPS (AliExpress) |
| USB-A connector (GCT USB3130-30-A) | 1 | Optional — solder to D+/D− test points |
| BSS123 | 1 | Transistor |
| 10R 0603 or 0805 | 1 | Resistor |
| 4.7kΩ | 1 | Resistor |
| 10kΩ | 1 | Resistor |
| APX803L20-28SA-7 | 1 | Supervisor |
| BSS123 | 1 | Transistor |
| BSS84 | 1 | Transistor |
| ZL262-40DG | 1 | female socket |
| 4020 spekaer | 1 | speaker |
The bare PCB version requires soldering the 40-pin header and a few passives. Component values are printed directly on the PCB.
💻 What Can You Do With It?
ZEPIR runs full Raspberry Pi OS — it's a real Linux computer, not a toy terminal.
- 🐚 Shell & scripting — Python, Bash, Nano, Midnight Commander, Git
- 🌐 Web browsing — w3m text browser with image support
- 🎵 Music playback — MP3 (mpg123), MOD tracker (mikmod)
- 🖼️ Image viewer — framebuffer image display with
fbi/fim - 📡 SSH & remote admin — manage servers and IoT devices from your pocket
- 🤖 Local AI (optional, Pi 5 required) — run Ollama + small LLMs offline
- 🎮 Retro & fun — cmatrix, cowsay, fortune, sl...
📋 Installation Guide
Step 1 — Flash SD Card
Flash Raspberry Pi OS Lite using Raspberry Pi Imager.
In the Imager advanced settings: - Enable SSH - Set username, password, and Wi-Fi credentials
Step 2 — Configure Display & Audio
Edit /boot/firmware/config.txt and add:
# SPI display
dtparam=spi=on
dtoverlay=fbtft,spi0-0,st7789v,dc_pin=25,rotate=270,width=240,height=320,speed=62000000

# Audio
dtparam=audio=on
dtoverlay=audremap,pins_18_19
audio_pwm_mode=2
Edit /boot/firmware/cmdline.txt — append to the existing single line:
fbcon=map:10 fbcon=font:VGA8x8
Step 3 — First Boot
Connect via SSH. Then run:
sudo raspi-config
Configure: Expand filesystem → Enable autologin → Boot to terminal (CLI) → Finish.
Configure console font:
sudo dpkg-reconfigure console-setup
Select: UTF-8 → Guess optimal → Terminus → 6×12
Step 4 — Test Hardware
Test display: ls /dev/fb* sudo dd if=/dev/urandom of=/dev/fb1
Random pixels should appear on screen.
Test audio:
aplay -l
alsamixer
espeak-ng "Hello from ZEPIR"
Step 5 — Install Packages
sudo apt update
Core tools
sudo apt install mc w3m w3m-img mpg123 espeak-ng fbi fim python3-evdev
Extra fun & utilities
sudo apt install mikmod ranger nnn btop ncdu cmus cmatrix sl cowsay fortune
In sudo raspi-config, set sound output to PCM audio.
Step 6 — Set Up GPIO Keyboard
Copy the keyboard driver to /home/pi/gpiokeyboard/gpiokeyboard.py (download from the Source Code link below).
Edit /etc/rc.local and add before exit 0:
sudo python3 /home/pi/gpiokeyboard/gpiokeyboard.py &
The keyboard driver is plain Python using evdev — read it, modify it, make it yours.
🤖 Optional: Local AI (Raspberry Pi 5 required)
> Pi Zero 2 W is great for Linux tasks. For running local LLMs, a Raspberry Pi 5 with at least 4 GB RAM is required.
Install Ollama curl -fsSL https://ollama.com/install.sh | sh Run a small model ollama run qwen3:1.7b
Recommended lightweight models:
| Model | Size | Notes |
|---|---|---|
| tinyllama | ~700 MB | Smallest, fastest |
| gemma3:1b | ~800 MB | Google's compact model |
| qwen3:1.7b | ~1.5 GB | Good multilingual support |
| ministral-3b | ~2 GB | Solid all-round performance |
Voice pipeline (experimental):
ollama run qwen3:1.7b "Say hello" --nowordwrap | espeak-ngDOWNLOAD
Write Your Own Review
Bestselling Products You May Like

New Products You May Want


RTD2556 Driver Board/Controller Board for HD Monitor With EDP 30Pin 1920x1080p Touch Function
was
$20.90
Special Price
$14.63
Warranty
Service
VIP Distributor
Discount
Professional
Tech Support
Fast
Delivery
×
 Add to cart successfully!


Customers Who View This Item Also Bought