Story
This time I will present you a classic 7 segment display alarm clock which will represent another one from my series of DIY unusual and ordinary clocks which you can watch on my playlist. In this case, it is characteristic that is used the STM32 microcontroller board known as "Blue Pill".
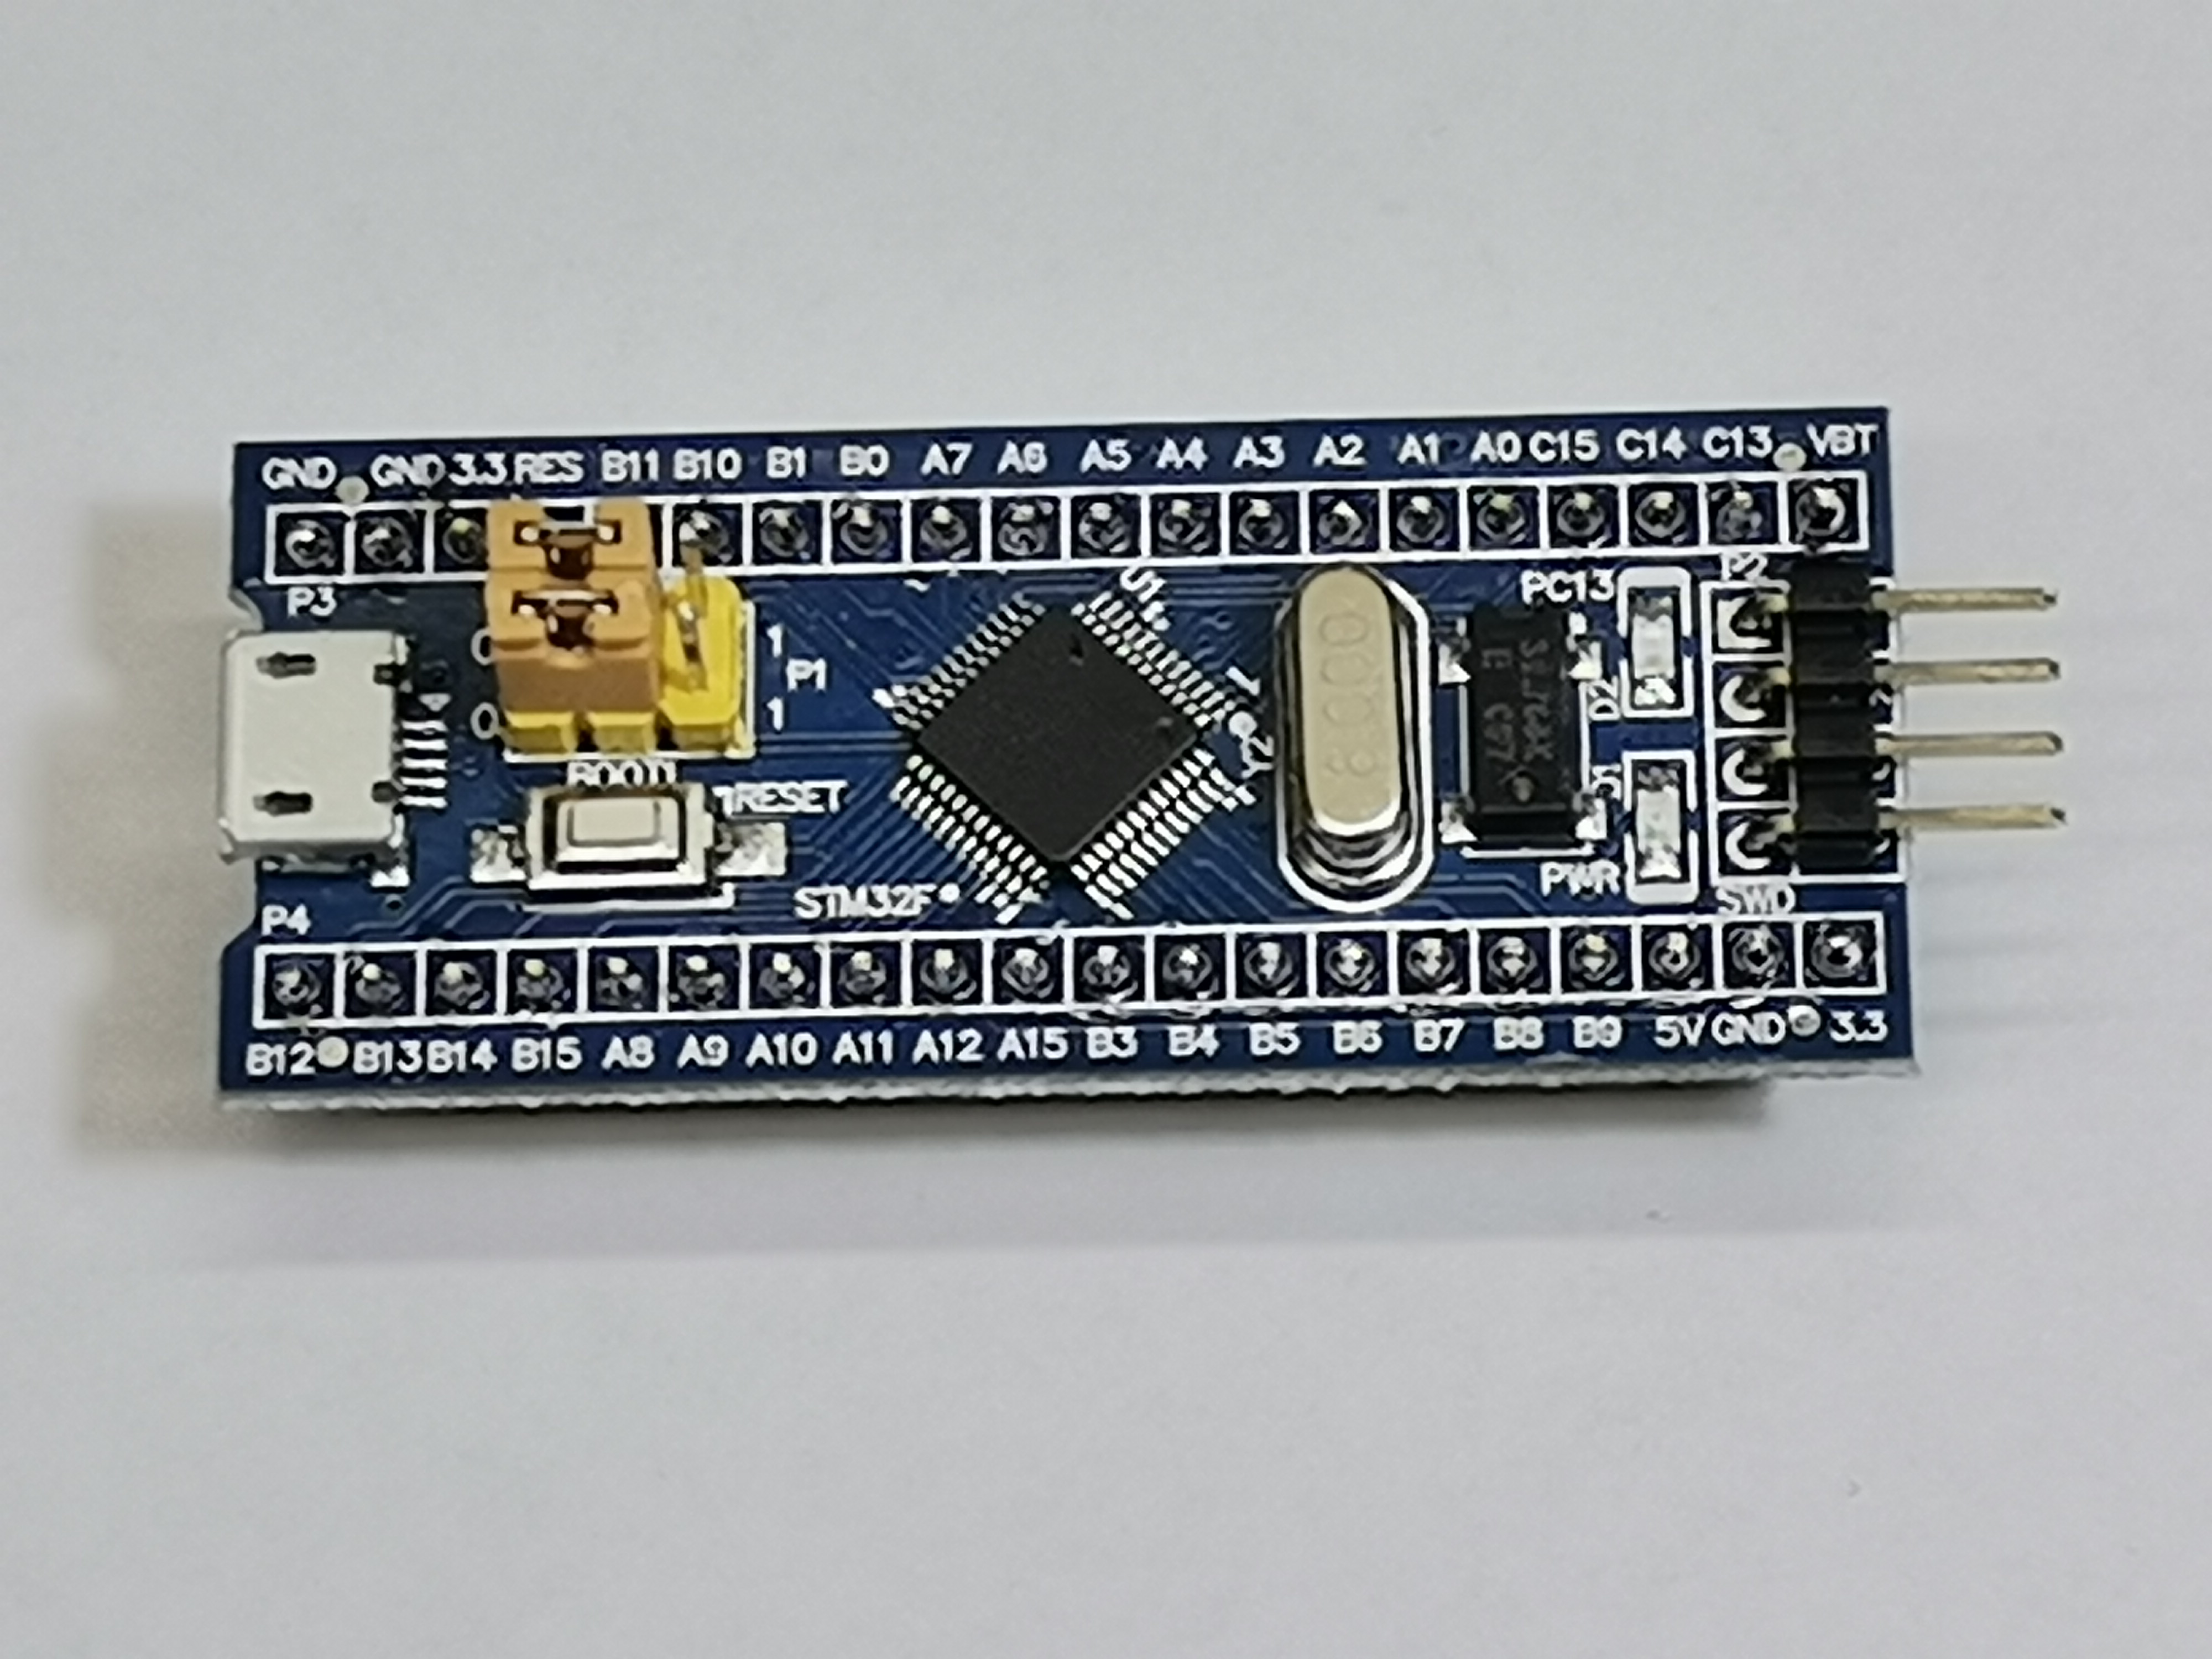
It is a popular and inexpensive development board based on the STM32F103C8T6 microcontroller from STMicroelectronics. The ARM Cortex-M3 core offers much more processing power and peripherals compared to typical 8-bit microcontrollers like those found in the Arduino.
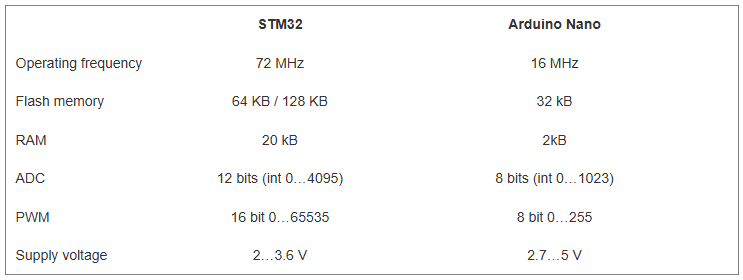
Its price is also significantly lower than many other development boards with similar capabilities. The code is taken from the RCL-Radio blog where you can also find detailed instructions.
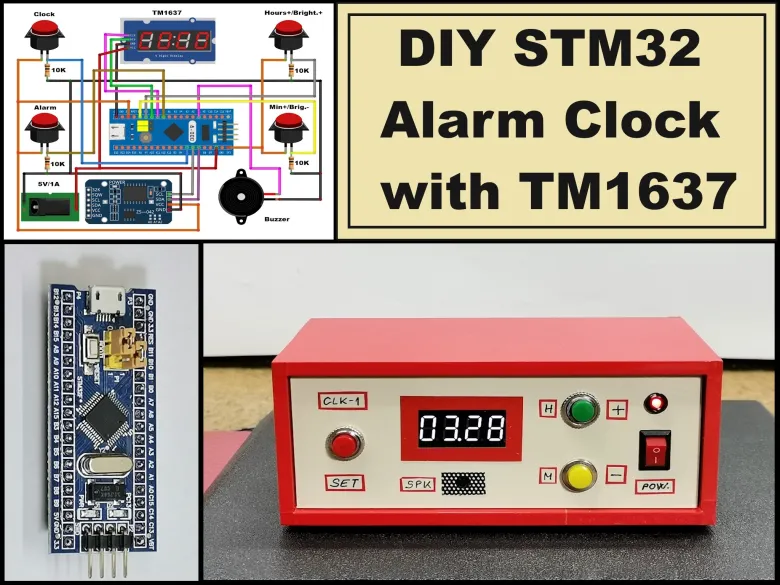
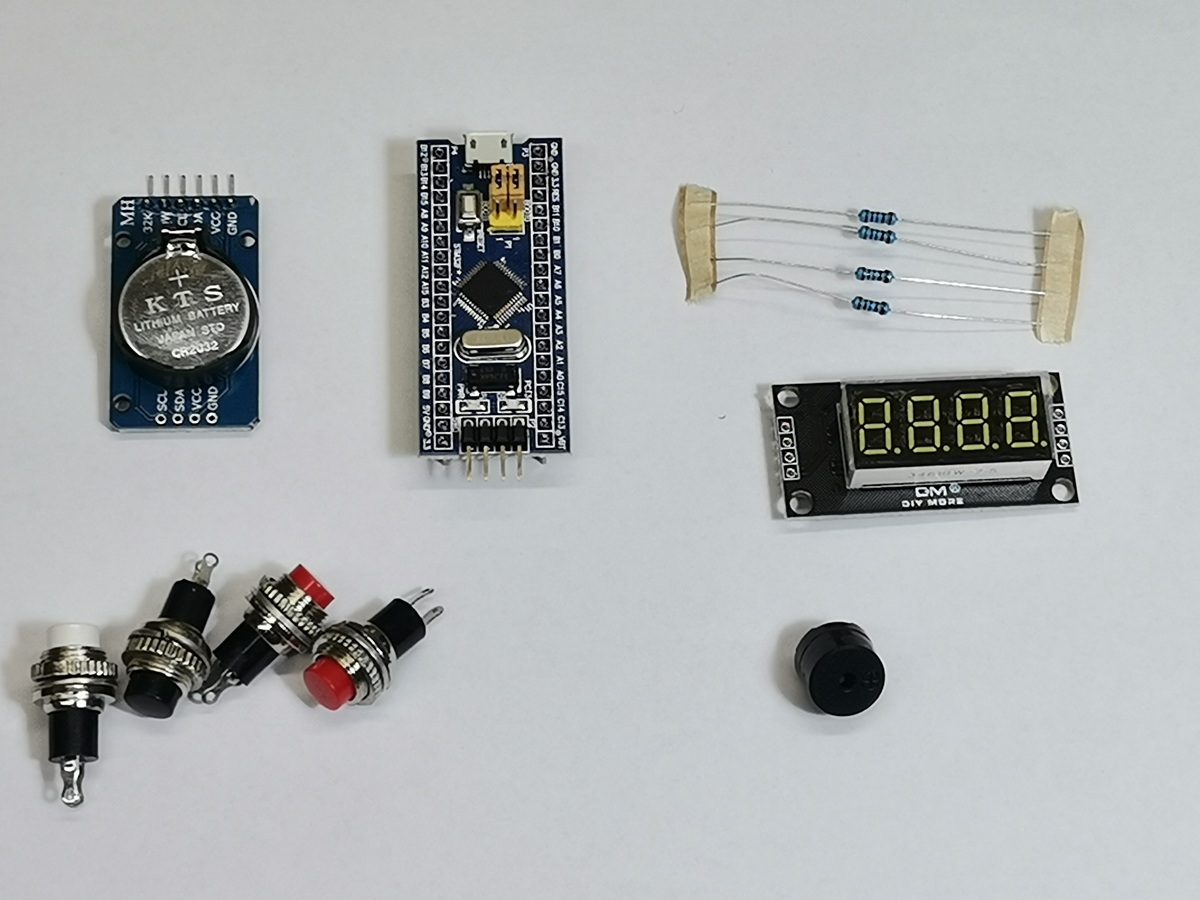
The device is extremely simple to build and the total cost does not exceed 5-6 dollars. It consists of several components:
- STM32 Microcontroller board
- TM1637 4-digit 7-segment display module
- DS3231 Realtime clock midule
- 4 Buttons
- and small Buzzer
First, let me explain how to install the code on the Blue Pill board.
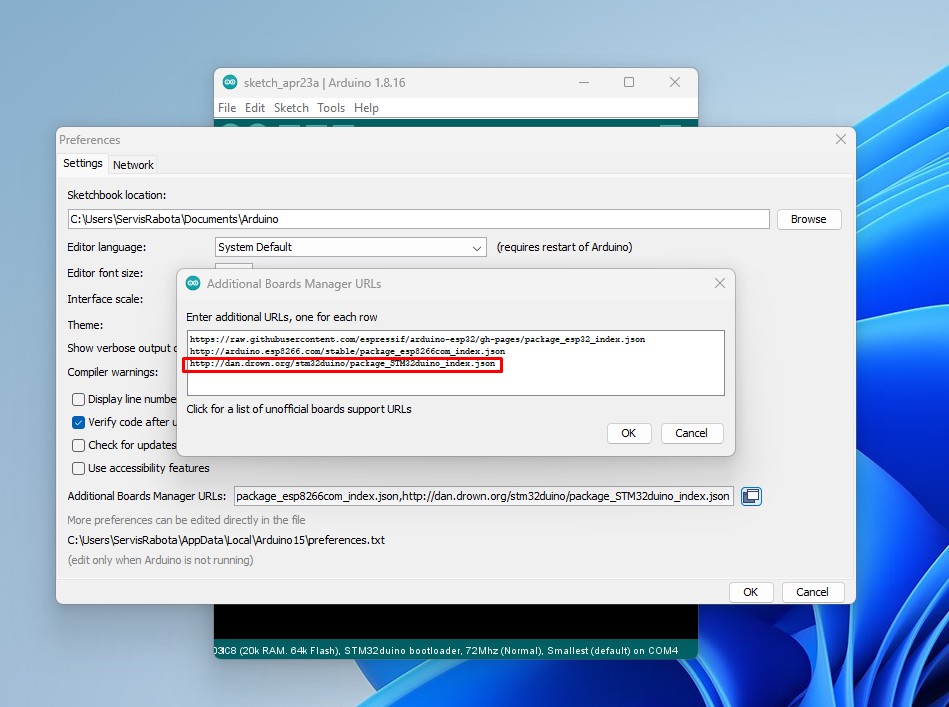
To start programming in the Arduino IDE, you need to add the STM32 board
- File > Settings > Additional links for board manager
Add line: http://dan.drown.org/stm32duino/package_STM32duino_index.json
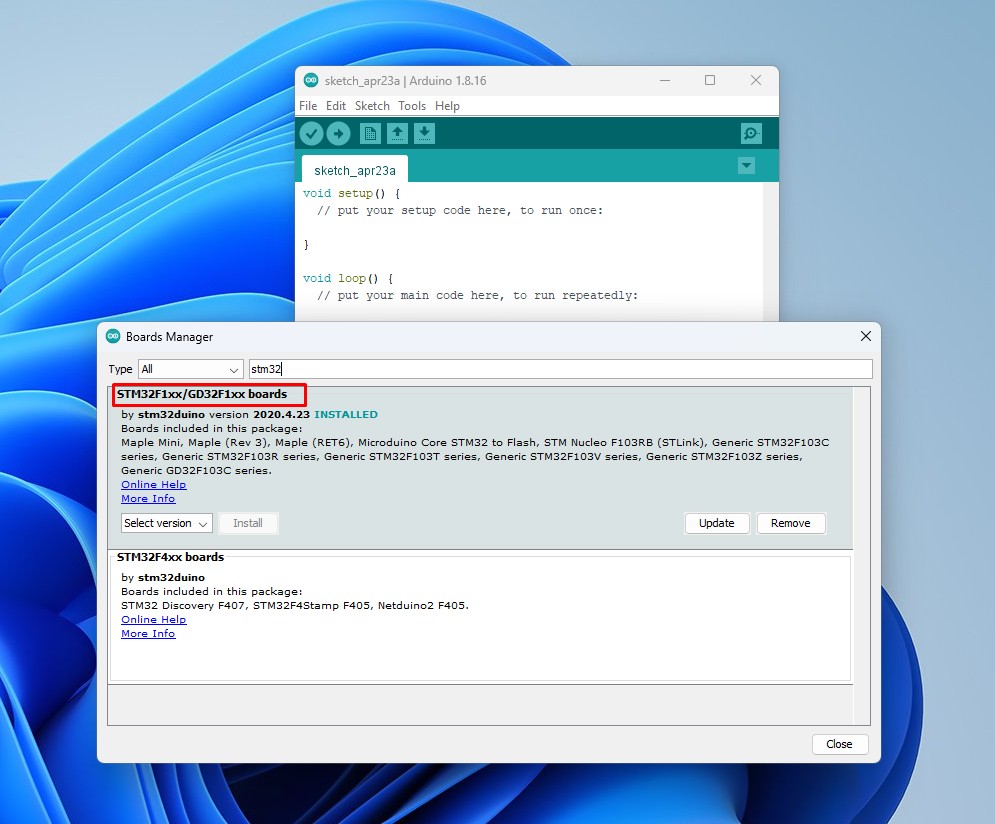
- Then, Open the board manager
Tools > Boards > Board Manager and type STM32 -> install
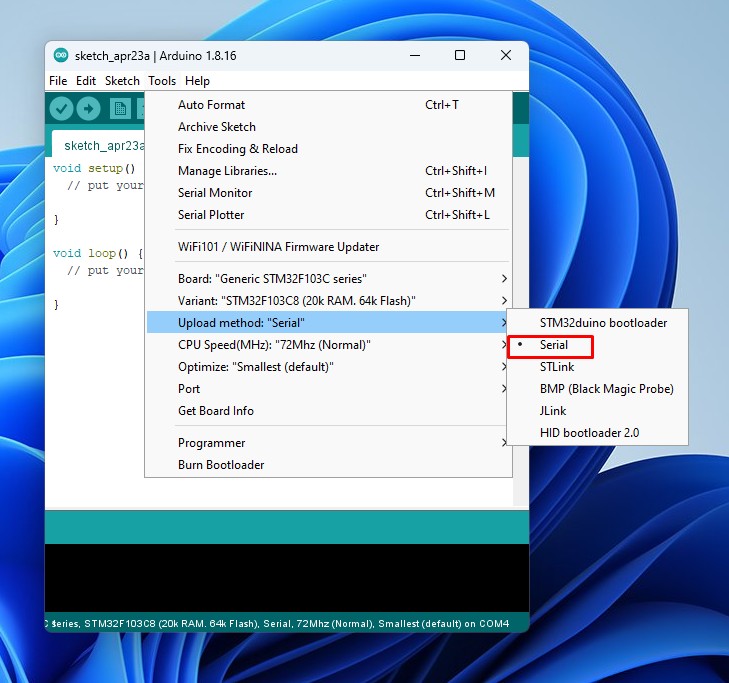
- Now we select "GenericSTM32 F103C series", and in the Upload method section, select Serial
- The simplest way to upload the code is to use a small USB to COM adapter and connect it as shown in the diagram.
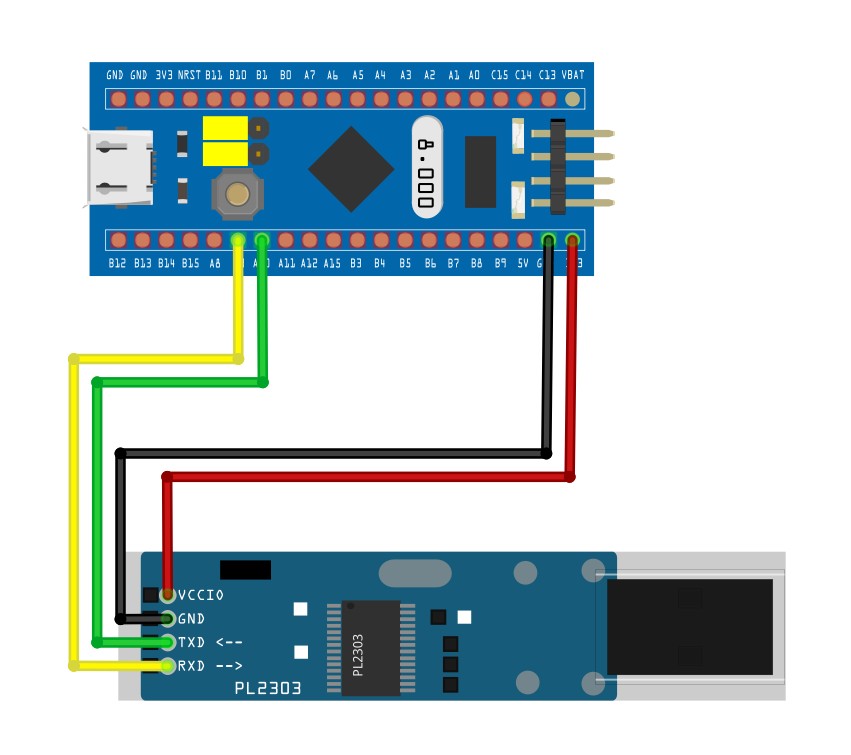
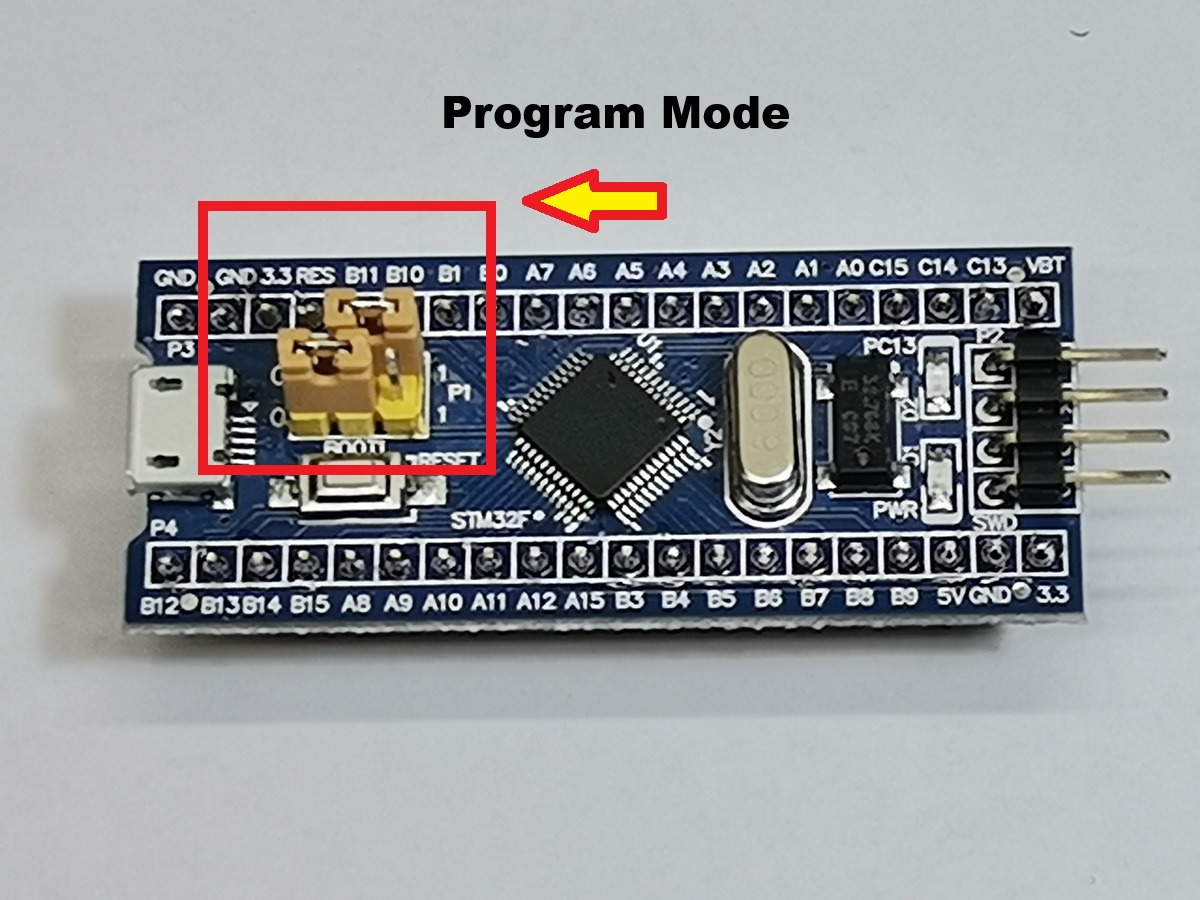
- First we need to set the jumper on the STM32 to "Program mode" as shown in the image.
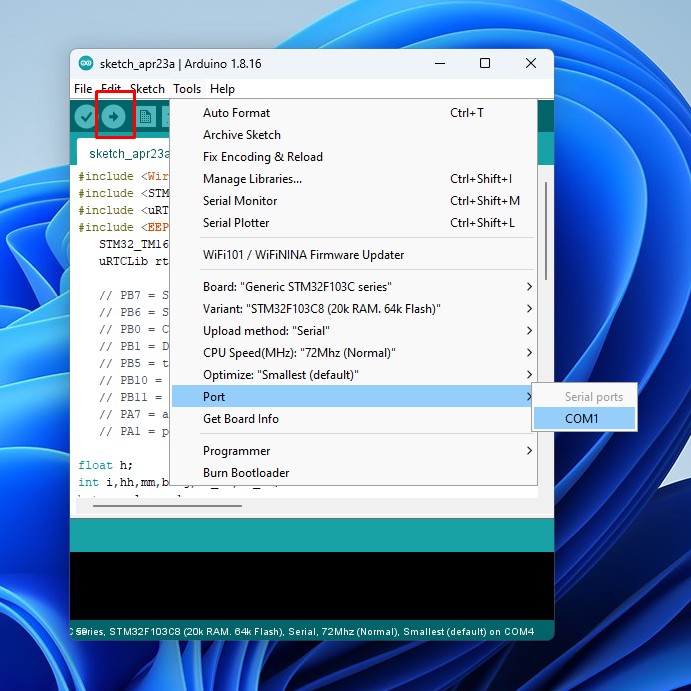
- Then, We select the COM port that corresponds to the USB to COM adapter and press upload.
When the upload is complete, we return the jumper to its original position, and remove the USB to COM adapter from the PC.
Now the code has been successfully uploaded and we can mount all the components.
In the style of a classic alarm clock, use a real-time clock module with a built-in battery to store the set time when not connected to power.
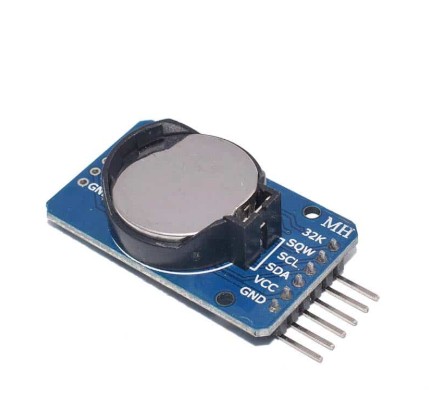
Thanks to the four buttons, setting is extremely simple. To adjust the time and alarm time, you need to press and hold the time set or alarm button and use the hours++ and minutes++ buttons to set the desired time. Тo set the seconds accurately, set the minutes 1 minute more; when changing the minutes, press the "Time adjustment" button to reset the seconds.
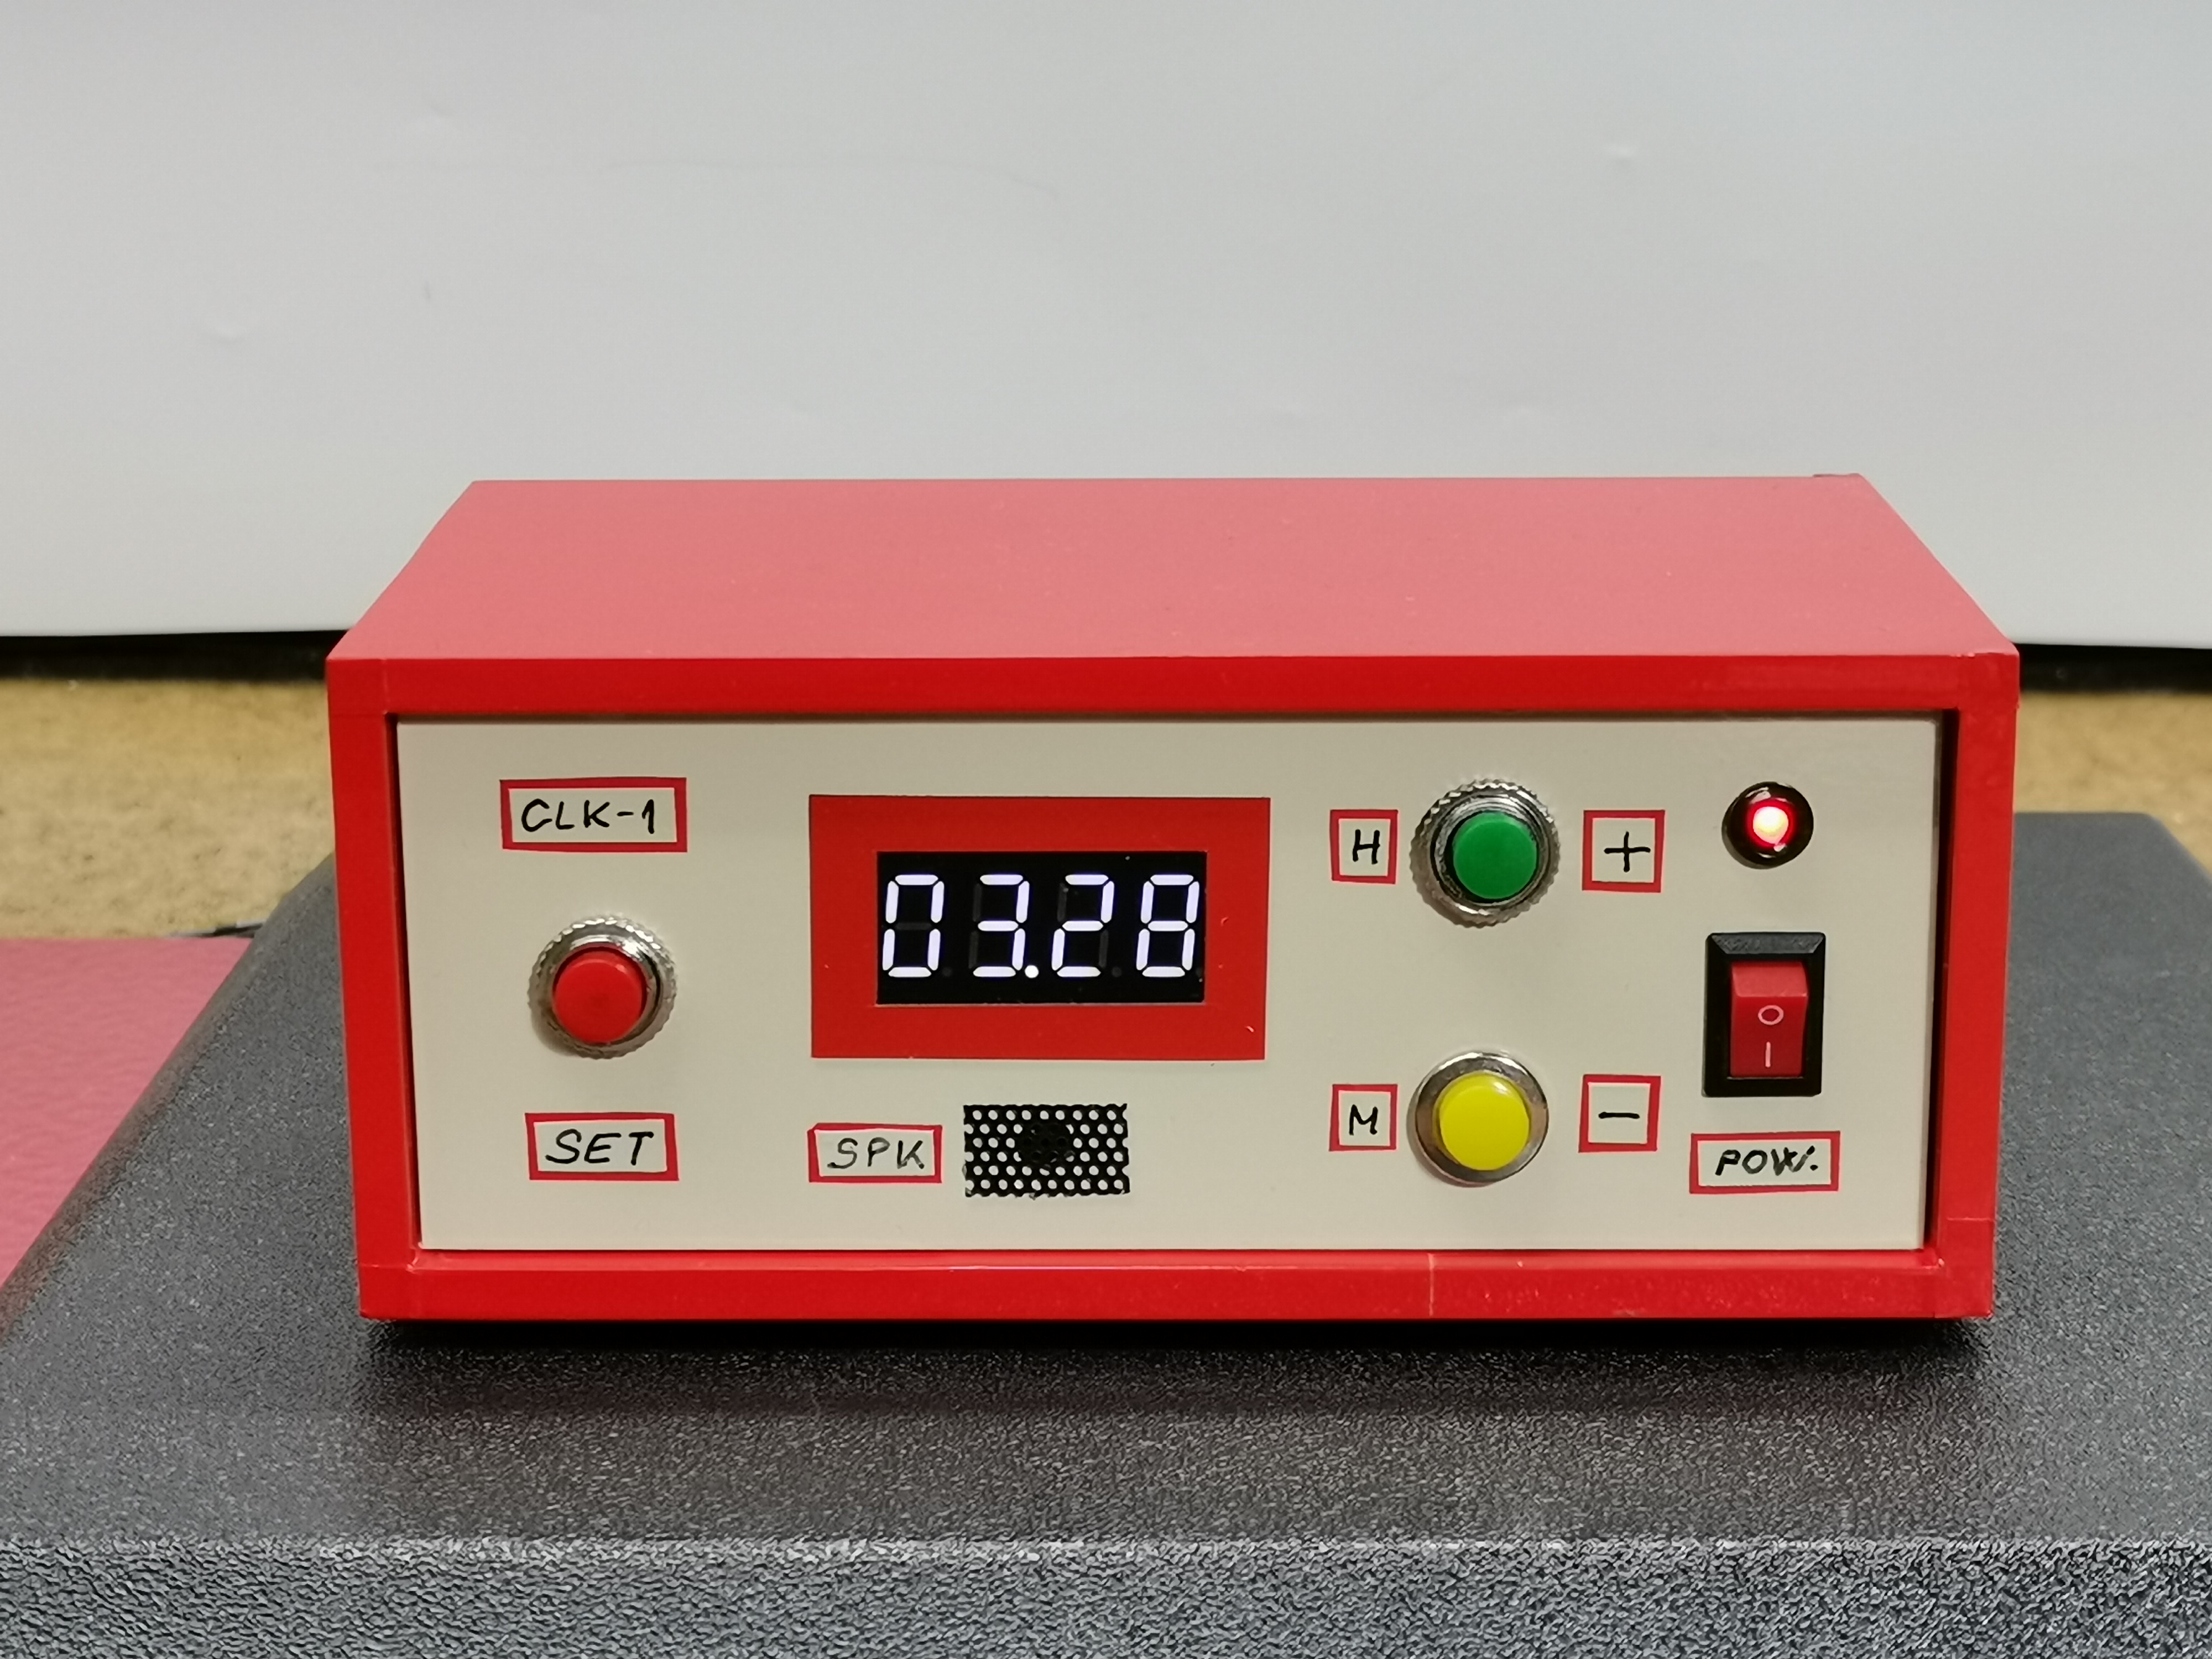
You can also adjust the display brightness by simply pressing the h+ and m+ buttons. The DS3231 real time clock contains a temperature sensor, and the temperature sensor readings are displayed on the display every 10 seconds.
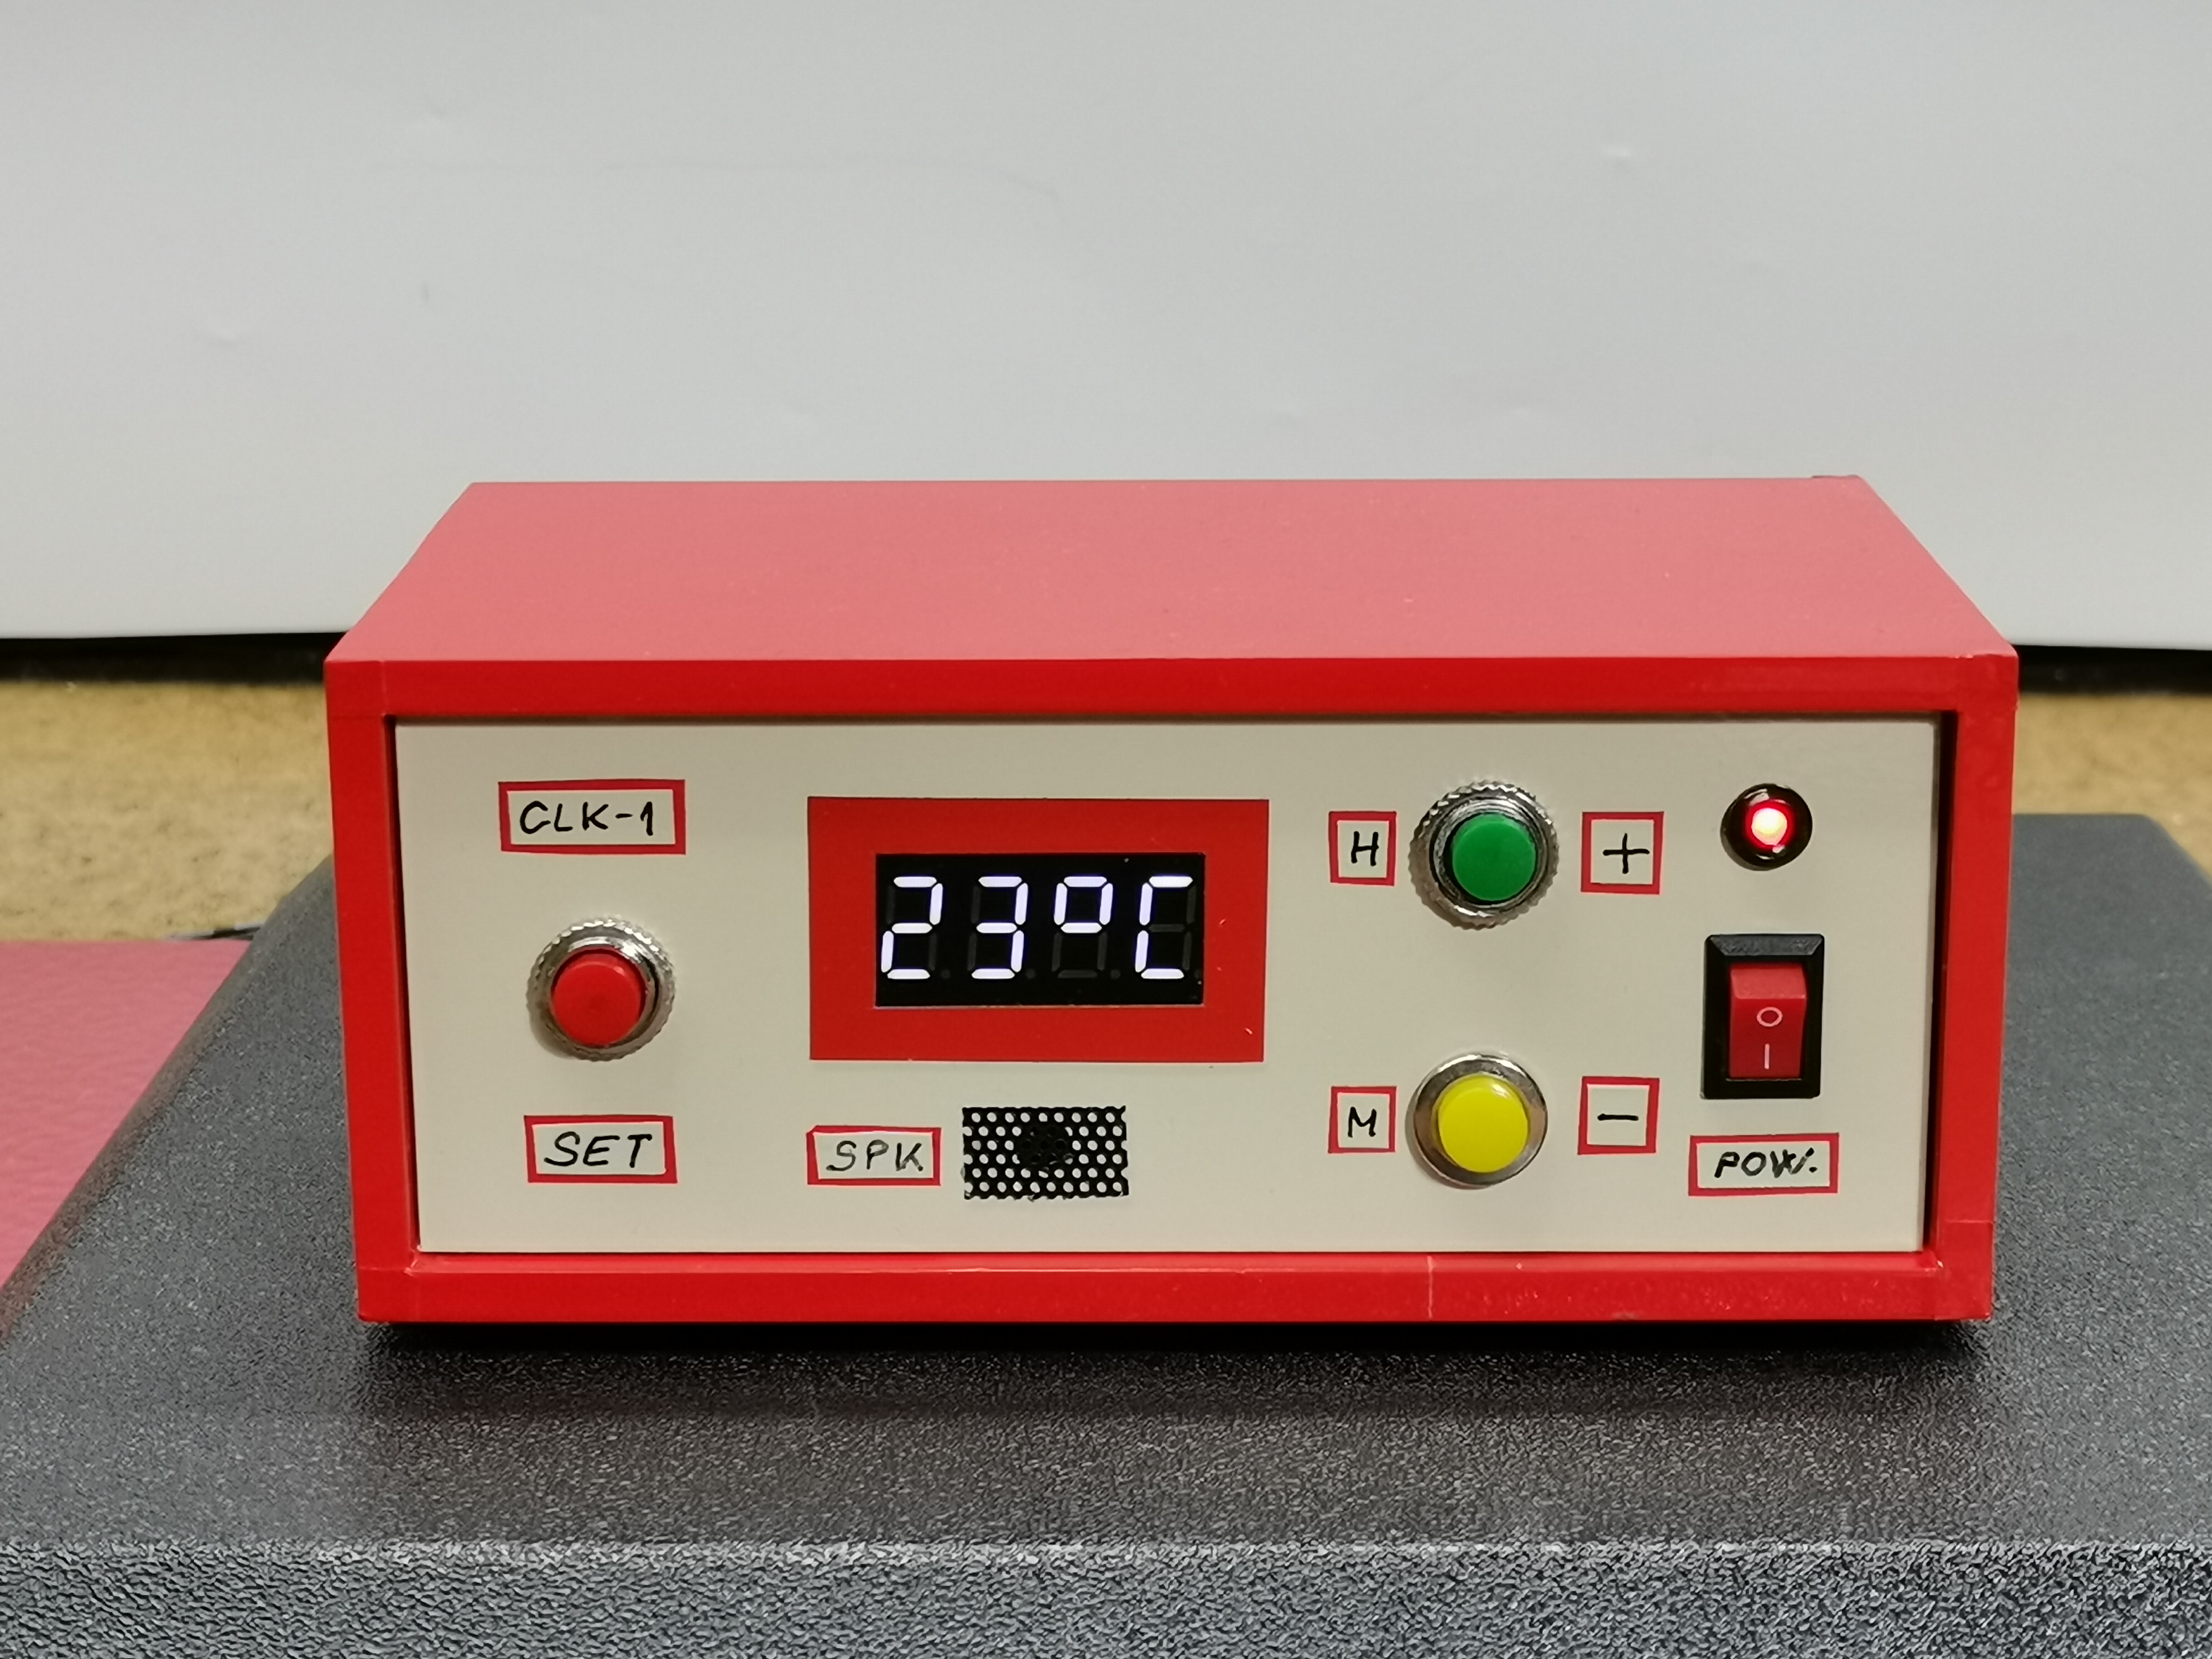
When the alarm is activated, a sound signal is emitted from the piezo emitter for one minute, and if we press any of the buttons in the meantime, the sound stops.
Finally, a short conclusion. With its simple design, low cost, and easy setup, this STM32 alarm clock is a perfect DIY project for beginners and electronics enthusiasts alike.


