Story
Project Overview — What is this project?
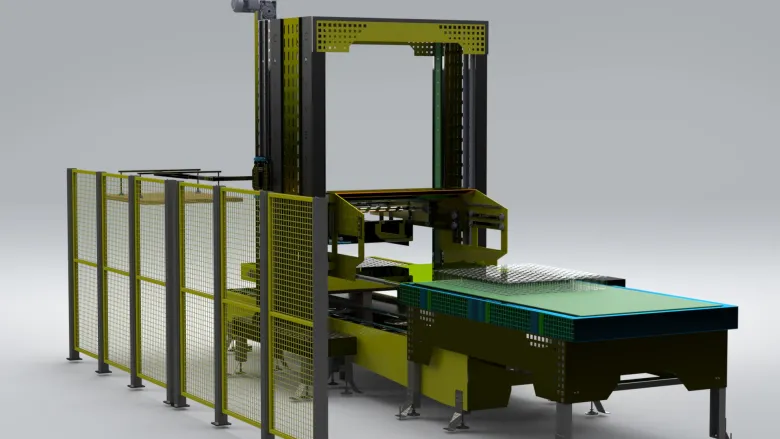
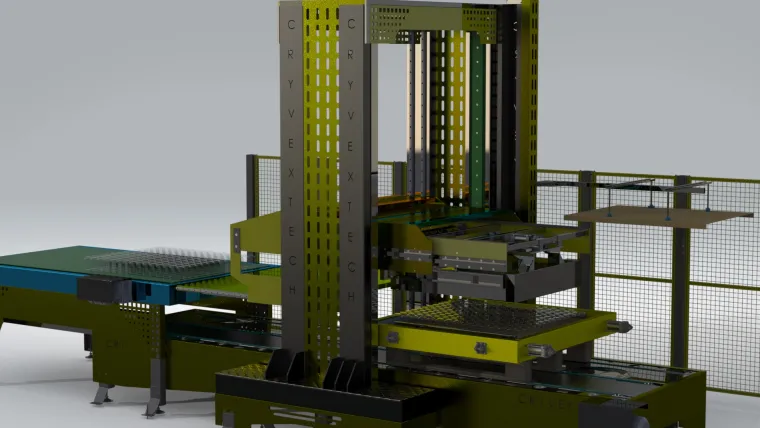
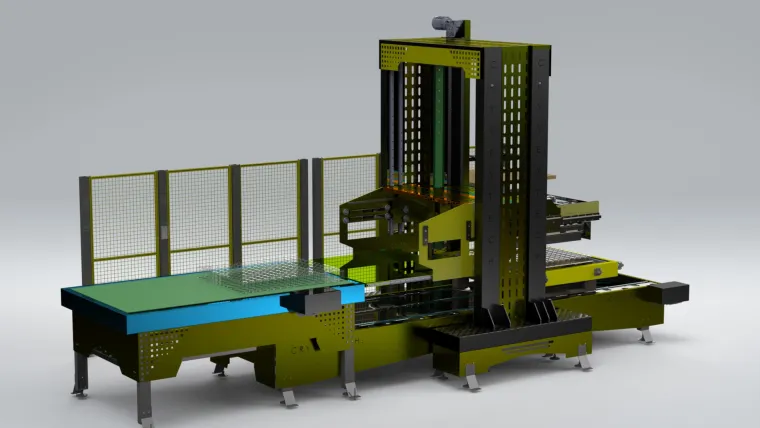
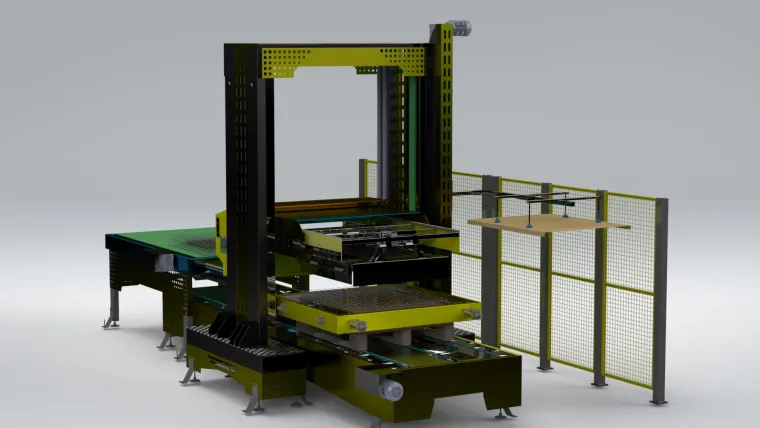
This project is an Automatic, Modular Depalletizer engineered to unload all types of jars and cans (glass, metal, plastic — varying diameters and heights) from industrial pallets. The machine combines a servo-driven gantry, mechanical grippers, an on-demand vacuum separator, and QR-based product recognition to automatically calibrate itself for each pallet type. It is designed for production lines that require fast, safe, low-downtime pallet unloading with easy maintenance and full Industry-4.0 integration.
Key specs (as implemented in this prototype):
-
Overall dimensions: 6500 × 2300 × 3300 mm (L×W×H)
-
Capacity range (by container type & configuration): 8–20 boxes/min
-
Typical pallet load: ~40–120 boxes/pallet (container size dependent)
-
Vacuum separator pump recommendation: 40–80 m³/h (used intermittently only for layer separation)
-
Modular multi-head options: 2–4 heads (quick-change adaptors for different container sizes)
-
Controls: PLC + HMI, Ethernet / OPC-UA connectivity, optional Android monitoring app
How it works — functional flow
-
Pallet arrives on the infeed conveyor and is stopped at the work station.
-
QR reader scans pallet tag → PLC reads product profile (container diameter/height, layer map, handling rules).
-
Height sensors (lidar/ultrasonic/photocell) measure pallet top; PLC computes Z-offset and pick positions.
-
Gantry moves gripper head(s) to target coordinates. Mechanical grippers perform the primary pick; vacuum engages only if a layer needs separation or delicate handling.
-
Picked boxes are placed on buffer conveyors for downstream processes.
-
System logs the operation; optional mobile app shows live status, pallet count, and alerts.
Step-by-step Build & Implementation Tutorial
This is a practical walkthrough — aim to include photos/videos at each major step.
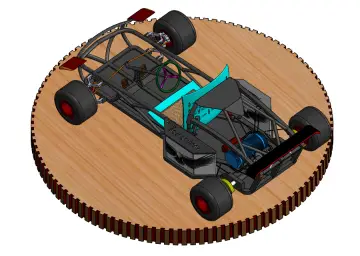
1. Mechanical Design
-
Create frame drawing (steel square tube frame sized to 6500×2300 mm footprint).
-
Design gantry rails and carriage; select hardened linear rails or profile rails for long life.
-
Design modular head plate to accept quick-change adaptors (pin + cam-lock system).
Deliverables: 3D CAD assembly (STEP), exploded parts list, BOM.
2. Gripper & Nozzle System
-
Implement mechanical grippers for general cases (two-jaw soft face).
-
Design silicone vacuum cups and quick-release nozzle adaptors for different diameters.
-
Implement a simple locking latch on each adaptor for tool-free replacement.
Tip: Make adaptors symmetrical and keyed — prevents wrong orientation.
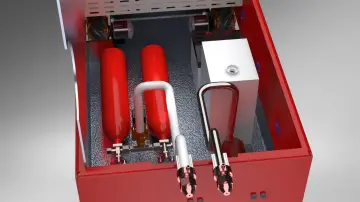
3. Vacuum Separator Module
-
Choose pump 40–80 m³/h with vacuum reservoir and solenoid valves.
-
Integrate a vacuum sensor and a small filter/regulator assembly.
-
Use vacuum only for layer separation; control via PLC IO to minimize wear.
4. Sensors & QR Integration
-
Mount a QR imager at pallet entry. Store a mapping table (QR → product profile) in PLC or a small local DB.
-
Add pallet top sensor (lidar or ultrasonic) and layer presence sensors at gantry positions.
Calibration routine: on first pallet, read QR → measure top height → compute pick Z for each layer → save to session.
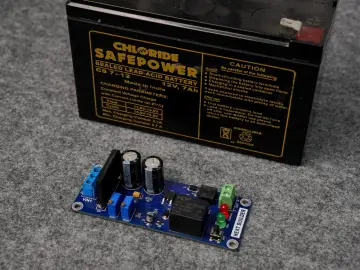
5. Electrical & Control
-
PLC (Siemens / Beckhoff recommended) + servo drives for X/Y/Z axes.
-
HMI screens: Manual/Auto/Service, live diagnostics, calibration wizard.
-
Implement OPC-UA / MQTT for remote telemetry and Android app feed.
6. Software & Logic
-
Create state machine: Idle → Scan → Measure → PickCycle → Place → Log.
-
Implement safety interlocks, light curtain inputs, and E-stop handling.
-
Build calibration routine that blends QR profile with sensor readback for ±2–5 mm accuracy.
7. Commissioning & Testing
-
Dry run with dummies; validate coordinates, gripper force, and vacuum timing.
-
Test across smallest → largest containers; measure cycle time and adjust motion profiles.
-
Run endurance test (8 hours) and log error rates.
Maintenance Plan (short & essential)
-
Daily: Visual check of frame, sensor lenses, conveyor jams; verify HMI alarms are clear.
-
Weekly: Inspect vacuum filters, quick-change adaptor locks, lubrication points on rails.
-
Monthly: Check belt tensions, encoder feedback consistency, safety circuit test.
-
Quarterly: Replace vacuum filter elements, check servo motor couplings, run firmware/PLC backup.
-
Spare parts: Keep extra vacuum cups, nozzle adaptors, a spare QR imager, and critical fuses/drives on hand.
Common Pitfalls & Troubleshooting
-
Poor QR readability: ensure clean labels, consistent placement and proper illumination.
-
Overuse of vacuum: using vacuum for primary pick increases wear; use mechanical grippers as default.
-
Sensor misalignment: causes misplaced picks — design robust mounts and perform daily sensor checks.
-
Too aggressive motion profiles: increase jerk/acceleration gradually to avoid jar breakage.
-
Improper nozzle selection: mismatched cup size causes slippage — use quick change adaptors and a small verification pick.
Community Value — why share this?
This design demonstrates a pragmatic combination of mechanical reliability, sensor-driven calibration, and low-maintenance automation tailored for small to medium-scale production. Sharing CAD, control logic templates, and a maintenance checklist helps other engineers avoid common integration issues and accelerates deployment on diverse product lines.
If you want, I can now:
-
Convert this into a 500+ word submission suitable for Elecrow’s contest,
-
Produce the short 500-character elevator pitch variation, or
-
Generate the file list & captions ready to attach with your GrabCAD upload. Which one do you want next?