
Story
Most MCU-based devices are silent — yet that silence hides a huge opportunity.
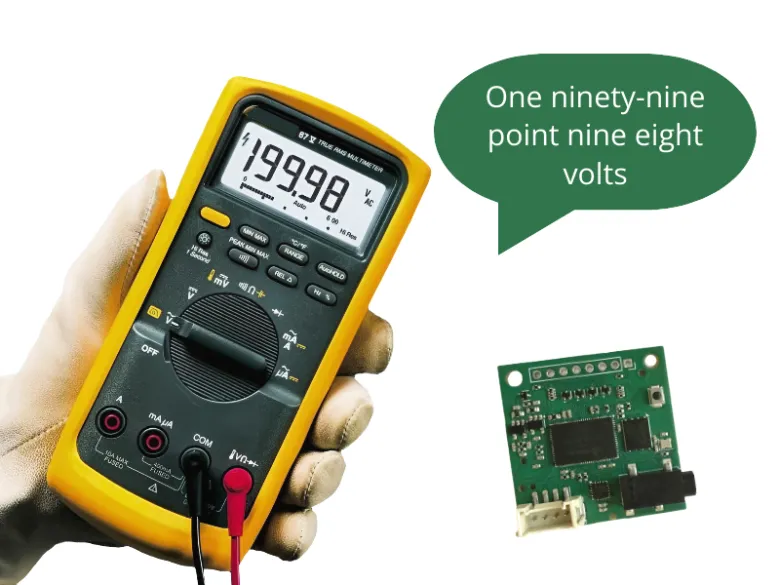
Picture this: you’re holding two probes on a busy board, adjusting a supply or watching how a circuit responds. Each time you take a measurement, you briefly look away at the LCD, then back to the test point. It’s a small interruption — but it happens constantly, and it breaks the flow of working with the circuit.
Now imagine the same workflow, but the multimeter simply tells you the value.
You measure… and you hear the value.
Your hands stay steady; your attention stays exactly where it needs to be.
This project shows how easily a microcontroller can gain a voice — and how spoken measurements make tools far more convenient and intuitive to use.
Here, you’ll build a complete solution that turns a digital multimeter into a talking instrument using an Arduino-class board and TinyTTS.
It’s both a practical tool and a template for adding voice to any measurement device.
What You’ll Build
A voice-enabled multimeter that:
- reads measurement packets from a standard digital multimeter,
- parses mode and value on an Arduino-compatible board,
- and speaks the results aloud through TinyTTS, fully offline.
It will automatically:
- announce voltage, current, resistance, capacitance, frequency, etc.,
- convert numbers into natural speech (“three point eight six volts”),
- warn on overload or disconnection,
- and start up with “System ready.”
All with just three components:
a multimeter, an Arduino-class board, and a TinyTTS module.
Hardware & Requirements
This build needs only three components:
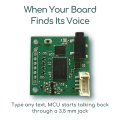
1. TinyTTS module
Generates all speech offline and handles voice output.
2. Arduino-class board (ATmega328P compatible)
UNO, Nano, or Lotus — any 328P-based board works.
3. Digital multimeter with UART packet output
Any model that sends 19-byte measurement frames.
Optional: small speaker or headphones, USB cable for flashing.
Connect the hardware
- Multimeter → Arduino (TX/RX)
- Arduino → TinyTTS (TX/RX)
- Plug Arduino into your PC

Quickstart
Two ways to get your multimeter talking — choose the one you prefer.
You only need to flash your Arduino — TinyTTS requires no firmware flashing and speaks any text sent to it out of the box.
Option A — Flash the prebuilt firmware (fastest)
1. Run VoiceMultimeter_Tool.exe
- Select your Arduino board
- Click Flash Now
2. Power the multimeter
You should hear “System ready.”
Start measuring — values will be spoken automatically.
Option B — Build and flash from source
1. Install Arduino IDE 1.8.x or later
2. Clone the repository
3. Open main/main.ino
4. Select board: Arduino UNO / Nano / Lotus
5. Select the correct COM port
6. Upload the sketch (Ctrl+U)
That’s all — TinyTTS will immediately begin announcing modes and measurement values.
System Overview
At its core, the system does one simple thing:
take measurement data from a multimeter → turn it into text → let TinyTTS speak it.

Here’s how the pieces work together:
1. Multimeter → Arduino
The multimeter sends 19-byte UART packets containing:
- measurement mode (DCV, ACmA, Ω, Hz, etc.)
- numeric value
- unit
- overload and status flags
2. Arduino parses and decides what to say
The firmware includes three small modules:
- SerialBridge — receives raw packets and tracks connection state
- MultimeterParser — extracts mode, value, unit, overload
- Main Logic — converts these into spoken phrases (“three point eight six volts”, “resistance”, “overload”, etc.)
Timing rules prevent spam:
- mode changes are spoken immediately
- measurement values are spoken at safe intervals
3. Arduino → TinyTTS
Arduino sends plain text over UART:
"three point eight six volts"
"resistance"
"overload"
4. TinyTTS → Audio
TinyTTS speaks the phrase instantly, offline — no cloud, no network.
Firmware Architecture
The firmware is intentionally modular so each part can be reused in other projects. Everything runs on a simple ATmega328P-based Arduino.
1. SerialBridge — reading multimeter data
The multimeter sends fixed-length 19-byte frames over UART.SerialBridge handles:
- receiving and buffering packets
- detecting connection, disconnection, and power-off
- exposing a clean “packet ready” interface to the rest of the firmware
This keeps hardware-specific details isolated.
2. MultimeterParser — decoding the packets
Each frame contains:
- measurement mode (e.g., DCV, ACmA, OHM, CAP)
- numeric display (with decimal point locations)
- unit (V, A, Ω, Hz…)
- overload flag
MultimeterParser converts the raw bytes into a structured Measurementobject used by the main logic.
3. Speaking logic — converting measurements into phrases
Two helper functions handle the language layer:
getModeVoiceText()Converts mode codes into phrases like“D C Voltage”, “Resistance”, “Frequency”
formatNumberForSpeech()Converts strings like "3.86" into“three point eight six”
Units are also mapped to spoken forms ("mA" → “m a”, "kΩ" → “k ohm”, etc.).
4. Output scheduling — when to speak
To avoid flooding the user with constant messages, the firmware uses simple rules:
- mode changes→ spoken immediately
- measurement values → spoken at fixed intervals
- overload→ spoken once per event
- connection/power events → “Connected”, “Disconnected”, “Power Off”
This creates a calm, predictable voice interaction.
5. TinyTTS integration
TinyTTS is controlled via a single UART:
g_hx_tts->say("three point eight six volts");No preprocessing, no phonemes, no model loading.TinyTTS simply speaks whatever text is sent, fully offline.
6. Configuration
All timing and behavior parameters are in Config.h, including:
VOICE_INTERVAL — how often values are spoken
MODE_CHANGE_DEBOUNCE — stabilize mode transitions
STATE_CHANGE_DEBOUNCE — avoid noisy connection flicker
Most users don’t need to change anything, but advanced makers can fine-tune the experience.
Adapting the Project to Your Own Devices
Although this build uses a digital multimeter as the data source, the architecture is completely general.Any device that can send measurement data over UART can become a voice-enabled instrument.
For makers
You can reuse the overall pattern in your own projects:a microcontroller reads a value → prepares a short text phrase → sends it to TinyTTS for immediate offline speech.
This makes it simple to add voice feedback to sensor nodes, handheld tools, test fixtures, or accessibility-focused builds.
For product developers / OEMs
The project doubles as a minimal reference design for adding voice to measurement equipment:
Sensor module → Microcontroller → TinyTTS → Audio
To turn any test or monitoring device into a talking version, you only need:
- one UART to send text
- a TinyTTS module for speech output
No cloud, no DSP stack, no model integration — the voice layer becomes a plug-in building block.
Resources & Next Steps
Project Repository
Source code, firmware, flashing tool, and documentation: https://github.com/Grovety/Voice_Multimeter
TinyTTS Hardware
Official kits and modules for offline speech generation: https://www.elecrow.com/grc-tinytts-kit.html
What to build next?
We’d love to see what you create based on this project — whether it’s another talking instrument, a lab tool with voice feedback, or something entirely unexpected. Share your builds and ideas in the comments.
And tell us: Which other tools or devices would benefit the most from having a voice?

")