

Story
🔧 How to Use Elecrow Pico W5 With Arduino IDE (Blink LED)
🧰 What You Need:
-
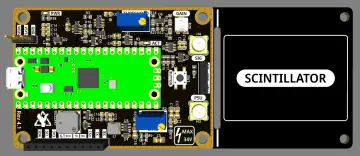
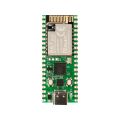
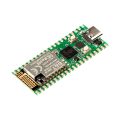
Elecrow Pico W5 (RP2040 version)
-
USB-C cable
-
Computer with Arduino IDE installed (get it from arduino.cc)
✅ Step 1: Connect the Pico W5
Plug the Pico W5 into your computer using a USB-C cable.
⚙️ Step 2: Add RP2040 Support to Arduino IDE
-
Open Arduino IDE
-
Go to:
File > Preferences -
Find the “Additional Board URLs” field
-
Paste this URL in:
https://github.com/earlephilhower/arduino-pico/releases/download/global/package_rp2040_index.json -
Click OK
🔌 Step 3: Install the Board Package
-
Go to:
Tools > Board > Boards Manager -
Search for: “Raspberry Pi Pico/RP2040”
-
Click Install (by Earle Philhower)
🧭 Step 4: Select the Board
-
Go to:
Tools > Board -
Select “Raspberry Pi Pico” (even though it’s a Pico W5, it works with the same setting)
💡 Step 5: Open and Upload Blink Example
-
Go to:
File > Examples > 01.Basics > Blink -
Click the Upload arrow (top left)
The onboard LED should start blinking once the code is uploaded.
💬 Final Notes:
-
The onboard LED is usually on GPIO 25
-
Works with both Arduino and MicroPython
-
For MicroPython, you can use Thonny or uPyCraft IDE