
Story
Introduction: The Quest for Quiet
### 1.1 The Problem
We’ve all been there — you find the perfect spot in the library, ready to dive into your studies, only to be disrupted by a loud conversation nearby. Libraries are sanctuaries of silence, but maintaining that perfect, quiet environment is a constant challenge. Staff can't be everywhere at once, and often, people don't realize they're being disruptive. This project was born from a simple idea: what if technology could provide a gentle, automated nudge to maintain a peaceful atmosphere?
### 1.2 The Solution
This project is a smart, non-intrusive noise monitoring system designed to:
* **Measure ambient noise** in real-time using a built-in microphone.
* **Provide immediate, visual feedback** to students and patrons using a color-coded LED ring.
* **Alert library staff** automatically via an MQTT message when noise levels exceed a defined threshold.
* **Report data to the cloud** for real-time monitoring and future analysis.
The system is built on the **M5Stack Core2 for AWS EduKit**, an all-in-one IoT development device. It monitors the room's decibel (dB) level and uses a simple "traffic light" system (Green, Orange, Red) to provide instant feedback. When noise becomes excessive, it sends an alert to a cloud-based MQTT broker, which can be viewed on a live web dashboard.
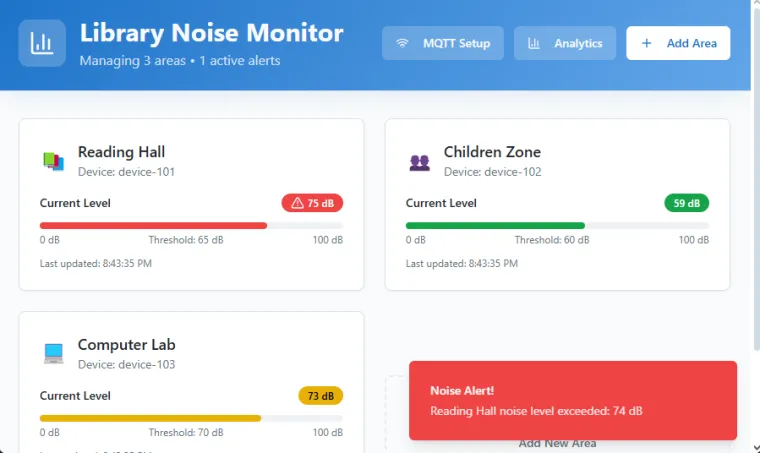
The live dashboard for this project can be viewed at: **[https://lib-room-manager.lovable.app](https://lib-room-manager.lovable.app)**
## 2. The Technology Stack
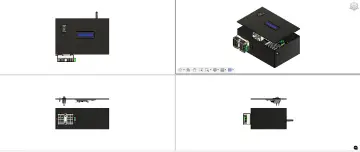
### 2.1 Hardware: M5Stack Core2 for AWS EduKit
The M5Stack Core2 for AWS EduKit was the perfect hardware choice for this project. It's a compact, powerful, and integrated device that includes everything needed out of the box:
* **Built-in I2S Microphone:** Eliminates the need for an external sensor to capture audio.
* **Touchscreen Display:** Used to show the current time, battery status, and real-time noise levels.
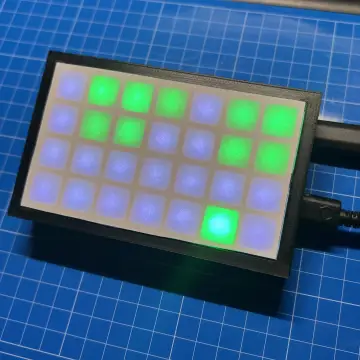
* **RGB LED Ring:** Provides instant, intuitive, and silent visual feedback on the room's noise level.
* **Rechargeable Battery:** Allows for portable, wire-free deployment in any part of the library.
* **Wi-Fi Connectivity:** Essential for connecting to the cloud and sending alerts.
This all-in-one platform simplified the development process significantly, allowing the focus to remain on the software and system logic rather than juggling separate components.
### 2.2 Software and Cloud Architecture
* **Programming Language:** C++ on the Arduino framework.
* **Key Libraries:** `M5Unified` (for hardware control), `PubSubClient` (for MQTT communication), `ArduinoJson` (for formatting MQTT messages), and `FastLED` (for controlling the LED ring).
* **Cloud Messaging:** **HiveMQ Cloud (Free Tier)** is used as the MQTT broker. It acts as a central post office for messages, receiving noise alerts from the device and delivering them to any subscribed client, like our web dashboard.
* **Frontend:** The dashboard was initially built using **lovable.dev** and then customized using **Visual Studio Code** to integrate a live MQTT feed via WebSockets.
## 3. The Pivot: From AWS IoT to HiveMQ
A significant decision during this project was the move from AWS IoT Core to HiveMQ's public cluster.
Initially, the project was built using the M5Stack's native AWS IoT integration. This provides a highly secure and robust connection, perfect for enterprise-grade applications where data privacy is critical. However, for this specific use case, I re-evaluated the necessity.
**The Rationale:**
* **Cost:** While AWS offers a free tier, costs can accumulate as you add more devices or exceed usage limits. For a personal or small-scale project, a completely free solution is more sustainable.
* **Data Sensitivity:** What information could be compromised? The data being sent is simply a noise level (e.g., "72 dB") and a timestamp. This is not personally identifiable or sensitive information. An outsider gaining access to this data would, at most, know that a specific area of the library was noisy at a certain time. This data is only truly meaningful to library staff.
* **Simplicity:** AWS IoT requires a more involved setup process involving certificates, policies, and multiple services (like SNS or Lambda for notifications). For a simple alert system, a public MQTT broker like HiveMQ offers a much more straightforward path. HiveMQ's support for WebSockets was a key advantage, as it allowed the web-based frontend to subscribe to the MQTT topic directly, without needing a middleman service or a complex backend.
This pivot demonstrates a key engineering principle: **choosing the right tool for the job.** While a private, secure connection is powerful, it was overkill for this application. HiveMQ provided a simpler, cost-free, and more direct architecture for achieving the project's goals.
### Analogy: The Postal Service
To understand the role of HiveMQ, think of it as a digital post office:
* **HiveMQ Broker:** The central post office.
* **Publisher (The M5Stack Device):** A person sending a letter (the noise alert).
* **Topic (`library/noise/area1/alerts`):** The specific mailbox address where the letter is sent.
* **Message (The JSON Payload):** The content of the letter itself.
* **Subscriber (The Web Dashboard):** The person waiting at that mailbox to receive the letter.
* **WebSockets:** This is like the post office offering an email delivery option (instant and digital) instead of just relying on physical trucks.
## 4. How It Works: The Step-by-Step Logic
The system operates on a continuous loop, classifying the ambient noise into one of three categories.
**1. Listening and Classifying Noise:**
The built-in microphone constantly samples the ambient sound. The Arduino code processes these samples to calculate the average sound intensity, which is then converted into a more human-readable decibel (dB) value. This value is then classified:
* **Quiet (< 35 dB):** The ideal study environment. The LED ring glows a calm **Green**.
* **Normal (35–60 dB):** A low level of ambient noise is present. The LED ring turns **Orange** as a gentle, visual reminder to keep voices down.
* **Loud (> 60 dB):** The noise has become disruptive. The LED ring immediately flashes **Red**, and a JSON-formatted alert is sent to the HiveMQ cloud broker.
**2. Providing Instant Feedback:**
The device gives immediate feedback in two ways:
* **The Touchscreen Display:** Shows the real-time dB level, the current time, and the battery status, providing clear information at a glance.
* **The LED Ring:** Acts as a silent "traffic light," guiding behavior without making a sound. The colors are intuitive and universally understood.
**3. Cloud Integration & Librarian Alerts:**
When the noise crosses the "Loud" threshold:
1. The device connects to Wi-Fi.
2. It establishes a secure connection to the HiveMQ broker using the predefined credentials.
3. It **publishes** a message to the `library/noise/area1/alerts` topic. The message is a JSON payload containing the noise level, the reason for the alert, the device ID, and a timestamp.
```json
{
"noise_level": 68,
"alert_reason": "Loud noise level detected",
"client_id": "library-device-area1",
"timestamp": 1662159600000
}
```
4. The live web dashboard, which is **subscribed** to the same topic, receives this message instantly and displays the alert. This allows staff to monitor the library's status from a central desk without needing to patrol.
## 5. How It Was Built: A Technical Walkthrough
Building this project involved several key stages:
1. **Setting up the Environment:**
* Installed the **Arduino IDE** and the necessary board support for the M5Stack Core2.
* Installed the required libraries: `M5Unified`, `PubSubClient`, `ArduinoJson`, and `FastLED`.
* Flashed a basic "hello world" sketch to confirm that the display, LEDs, and other core functions were working correctly.
2. **Capturing and Processing Noise:**
* The `M5.Mic.record()` function was used to capture audio samples from the built-in PDM microphone into a buffer.
* The code calculates the average amplitude of the samples and converts this into a decibel value using a logarithmic formula.
* A calibration offset (`MIC_CALIBRATION_DB_OFFSET`) was added and tuned through real-world testing to ensure the dB readings were accurate.
3. **Designing the User Interface:**
* **LEDs:** The `FastLED` library was used to program the RGB LED ring. Simple logic was written to set the color to green, orange, or red based on the `currentNoiseCategory`. A flashing red effect was added for "Loud" alerts to draw attention.
* **Display:** The `M5.Display` library was used to design a clear UI. The screen is divided to show the battery level, a large digital clock, the date, and the current dB reading with corresponding colors. The code is optimized to only redraw parts of the screen when their values change, which prevents flickering and improves performance.
4. **Connecting to HiveMQ:**
* The device's Wi-Fi was configured to connect to a local network.
* Time was synchronized using an NTP (Network Time Protocol) server to ensure accurate timestamps on alerts.
* The `PubSubClient` was configured with the HiveMQ broker address, port, and user credentials. The `netClient.setInsecure()` function is used because we are connecting to a public broker where certificate validation is handled differently than in a private AWS setup.
* A state machine (`handleMQTTTaskMachine`) was implemented to manage the connection process. When an alert is triggered, the machine moves through states: `MQTT_SHOW_STATUS` -> `MQTT_PENDING_CONNECTION` -> `MQTT_PENDING_SEND` -> `MQTT_PENDING_DISCONNECT`. This ensures a clean, reliable, and non-blocking process for sending alerts.
5. **Final Touches and Optimization:**
* A "grace period" on startup was added to prevent false alerts while the microphone initializes.
* The microphone buffer handling was optimized to prevent crashes or freezes.
* The thresholds for Quiet, Normal, and Loud were fine-tuned by testing the device in different environments to ensure they felt right.
## 6. The Human Side: A Gentle Nudge
The goal of this system was never to be punitive. It’s a tool for awareness.
* **For Students:** The visual feedback is subtle and non-confrontational. The LEDs and display quietly guide behavior, empowering students to self-regulate the noise level respectfully.
* **For Librarians:** The cloud alerts allow staff to be more efficient. They are freed from constant patrolling and can intervene only when an alert confirms it's necessary. This creates a more positive and less confrontational library experience for everyone.
## 7. Future Roadmap
This project serves as a strong foundation that can be expanded into a complete smart library management tool:
* **Data Analytics Dashboard:** Create a historical dashboard that shows noise trends over time, helping librarians identify peak noisy hours or problematic areas.
* **Noise Heatmaps:** Deploy multiple devices across the library and use the data to generate a heatmap showing which zones are the quietest or loudest.
* **Automated Policies:** Implement "quiet hours" where the noise thresholds are automatically lowered.
* **Multi-Device Network:** Expand the system with more devices, each with a unique client ID, all reporting to a central dashboard.
## 8. Conclusion
The Library Noise Monitor is a testament to how modern IoT technology can solve small but meaningful everyday problems. By leveraging the integrated capabilities of the **M5Stack Core2 for AWS EduKit** and the simplicity of the **HiveMQ** cloud, this project delivers a practical solution that enhances the library environment for everyone. It's more than just a noise meter; it's a connected system that fosters a more respectful and productive space for learning.