Back to School with STEM-Limited-Time Event(Aug 6-Sep 5)

user-img

ESPBoards

+ Follow

DIY Automated 360° Product Photography Turntable

A WiFi-controlled 360° photo turntable powered by ESP32 and ESPHome, fully integrated with Home Assistant. Features speed control, start/stop, and a “return to home” function for hands-free, repeatable product photography.

DIY Automated 360° Product Photography Turntable
 
  • thumbnail-img
  • thumbnail-img
  • thumbnail-img
  • thumbnail-img
  • thumbnail-img
 

Hardware Components

  • ESP32 C3 Super Mini

    Aokin
    X 1 fenxiang
  • 28BYJ-48 Stepper Motor with ULN2003 Driver Board

    X 1
  • 5.5 x 2.1 mm barrel jack socket

    X 1
  • Push Button

    Elecrow
    X 1 fenxiang
  • 5V 2.5A Switching Power Supply

    Digilent
    X 1 fenxiang
  • FF and MF DuPont Wires

    Unknown
    X 1 fenxiang

Tools, APP Software Used etc.

  • 3D Printer

  • Hot glue gun

Story

Introduction
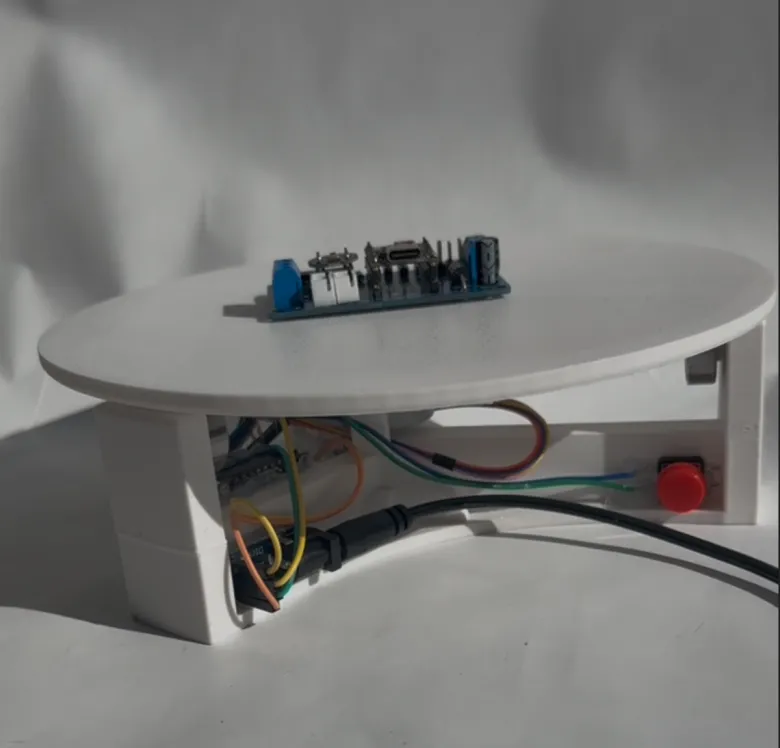
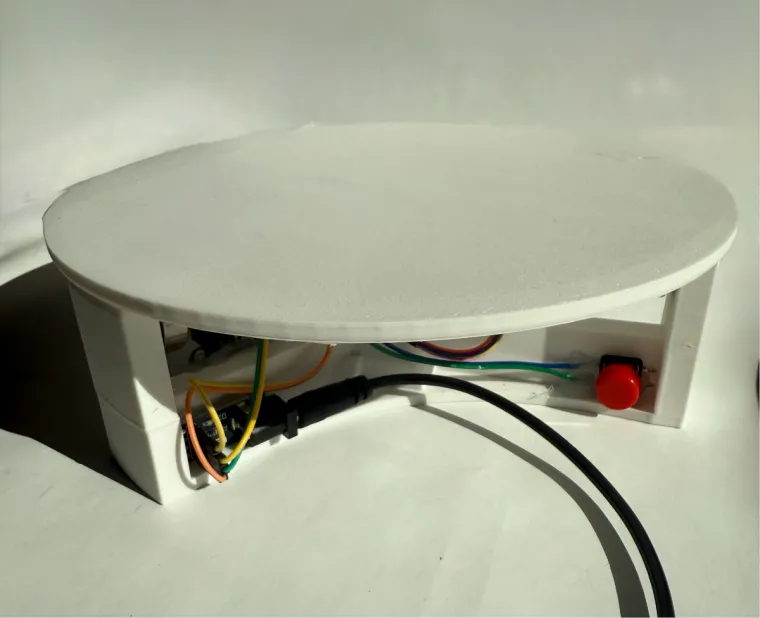
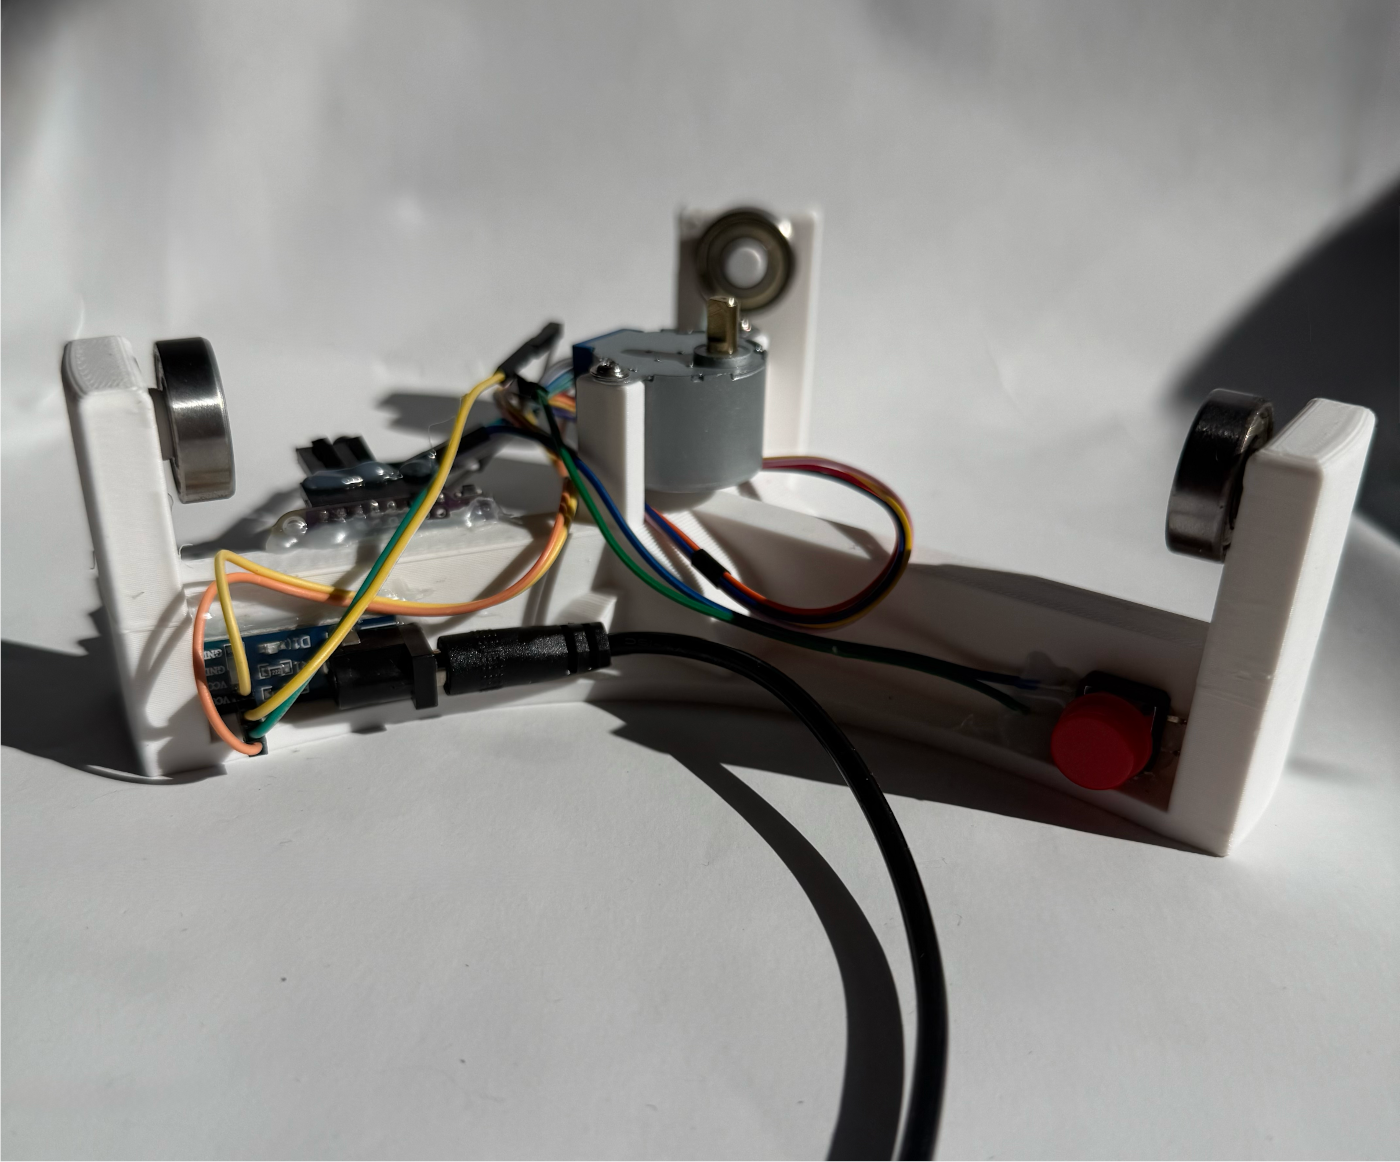
This project upgrades a simple motorized turntable into a smart, automation-friendly photography tool.
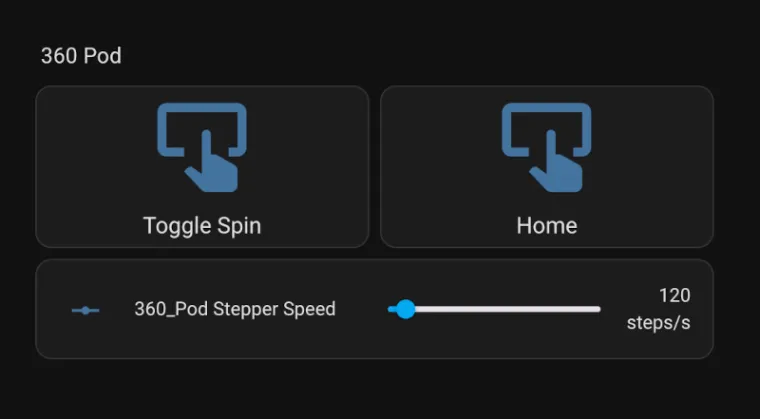
Powered by an ESP32 running ESPHome, it connects to Home Assistant over WiFi for start/stop control, speed adjustment, and a “return to home” function. A local push button provides quick manual operation, making it ideal for 360° product shots, electronics demos, and timelapse work.

Full build log and resources are available here: https://www.espboards.dev/blog/smart-360-photo-turntable-esphome-home-assistant/

Build Steps

1. 3D Print the Base & Top
Download the original minimalist turntable model from Printables and print it in PLA or PETG. Add small mounting points for the ESP32 and push button if desired.

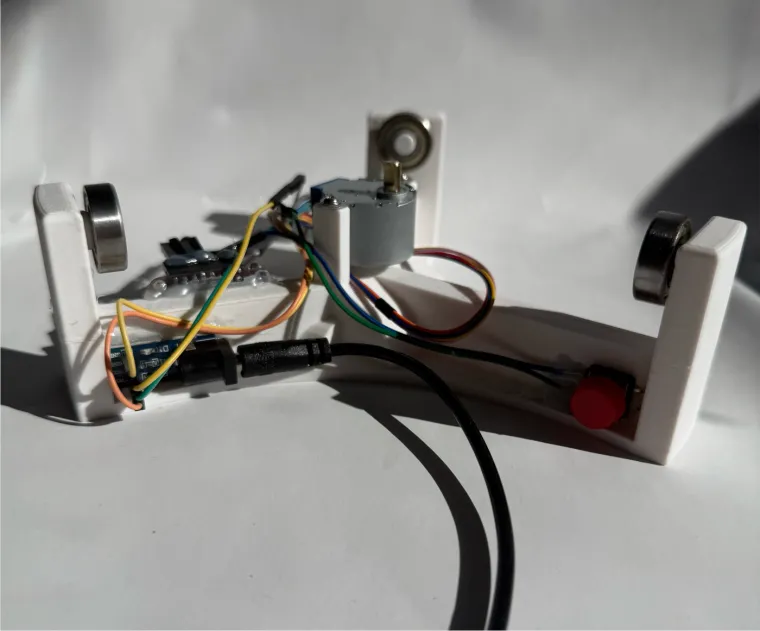
2. Gather Electronics

  • ESP32 Development Board

  • 28BYJ-48 Stepper Motor + ULN2003 Driver Board

  • Momentary Push Button (12×12×7.3 mm)

  • 5.5×2.1 mm DC barrel jack socket

  • 5V regulated power supply (1 A or more)

  • DuPont jumper wires

  • Hot glue gun

3. Wire the Components
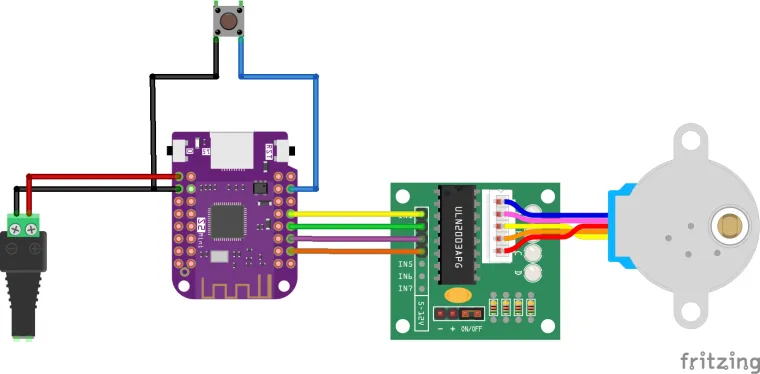
Connect ESP32 GPIOs to ULN2003 IN1–IN4, wire the push button to a GPIO with GND, and share ground between ESP32 and the motor driver. Power via the DC jack.

4. Flash ESPHome
Use ESPHome to load the YAML configuration that controls the stepper motor, reads the button input, and exposes controls to Home Assistant. Update WiFi credentials, API key, OTA password, and GPIO pins as needed.

5. Assemble the Turntable
Mount the motor and bearing in the printed base, place the electronics inside, secure with hot glue, and attach the turntable top. Ensure wires are routed clear of moving parts.

6. Test & Use

  • Short press the button to start/stop a full spin.

  • Long press to return to the home position.

  • In Home Assistant, use the on-screen buttons and slider to control motion and speed.

Closing Thoughts
This quick upgrade transformed a basic turntable into a versatile, hands-free photography tool. The combination of ESP32, ESPHome, and Home Assistant gives you precise control, easy automation, and a clean workflow for capturing smooth, consistent 360° shots.

Full build log and resources are available here: https://www.espboards.dev/blog/smart-360-photo-turntable-esphome-home-assistant/


Code
Schematic and Layout
  • Fritzing Diagram

    360-turntable-fritzing_163430360368966e8133c9c.png
    Download(0)

DIY Automated 360° Product Photography Turntable

A WiFi-controlled 360° photo turntable powered by ESP32 and ESPHome, fully integrated with Home Assistant. Features speed control, start/stop, and a “return to home” function for hands-free, repeatable product photography.

26
 
3
0
0

Share your project on social media to expand its influence! Get more people to support it.

  • Comments( 0 )
  • Like( 3 )
/1000
Upload a photo:
You can only upload 1 files in total. Each file cannot exceed 2MB. Supports JPG, JPEG, GIF, PNG, BMP

You May Also Like

View All
Add to cart
Board Type : GerberFile :
Layer : Dimensions :
PCB Qty :
Different PCB Design
PCB Thickness : PCB Color :
Surface Finish : Castellated Hole :
Copper Weight : 1 oz Production Time :
Total: US $
As a sharing platform, our community will not bear responsibility for any issues with this design and parameters.

PCB Assembly

PCBA Qty: BomFile:
NO. OF UNIQUE PARTS: NO. of Components:
Country: Shipping Way:
Assembly Cost: US $
As a sharing platform, our community will not bear responsibility for any issues with this design and parameters.
Add to cart
3dPrintingFile : Size :
Unit : Volumn :
3D Printing Qty : Material :
Total: US $12.99
As a sharing platform, our community will not bear responsibility for any issues with this design and parameters.
Add to cart
Acrylic Type : AcrylicFile :
Dimensions: Engrave:
Acrylic Qty :
Acrylic Thickness:
Acrylic Color:
Total: US $12.99
As a sharing platform, our community will not bear responsibility for any issues with this design and parameters.
Add to cart
CNC Milling File : Size:
Unit: Volumn:
CNC Milling Qty : Material:
Type of Aluminum: Surface Finish:
Tolerance:
Surface Roughness:
Total: US $12.99
As a sharing platform, our community will not bear responsibility for any issues with this design and parameters.
Add to cart
Item Price Qty Subtotal Delete
Total: US $0.00
Certified Product | Supported Purchase: Full After-sales Protection