











Story
Parts(Stage 1)
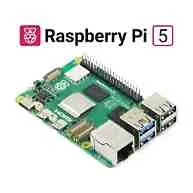
1. You need to obtain the Raspberry Pi 5. Prices start from £43.20 on the Pi hut.
2.you need to have an official Active cooler and Raspberry pi 5 power supply, to prevent the Pi from experiencing thermal throttling and underpower.
3. you need an NVMe or Suitable Micro SD. With thermal throttling temperatures of 80 degrees Celcius, that will wear down a Micro SD. I used an official Pi Micro SD.
OS flashing(Stage 2)
4. You either need another computer, or if you do not have one, your new Raspberry Pi 5.
5. You need to install Raspberry Pi Imager Note: remove all personal data from your stroage as it will be removed from the Storage while writing. This will let your Raspberry Pi 5 boot off your storage device. Once installed, You have the flashing tool. Get a spare adapter for your booting device, this will need to be flashed. Attatch you storage device via your dongle, and open Imager. Select your target storage device, and customize it to your liking. Then click write, I understand. Wait until it is finished, and then done!
If you are using just your Raspberry Pi, it has to be a 4 or above(a 5 will be fine, or even a 400, 500 or 500+). To flash with just the Pi, you must insert a blank storage device and hold space while it starts. then, click n to start network install. This should isnatll Raspberry Pi Imager onto your RAM. Select your Operating system and customise it, and then it will write, verify and then your Pi should reboot. The Imager is wiped from the RAM as it reboots, letting the RAM be reused
Customize(Stage 3)
6. After flashing, plug out your storage and put it back in. If you are using windows, it should boot as 'bootfs' as in my case. open bootfs, and locate config.txt, in older OS, it is /boot(fs)/config.txt in newer: /boot(fs)/firmware/config.txt. Open it.
7. In config.txt, scroll down to the bottom and put arm_freq=2600. this will set it to 2.6GHz.
8.Eject your storage and put it in your Pi, ready to boot.
Test and edit(Stage 4)
9. Power your Pi, and If it boots successfully, you have passed part one. Open a terminal window and type sudo apt install stress-ng. Then do in another window watch vcgencmd get_throttled & vcgencmd measure_temp & vcgencmd measure_clock. this will measure your statistics of your overclock. Run stress-ng --cpu 4 --timeout 5m There are 3 main scenarios:
1: During and after the stress test vcgencmd get_throttled returns 0x0 and vcgencmd measure_clock reports 2600. This means the overclock is successful
2. vcgencmd get_throttled returns 0x1: This means the power supply cannot provide a full 5V 5A. Do NOT use this power supply for overclocking. It is not stable.
3. vcgencmd measure_temp skyrockets to 80 Degrees Celcius: turn off your pi via the power button immediately. Go back to the last stable clock speed and that is the maximum overclock at stock voltage.
If the outcome is scenario 1, you can repeat stage 3 onwards by increasing arm_freq by 100 (0.1GHz)
What about over_voltage_delta in config.txt(Optional)?
This is only reccomended for dedicated overclockers and a maximum of 75000 over voltage is reccomended for daily use.
after the arm_freq:
over_voltage_delta (Your value)
That is the guide on how to overclock your Pi 5. Enjoy!