


Story
Final walking video of the dog
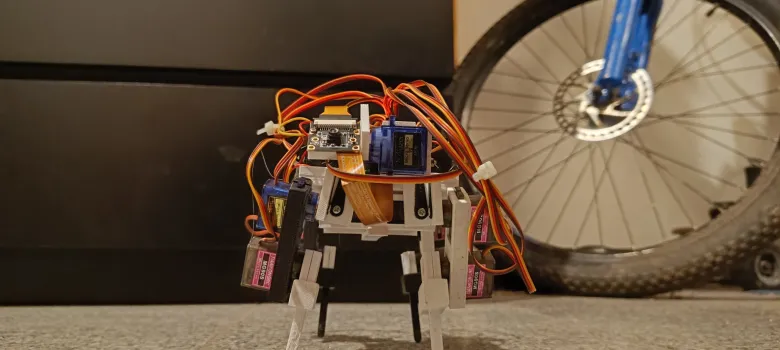
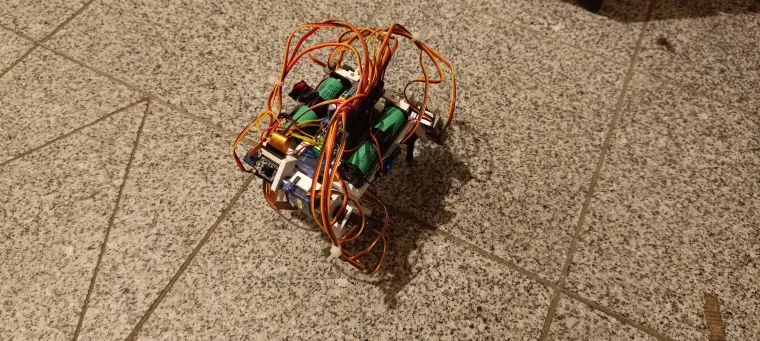
RoboDog is a low-budget 3D-printed robot dog with 14 degrees of freedom, controlled by a Raspberry Pi Zero 2 W and built entirely from off-the-shelf parts (no custom PCBs, no fancy hardware). It can walk in any direction, trot, and move a 2-axis camera head.
What is the project about?
I wanted to see how far I can go with a “cheap but not completely useless” robot dog:
-
Fully 3D-printed frame
-
12 DOF in the legs (3 per leg)
-
2 DOF camera head
-
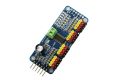
Raspberry Pi Zero 2 W as the brain
-
PCA9685 as the servo driver
-
Simple Python code, no heavy frameworks
-
Target parts cost around 100 euro (not counting tools and all the broken experiments)
It’s meant as a hackable platform: you can rebuild it, change the gait, rewrite the controller, add your own vision / autonomy on top.
Project story, logs and many more details:
Hackaday project page: https://hackaday.io/project/204567-robodog
Code + CAD files:
GitHub repo with code and 3D files: [LINK TO GITHUB]
I give full consent to Elecrow to use text and images from my Hackaday project page and GitHub repo for presenting this project, as long as my name and project are mentioned as the source.
How does it work?
Hardware (short)
-
Controller: Raspberry Pi Zero 2 W
-
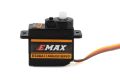
Servos:
-
Legs – mostly MG90S-class metal gear hobby servos
-
Head – 9 g servos
-
-
Servo driver: PCA9685 (16-channel)
-
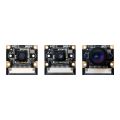
Camera: Freenove 120° 8 MP camera
-
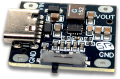
Power:
-
2× 18650 cells
-
Each cell → its own step-up converter
-
One converter powers the Pi, the other powers the servos (via PCA9685 V+)
-
Grounds are shared between Pi and PCA
-
All mechanical parts were modeled in FreeCAD and printed on an Anycubic Kobra 3. Servos are used as structural elements to hold most of the parts together.
Software (short)
-
Python runs on the Pi and talks to the PCA9685 to control servo angles.
-
Each leg gets a target trajectory (about 200 points) in normalized coordinates.
-
Movement speed is controlled by scaling this trajectory.
-
A gait controller runs in a loop, updating leg targets and sending servo angles.
-
A trotting gait (diagonal legs lifting together) gives decent stability without full center-of-mass planning.
-
A simple web frontend (built with help from ChatGPT) shows the video stream and has on-screen joysticks to control walking and head movement.
How to run it (very short)
-
Start the main controller on the Pi, for example:
python3 main.py -
Open the web interface in a browser at:
http://PI_IP_ADDRESS:8000 -
Use the on-screen joysticks or keyboard to:
-
Move forward / backward / sideways
-
Rotate in place
-
Move the camera head
-
-
Adjust speeds in
settings.json(collinear_max_speed,perp_max_speed,rotation_max_speed) if it’s too slow or too chaotic.
Why is it useful?
-
It shows how to build a walking quadruped without custom PCBs or expensive robotics hardware.
-
It exposes a lot of real-world problems people hit in cheap robotics: bad power design, brownouts, shaky servos, mechanical redesigns, calibration and offsets.
-
It provides a complete pipeline: CAD → 3D printing → wiring → servo zeroing and offsets → basic inverse kinematics → gait → remote control UI.
-
Others can reuse the design as a starting point, or as a “what to avoid” list, and get to their own working quadruped much faster.
For full step-by-step logs, problems, fixes and more images/videos, please check the “Project Logs” section on the Hackaday page(https://hackaday.io/project/204567-robodog).