Story
This project presents a 3D printable camera case assembly with simple press-fit mechanism, designed to provide a robust and practical enclosure solution for a wide range of camera-based applications, including IoT devices and drones. The design prioritizes ease of use, durability, and functional performance, making it an ideal choice for hobbyists, developers, and makers seeking a reliable housing for their camera modules. The entire assembly, comprising a base and a top lid, is optimized for additive manufacturing using common materials like ABS plastic and PLA, ensuring accessibility, low-cost replication, and a high-quality finish.
Key Features and Functional Design
The camera case assembly is composed of two primary 3D printed components:
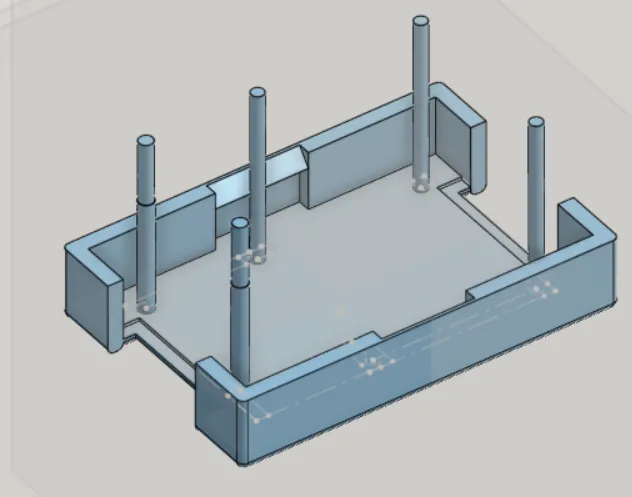
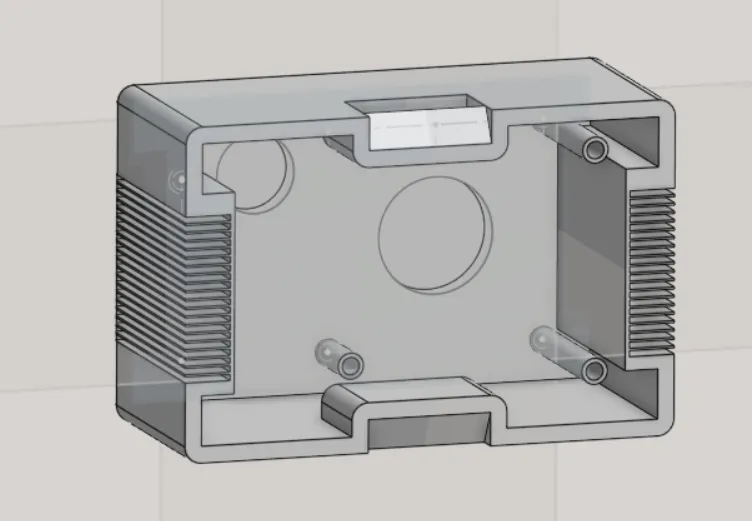
- Base Section (Bottom Part): This foundational piece is designed to securely house the camera module(s). It features precisely engineered slots and mounts that hold the hardware firmly in place, preventing any movement or misalignment. Integrated guiding posts ensure that the camera module is correctly oriented and aligned with the lens cutouts in the top lid. The internal architecture provides a stable platform for the electronics, protecting them from physical shock and environmental factors. It is designed with a press-fit mechanism for eliminating need of fasteners.
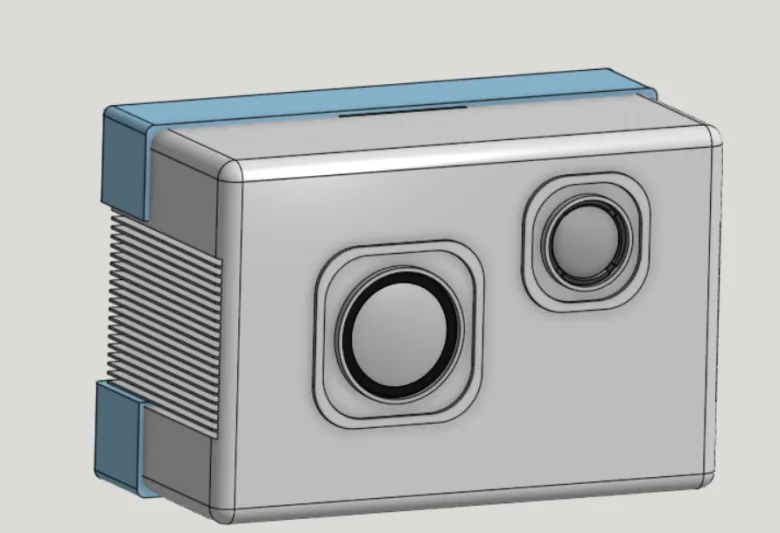
- Top Lid (Cover): The top lid provides the final layer of protection and structural integrity. It is designed with smooth, ergonomic curves for an elegant look and feel. The lid's primary function is to secure the camera module within the base and to provide precisely located cutouts for the camera lenses. Its press-fit/snap-fit design allows for a quick and secure attachment to the base, creating a single, cohesive unit. This mechanism is engineered to provide a tight fit without being overly difficult to assemble or disassemble.
- Passive Cooling System: A unique and highly functional aspect of this design is the incorporation of passive cooling fins on the side of the case. These fins are strategically positioned to enhance heat dissipation from the sensitive camera electronics. For applications like drone-based video capture or continuous operation of IoT devices in outdoor or enclosed conditions, effective cooling is paramount to prevent overheating and maintain optimal performance. This integrated thermal management solution ensures the longevity and reliability of the electronic components, particularly in high-demand scenarios.
Step-by-Step Fabrication and Assembly Guide
The process of creating and using this camera case is straightforward and accessible to anyone with access to a 3D printer.
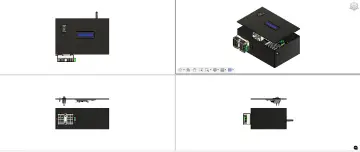
- CAD Design: The foundational design work was performed using OnShape. The design files are provided in the STEP format, a universally compatible file type that allows for easy modification. This open-source approach empowers users to adapt the design to fit different camera modules or specific project requirements. Feel free to edit the parts to suit sensors of your own requirement or contact me for more information.
- 3D Printing: The recommended material for printing is either ABS or PLA plastic. This material was selected for its exceptional durability, impact resistance, and ability to withstand higher temperatures. It also provides a smooth and professional-looking finish. For optimal results, the following print settings are advised: a layer height of 0.2 mm for a balance of detail and speed, an infill of 25–30% to provide sufficient strength without adding unnecessary weight, and supports as required for any overhangs. The recommended print orientation is to place the base flat on the print bed.
- Assembly: The assembly process is intuitive and requires no tools. First, the camera module is inserted into the dedicated slots within the bottom part. The lens should be aligned with the corresponding cutouts. The top lid is then placed over the base and gently pressed down until the snap-fit mechanism engages, locking the two parts together. The fit is designed to be secure yet non-destructive, allowing for future disassembly if needed.
- Testing and Usage: Once assembled, the case can be mounted onto the target platform, whether it be a drone, a robot, or a stationary IoT setup. The camera module is then connected to a processing board, such as a Raspberry Pi, Jetson Nano, or ESP32. It is recommended to test for proper image alignment and to monitor the cooling efficiency during extended periods of operation to ensure everything is functioning as expected.