

Story
 Functional Video Demo: https://drive.google.com/file/d/1Ec3URWUdRoUvOFnC5bsJK41PvlxURxcX/view?usp=sharing
(Make sure to increase the video quality on Drive)
Full Video: https://youtu.be/B1ApHMpz72Y
About the Project
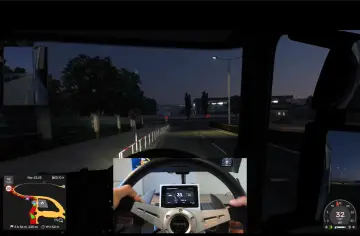
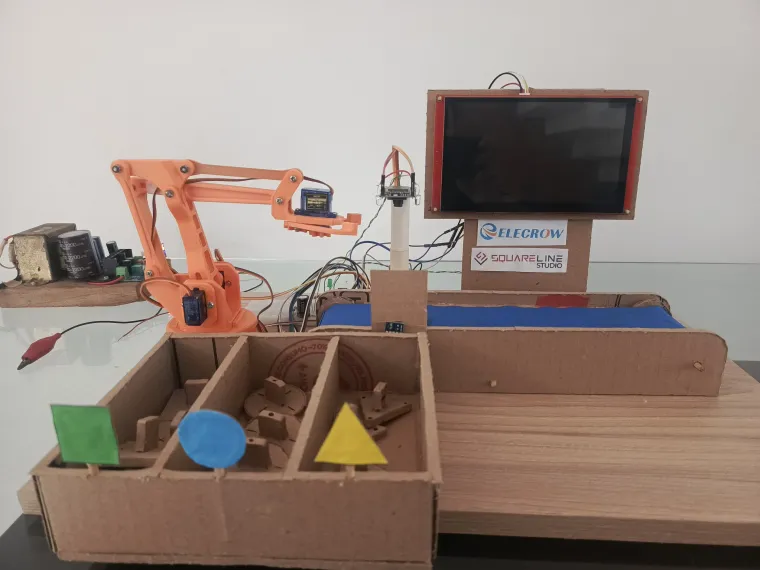
Inspired by modern industrial automation systems used in large-scale factories, the Vision-Guided Sorting Platform is a functional proof-of-concept (PoC) that replicates a smart production line. My goal was to demonstrate how complex tasks—such as object recognition and automated sorting can be implemented using accessible electronics and creative structural materials like cardboard.
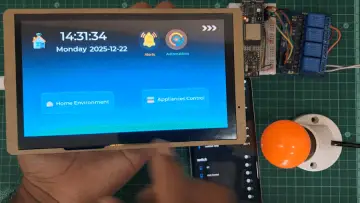
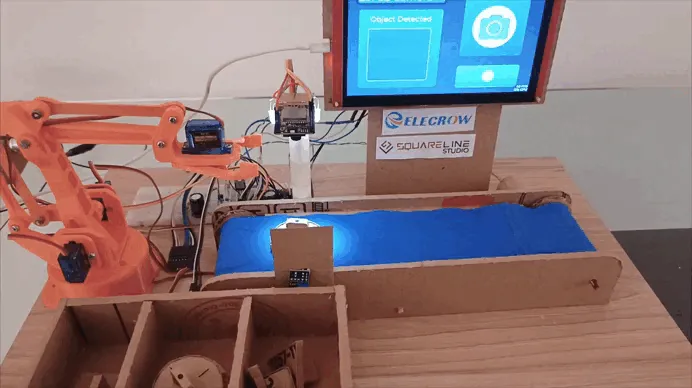
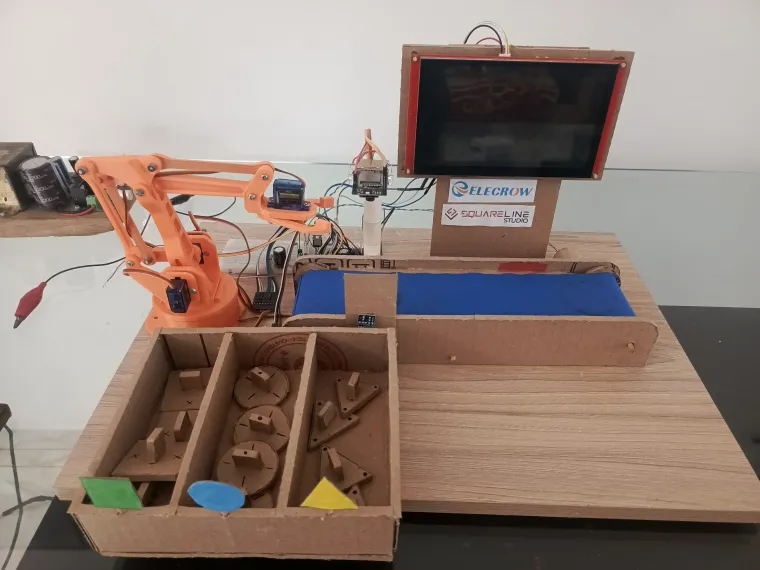
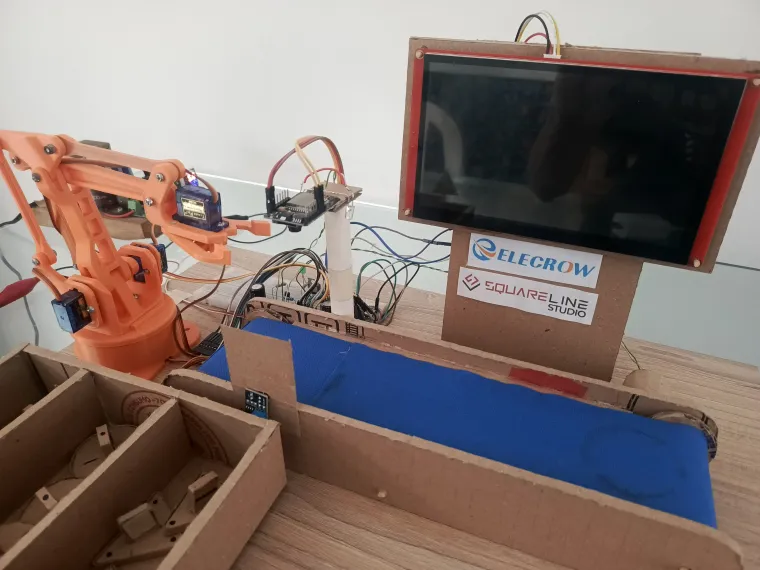
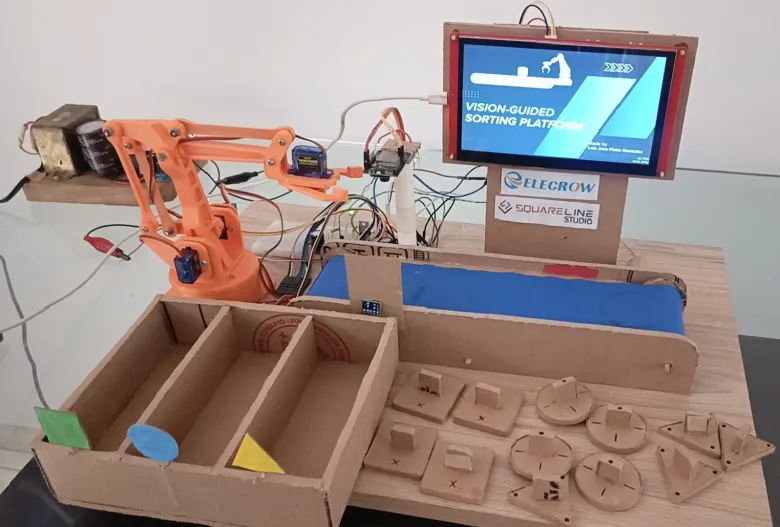
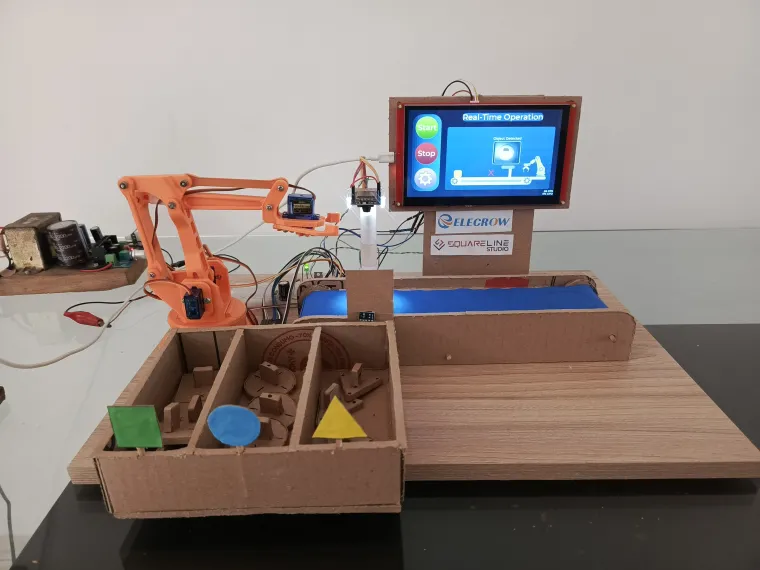
The project is a small-scale model of a sorting facility. It features a conveyor belt that transports items, an ESP32-CAM that identifies their geometry (Squares, Triangles, and Circles), and a robotic arm that performs the physical sorting. The entire system is managed by a 7-inch CrowPanel HMI, which provides a professional-grade graphical interface to monitor and control the operation in real-time.
This platform focuses on the synergy between three core areas of engineering:
-
Computer Vision: Identifying shapes through image processing.
-
HMI (Human-Machine Interface): Enhancing user experience with a high-resolution dashboard designed in SquareLine Studio.
-
Mechanical Control: Synchronizing motors and servos via serial communication to achieve precise movement.
By using a handcrafted cardboard chassis, the project emphasizes that the real power of modern automation lies in the software logic and the seamless integration of different hardware modules.
How does it work?
The Vision-Guided Sorting Platform follows a precise sequence where the HMI manages the commands and the Arduino Nano executes the machine logic. Here is the step-by-step process:
1. System Activation:
The process starts at the 7-inch CrowPanel HMI. Using the interface designed in SquareLine Studio, the user press "Start". The HMI signals the Arduino Nano to activate the conveyor belt.
2. Detection Trigger:
When an object passes through an Infrared (IR) Sensor, it sends a signal to the Arduino Nano to stop the belt or prepare for the identification phase.
3. Triple-Check Validation:

The ESP32-CAM analyzes the object. To ensure high reliability, the Arduino Nano implemented a validation logic: it reads the serial data and waits until the camera identifies the same shape (Square, Triangle, or Circle) three consecutive times.
4. Instant Reporting & Sorting: As soon as the third match is confirmed, the Arduino Nano performs two actions:
-
-
Data Transmission: It immediately sends the object's value to the CrowPanel, so the HMI updates the dashboard and counters instantly.
-
Mechanical Execution: Simultaneously, the Arduino triggers the robotic arm's motion sequence to sort the verified object into its corresponding bin.
-
5. Cycle Reset: Once the arm completes the movement and returns to its home position, the system resets and the conveyor belt starts moving again for the next item.
Step-by-Step Guide
This project was developed in several stages, from structural design to AI training and complex serial communication management. Below is the breakdown of the process:
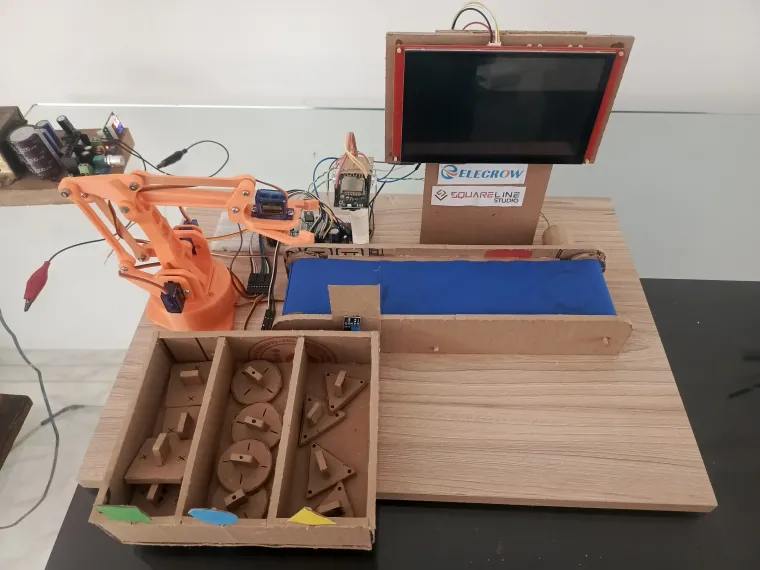
Step 1: Structural Design & Hardware Assembly
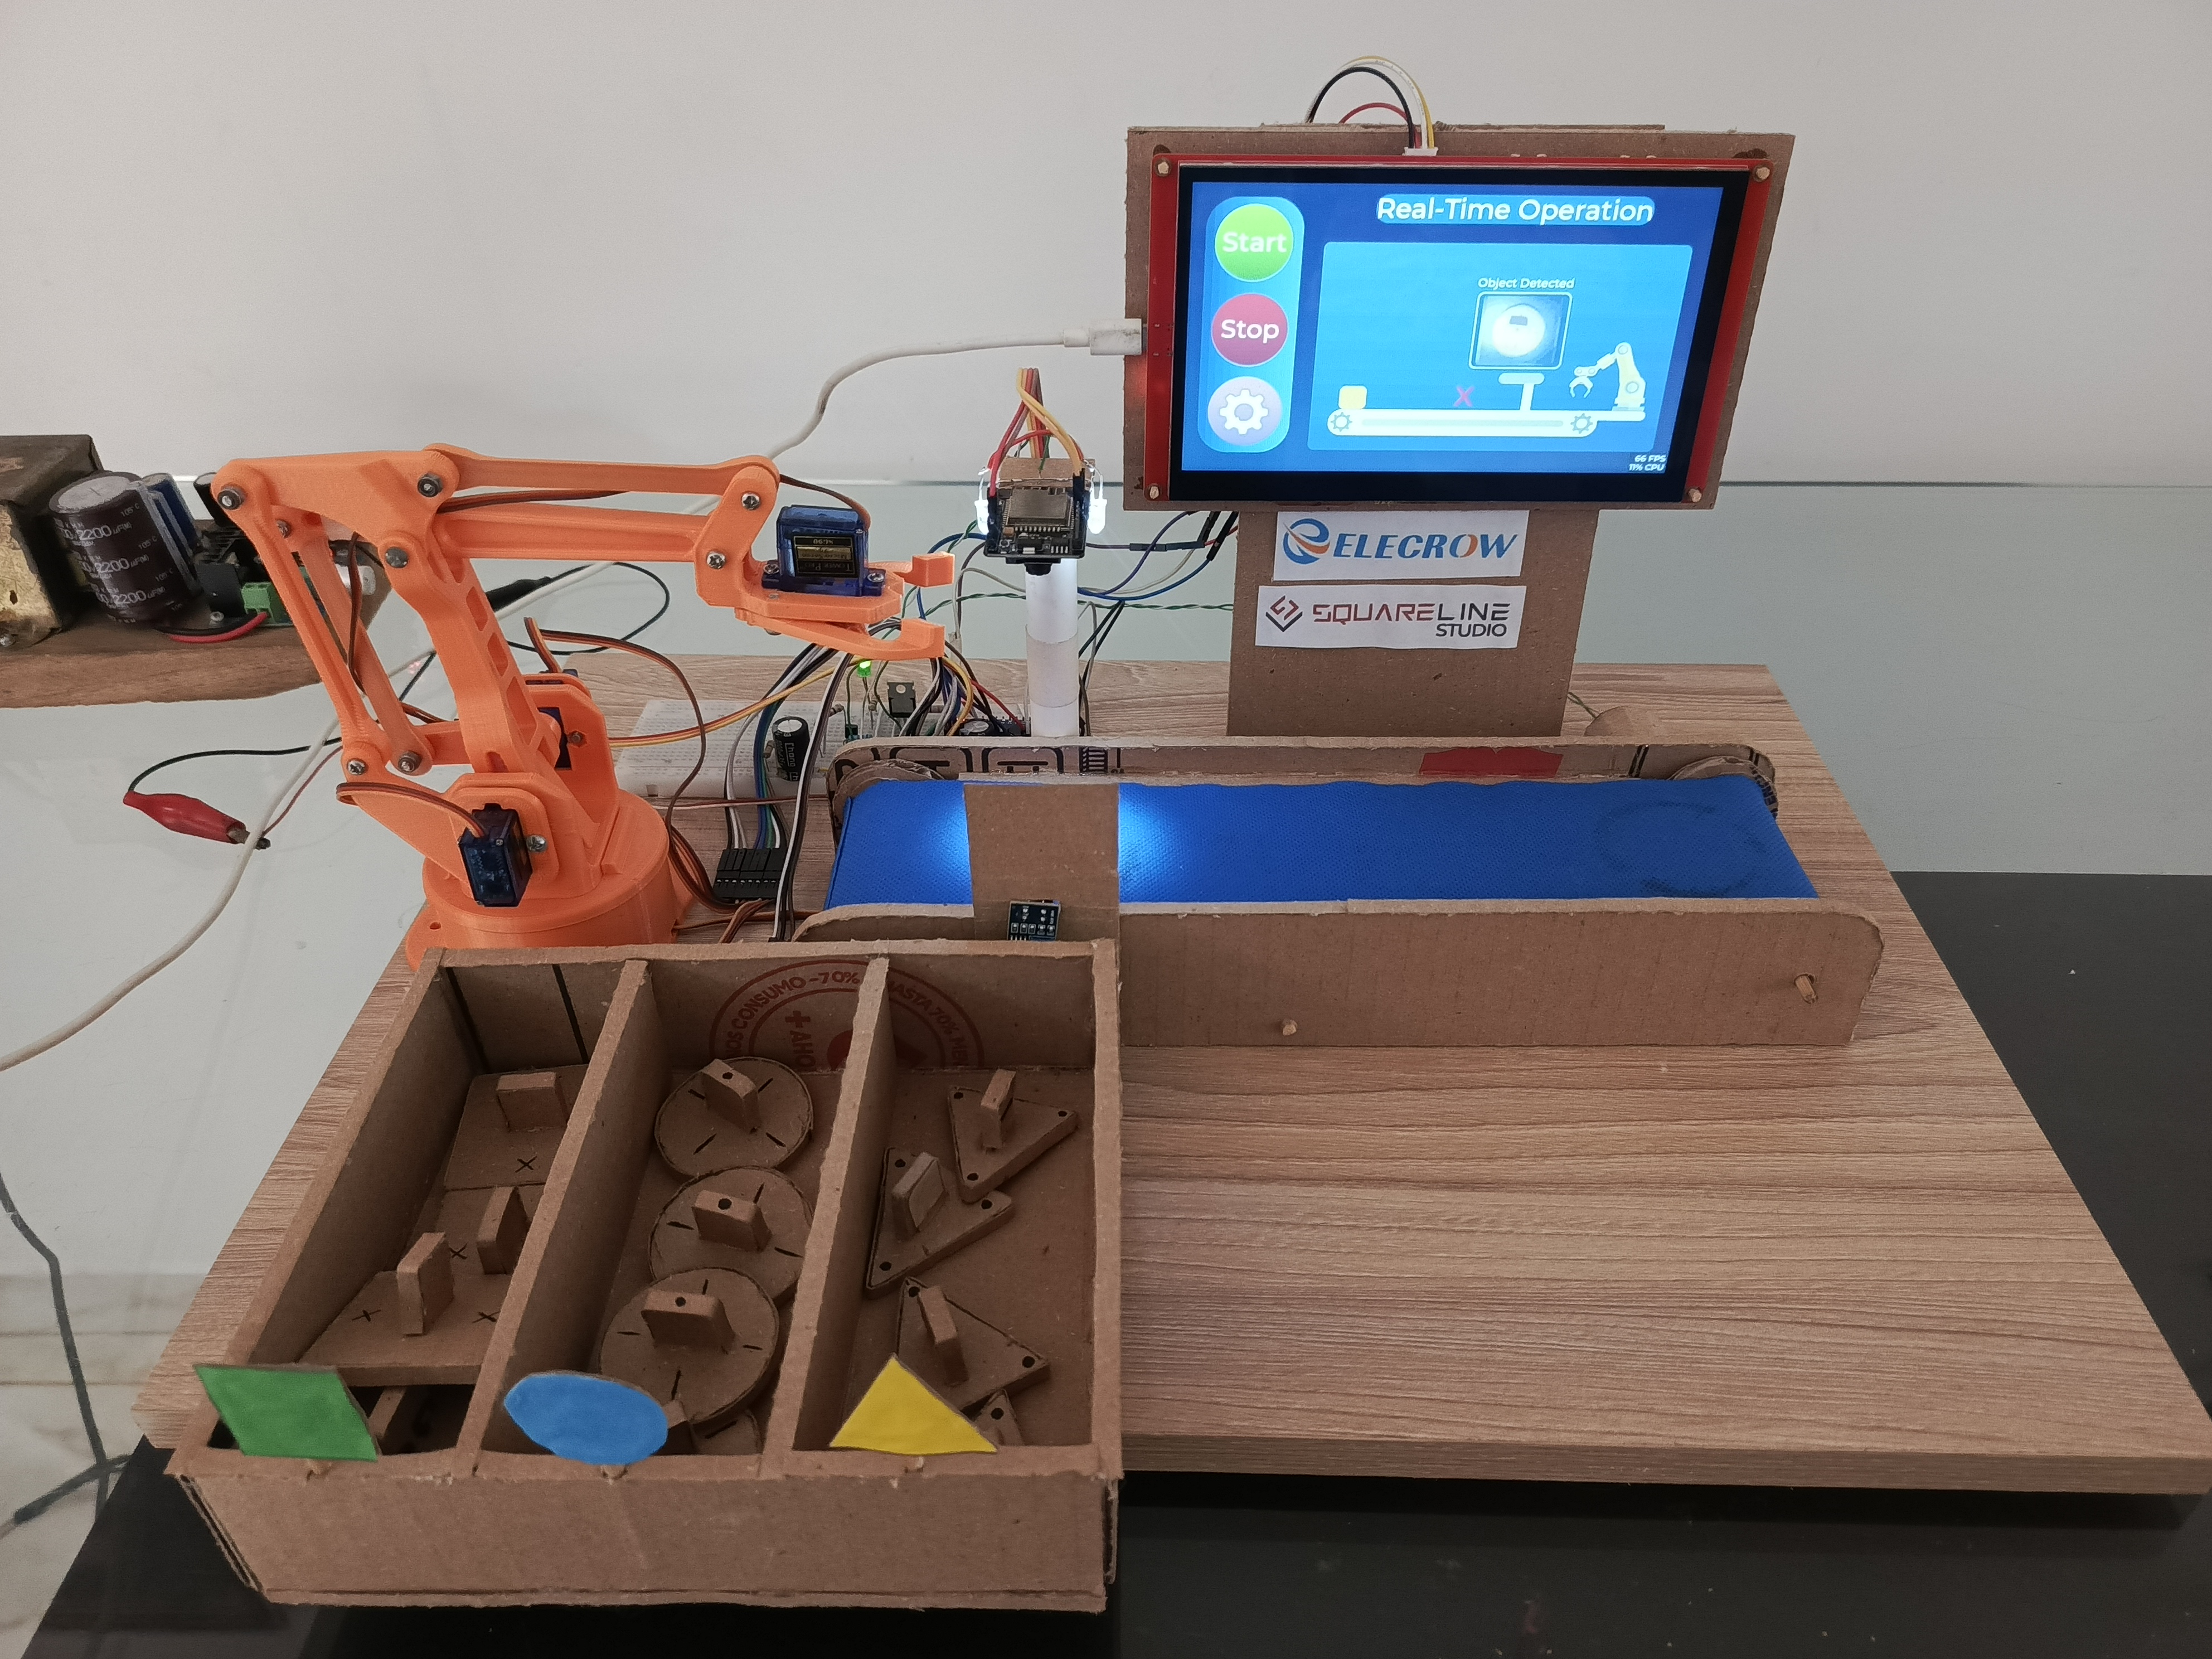
The first step was building the physical chassis. I used cardboard to create a lightweight yet functional structure for the conveyor belt, the robotic arm mount, and the HMI housing.
-
Note: While there is no specific tutorial for the cardboard structure, you can adapt the dimensions based on your specific robotic arm and conveyor belt size.
Step 2: Schematic Planning (KiCad)
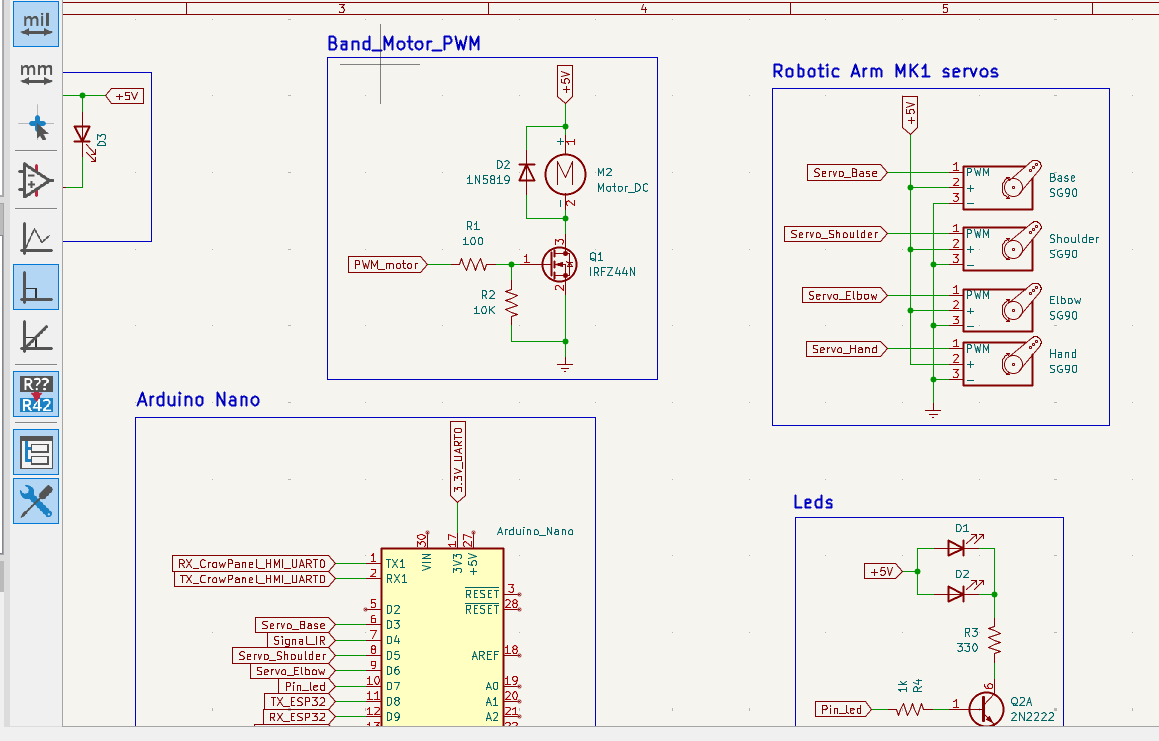
To ensure all components were correctly integrated, I designed the system schematic using KiCad. This stage was crucial for planning the connections between the CrowPanel 7", the ESP32-CAM, the Arduino Nano, and the power supply for the motors and servos.
Step 3: AI Training with Edge Impulse
TUTORIAL: https://www.youtube.com/watch?v=9uhKfEK73nA&t=1139s
The "brain" of the vision system was trained using Edge Impulse.
1. Data Collection: I captured approximately 80 images for each shape (Square, Circle, and Triangle) directly from the ESP32-CAM.
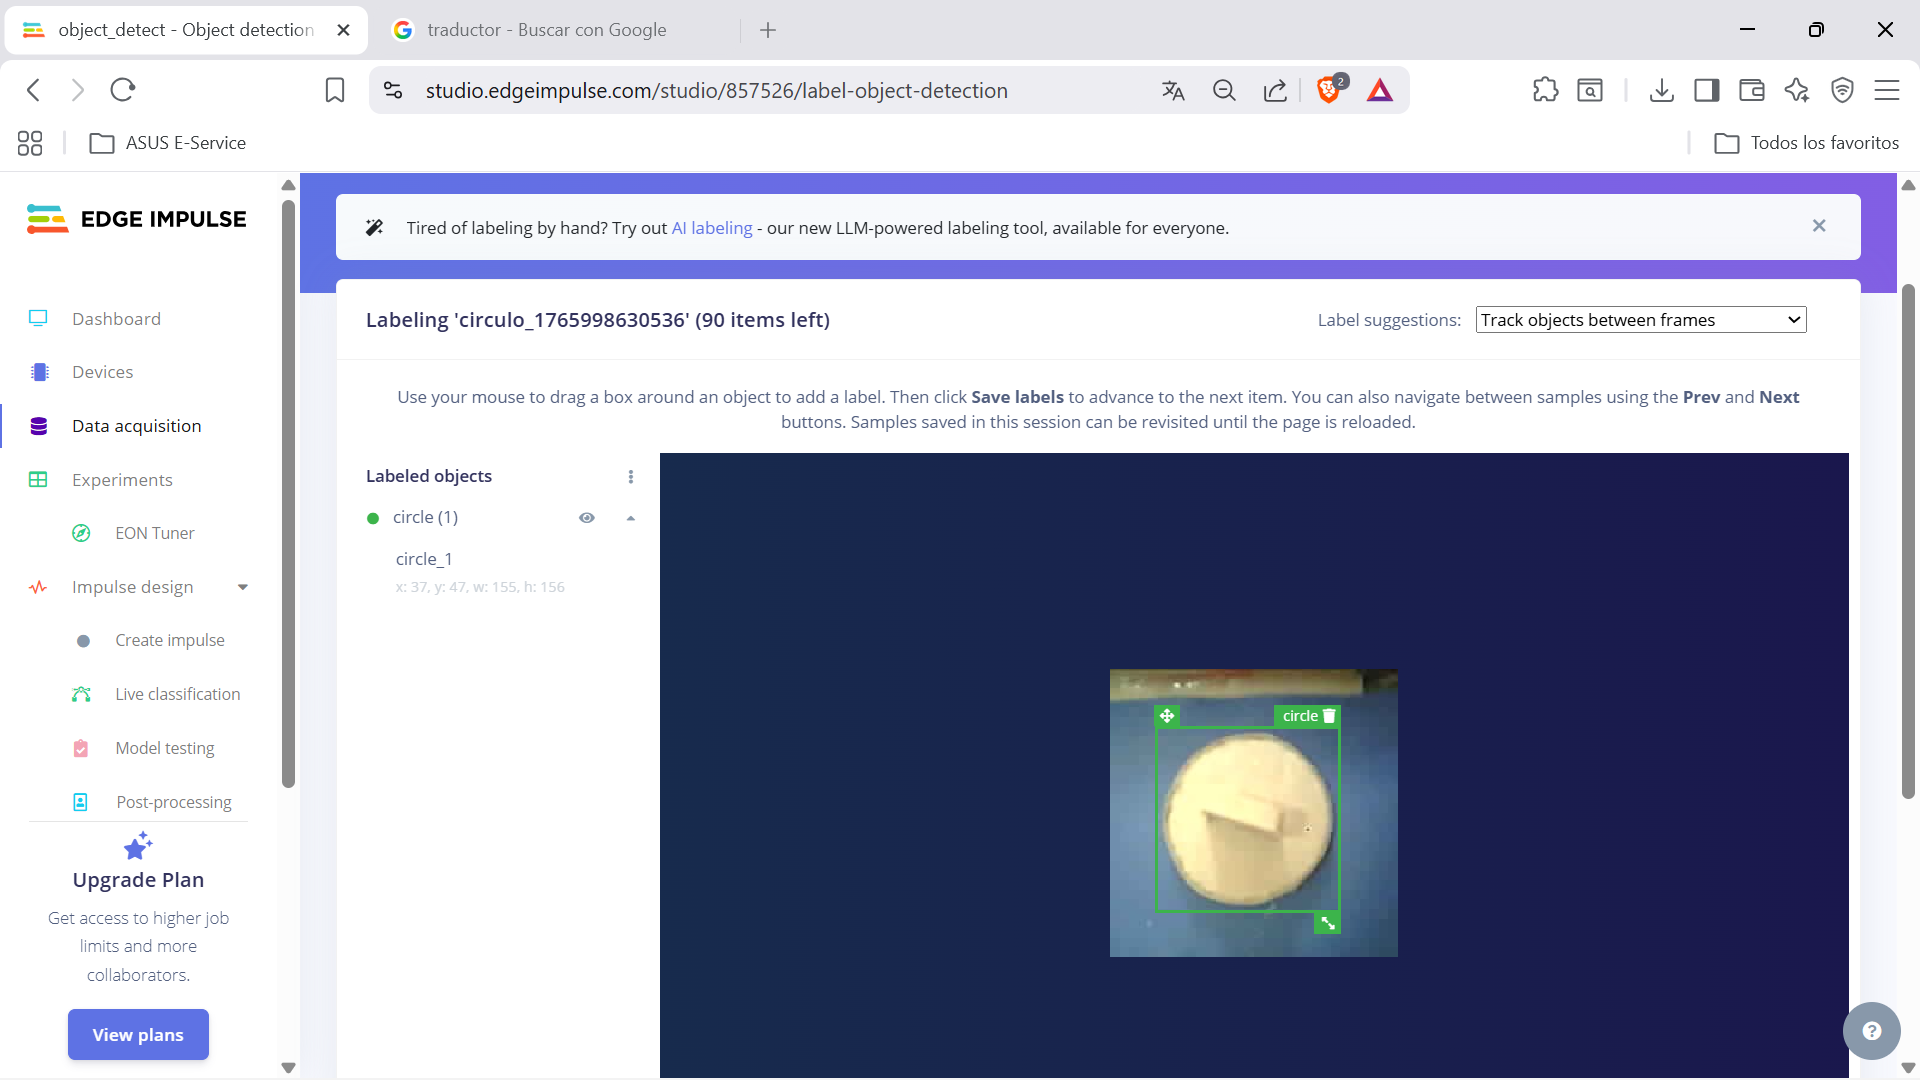
2. Environment: Good lighting is essential for consistent recognition.
3. Deployment: Once trained, the platform generates the Arduino library used in the code.

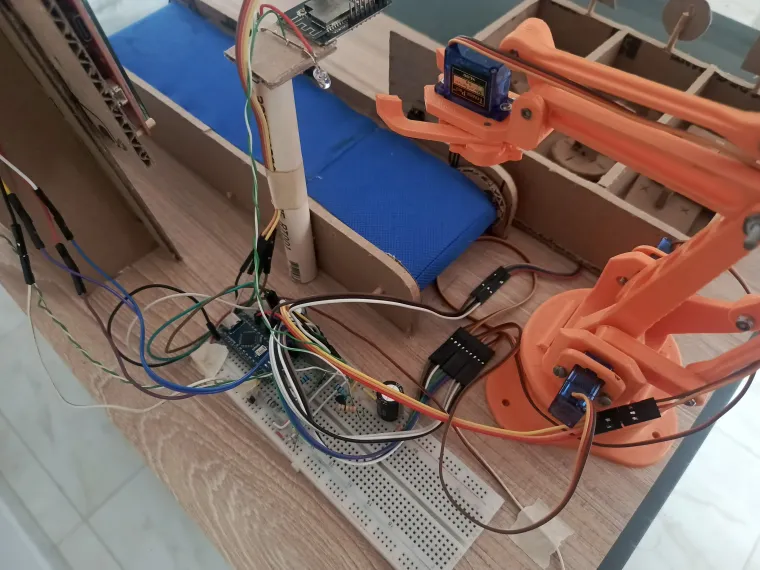
Step 4: Serial Communication & Command Logic
The system relies on a multi-device serial protocol. The Arduino Nano uses the SoftwareSerial library to handle multiple data streams simultaneously.
-
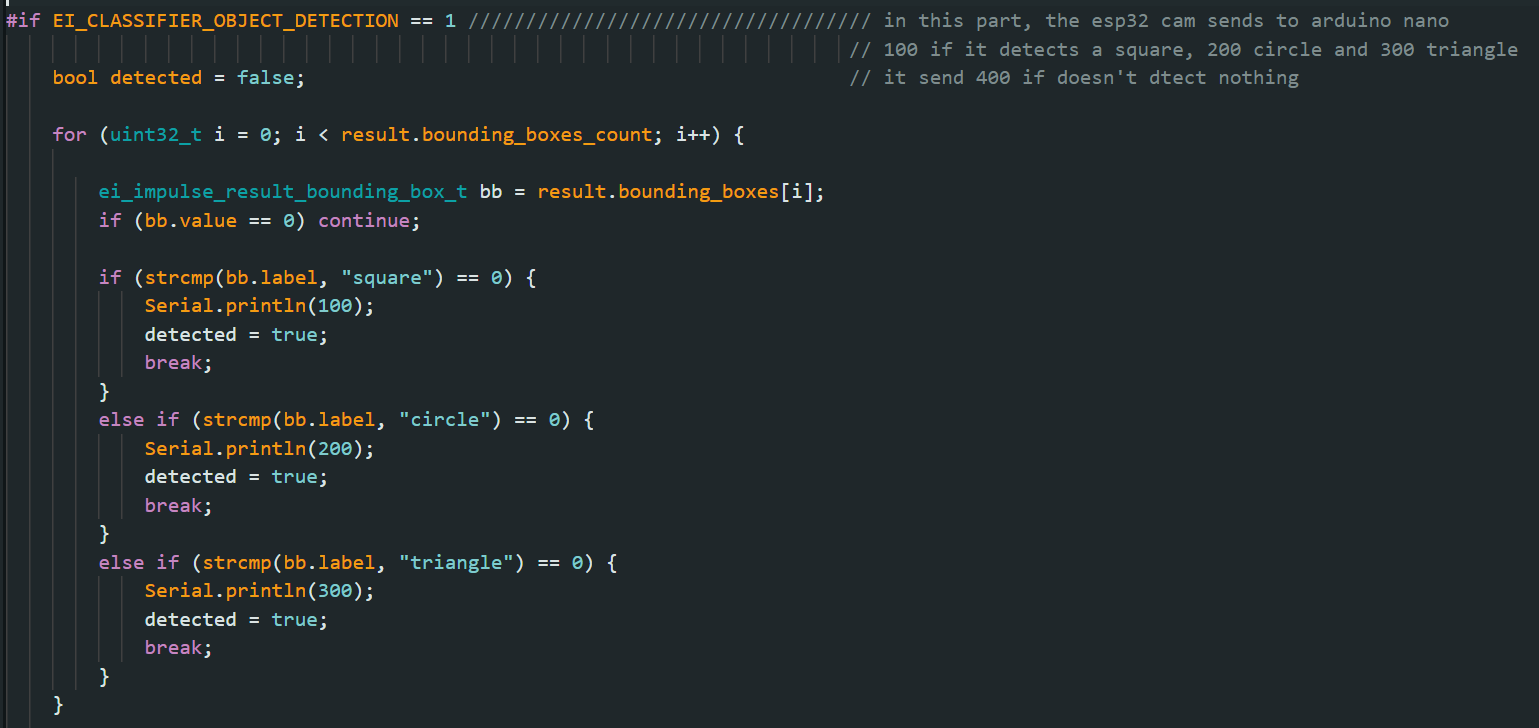
ESP32-CAM to Arduino Nano (Pins 9, 8): The camera sends specific codes based on the detected object:
-
100= Square -
200= Circle -
300= Triangle -
400= No object detected
-
-
HMI (CrowPanel) to Arduino Nano (Hardware Serial TX0/RX0): The screen sends commands to control the hardware:
-
"2": Turn LED ON |"3": Turn LED OFF. -
"Arm: value": Receives a value (0-100) from the HMI slider and maps it to control the arm's speed. -
"Band: value": Receives a value (0-100) and maps it to the conveyor belt speed.
-
Step 5: Code Implementation
You can find the complete source code for both the Arduino Nano and the ESP32-CAM in my repository. The code includes the mapping functions and the "Triple-Check" logic to ensure sorting accuracy.
Step 6: HMI Design with SquareLine Studio
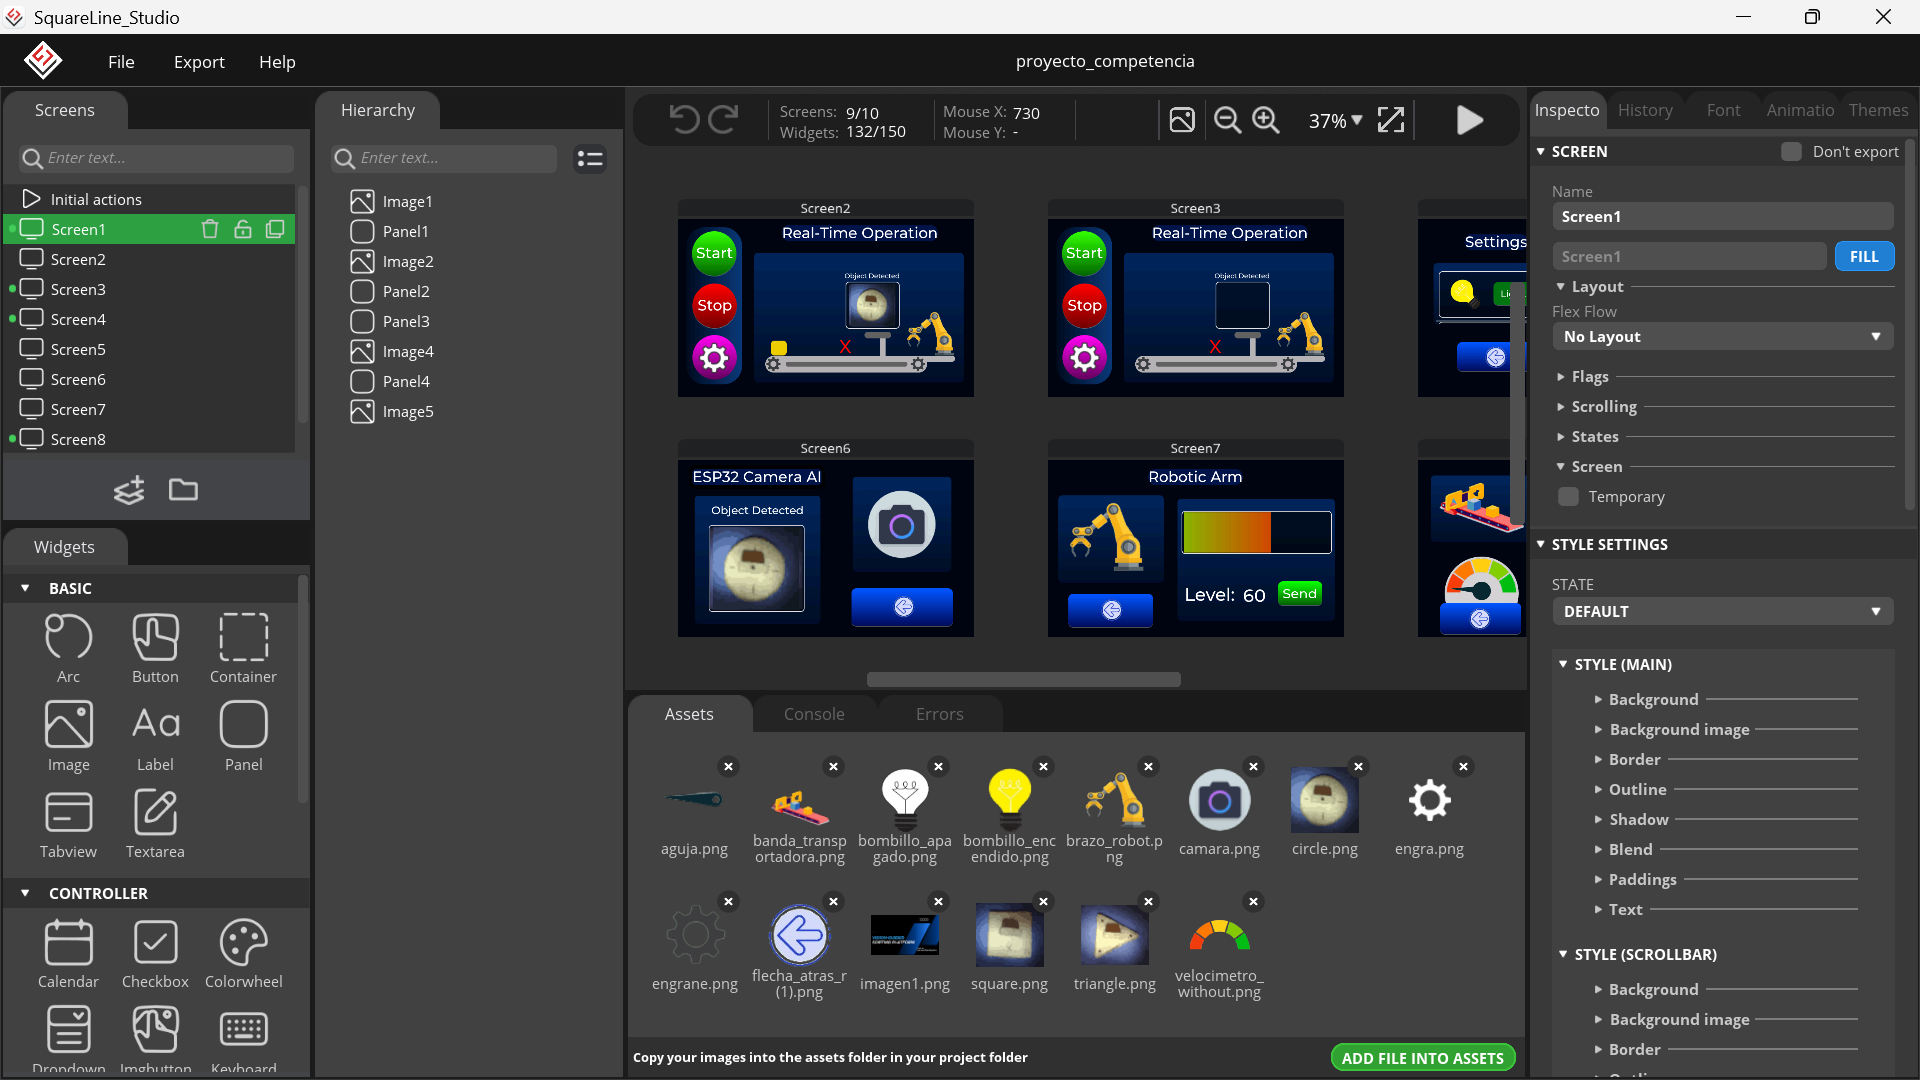
After defining the communication protocol, I focused on the user experience. Using SquareLine Studio, I designed a professional graphical interface for the 7-inch CrowPanel. The UI features:
-
Rich Visuals: Animated transitions, custom images, and intuitive panels.
-
Interactive Controls: Sliders for speed adjustment, buttons for manual control, and dynamic labels for status updates.
-
Responsive Layout: Implemented using Flex Layout to ensure all elements are perfectly aligned.
Integrating SquareLine (C) with Arduino (C++)
Since SquareLine Studio generates pure C code, integrating it with Arduino functions (like Serial communication) requires specific handling. To bridge these, I used the extern "C" declaration.
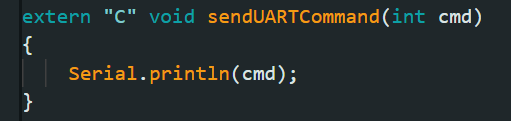
A key challenge was updating labels in real-time based on slider movements. For example, to sync a slider with a text label and send the value via Serial, you must follow this workflow:
1. Define the function: Create a function to capture the slider value and convert it to a string for the UI and a command for the Serial port.

2. Declare in ui_events.h: Add the function prototype so the UI knows it exists.
![]()
3. Implement in ui.c: At the end of the file, during the screen initialization, link the event to your slider.

Note: This logic applies to all sliders and interactive components in the project. By using this method, the HMI sends strings like
"Arm: value"or"Band: value"directly to the Arduino Nano.
Detailed code snippets and the full structure for this integration are available in my repository.
Dynamic Visual Feedback & Image Management
To provide an intuitive user experience, the HMI displays the exact images used during the Edge Impulse AI training phase. I pre-loaded the representative images for the Square, Circle, and Triangle into the CrowPanel’s memory.


1. Image Visibility via Opacity
To manage these visuals efficiently without taxing the processor, I implemented a visibility system based on Opacity levels:
-
Active State: When an object is confirmed, a "Fade In" function sets the opacity of the corresponding imageto 255 (fully visible).
-
.

-
Inactive State: A "Fade Out" function sets the opacity to 0 (hidden).
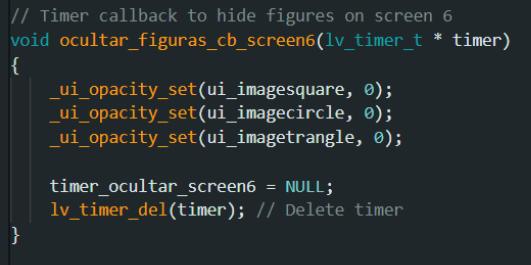
This ensures that only the detected object's image appears on the dashboard at the right time.
2. UART0 Communication & UI Sync
The CrowPanel monitors its UART0 port (the same port used for PC communication) to listen for data from the Arduino Nano.

The logic works as follows:
-
The Arduino Nano sends the verified object ID.
-
The CrowPanel's
.inosketch identifies the ID. -
It calls the specific function to trigger the correct image's opacity.
This creates a seamless loop where the physical cardboard object on the belt is instantly mirrored by its digital training sample on the 7-inch display.
Cardboard
MK1 robotic arm
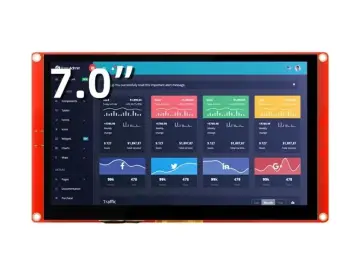
CrowPanel 7.0" HMI ESP32 Display
Wooden base
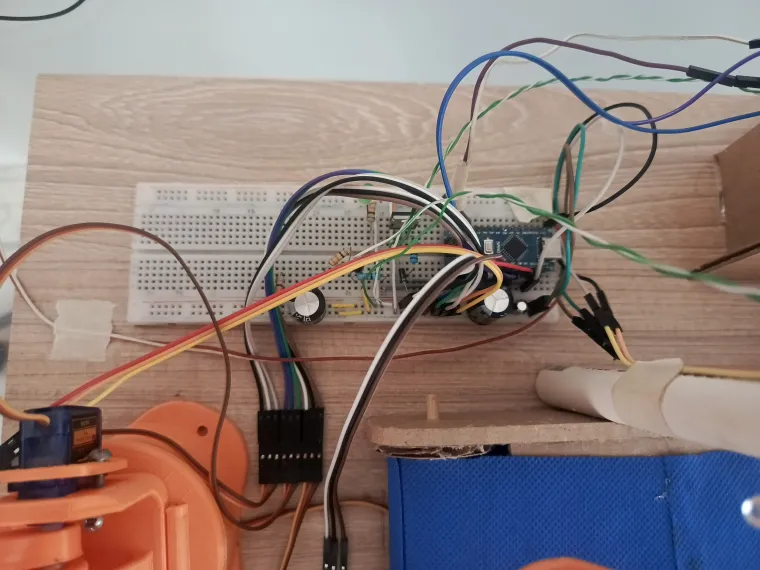
Wires
Breadboard
5V power supply
1 × 2200 µF capacitor
1 × 1000 µF capacitor
1 × 100 nF capacitor
2 × white LEDs
ESP32-CAM
Resistors (values specified in the schematic)
IRFZ44N MOSFET
1 × green LED (power-on indicator)
Infrared sensor
This sensor outputs 0 when active and 1 when inactive
1 × Arduino Nano
Glue
Marker
1 × DC motor
1/2 inch PVC tube
Wooden skewers (used as conveyor belt shafts)
Surgical fabric (used for the conveyor belt)
Gears for the conveyor belt
1 × 1N5819 diode
1 × 2N2222 transistor
Conclusion
This project was a challenging but rewarding journey in combining multiple technologies into a single automated system. From training an AI model to designing a professional HMI and building a custom chassis from cardboard, the Vision-Guided Sorting Platform proves that with the right tools like CrowPanel and SquareLine Studio, the possibilities for industrial prototyping are endless.
Thank you for checking out my project!