
Story
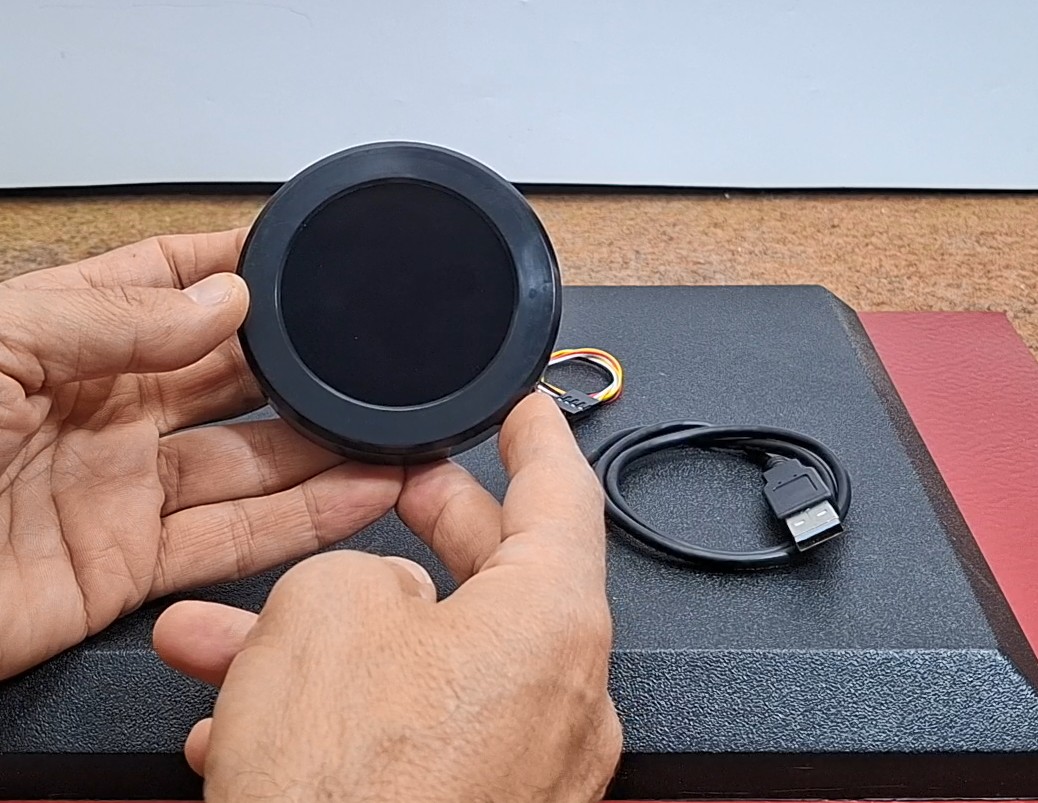
Today I received a shipment with a large round LCD display from Elecrow. The device is packed in two boxes so that it is fully protected from damage during transportation. Inside there is a display, a USB cable for power and communication, as well as an additional cable for connecting an external module.
This is CrowPanel 2.1inch-HMI ESP32 Rotary Display 480*480 which has some really impressive features:
- high-performance ESP32-S3 chip
- WiFi and low-power Bluetooth
- capacitive touch screen with knob
- and the Rotary encoder in the form of a circular ring
It supports Arduino IDE, Lua RTOS, Home Assistant/PlatformIO/Micro Python, and LVGL library.
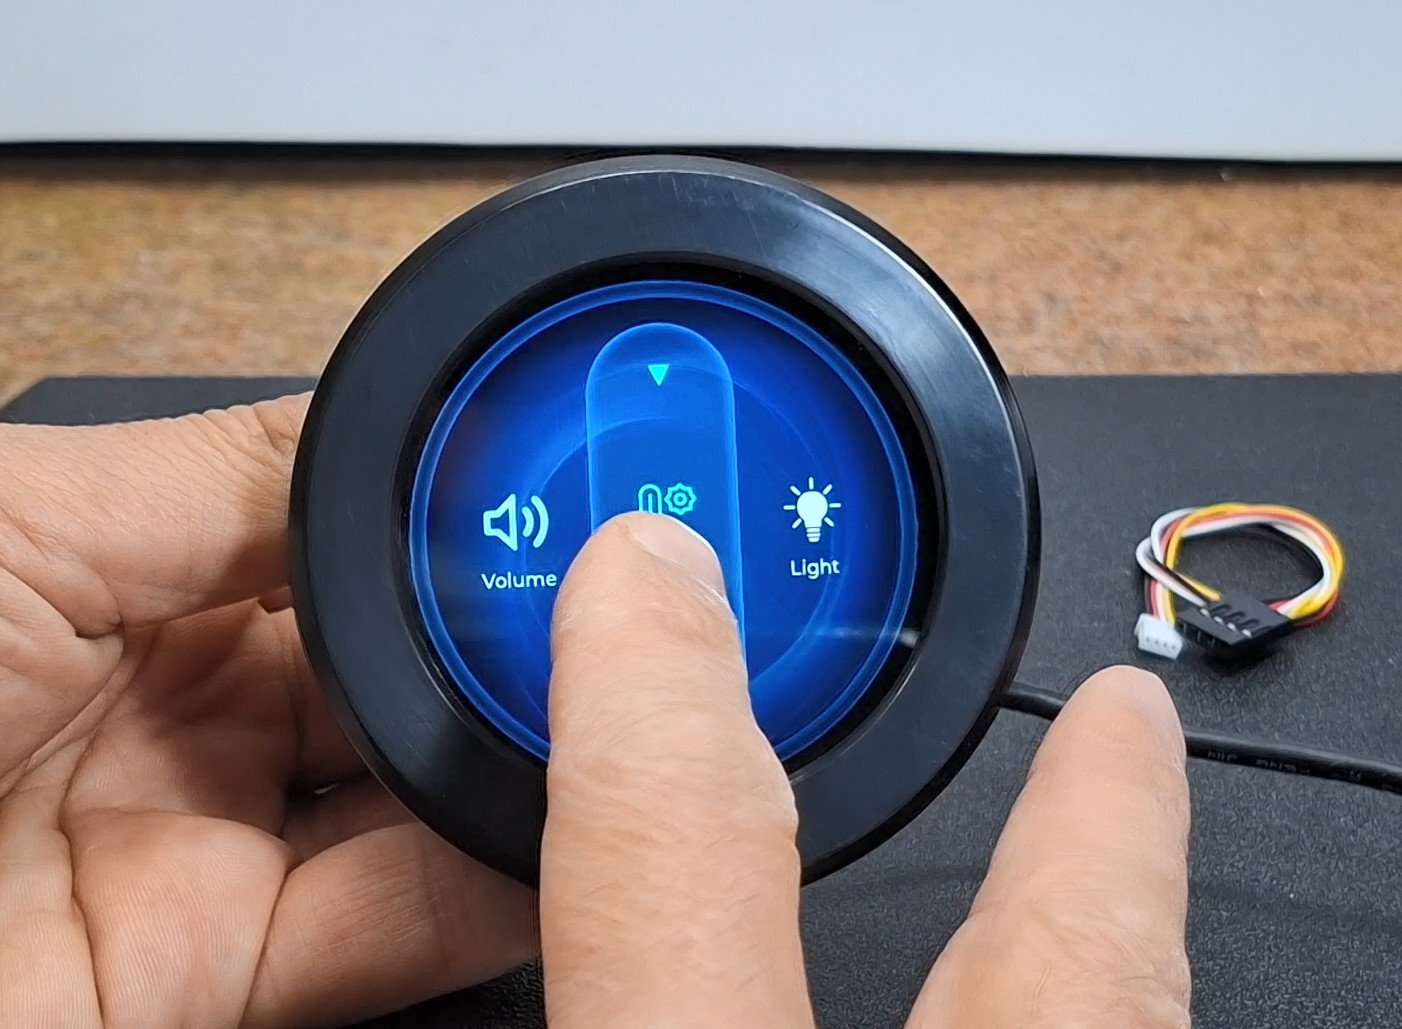
When the device is turned on for the first time, a demo application is installed that presents several basic features on the display.
Thanks to the high resolution, the image on the display is clear and beautifully visible from different angles.
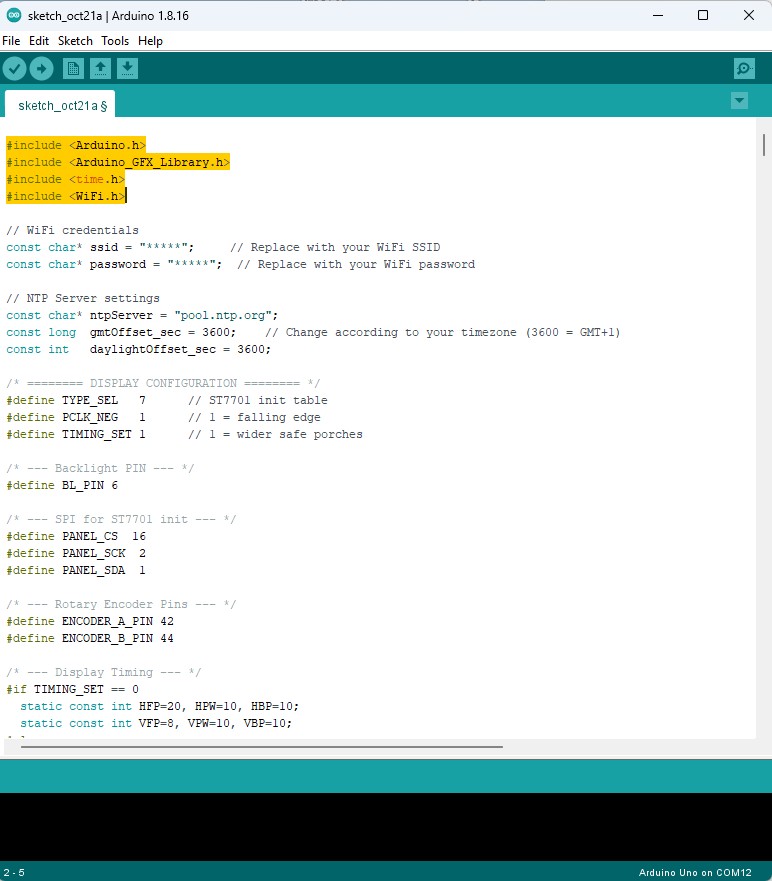
This time I decided to make a relatively simple project, without the proposed support from Elecrow, in order to discover the way to connect all the components to the microcontroller. At first I tried to use the TFT_eSPI library but soon I discovered that the display communicates via RGB panel interface (i.e. parallel RGB, not SPI), so this idea was dropped. So I decided to use the Arduino_GFX_Library library which has support for this way of connecting the display. I imagined the project to be made in a classic way, without the support of the LVGL library and Squareline Studio, by manually drawing all the lines individually. This way the project will not look like most projects that use the previously mentioned libraries and tools and will therefore be authentic.
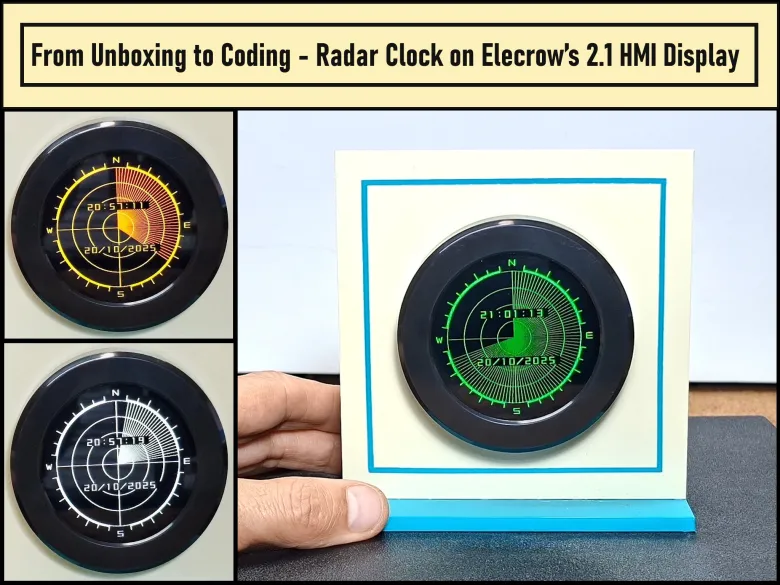
The choice is another Clock project in addition to my large collection of unusual clocks . This time it will be a visually interesting Radar Clock, actually a Radar simulation, on which the exact time and date will be written.
In this project I will present the functionality of the Wi-Fi part, as well as the rotary encoder. First, let's see how the device functions in real conditions: After turning on the device, a message appears on the screen and the Wi-Fi network is being connected.

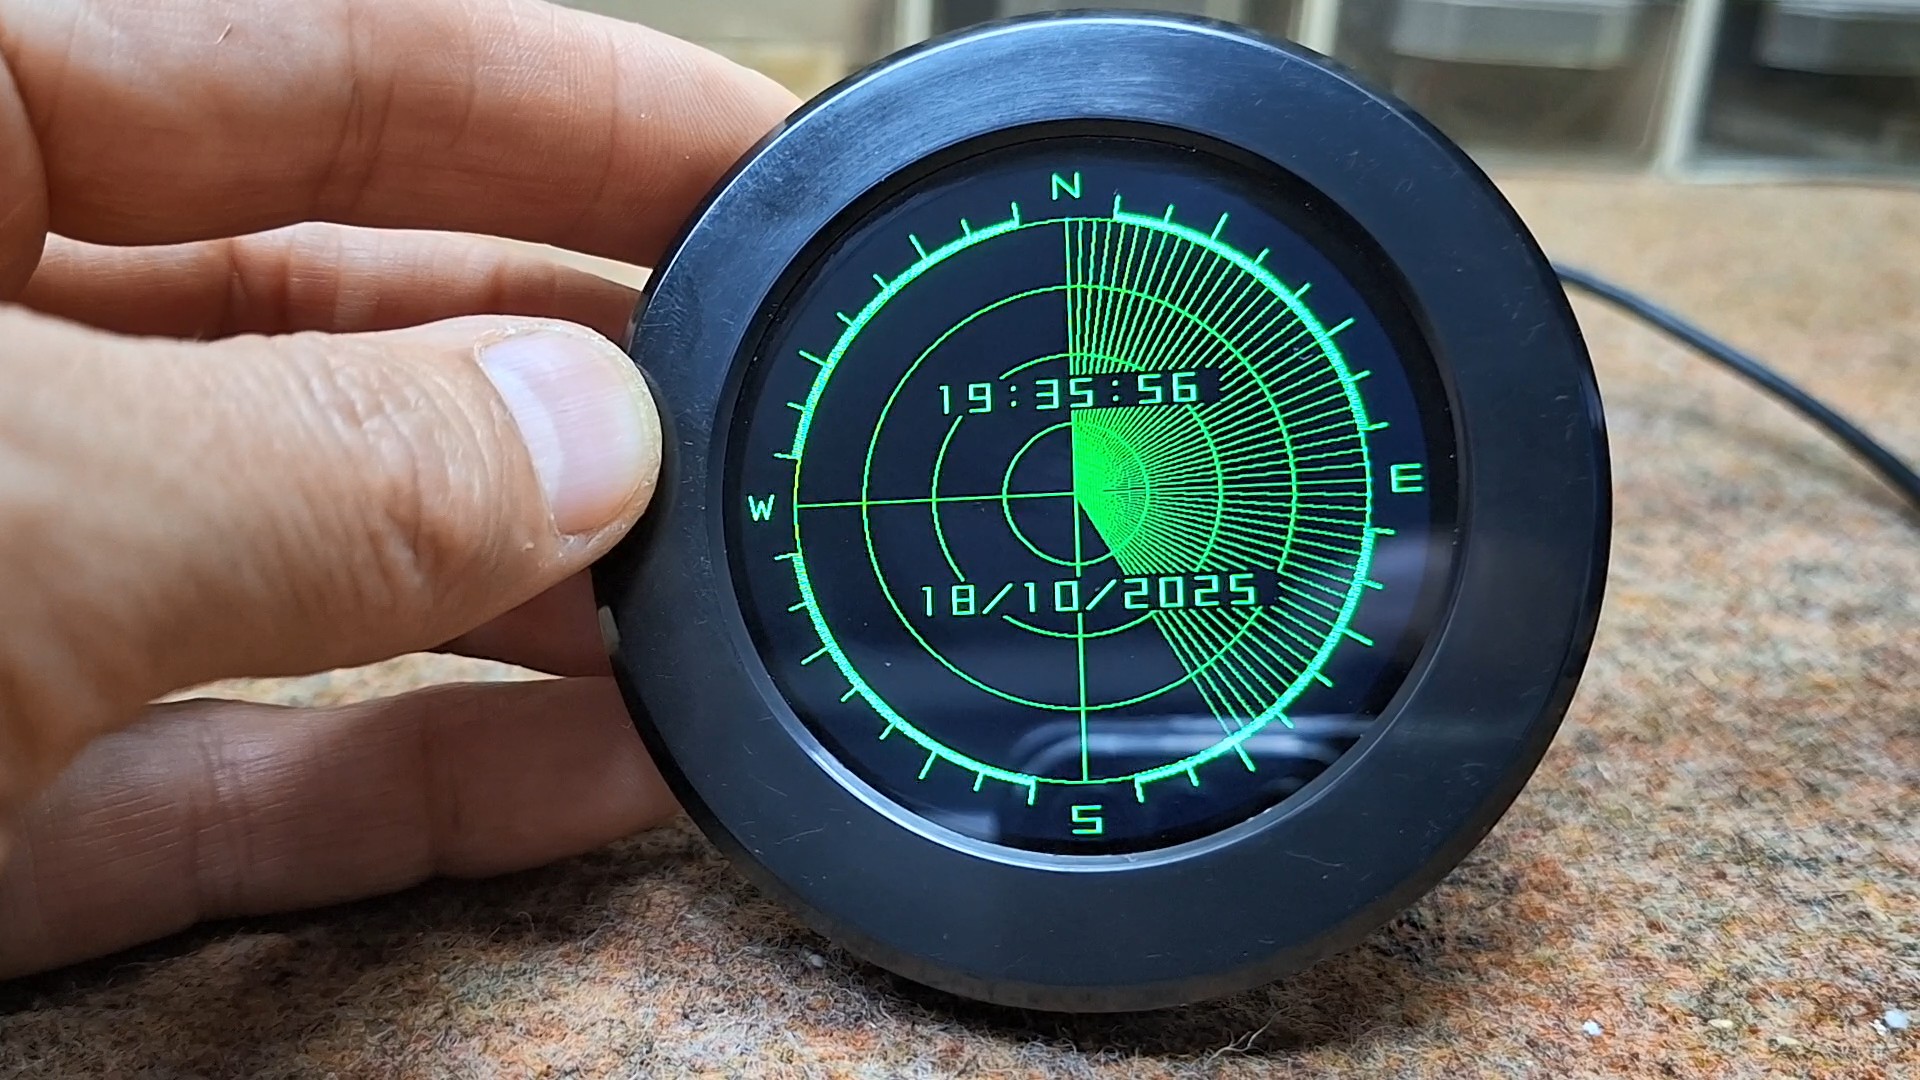
After that, the main screen appears. The default color is green, as in most real radar systems. The upper half of the screen shows the time, and the lower half shows the date.
The exact time is downloaded via the Internet from an NTP server, so there is no need to manually set the clock. To demonstrate the functionality of the rotary encoder, I added a section in the code where the colors of the radar can be changed. Unfortunately, this video cannot capture the beautiful colors displayed on this high-quality display.
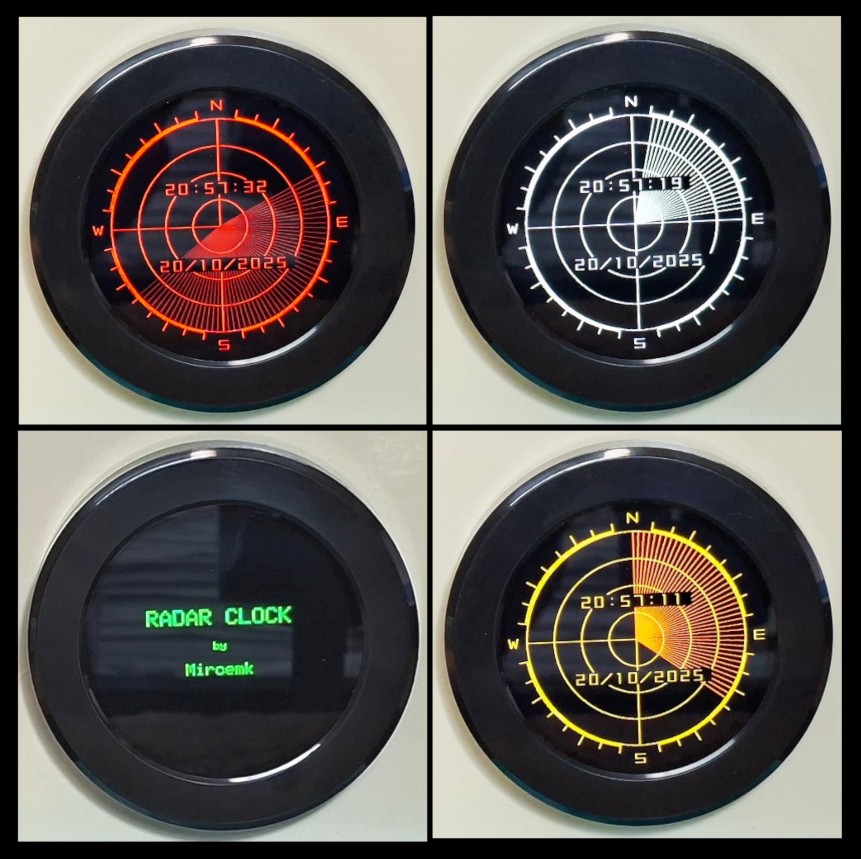
At the beginning of the code, 5 color schemes are defined that change by turning the encoder. The color change is instantaneous and does not affect the functionality at all.
Now a few words about the code. When compiling I used ESP32 cores 3.x.x, the latest version of Arduino _GFX library and arduino IDE ver. 1.8.16.
Overall, the code may not be very simple, which is a consequence of the fact that everything is drawn programmatically. However, it is made in a way that you can easily change several parameters to make a custom clock face. It is also seen that the code uses a minimum number of basic libraries. I plan to create code in the next projects with this display using the new libraries and tools developed specifically for projects with LCD displays, because the development is much easier and the final effect is fascinating.
Otherwise, I made a kind of housing for this project from 3 and 5 mm PVC material coated with colored self-adhesive wallpaper.
And finally, a short conclusion. This module from Elekrow has endless possibilities for making DIY projects in a relatively simple way using specialized libraries and tools, which way I will describe in more detail in one of the following videos. A huge advantage is the fact that there is no need for soldering or other hardware work. There is even a cable for connecting external modules, also without soldering, during the test period.