Story
This project showcases a modern, round-shaped portable speaker enclosure designed specifically for 3D printing and injection molding. Unlike traditional rectangular wooden speaker boxes, this enclosure embraces smooth organic curves, fluid surfaces, and a sculpted aesthetic that enhances both acoustic performance and visual appeal. The goal was to create a speaker that looks friendly, futuristic, and expressive—almost like a character—while still delivering practical internal structure, smart airflow, strong mounting support, and easy assembly for makers of all skill levels.
1. Project Overview
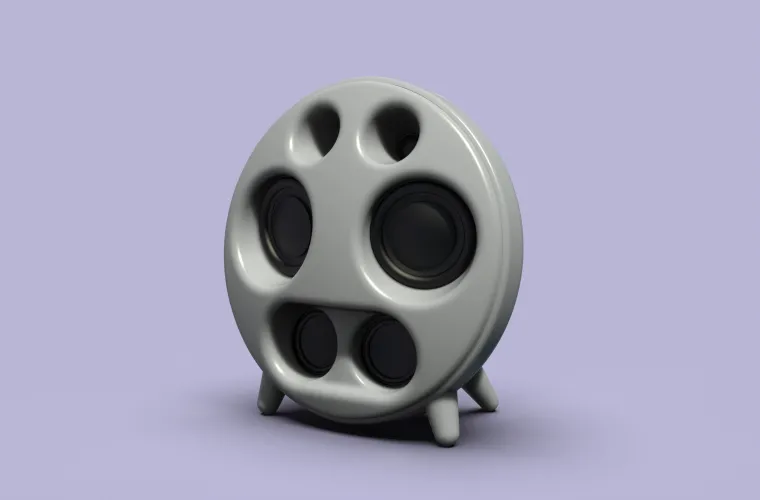
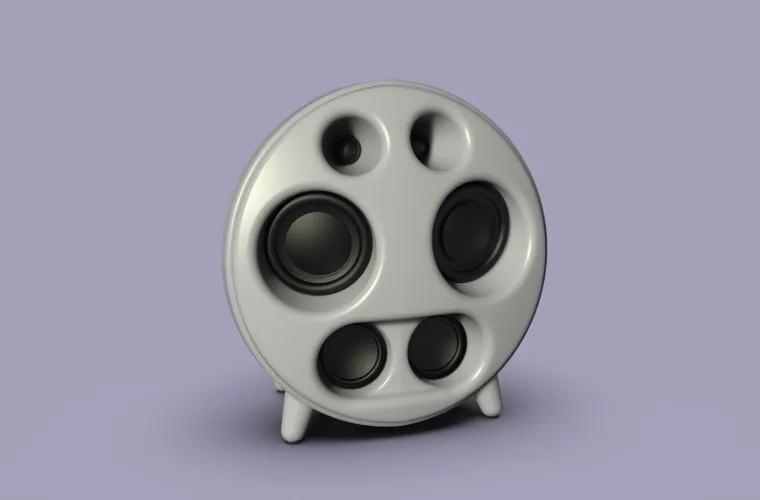
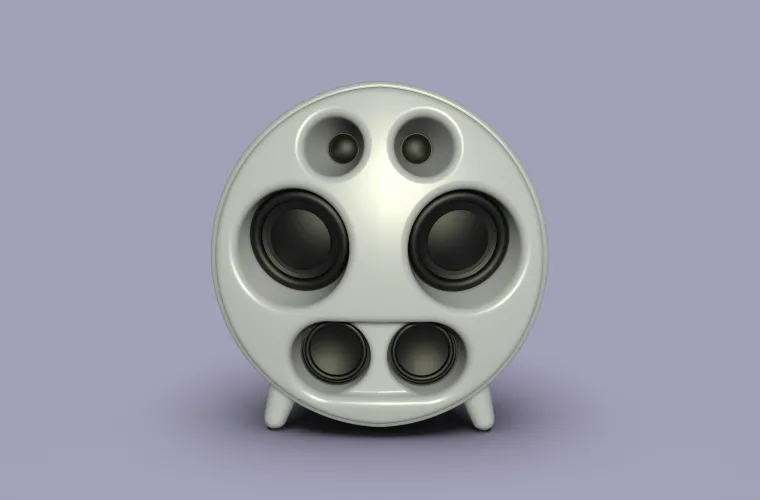
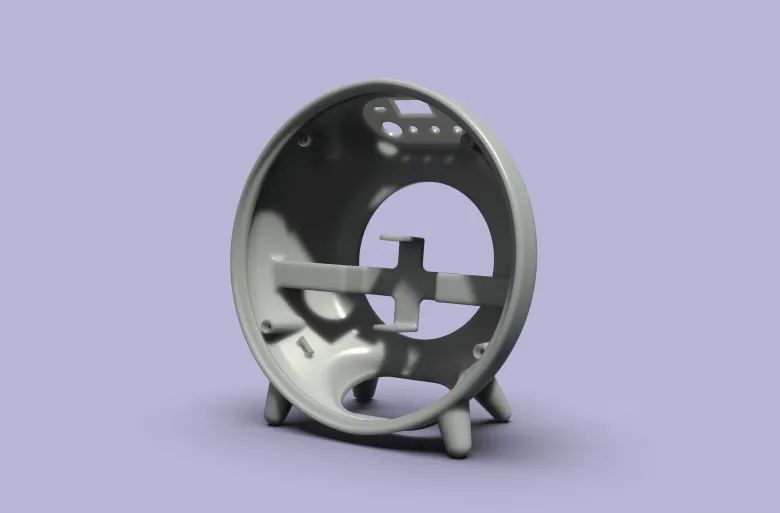
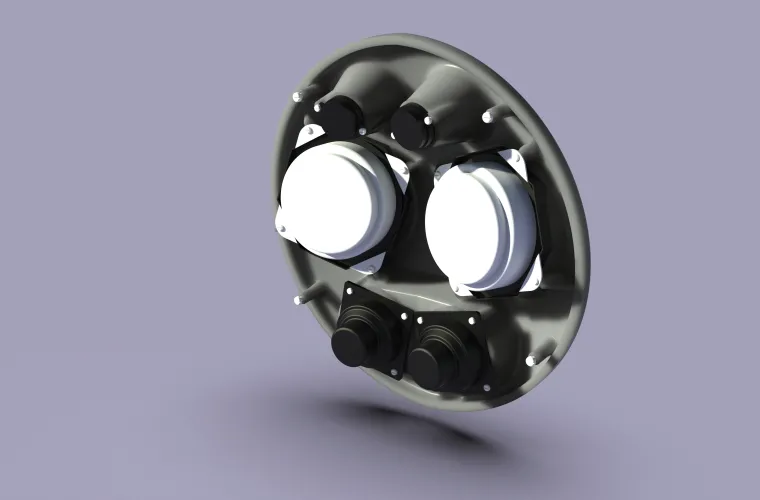
At its core, this enclosure houses a multi-driver audio system featuring two main mid-range drivers, two passive radiators, and dual tweeters, arranged to create a wide soundstage with impressive presence. The circular layout allows the drivers to be positioned symmetrically, helping sound dispersion feel more natural and immersive to the listener. The back of the enclosure features an integrated bass reflex port, which boosts low-frequency output without requiring larger physical drivers.
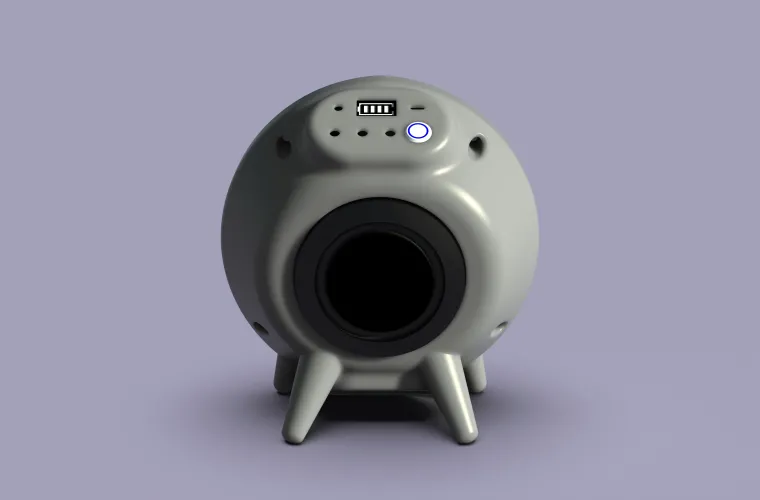
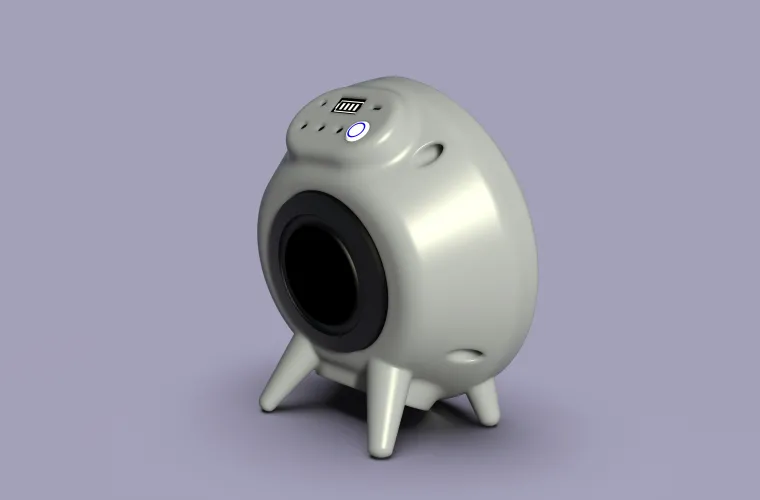
The design stands on four angled legs, giving it stability and a playful stance. These legs are printed as part of the main shell structure, meaning there are no metal rods, reinforcement wires, or external brackets required. The enclosure is strong purely through geometry and surface thickness optimization, demonstrating the structural benefits of curved surfaces.
2. Design & Structural Features
Inside the enclosure, a structural frame supports the amplifier board and routing for internal wiring. Small cylindrical mounting posts are positioned accurately for driver screws, ensuring proper alignment and vibration-free sealing. The large circular front plate is sculpted into concave pockets, visually emphasizing each driver and giving the overall product a unique, expressive “face-like” personality.
The smooth internal curves reduce unwanted resonance. There are no flat parallel wooden surfaces like typical rectangular speaker boxes—this reduces standing waves, ultimately improving mid-range clarity and reducing distortion. The rear-mounted passive radiators work together with the internal chamber to add punchy bass to a lightweight, compact form factor.
3. Manufacturing Approach
This enclosure was engineered for compatibility with several manufacturing methods:
• FDM 3D Printing (PLA, PETG, ABS)
• Resin Printing (Large-format SLA)
• Injection Molding (ABS/PC blends)
Average wall thickness of 2.5–3.2 mm ensures proper rigidity without wasting material. There are no sharp undercuts, and the leg geometry includes natural draft angles, making the design friendly for mold parting. Support materials during 3D printing are minimal due to smooth bridging transitions, which helps reduce print time and material waste. Hardware inserts are optional; plastic screw posts with self-tapping screws work effectively for quick assembly.
4. Electronics & User Interface
On the upper-rear section, a gently raised control panel provides:
• Power button
• Battery indicator LED
• Volume controls
• USB charging port
All controls are recessed into the enclosure surface, maintaining a clean appearance while protecting components from accidental touches during transport or desktop use.
5. Assembly Process
Step 1 – Print the shell with ~15–20% infill for improved rigidity
Step 2 – Install the passive radiators and mid drivers into the front cavities
Step 3 – Mount the tweeters into the upper circular pockets
Step 4 – Attach the amplifier module onto the internal frame
Step 5 – Wire the system and perform functional testing
Step 6 – Seal the enclosure by screwing on the rear cover
All drivers can be serviced easily by removing the back plate.
6. Educational Value
This project teaches newcomers:
• Driver positioning and sound dispersion fundamentals
• Passive radiator tuning for improved bass
• Acoustic chamber shaping for resonance control
• Fundamentals of enclosure rigidity and geometry
• Design-for-manufacturing (DFM) considerations
It’s an excellent introduction to DIY audio engineering and 3D-printed consumer product design.
7. Final Thoughts
The design is not just about sound—it is about personality, manufacturability, and learning. The round enclosure gives the speaker a friendly emotional presence compared to boxy rectangles. This project brings together industrial design, acoustics, CAD modeling, and real-world manufacturability in a simple, approachable, and deeply thoughtful build suitable for both beginners and enthusiasts.
It also supports remixing and customization, allowing makers to experiment with different driver sizes, leg shapes, enclosure thicknesses, and surface finishes.