

Story
Project Overview
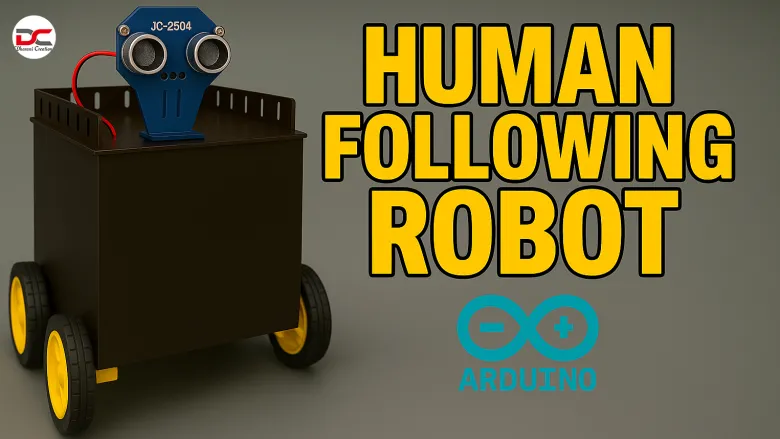
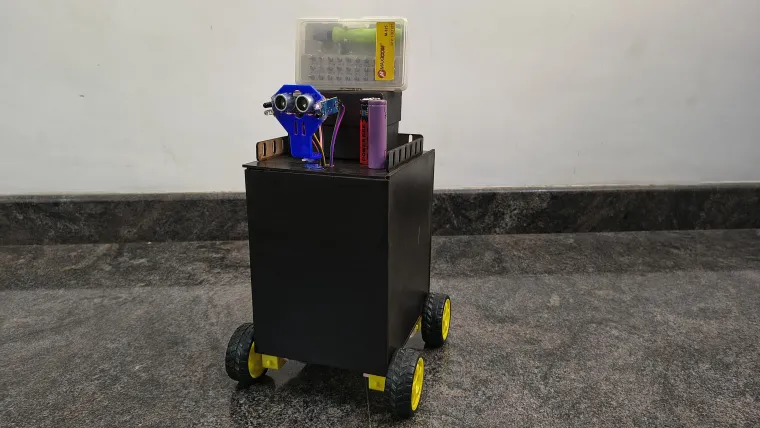
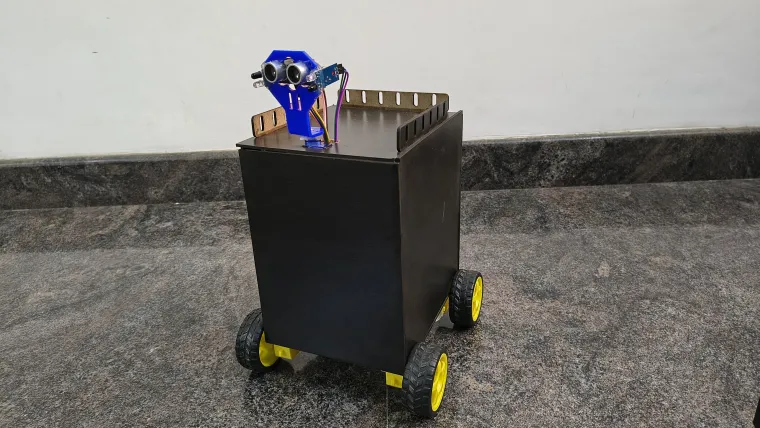
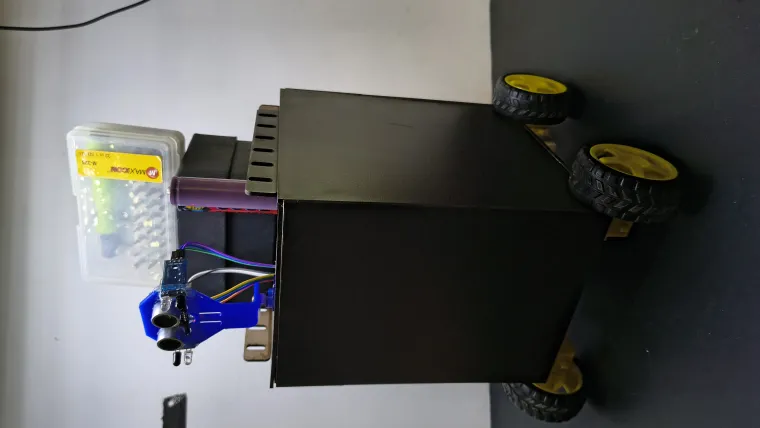
The project involves building a mobile robot—likely using an Arduino microcontroller—that autonomously follows a person by measuring distances with ultrasonic sensors.
Core Components
Based on similar DIY projects, the typical components include:
-
Arduino UNO – The main controller handling sensor data and motor commands.
-
Ultrasonic Sensors (e.g., HC‑SR04) – Often three, placed at the front, left, and right to measure distances to obstacles or a person
-
Motor Driver (e.g., L298N or L293D) – Interfaces between the Arduino and DC motors to control movement .
-
DC Motors with Chassis – Providing locomotion, usually two-wheel setups on a chassis.
-
Power Supply – Batteries such as Li-ion cells to power the motors and Arduino.
-
Wiring and Breadboard – For rapid prototyping and connections.
Wiring and Circuit Design
-
Sensors: Each ultrasonic sensor has Trigger and Echo pins connected to digital I/O pins on the Arduino. Power and ground are common.
-
Motors: DC motors connect via the motor driver to the Arduino. The driver receives direction and speed signals through control pins.
-
Power Management: The motor driver handles higher voltage/current for motors, while Arduino runs from regulated 5 V.
Operational Logic
-
Reading Distances: The Arduino continuously reads distances from the ultrasonic sensors (front, left, right).
-
Decision Making: Based on sensor values, the robot decides whether to:
-
Move forward (if the person is ahead),
-
Turn left or right (if the person is off to the side),
-
Stop or back up (if too close) .
-
-
Motor Commands: Depending on logic, the Arduino commands the motor driver to move the robot in the appropriate direction.
Example logic from similar projects:
-
If the front sensor distance is below a threshold, move forward.
-
If left distance is less than right, turn left; if right less, turn right.
-
If too close, stop or reverse .
Software & Code Structure
-
Setup (
setup()):-
Initialize sensor pins (Trigger as OUTPUT, Echo as INPUT).
-
Configure motor driver control pins.
-
Start serial communication (for debugging).
-
-
Loop (
loop()):-
Read sensor distances via functions (e.g.,
sensorOne(),sensorTwo(),sensorThree()). -
Print distances (optional).
-
Compare readings to thresholds.
-
Call movement functions:
moveForward(),turnLeft(),turnRight(),stop(),moveBackward(), etc. -
Repeat continuously .
-
Applications & Extensions
-
Real-World Uses: Shopping cart robots, luggage carriers, assistance robots in public spaces, pet-like companions, surveillance bots, hospital assistance, etc. .
-
Beyond Basic: You could enhance the robot by adding line sensors for obstacle detection, integrating Bluetooth or camera modules, or improving targeting via machine vision.