


Story
As an amateur astronomer, especially at the beginning, the most difficult part of observing the night sky was locating the desired object, regardless of whether it was a bright object (such as a star or a planet) or, even more difficult, a Messier object. I often spent a lot of time searching for an object. First of all, I want to advise anyone who wants to start this hobby not to repeat the mistake that more than 90% of people make. Most often, the first choice is a Refractor type of telescope, which is practically unusable for this purpose. Almost as a rule, such telescopes from a lower price class (which is a logical choice for a beginner) have terrible characteristics, starting from poor and unstable mounting to extremely poor-quality optics.
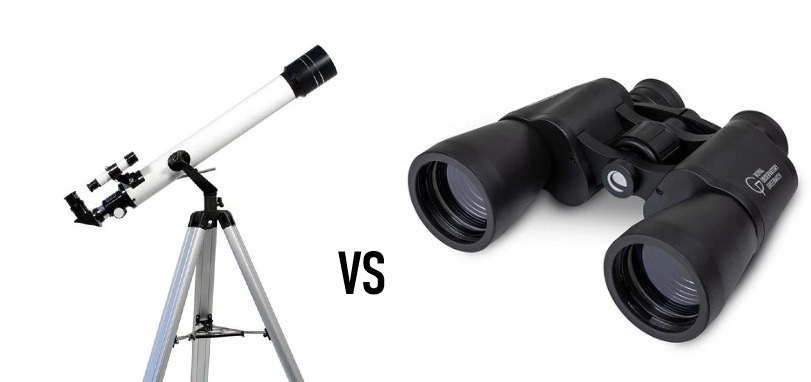
The best beginner's choice, I can confidently say, is an average pair of binoculars in a price class similar to a Refractor telescope. Most often, binoculars have incomparably better optics, are easy to handle, do not require a stable mount to begin with, and have a wide field of view. It's enough to point it at the Moon for the first time, and you'll probably be constantly looking forward to clear nights and exploring the incredibly interesting night sky.
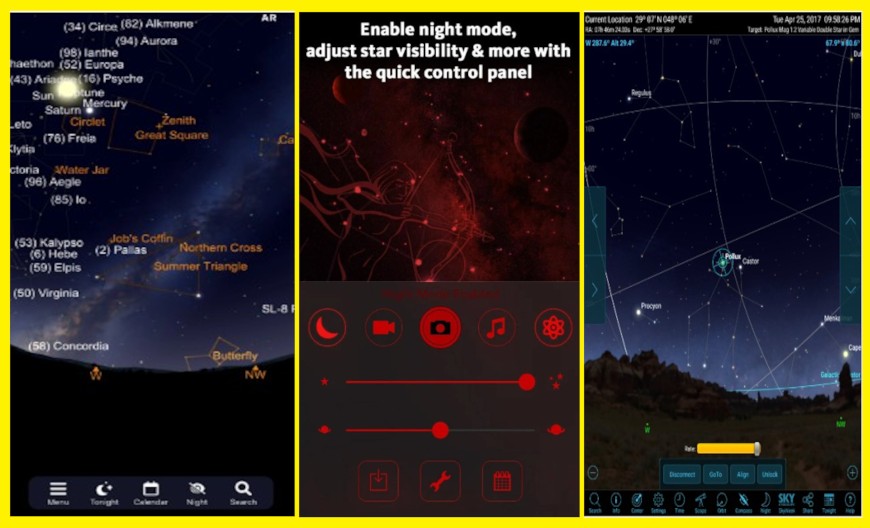
Let's go back to the initial problem: locating the desired object. Nowadays, there are many smartphone programs for this purpose, among which the most famous are Stellarium, SkySafari, SkyView, and all of them use your phone's camera, GPS, and gyroscope to map the night sky in real time. Although they are very helpful, they are not precise enough to quickly locate an object with a telescope or binoculars, considering that these optical devices have a relatively small angle of view.
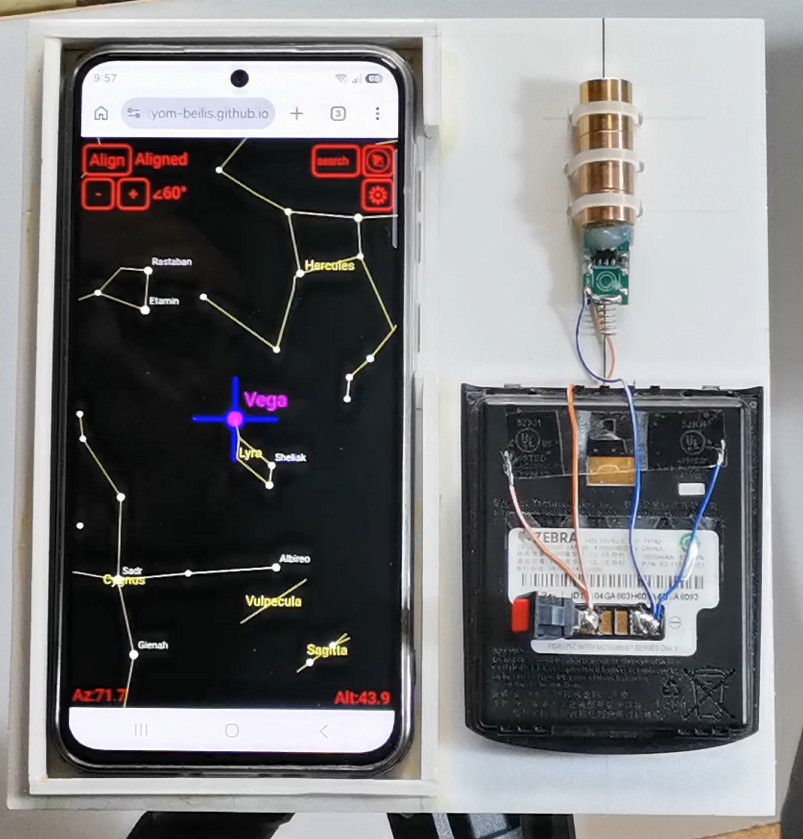
With the method I will show you below, you will be able to locate an object in the sky with such precision that you will be able to find any object in no more than 20-30 seconds. It sounds incredible, but even more incredible is the fact that the entire equipment would cost you less than ten dollars. You need a small green laser pointer, a lithium-ion battery and a suitable holder for the laser, battery and Smartphone. I made the holder from PVC material, but it can be made from any other material that you have on hand, just it should not be iron, because it affects the smartphone sensors and the pointing will not be accurate. The first condition is that the laser pointer and the smartphone are in the same horizontal plane, which is observed because they are mounted on the same flat plate, and the second condition is that they are placed parallel along the vertical axis. There may be certain minimal deviations that would later be compensated for by calibrating the option in the software. On the underside I attached a suitable shape that fits my tripod mount.
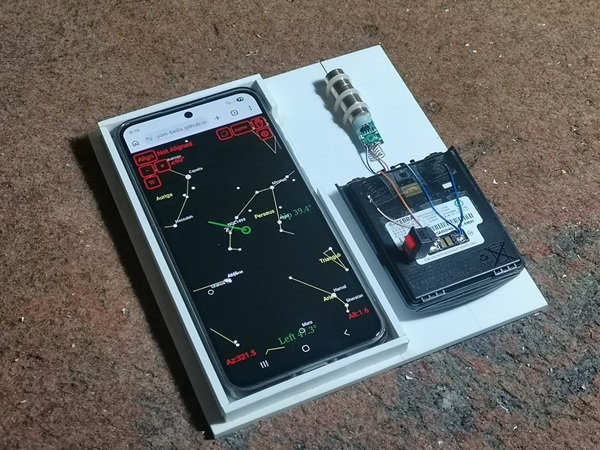
As for the software, it is "AstroHopper" which is basically a web application and does not have to be installed, but if you want you can download it for offline use. It is enough to type astrohopper in any search engine on your phone and the first search takes you to GitHub and the online application appears. It seems to be the same as similar applications, but there is one option that makes it much more useful for such purposes, and that is the Align button that serves for calibration.
Now I will carefully and gradually explain to you the procedure for calibrating and finding a certain celestial object, but in laboratory conditions, indoors, first of all because I do not have appropriate devices for recording at night in low light, but also because the procedure can be explained quite clearly in such conditions.
For example, I want to locate the Messier object M13 (Hercules) globular cluster which contains of several hundred thousand stars. This is also one of the brighter Messier objects and can be seen with 50mm binoculars in a relatively light-poor urban environment.

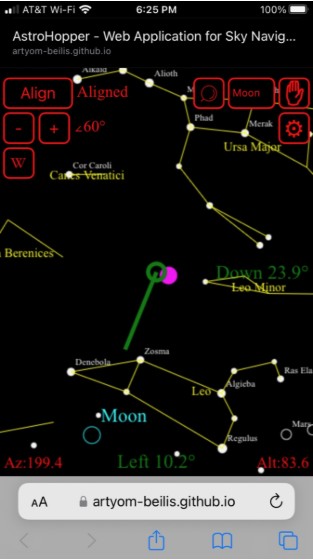
During this period, M13 is located approximately to the northeast at night. So first I point my phone in that direction and search for M13 on Astrohopper. I find it very easily and then I activate the laser. The laser beam ends somewhere in the sky and now I look for a relatively bright star close to this point. I assume that most of the stars are already familiar to you, but even if you don't know it at all, you can easily guess which star it is based on the markings and the arrangement of the stars on Astrohopper. In this particular case, the relatively close and bright star is Vega. Next comes the most important part: I point the laser pointer precisely at this star (Vega). On the astrohopper, we press Align and a "select star" button appears. If Vega is now in the field of view of the phone, we mark it by pressing on it. If it is out of the field of view, we press the button at the very top right and search for Vega. When we find it, we press on it and the calibration begins. This takes a few seconds and now we have the "Aligned" mark and we can search for any object in the sky, specifically now M13. In the search field, we write M13 and move the pointer exactly to M13 on the smartphone display. Now M13 in the sky is located less than one to two degrees around the end of the green laser beam.
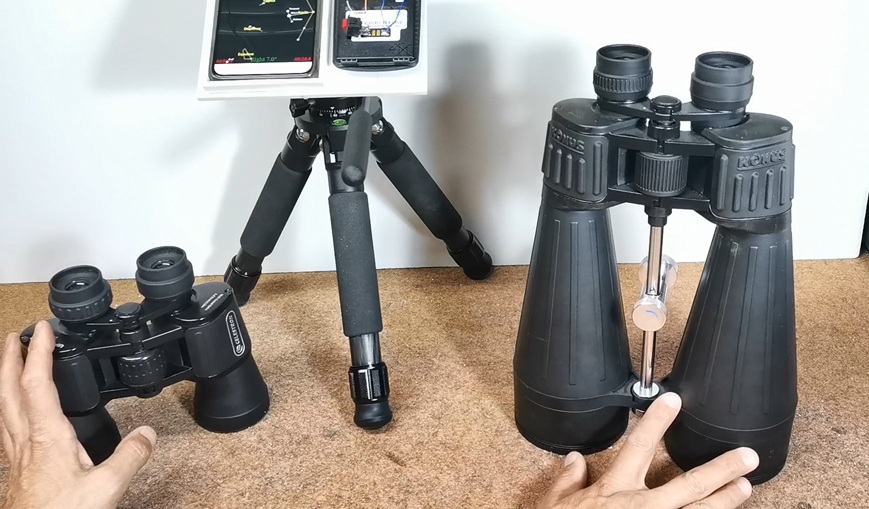
I used these two binoculars for observation, one with 50mm lenses, and the other larger with 80mm, and in both cases M13 was always in the same field of view with the end of the laser after calibration, which means I found this object instantly.

Due to the excessive ambient lighting, it was a little more difficult for me with the smaller binoculars, but with the larger ones, a cottony white circle full of stars instantly appeared in my field of vision. I repeated this procedure on several other relatively bright Messier objects and the result was more than successful. In most cases the desired object and the end of the laser beam were in the field of view of the binoculars.
A very useful option is that during the observation we can recalibrate at any time depending on which bright star is close to the desired object. This way the accuracy is the highest. First, we can test this process without binoculars with the Moon and surrounding stars as an easy training. Unfortunately, during the creation of this video, the moon was not visible at night in my region, so I could practically demonstrate the same procedure to you in real conditions.
I would like to point out that for long-term use, the laser module should be mounted on a suitable aluminum heat sink, otherwise it will quickly overheat and lose the properties (intensity) of the laser beam.
Otherwise, this method is irreplaceably practical when it comes to group observation, for example, astronomical societies, where a certain object needs to be located simultaneously from multiple optical instruments, and also in the event that we want to quickly show a certain celestial object to a beginner, most often with binoculars.
And finally a short Conclusion. This simple DIY project proves that expensive GoTo systems are not always necessary. With a smartphone, AstroHopper, and a green laser pointer, you can quickly and accurately locate celestial objects and spend more time observing the universe instead of searching for it. The entire project costs less than $10, requires only basic materials, and can significantly improve your stargazing experience. It is especially useful for astronomy clubs, public observations, beginners, and anyone who wants a faster and easier way to explore the night sky.


