






Story
ESP32 PC Control Deck
I wanted to see if a small ESP32 touchscreen could become something genuinely useful on my desk.
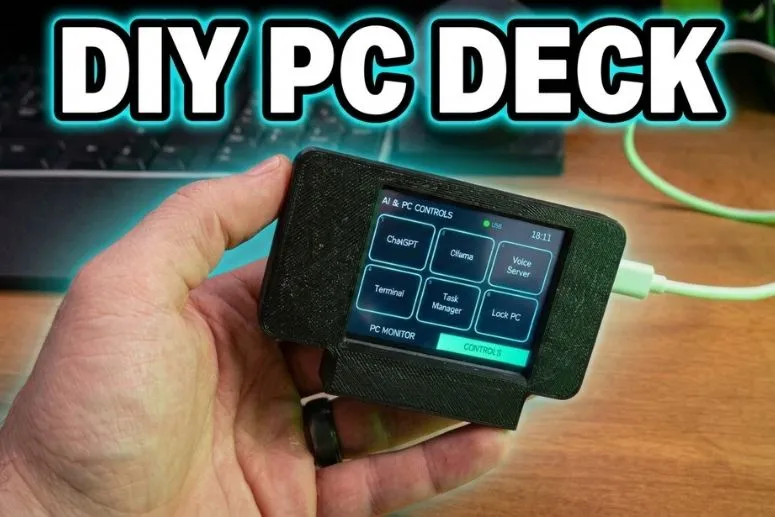
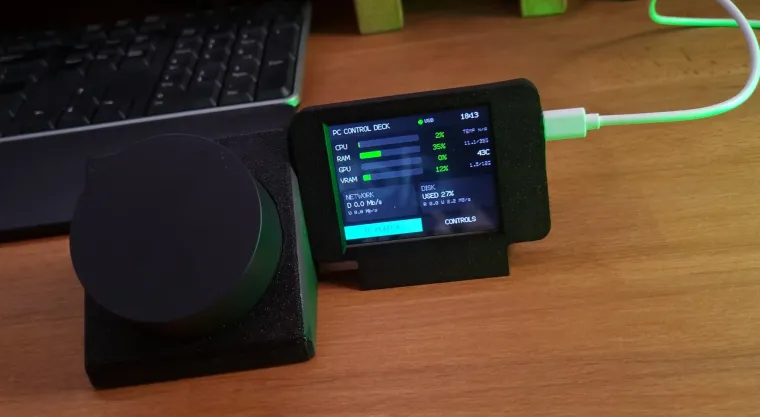
The result is a USB-connected PC Control Deck that combines a system monitor with a small touch control panel.
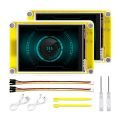
The project uses the Elecrow 2.8-inch ESP32 Solo Miner LCD Display. The board includes an ESP32-WROOM-32, a 320x240 touchscreen and USB serial connectivity.
I have already experimented with similar hardware for projects such as a small game console, a DOOM-like game and a Pocket Admin Toolkit.
This time I wanted to build something I could actually keep on my desk and use while working.
You can see the finished project here:
https://www.youtube.com/watch?v=16eqHU4j9Fk
The complete source code is available here:
https://github.com/lepczynski-cloud/ESP32-PC-Control-Deck
What does it do?
The first screen works as a live PC monitor.
It can display:
- CPU usage
- RAM usage
- used and total RAM
- GPU usage
- VRAM usage
- used and total VRAM
- GPU temperature
- optional CPU temperature
- optional system and storage temperatures
- network download speed
- network upload speed
- disk usage
- disk read activity
- disk write activity
- current PC time
- USB connection status
The second screen works as a touch control panel.
My current configuration includes:
- ChatGPT
- Ollama
- local Voice Server
- Windows Terminal
- Task Manager
- Lock PC
The actions are configurable, so the same project can be adapted to a different workflow.
For example, the buttons could be used to start scripts, open websites, launch development tools, control media applications or start local services.
Why USB instead of Wi-Fi?
I wanted the device to be as simple as possible.
The display already sits next to my computer, so adding Wi-Fi or Bluetooth did not provide much benefit.
One USB cable is enough to:
- power the ESP32
- send PC telemetry to the display
- send touch-button events back to the computer
The ESP32 does not store passwords, browser cookies, API keys or account credentials.
It only receives system statistics and sends simple macro IDs back to the PC.
All actions are executed by a small local program running on the computer.
How the project works
The architecture is simple PC runs a small Python bridge. The bridge collects system information and sends it to the ESP32 as JSON messages over USB serial. The ESP32 receives the data and updates the touchscreen interface.
When a button is pressed, the ESP32 sends the ID of the selected macro back to the computer. The Python bridge checks its local configuration and performs the configured action.
This separation keeps the ESP32 firmware simple and allows the PC actions to be changed without rebuilding the firmware.
Step 1: Prepare the hardware
I used the Elecrow 2.8-inch ESP32 Solo Miner LCD Display.
Product page:
The board used for this project includes:
- ESP32-WROOM-32-N4
- 2.8-inch 320x240 TFT LCD
- ILI9341V display controller
- resistive touchscreen
- USB-C connection
- CH340 USB serial interface
Connect the board directly to the computer using a USB cable.
No additional electronics are required for the basic version.
Step 2: Download the project
Clone or download the GitHub repository:
https://github.com/lepczynski-cloud/ESP32-PC-Control-DeckThe repository contains both parts of the project:
src/ ESP32 firmware

host/ PC bridge software
Step 3: Flash the ESP32 firmware
I use CLion with PlatformIO, but the project can also be built directly with PlatformIO.
From the project directory run:
pio run -e esp32_pc_control_deckTo upload the firmware:
pio run -t upload -e esp32_pc_control_deckAfter the first boot, follow the touchscreen calibration shown on the display. The calibration values are stored on the ESP32.
Step 4: Start the PC bridge
On Windows run:
host\run_windows.batDuring the first run, the script creates a Python virtual environment, installs the required dependencies and creates a local configuration file.
The bridge then detects the ESP32 serial connection and starts sending system telemetry.
If more than one compatible serial device is connected, the COM port can also be configured manually.
Step 5: Configure the touch buttons
The button configuration is stored locally in:
host/config.jsonEach button can perform a different action.
For example, my configuration includes buttons for ChatGPT, local Ollama, my local voice server, Windows Terminal, Task Manager and locking Windows.
The configuration can be changed without recompiling the ESP32 firmware.
Local paths and private configuration are excluded from the public GitHub repository.
Step 6: Optional temperature monitoring
GPU information can be collected using NVIDIA tools when an NVIDIA GPU is available.
For additional Windows temperature sensors, the project can optionally use LibreHardwareMonitor.
After starting LibreHardwareMonitor, enable:
Options -> Remote Web Server -> RunThe bridge can then read available CPU, system and storage temperature sensors.
If a temperature sensor is not available, the interface simply displays an alternative value instead.
The rest of the monitoring continues to work normally.
Step 7: Start automatically with Windows
After confirming that the bridge works correctly, it can be configured to start automatically.
First run the bridge manually at least once:
host\run_windows.batThen run:
powershell -ExecutionPolicy Bypass -File .\host\install_autostart_windows.ps1The host bridge will then start automatically after logging in to Windows.
To remove automatic startup:
powershell -ExecutionPolicy Bypass -File .\host\uninstall_autostart_windows.ps1Step 8: Add an enclosure
I also printed an enclosure to make the project look better on my desk.
The original 3D model I found was designed for a different display, so I had to modify it to fit this Elecrow board.
Because of this, anyone using the same model may also need to modify it or find another enclosure that better matches their hardware.
Original enclosure model:
[ADD 3D MODEL LINK HERE]
If you want to upload an enclosure file as an attachment on Elecrow, make sure the license of the original model allows redistribution of modified versions.
Final result
The finished device gives me two useful functions in one small ESP32 project.
The monitoring screen gives me a quick overview of what my computer is doing without opening Task Manager or another monitoring window.
The control screen gives me quick access to tools and local services that I use regularly.
The project does not require Wi-Fi, Bluetooth or cloud services.
It is also easy to customize because the display and the PC bridge have separate responsibilities.
The ESP32 handles the interface.
The computer handles telemetry and actions.
This makes it easy to add new buttons, commands or monitoring functions later.
I am still developing some of my ESP32 projects, so more features and updates may appear in the GitHub repository.
Project video:
https://www.youtube.com/watch?v=16eqHU4j9Fk
Source code: