






Story
In one of my previous videos , I presented an interactive Rock-Paper-Scissors project in which we compete against the myCobot 280 M5Stack, a 6-DOF robotic arm from Elephant Robotics. In that video, I also explained some of the basic features of the robot and the installation of the required software support.
For this project, we will again use the M5Stack and MyCobotBasic libraries, which are listed at the end of the text, together with Python 3.11.
Face detection is performed using the MediaPipe Face Detection machine-learning model, while OpenCV handles the camera stream, graphical visualization, and calculation of the face position inside the image. PySerial is used for communication between the Python application and the M5Stack controller.
Detailed voideo description at: https://youtu.be/mhNUhMpSt1c
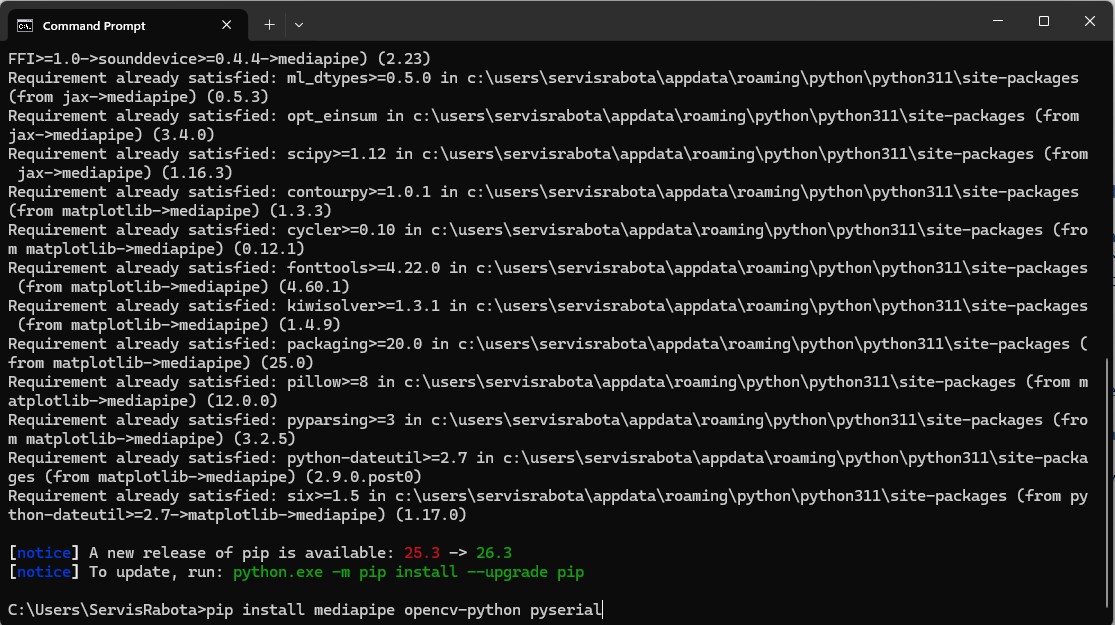
These Python packages can be installed on Windows 11 by running the following command in Command Prompt or Windows PowerShell:
pip install mediapipe opencv-python pyserial
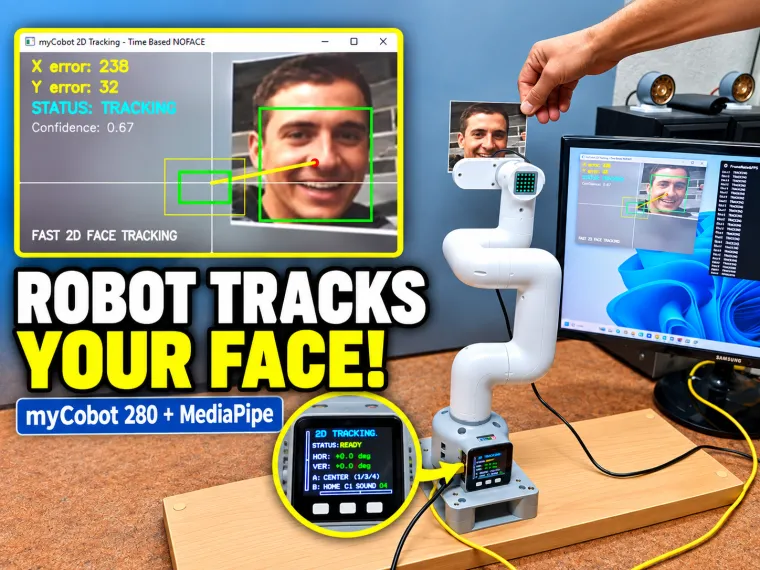
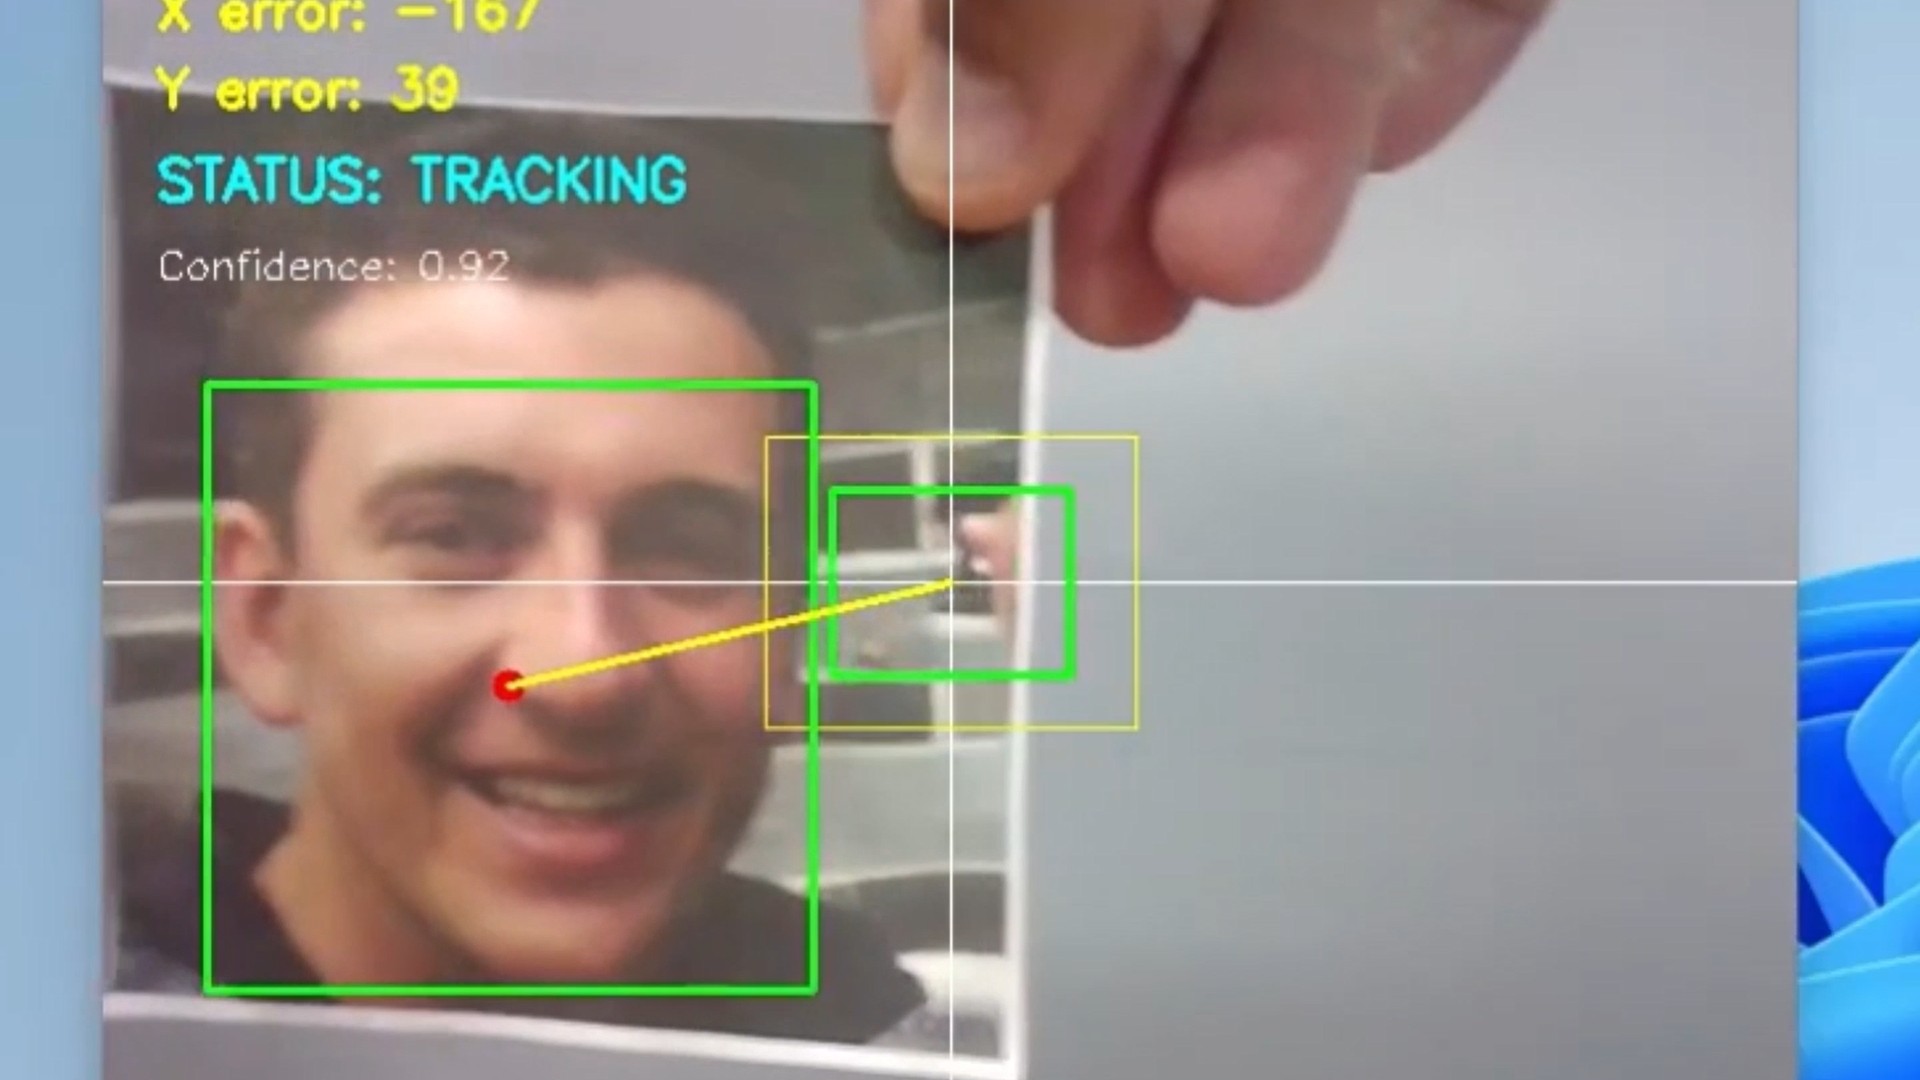
This time, the goal is quite different. The myCobot 280 robotic arm will first detect a human face using the Camera Flange 2.0 module, also manufactured by Elephant Robotics, and then automatically move the camera so that the detected face remains near the center of the image.
The project is divided into two main software parts: a Python program running on the PC and an Arduino C++ program running on the M5Stack controller of the robot. The Python program is responsible for computer vision, and depending on the position of the face it sends simple commands to the M5Stack through the USB serial connection: Now the M5 Stack controls the servos and moves the arm along with the camera. For smooth movement, the Arduino program uses small incremental joint movements rather than continuously sending large absolute position changes.
During development, I tested two different methods of moving the camera horizontally.
- In the first version: J5 controls LEFT and RIGHT movement , J4 controls UP and DOWN movement. This gives a compact tracking movement.
- In the second version: J1 controls LEFT and RIGHT movement, J4 controls UP and DOWN movement. In this case, the complete upper part of the robotic arm rotates around the base. Visually, this movement looks more like a robot turning its “head” toward the person, and it gives the project a very different character.
Both versions use exactly the same Python face-tracking program.
The small M5Stack display is used as a local status monitor for the complete system: Under the Title the current operating state is displayed, then horizontal and vertical positions numerically in degrees. In addition to the numerical values, two graphical position bars are displayed, for horisontal and vertical movements.
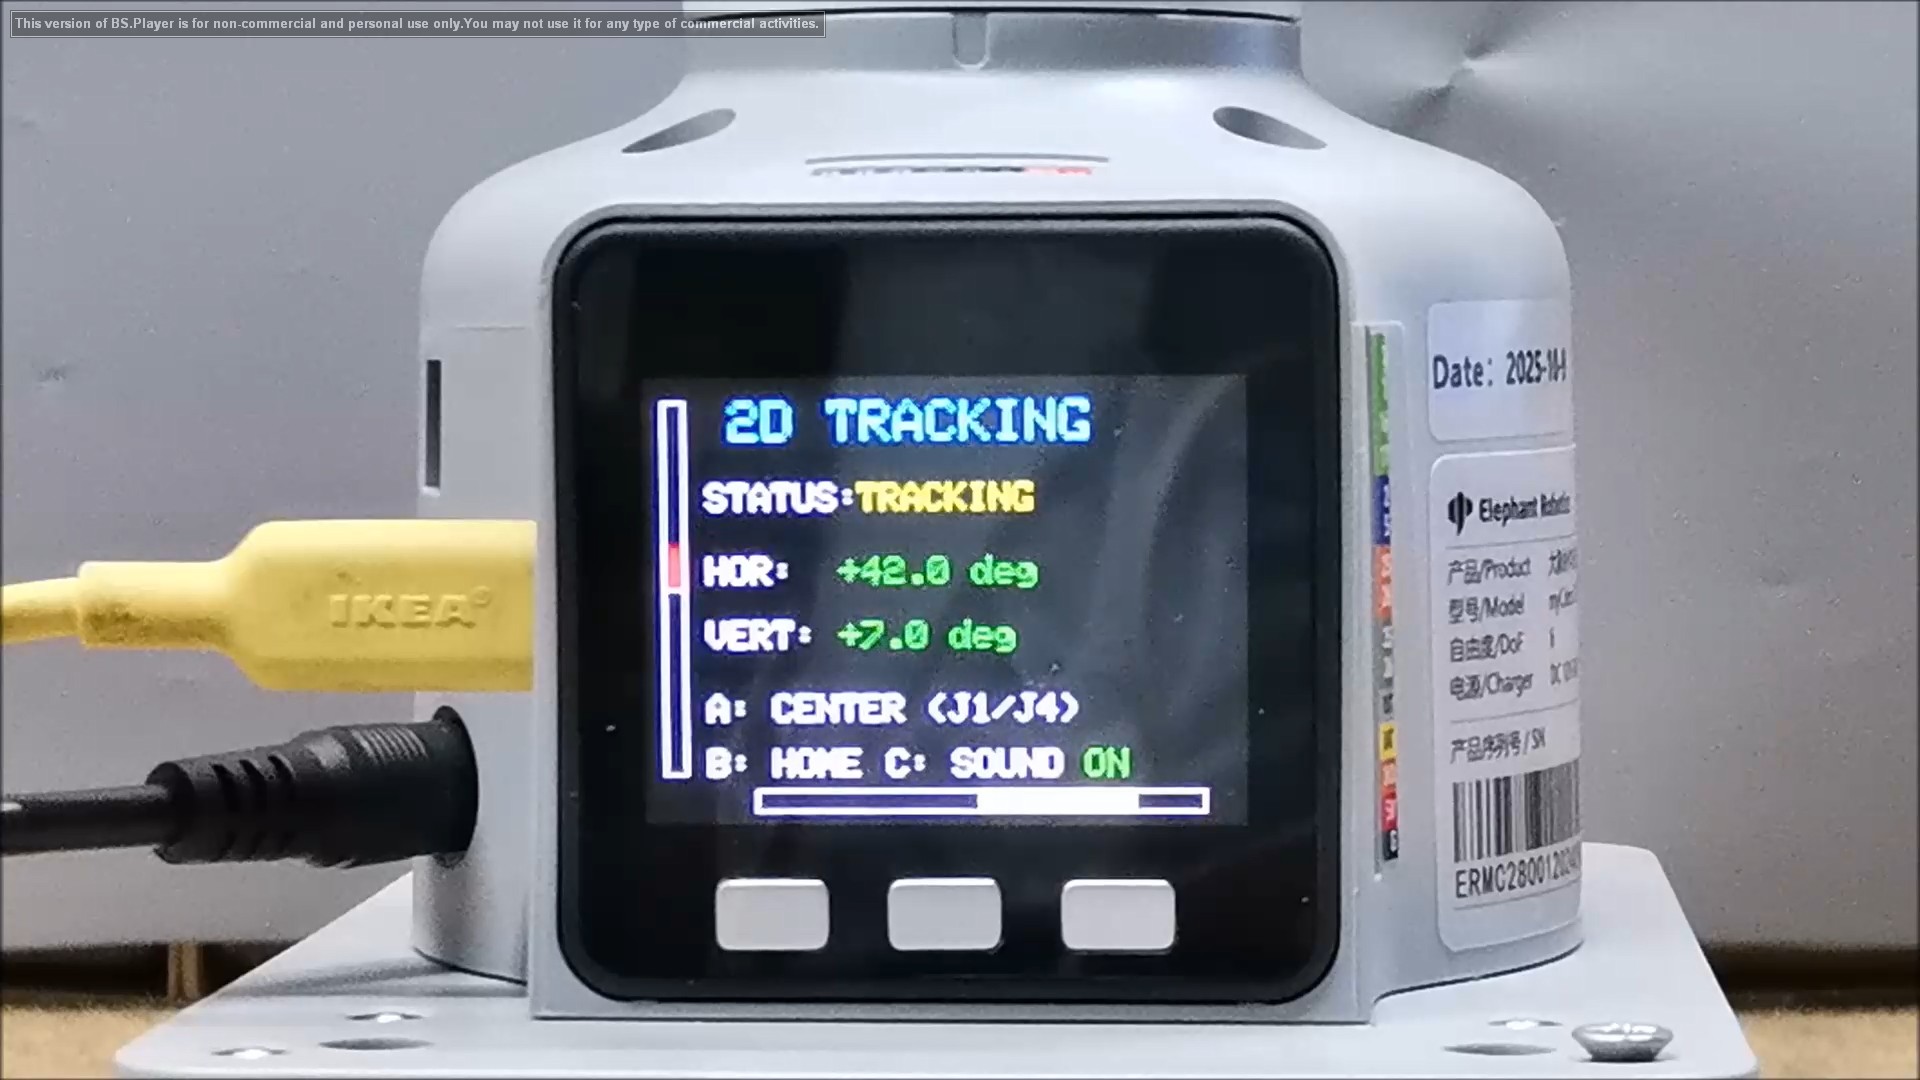
The three buttons on the M5Stack also have dedicated functions. Button A is used for Center, Button B activates the complete Home position at start and Button C switches the sound indication ON or OFF.
The OpenCV camera window provides additional visual information that is very useful during testing and calibration.
The built-in 5×5 LED panel on the myCobot is used as another simple but very effective status indicator. Different colors represent different operating conditions. Blue means that the robot is in a neutral or waiting condition. Green means that a face has been detected and the robot is actively following its movement. Red, the detected face is inside the central stop zone and no further movement is currently required. Yellow means that a previously tracked face has genuinely disappeared from the camera view for approximately one second.
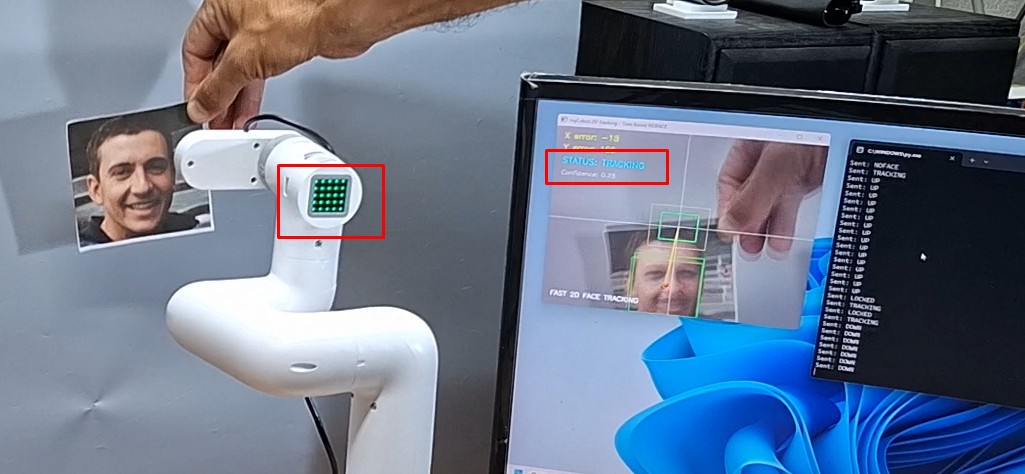
Several short sound signals are also used to make the operating states easier to recognize without looking at the display. HOME uses the same short sound that I used in my previous Rock-Paper-Scissors project. CENTER and LOCKED use a short 1800 Hz beep and a longer low-frequency tone indicates that the tracked face has been lost. The complete sound system can be enabled or disabled at any time using button C.
Now let's see how the device works in real conditions. By pressing the Home button, the entire arm is placed in a position ready for tracking. Center returns only the two tracking joints to their center positions. For a clearer presentation I am using a printed face from the "this person does not exist" website.
And finallu a short conclusion. This project transforms the myCobot 280 into a smooth real-time 2D face-tracking robot using Python, MediaPipe, OpenCV, and Arduino. Two different joint-control methods demonstrate how the same vision system can produce very different and natural-looking robotic movements.