Lesson06---USB2.0
Introduction
In this class, we are expanding on what we learned in the previous class.
Before studying this class, please make sure you understand the implementation of the touch function in the previous class. This will be of great help to your learning of this class.
As you know, in the previous class, we already learned the two components, bsp_usb and bsp_i2c. It was because we fully utilized these two components that our Advance-P4 screen could be made touchable.
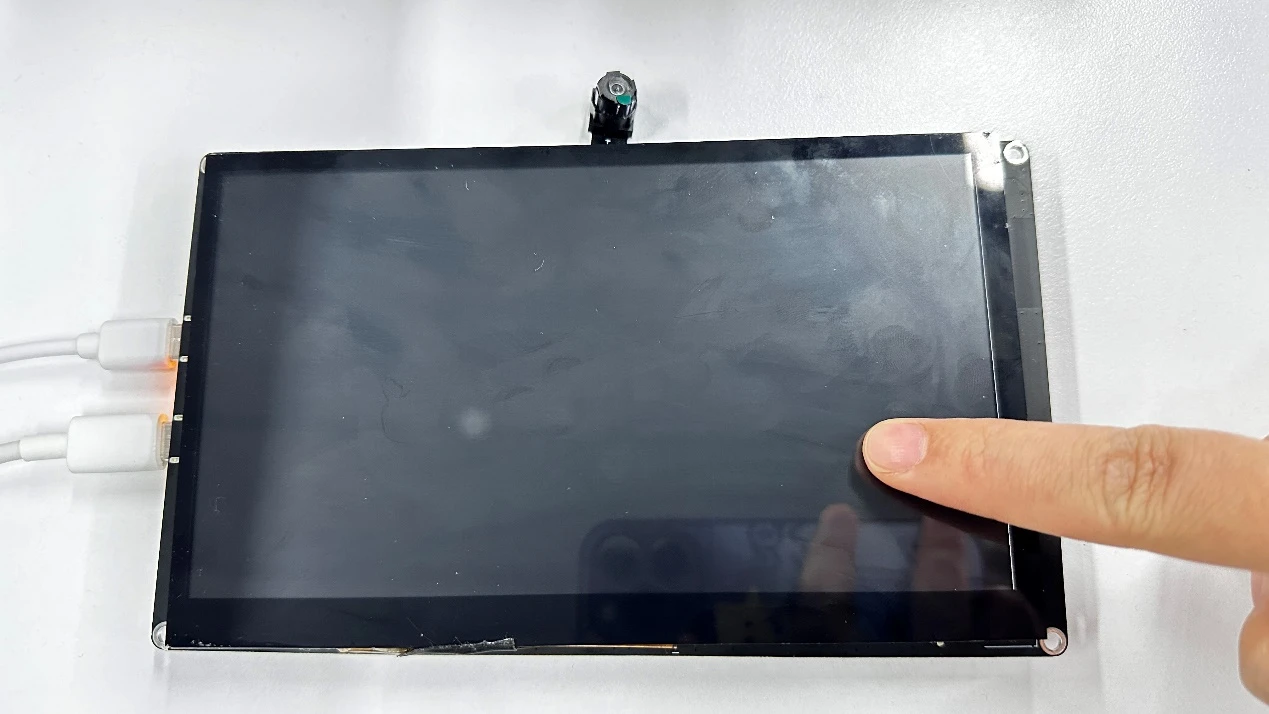
In this class, we will add a new component, bsp_usb, on top of these two components. This will enable us to use the USB2.0 interface on our Advance-P4 to act as a mouse. When you slide on the screen of the Advance-P4, you will be able to see that the mouse on your computer also moves accordingly.
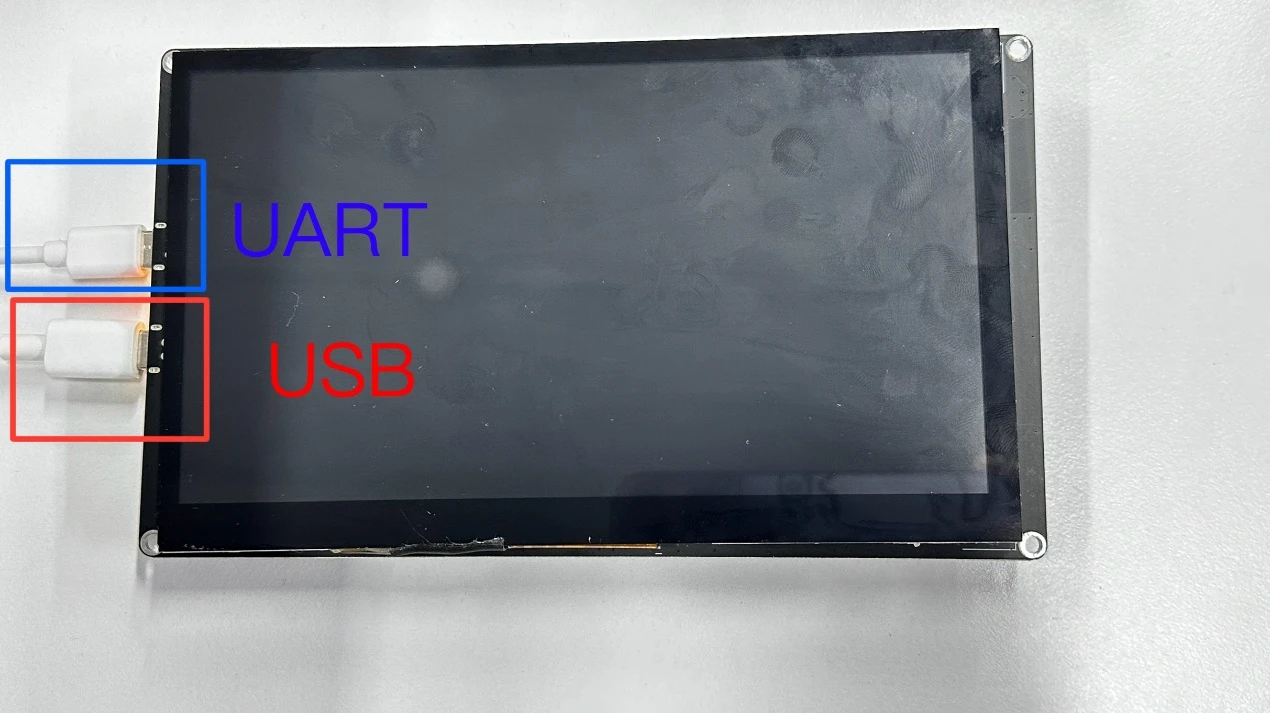
Hardware Used in This Lesson
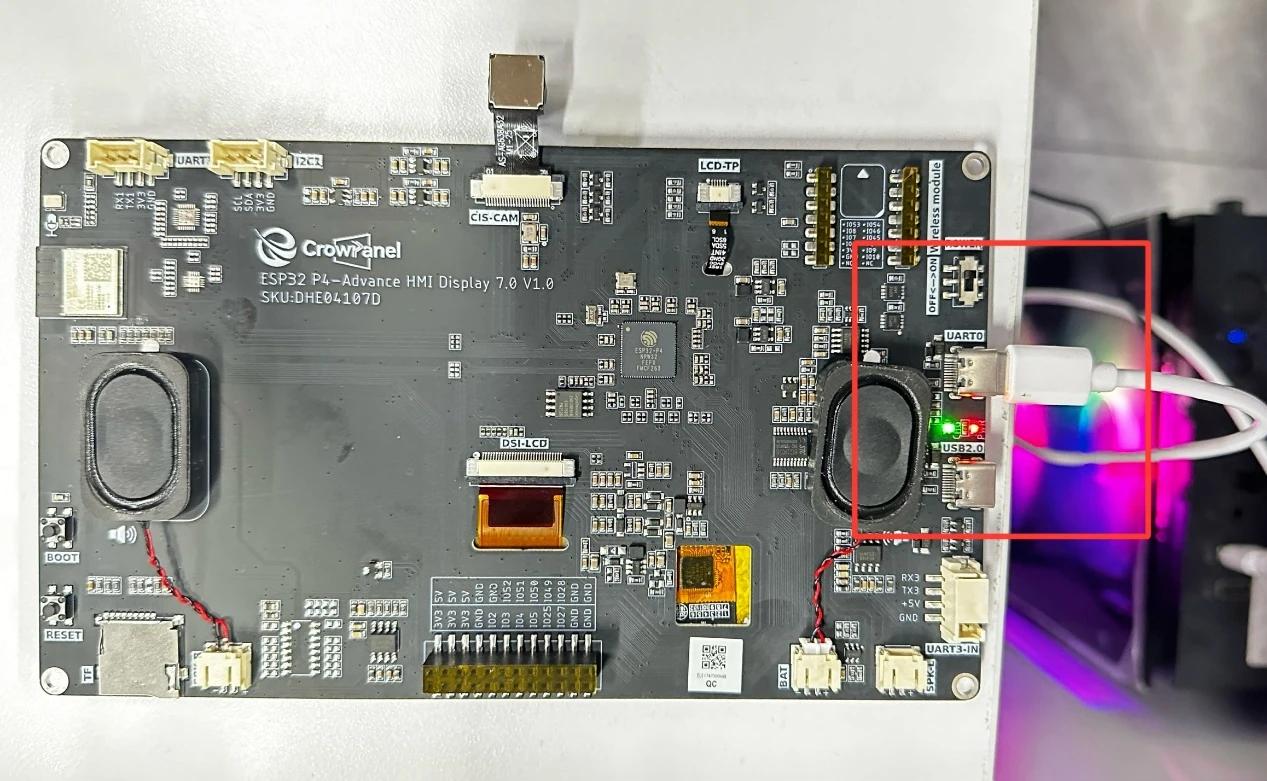
USB 2.0 on the Advance-P4
Operation Effect Diagram
After running the code, you will be able to see that when you slide the screen on the Advance-P4, the mouse on your computer also moves accordingly, and at the same time, you can see the relevant coordinates printed on the monitor.
Key Explanations
Now, this class is about adding the bsp_usb component based on the project from the previous class, so that we can slide and touch the Advance-P4 screen and control the computer mouse.
The previous touch function has already been realized using the bsp_usb and bsp_i2c components from the previous class.
Next, we will focus on understanding the bsp_usb component.
First, click on the Github link below to download the code for this lesson.
GitHub Link
Then, drag the code of this lesson into VS Code and open the project file.
After opening it, you can see the framework of this project.

In the example of this class, a new folder named "bsp_usb" was created under the "peripheral" directory. Inside the "bsp_usb" folder, a new "include" folder and a "CMakeLists.txt" file were created.
The "bsp_usb" folder contains the "bsp_usb.c" driver file, and the "include" folder contains the "bsp_usb.h" header file.
The "CMakeLists.txt" file integrates the driver into the build system, enabling the project to utilize the USB2.0 transmission functionality written in "bsp_usb.c".
USB 2.0 driver code
The USB2.0 driver consists of two files: "bsp_usb.c" and "bsp_usb.h".
Next, we will first analyze the "bsp_usb.h" program.
"bsp_usb.h" is the header file of the USB2.0 driver module, mainly used for:
Making the functions, macros and variable declarations implemented in "bsp_usb.c" available for external programs to use
Allowing other .c files to simply include "#include "bsp_usb.h" " to call this module
In other words, it is the interface layer, exposing which functions and constants can be used externally while hiding the internal details of the module.
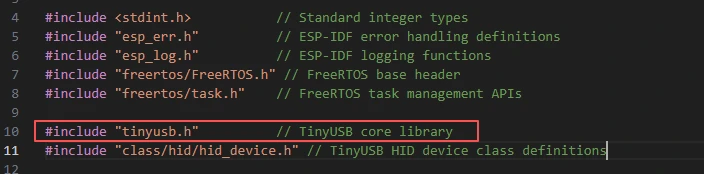
In this component, all the libraries we need to use are placed in the "bsp_usb.h" file for unified management.
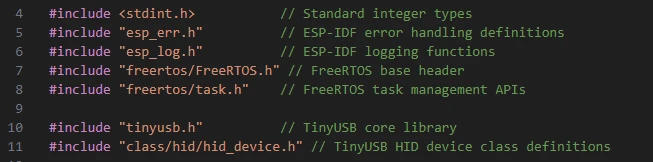
Like the tinyusb.h (this is a library under the network component esp_tinyusb)
In this case, we need to fill in the version of esp_tinyusb in the idf_component.yml file located in the main folder.
Since this is an official library, we need to use the official library to achieve the USB 2.0 transmission function on our Advance-P4.

When the project is compiled in the future, it will download the 1.1 version of the esp_tinyusb library. After the download, these network components will be saved in the "managed_components" folder. (This is automatically generated after filling in the version number.)
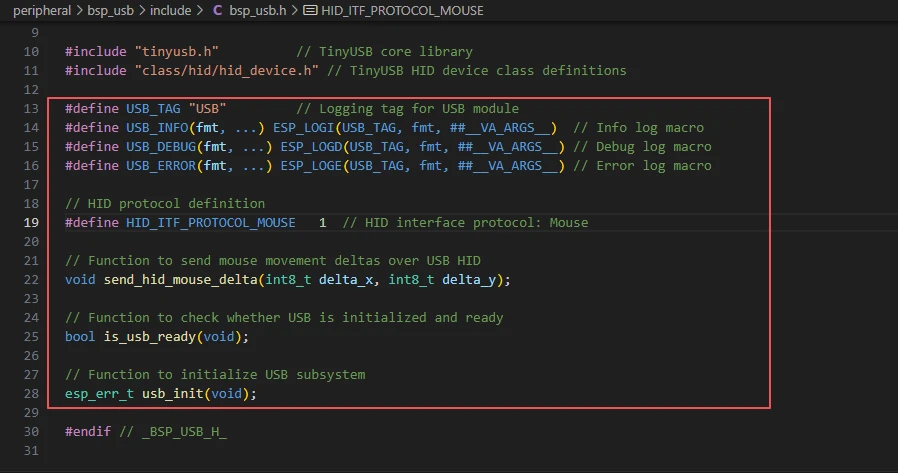
Then comes the declaration of the variables we need to use, as well as the declaration of the functions. The specific implementations of these functions are in "bsp_usb.c".
They are all unified in "bsp_usb.h" for the convenience of calling and management.
Let's take a closer look at "bsp_usb.c", examining the specific functions of each one.
bsp_usb: This is a simple USB HID (mouse) module based on TinyUSB, including HID descriptors, TinyUSB callbacks, and external initialization/sending interfaces.
Although these three functions have empty implementations, they must exist.
They are callback interfaces for USB HID devices to communicate with the host ---
tud_hid_descriptor_report_cb is used to return the HID report descriptor,
tud_hid_get_report_cb handles the GET_REPORT request from the host,
tud_hid_set_report_cb handles the SET_REPORT request or OUT data from the host.
tud_hid_descriptor_report_cb:
This callback is called by TinyUSB when the host requests the HID report descriptor through the control transfer. The function should return a pointer to a static or global descriptor array; in your implementation, it directly returns hid_report_descriptor, suitable for scenarios with only one HID interface.
tud_hid_get_report_cb:
This is the callback for handling the host's GET_REPORT request: when the host wants to read the "input/characteristic" report from the device side, TinyUSB will call it. The function should fill the buffer with the report data and return the actual length; currently, you return 0 (indicating no provision), and TinyUSB will handle this request as a STALL.
tud_hid_set_report_cb:
This callback is called when the host initiates a SET_REPORT (or sends data through the OUT endpoint). The application should parse the contents of the buffer based on report_id / report_type and perform the corresponding actions.
Then the following function is the interface we call to implement the USB 2.0 transfer function.
usb_init() → Initialize USB HID mouse device
send_hid_mouse_delta() → Send mouse movement data
is_usb_ready() → Determine if USB is available
send_hid_mouse_delta:
This is an external sending interface used to send the mouse movement increment through HID to the host: The function first checks tud_hid_ready() (whether the device has been enumerated and the HID is available), and if ready, it calls tud_hid_mouse_report(...) to send a mouse report containing the X/Y increment.
is_usb_ready:
This is a simple query function that returns the result of tud_hid_ready() to determine if the TinyUSB HID interface is ready to send reports to the host (that is, whether the device has successfully enumerated and the HID interface is available).
usb_init:
This function constructs tinyusb_config_t (containing string descriptors, configuration descriptors, etc.) and calls tinyusb_driver_install(&tusb_cfg) to install the TinyUSB driver; it is responsible for starting the USB subsystem and exposing the HID device to the operating system (the host).
The above bsp_usb component has realized the HID mouse function in the USB 2.0 device mode, enabling the ESP32P4 to simulate mouse operations.
That's all about the bsp_usb component. Just know how to call these interfaces and you're good to go.
Then, if we need to make a call, we must also configure the "CMakeLists.txt" file located in the "bsp_usb" folder.
This file is placed in the "bsp_usb" folder and its main function is to inform the build system (CMake) of ESP-IDF: how to compile and register the "bsp_usb" component.
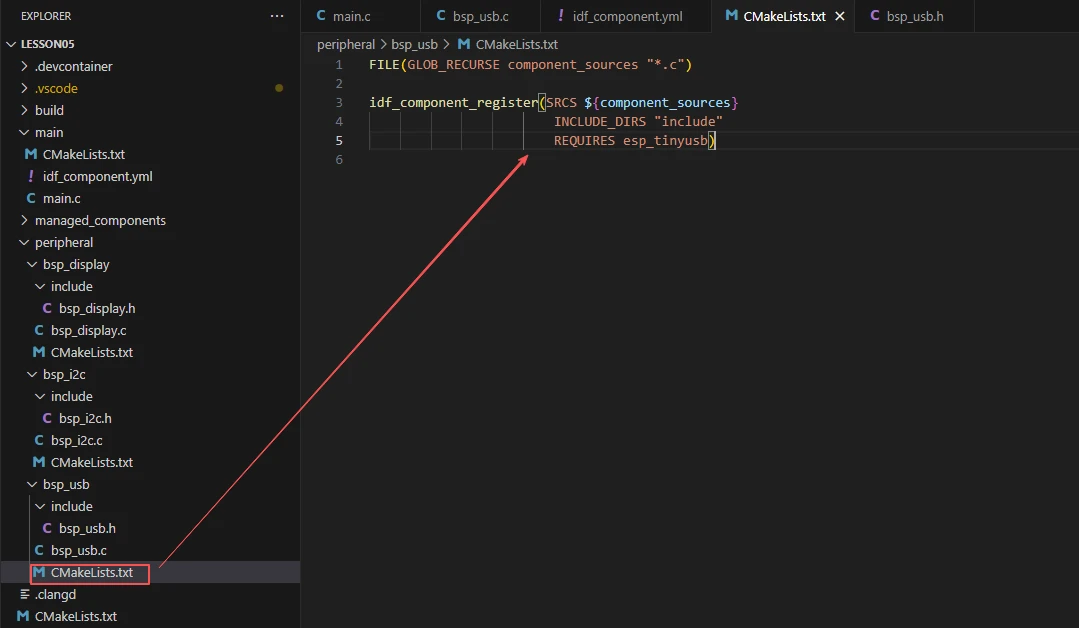
The reason why it is called esp_tinyusb here is that we called it in the "bsp_usb.h" file (for other libraries that are system libraries, there is no need to add anything).

Main function
The main folder is the core directory for program execution, and it contains the executable file main.c for the main function.
Add the main folder to the "CMakeLists.txt" file of the build system.

This is the entry file of the entire application. In ESP-IDF, there is no "int main()", but the program starts running from "void app_main(void)".
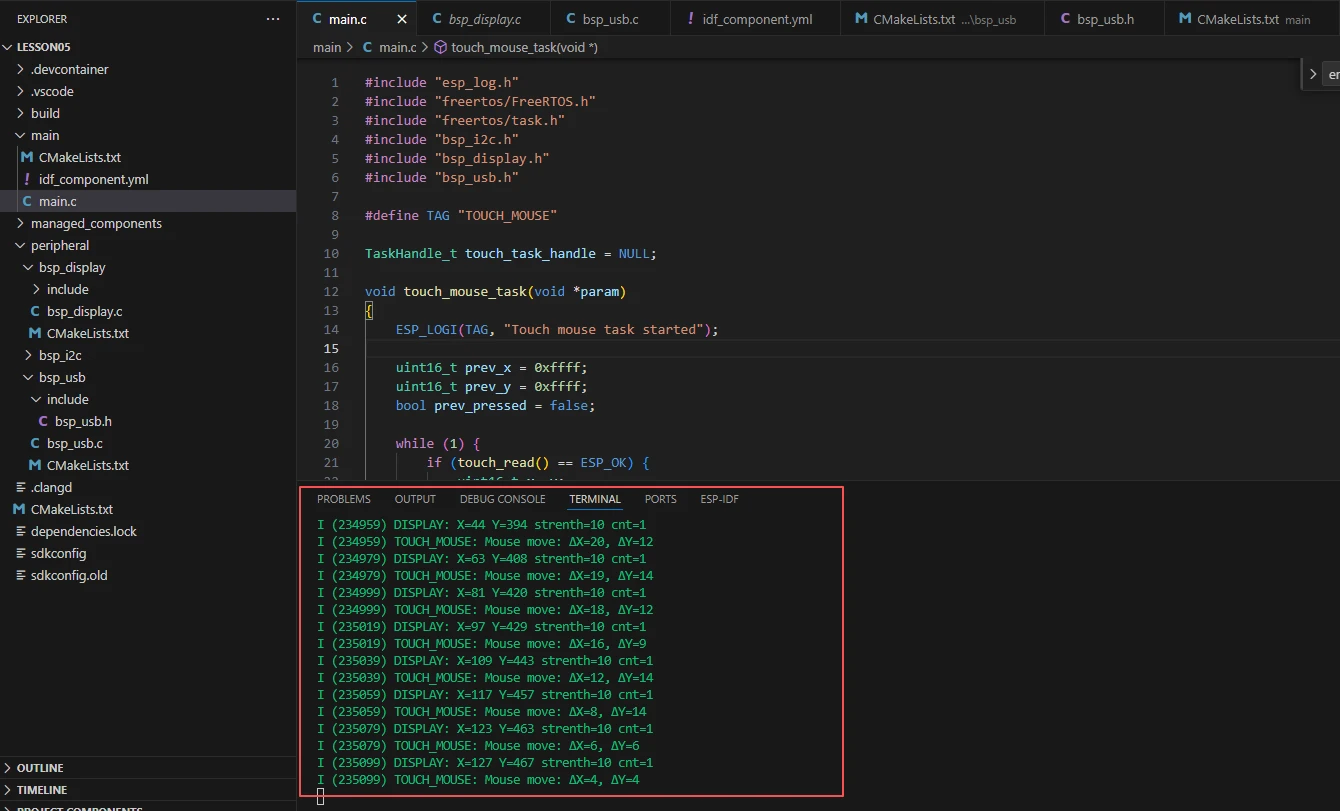
Let's first explain main.c.
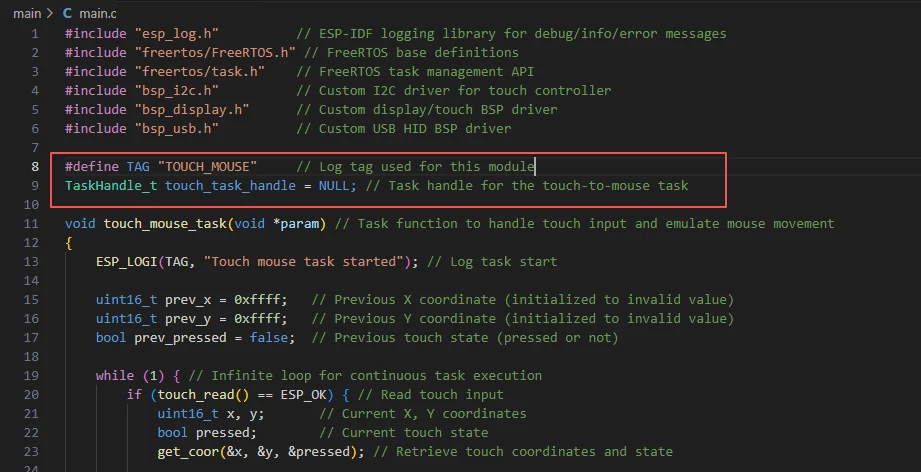
esp_log.h: Log printing in ESP-IDF (such as ESP_LOGI/ESP_LOGE, etc.).
freertos/FreeRTOS.h and freertos/task.h: Task management in FreeRTOS.
bsp_i2c.h: Initialize I2C for communication with the touch screen.
bsp_display.h: Obtain the touch screen coordinates.
"bsp_usb.h": USB HID mouse driver interface
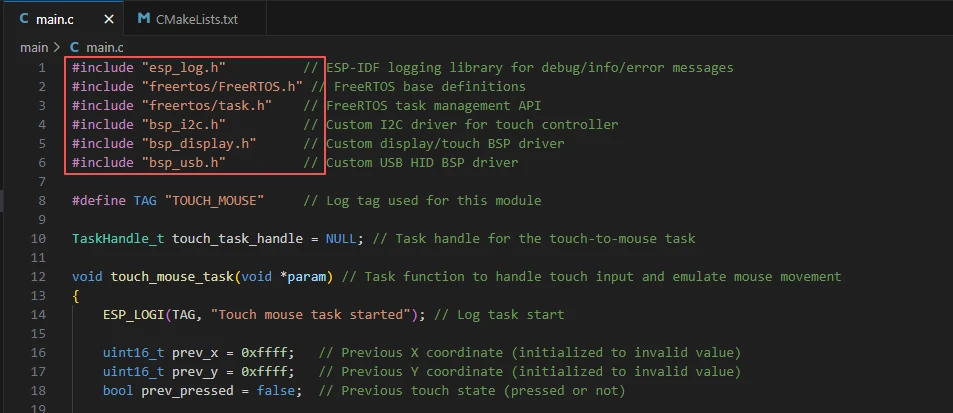
TAG: Log tag.
touch_task_handle: FreeRTOS task handle, used to manage the touch mouse task.
The touch_mouse_task function:
This function, named touch_mouse_task, serves to convert the finger movements on the touch screen into USB HID mouse movements. It continuously reads the touch screen coordinates and press status within an infinite loop. When the touch screen is pressed and the USB HID device is ready, it calculates the incremental movement (delta) of the finger and sends the mouse movement report to the computer via send_hid_mouse_delta; when the finger is released, it resets the previous coordinates. The entire process cycles at a 10ms interval, achieving a mouse sampling rate of approximately 100Hz.
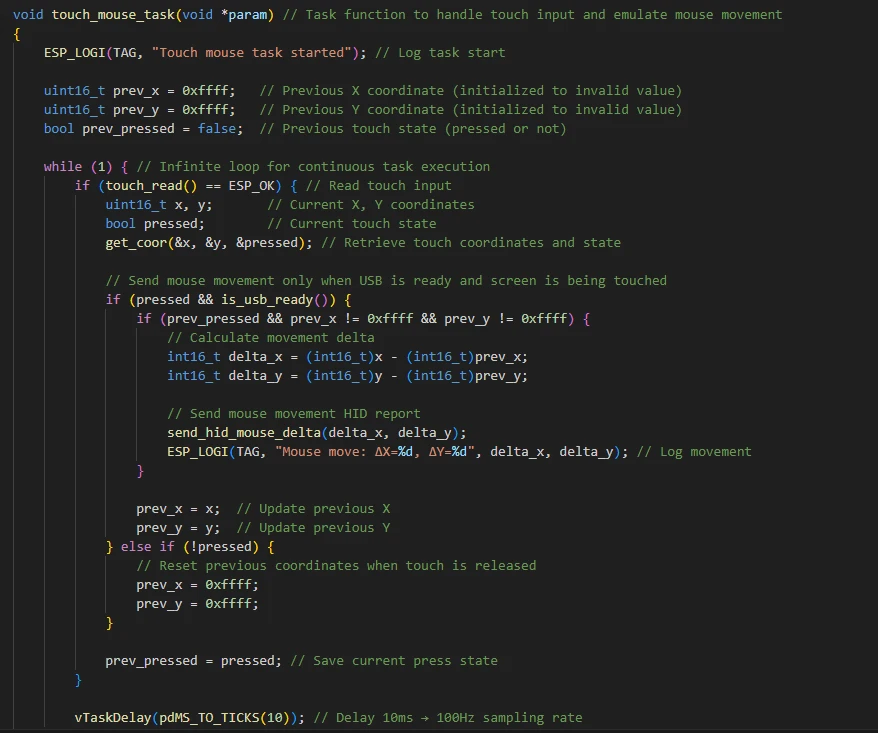
The workflow of the touch_mouse_task code:
Call touch_read() to obtain the touch screen status.
Use get_coor() to get the current coordinates (x, y) and the pressed state pressed.
If the screen is pressed and the USB is ready:
Calculate delta_x = x - prev_x, delta_y = y - prev_y.
Call send_hid_mouse_delta(delta_x, delta_y) to send mouse movement.
Update prev_x/prev_y.
Reset prev_x/prev_y when releasing the touch.
Delay 10ms to achieve a 100Hz sampling rate.
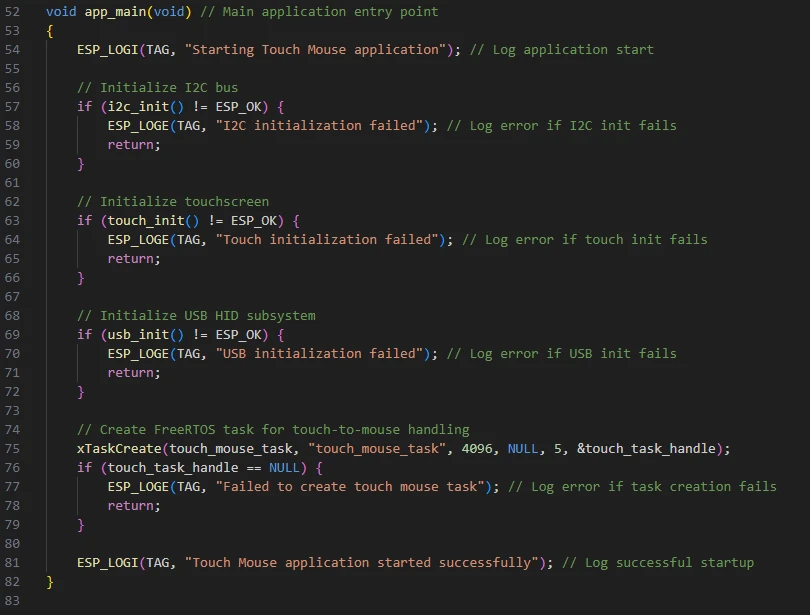
Then comes the main function app_main.
app_main is the main entry function of the program. Its function is to initialize the system peripherals and start the touch mouse task. It sequentially completes the initialization of the I2C bus, the initialization of the touch screen, and the initialization of the USB HID subsystem. If any initialization fails, it records the error and exits.
After successful initialization, it creates a FreeRTOS task named touch_mouse_task to continuously read the touch screen input and convert it into mouse movement signals, and finally starts the entire touch mouse application.\
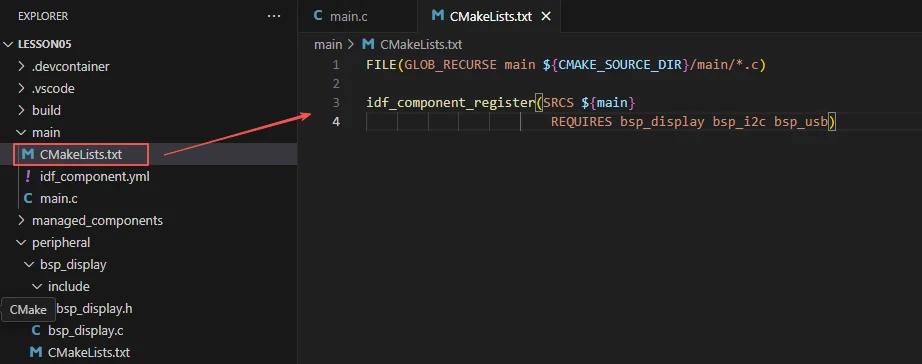
Now let's take a look at the "CMakeLists.txt" file in the "main" directory.
The function of this CMake configuration is as follows:
Collect all the .c source files in the "main/" directory as the source files for the component;
Register the main component with the ESP-IDF build system and declare that it depends on the custom component "bsp_display", the custom component "bsp_i2c", and the custom component "bsp_usb".
This way, during the build process, ESP-IDF knows to build "bsp_display", "bsp_i2c", and "bsp_usb" first, and then build "main".
Note: In the subsequent courses, we will not start from scratch to create a new "CMakeLists.txt" file. Instead, we will make some minor modifications to this existing file to integrate other drivers into the main function.
Complete Code
Kindly click the link below to view the full code implementation.
GitHub Link
Programming Steps
Now the code is ready. Next, we need to flash the ESP32-P4 so that we can observe the results.
First, we connect the Advance-P4 device to our computer host via the USB cable.
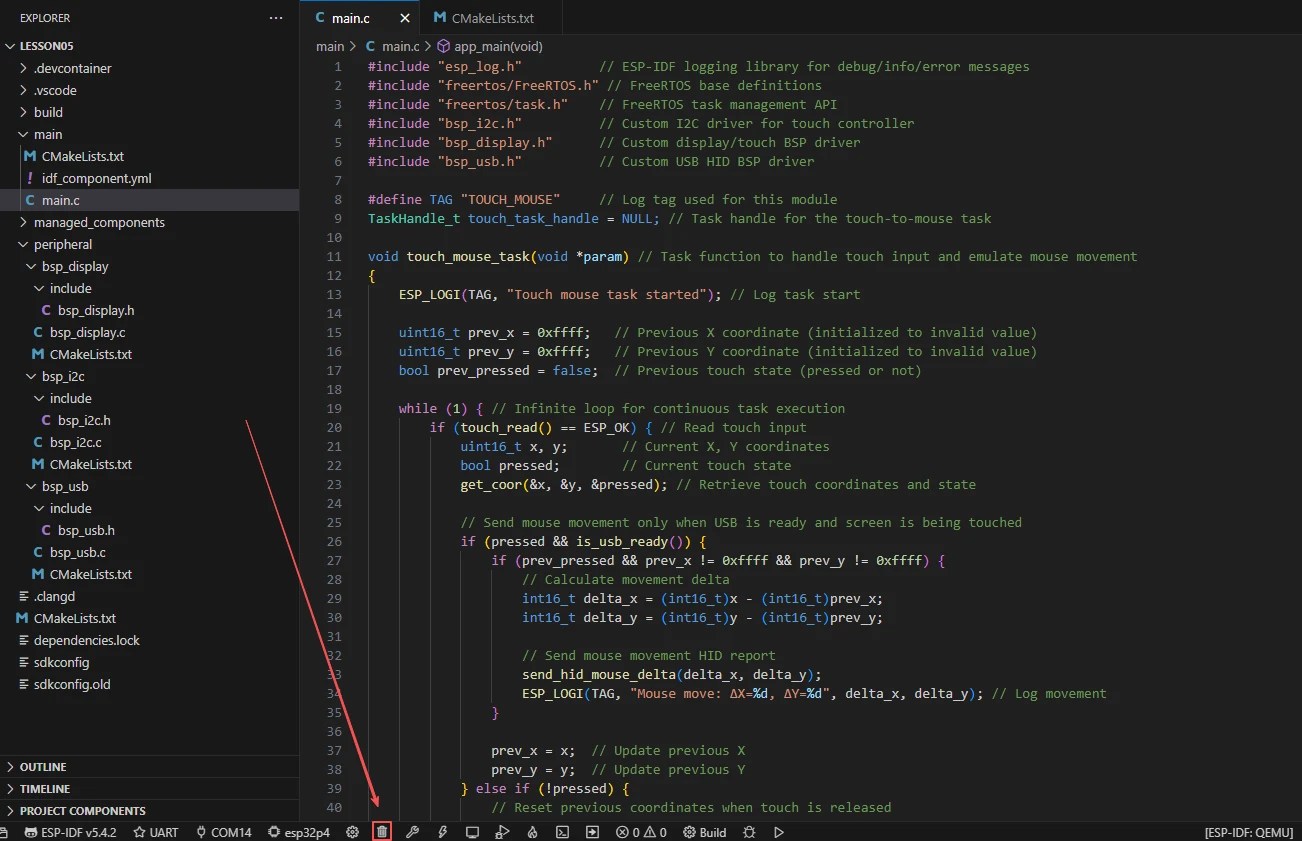
Before starting the burning process, delete all the compiled files and restore the project to its initial "uncompiled" state. (This ensures that the subsequent compilation will not be affected by your previous actions.)
Here, following the steps in the first section, first select the ESP-IDF version, the code upload method, the serial port, and the chip to be used.
Then here we need to configure the SDK.
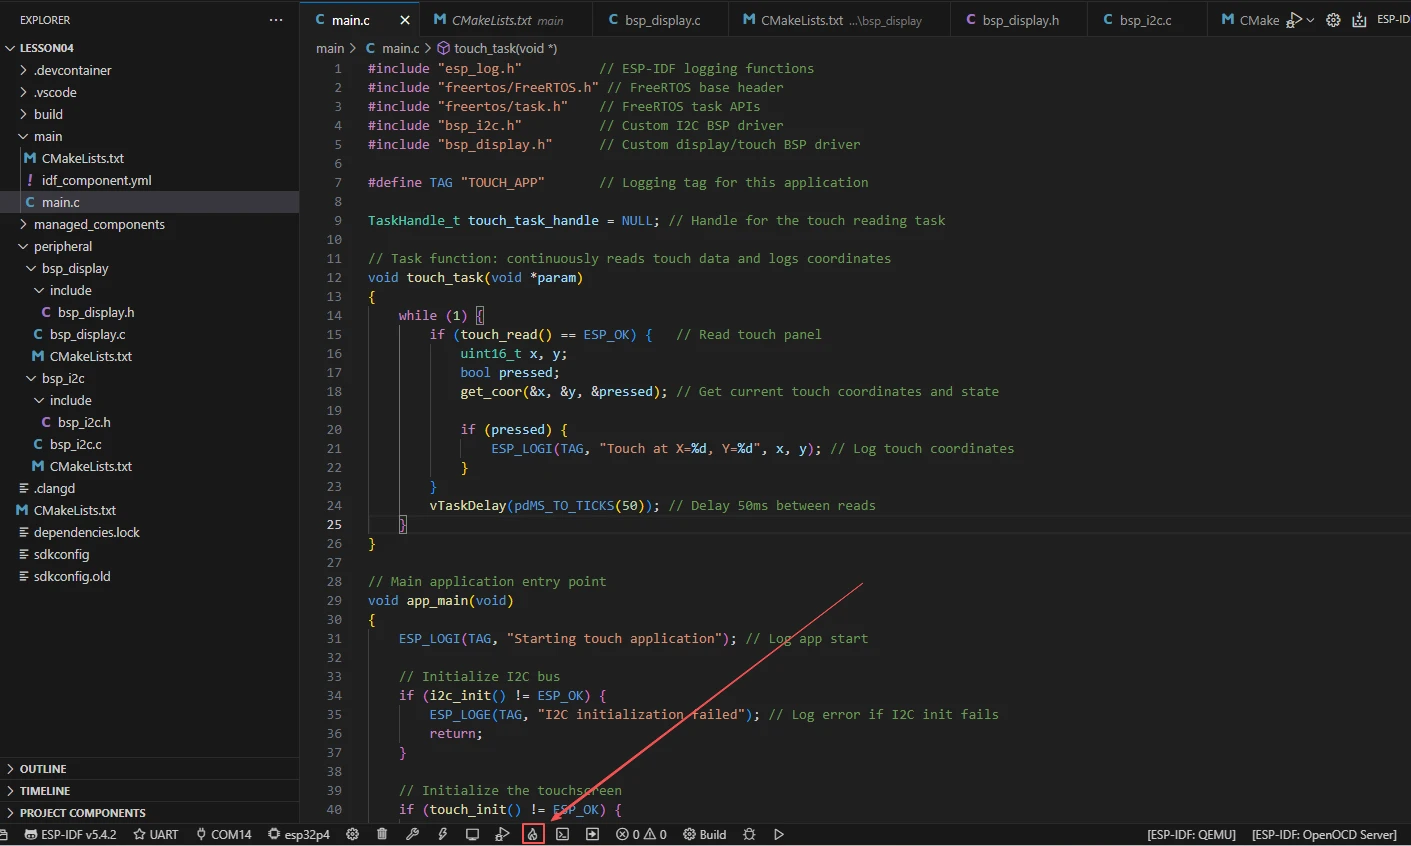
Click the icon in the picture below.

Wait for a moment for the loading process to complete, and then you can proceed with the related SDK configuration.

Then, search for "flash" in the search box.
(Make sure your flash settings are the same as mine.)

Then, search for "hid" in the search box.

After the configuration is completed, be sure to save your settings.
Then we will compile and burn the code (as detailed in the first class).
Here, we would like to introduce to you another very convenient feature. With just one button press, you can perform the compilation, upload, and open the monitor at once. (This is provided that the entire code is error-free.)
After waiting for a while, the code compilation and upload were completed, and the monitor also opened.
At this point, please remember to use another Type-C cable to connect your Advance-P4 through the USB2.0 interface. Only in this way can you use the USB2.0 protocol for communication.

When you slide the screen of the Advance-P4, the mouse on your computer also moves along. At this moment, your Advance-P4 becomes your new mouse. Meanwhile, you can also see the corresponding coordinates printed on the monitor when you turn it on.