Lesson12--- Playing Local Music from SD Card
Introduction
In this lesson, we will use the bsp_sd component and bsp_audio component (which were used in previous lessons) to play WAV audio files stored in the SD card.
Hardware Used in This Lesson
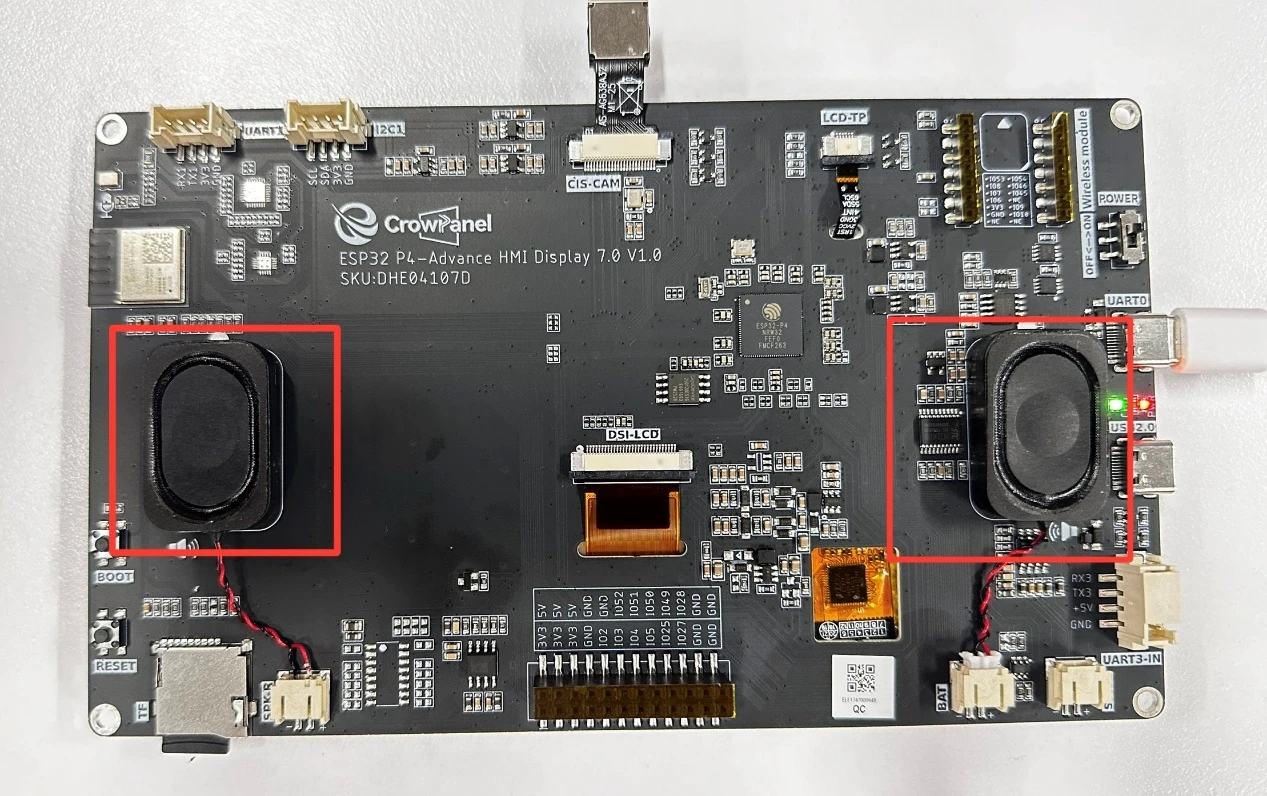
"Speaker on the Advance-P4"
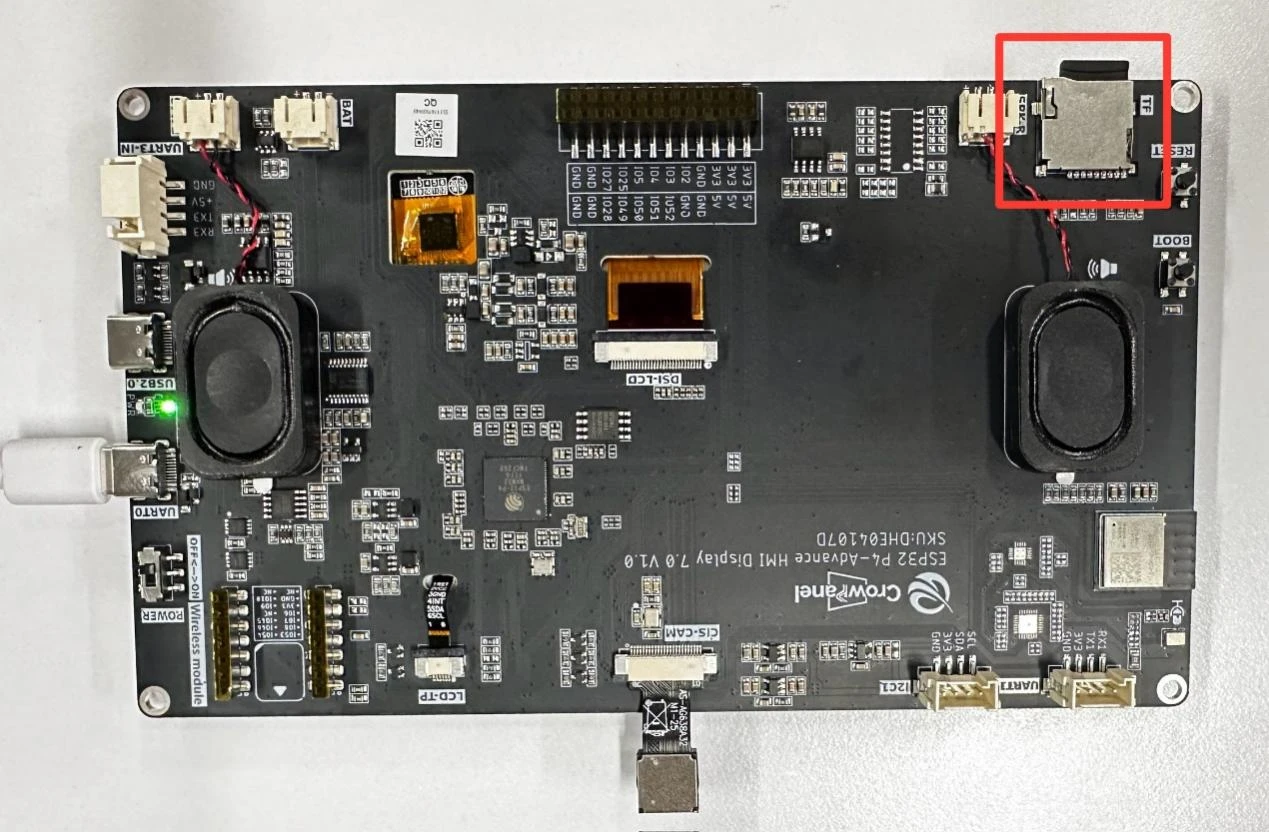
SD Card on the Advance-P4
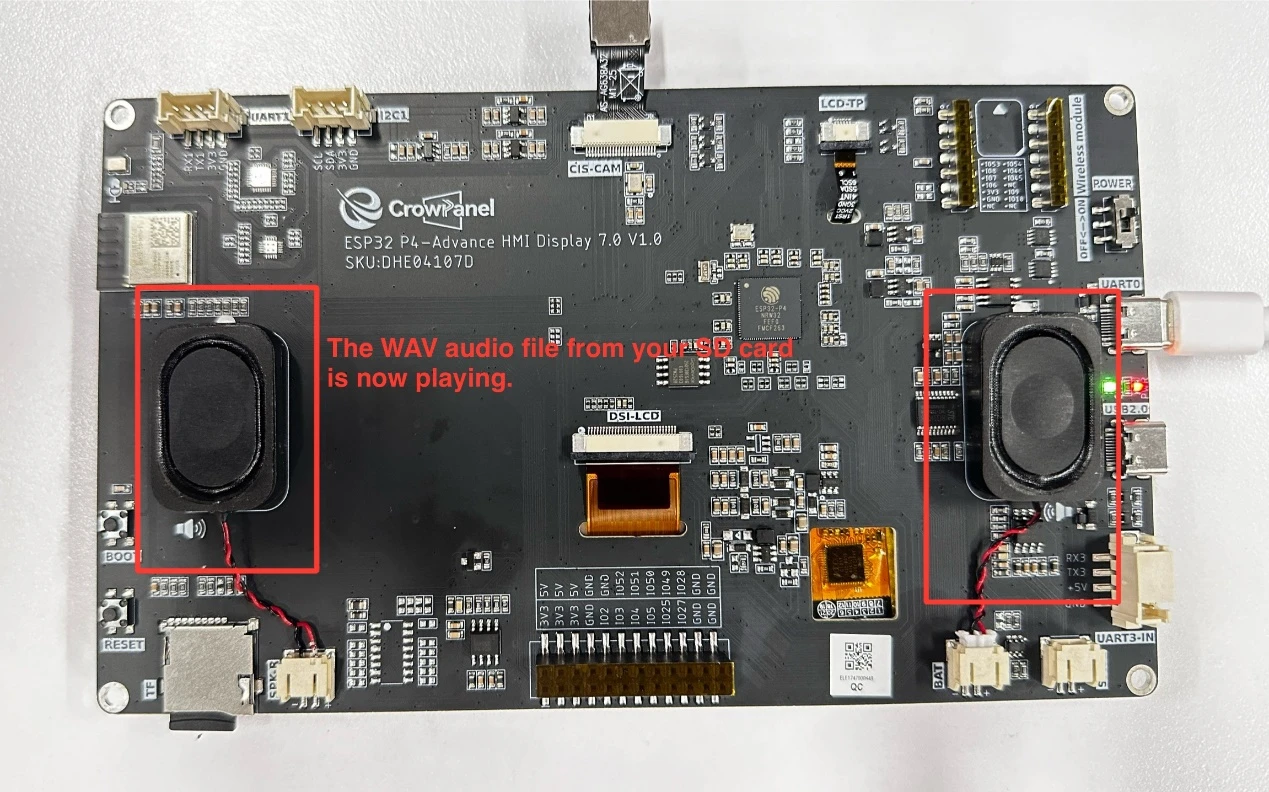
Operation Effect Diagram
After running the code, you will be able to hear the WAV audio saved in your SD card playing through the speaker on the Advance-P4.
Key Explanations
The key focus of this lesson is the combined use of the two components: bsp_sd and bsp_audio.In fact, for the SD card component, we still use the explained in detail earlier, so they will not be covered again here.
Next, we will focus on understanding the bsp_audio component.This component was used in the previous lesson to play the original sound after 5 seconds of recording. We already gained some knowledge about it back then, but only learned how to turn on the speaker.In this lesson, we will increase the difficulty slightly and learn how to play audio in WAV format.
First, click on the GitHub link below to download the code for this lesson.
GitHub Link
Then drag the code for this lesson into VS Code and open the project file.
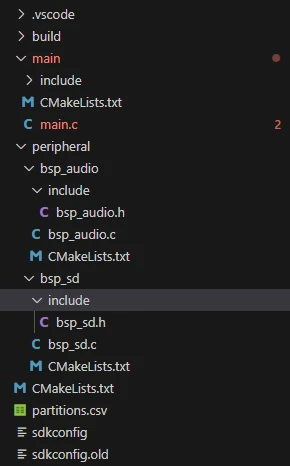
Once opened, you can see the framework of this project.
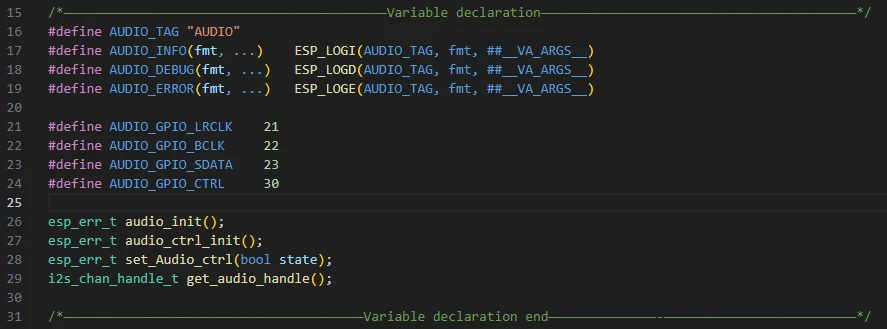
 {
{
In the example for this lesson, new folders named bsp_sd and bsp_audio are created under the peripheral\ directory.
Inside the bsp_audio\ folder, a new include folder and a "CMakeLists.txt" file are created. (The same structure applies to bsp_sd.)
The bsp_audio folder contains the "bsp_audio.c" driver file, and the include folder contains the "bsp_audio.h" header file. (The same file structure applies to bsp_sd.)
The "CMakeLists.txt" file integrates the drivers into the build system. This allows the project to utilize the functions defined in "bsp_audio.c" --- including parsing WAV audio and playing WAV audio from the SD card --- as well as the functions in "bsp_sd.c" --- such as initializing the SD card and retrieving SD card information.
bsp_audio Code
Let's first look at the audio playback component, which includes two files: "bsp_audio.c" and "bsp_audio.h".
Next, we will first analyze the "bsp_audio.h" program.
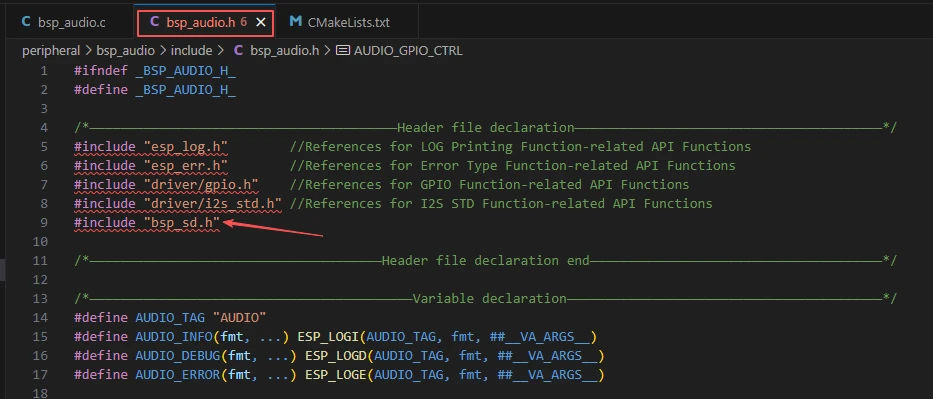
"bsp_audio.h" is the header file of the audio playback module, mainly used to:
Declare the functions, macros, and variables implemented in "bsp_audio.c" for external programs, so that other .c files can call this module simply by #include "bsp_audio.h".
In other words, it is an interface layer that announces which functions and constants are available to the outside while hiding the internal details of the module.
In this component, all the libraries we need to use are placed in the "bsp_audio.h" file for unified management.

Then, we declare the variables we need to use as well as the functions, whose specific implementations are in "bsp_audio.c".
Putting them uniformly in "bsp_audio.h" is for the convenience of calling and management. (We will learn about their functions when they are used in "bsp_audio.c".)
Now let's look at the specific function of each function in "bsp_audio.c".
bsp_audio.h: A custom audio module header file for this project, which defines macros, GPIO pins, and function declarations.

A global variable tx_chan is defined, with the type i2s_chan_handle_t, i.e., an I2S channel handle.
This handle represents the audio output channel (TX), and all subsequent audio playback operations will be performed through this channel.

audio_init() :
This function is used to initialize the I2S audio output channel of ESP32, enabling it to play audio in 16kHz, 16-bit, stereo format. It creates an I2S transmission channel, configures standard audio parameters (such as sampling rate, bit width, left/right channels, GPIO pins, etc.), and starts the channel to prepare for audio output.
-
esp_err_t err = ESP_OK; ------ Initializes the error status variable, defaulting to successful operation.
-
i2s_chan_config_t chan_cfg = {...}; ------ Configures I2S transmission channel parameters:
-
id: Uses I2S controller 1
-
role: Master mode (generates clock signals)
-
dma_desc_num and dma_frame_num: DMA buffer size settings
-
auto_clear: Automatically clears DMA buffer underflow
-
intr_priority: Interrupt priority
-
i2s_new_channel(&chan_cfg, &tx_chan, NULL); ------ Creates a new I2S transmission channel and saves it to tx_chan.
-
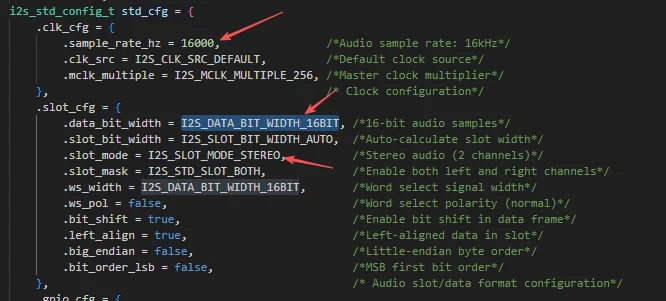
i2s_std_config_t std_cfg = {...}; ------ Configures standard I2S audio parameters:
-
clk_cfg: Clock settings (sampling rate 16kHz, master clock multiplier 256)
-
slot_cfg: Audio data format (16-bit, stereo, left-aligned)
-
gpio_cfg: GPIO pins corresponding to I2S signals (BCLK, LRCLK, SDATA output) and whether to invert them
-
i2s_channel_init_std_mode(tx_chan, &std_cfg); ------ Initializes the I2S transmission channel in standard mode, making the channel comply with the above clock, data format, and GPIO configurations.
-
i2s_channel_enable(tx_chan); ------ Enables the I2S channel to start working and transmit audio data.
-
return err; ------ Returns the initialization status; if there is an error midway, an error code will be returned in advance.
The main function of this function is to create and configure an I2S audio transmission channel, enabling ESP32-P4 to output audio in 16kHz, 16-bit, stereo format through specified GPIOs.
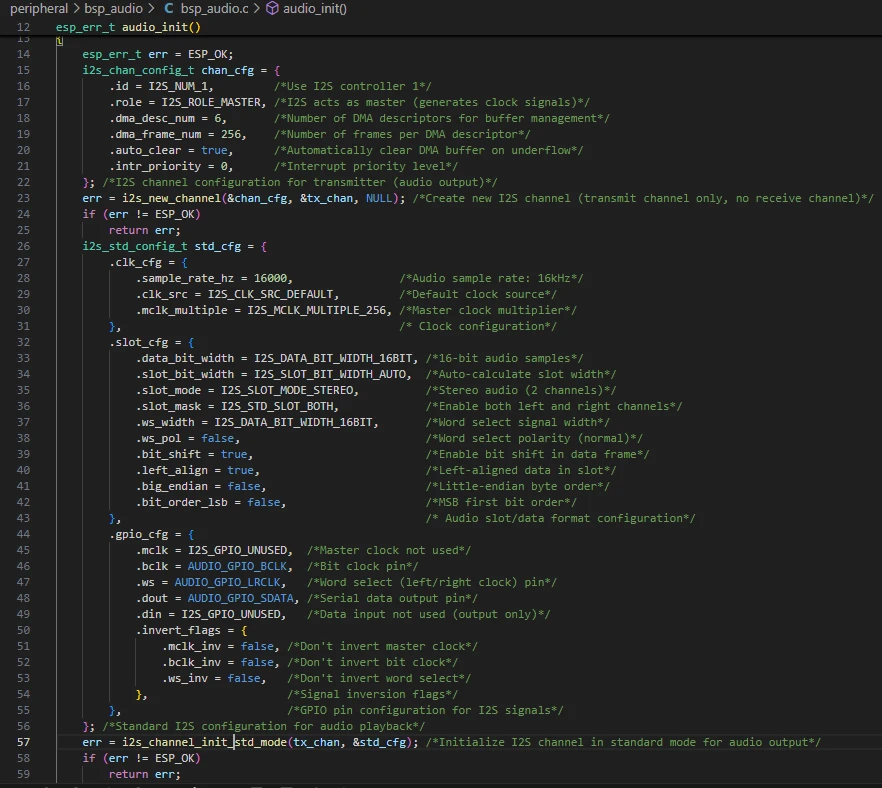
Therefore, any audio files you use later must meet this requirement (16kHz sampling rate, 16-bit bit depth, and stereo format, i.e., dual-channel).
audio_ctrl_init:
This function is used to initialize the audio power amplifier control pin, configuring it as an output mode to control the on/off state of the power amplifier subsequently.

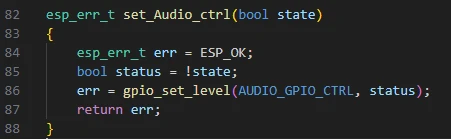
set_Audio_ctrl:
This function is used to control the on/off state of the audio power amplifier. It turns the power amplifier on or off by setting the level of the power amplifier control pin (active low).
validate_wav_header() :
This function is used to check whether the header of an opened WAV file is valid, confirm if the file is in standard PCM WAV format, and verify that it supports common sampling rates, channel counts, and bit depths.
After validation, the function restores the file pointer to its original position without altering the file reading state.
-
if (file == NULL) ------ Checks if the file pointer is null; returns false if it is.
-
long original_position = ftell(file); ------ Obtains the current position of the file pointer for subsequent restoration.
-
if (original_position == -1) ------ Checks if the file position was obtained successfully.
-
fseek(file, 0, SEEK_SET) ------ Moves the file pointer to the beginning of the file.
-
uint8_t header[44]; size_t bytes_read = fread(header, 1, 44, file); ------ Reads the first 44 bytes of the WAV file (the standard WAV file header).
-
if (bytes_read != 44) ------ Checks if the WAV header was read completely.
-
memcmp(header, "RIFF", 4) ------ Verifies if the file starts with "RIFF" (the RIFF chunk identifier).
-
memcmp(header + 8, "WAVE", 4) ------ Checks if the format is "WAVE".
-
memcmp(header + 12, "fmt ", 4) ------ Verifies the existence of the fmt subchunk.
-
uint16_t audio_format = *(uint16_t *)(header + 20); ------ Retrieves the audio format field (1 indicates PCM).
-
uint16_t num_channels = *(uint16_t *)(header + 22); ------ Obtains the number of channels (supports 1 or 2 channels).
-
uint32_t sample_rate = *(uint32_t *)(header + 24); ------ Retrieves the sampling rate and verifies if it is a commonly used value.
-
uint16_t bits_per_sample = *(uint16_t *)(header + 34); ------ Obtains the number of bits per sample (supports 8/16/24/32 bits).
-
memcmp(header + 36, "data", 4) ------ Verifies if the data chunk identifier is "data".
-
uint32_t file_size = *(uint32_t *)(header + 4) + 8; uint32_t data_size = *(uint32_t *)(header + 40); ------ Retrieves the total file size and audio data size for printing information.
-
AUDIO_INFO(...) ------ Outputs WAV file information (number of channels, sampling rate, bit depth, data size, and file size).
-
fseek(file, original_position, SEEK_SET); ------ Restores the file pointer to its original position.
-
return true; ------ Returns true if validation passes.
The function's role is to check the validity of the WAV file header, ensuring the file is in standard PCM WAV format, supports common sampling rates, bit depths, and channel counts, and restores the file pointer position after validation.
-
The first 44 bytes form the standard PCM WAV header, which describes information such as audio format, number of channels, and sampling rate.
-
Before playing or processing a WAV file, it is usually necessary to read and validate this header to ensure the file format meets expectations.
-
The validate_wav_header() function checks the validity of each field according to this structure.
Audio_play_wav_sd:
Audio_play_wav_sd() is used to read WAV files from the SD card and play audio through the I2S output of ESP32. It validates the WAV file header, skips the header, reads audio data in chunks, processes the volume (amplifies and limits the range), sends the data to the I2S player until the audio playback is completed, and then releases resources.
-
esp_err_t err = ESP_OK; ------ Initializes the error status variable.
-
if (filename == NULL) ------ Checks if the input filename is null; returns a parameter error if it is.
-
FILE *fh = fopen(filename, "rb"); ------ Opens the WAV file in read-only binary mode.
-
if (fh == NULL) ------ Returns an error if the file fails to open.
-
if (!validate_wav_header(fh)) ------ Calls the previously written WAV header validation function to check if the format is correct.
-
fseek(fh, 44, SEEK_SET) ------ Skips the WAV file header (44 bytes) to prepare for reading audio data.
-
Define buffer sizes
-
SAMPLES_PER_BUFFER = 512 ------ Number of samples read each time
-
INPUT_BUFFER_SIZE, OUTPUT_BUFFER_SIZE ------ Byte sizes of input and output buffers
-
heap_caps_malloc(...) ------ Allocates input and output buffers in SPI RAM; if allocation fails, releases the allocated resources and exits.
-
Initializes variables for reading and writing: samples_read, bytes_to_write, bytes_written, total_samples, volume_data.
-
set_Audio_ctrl(true); ------ Turns on the audio hardware or amplifier.
-
while (1) ------ Loops to read audio data and play:
-
samples_read = fread(...) ------ Reads audio samples from the file into the input buffer
-
if (samples_read == 0) break; ------ Exits the loop when the file reading is completed
-
for loop ------ Amplifies mono samples by 10 times, limits them to the int16 range, and stores them in the output buffer (can be used for the left channel here, or extended to stereo)
-
bytes_to_write = samples_read * sizeof(int16_t); ------ Calculates the number of bytes to be written to I2S
-
i2s_channel_write(tx_chan, output_buf, ...) ------ Writes audio data to the I2S output channel
-
Error checking: Prints an error and exits the loop if writing fails
-
Accumulates total_samples to count the total number of played samples
-
Cleans up resources after the loop ends:
-
set_Audio_ctrl(false); ------ Turns off the audio hardware
-
free(input_buf); free(output_buf); fclose(fh); ------ Releases buffers and closes the file
-
AUDIO_INFO(...) ------ Prints playback completion information
-
return err; ------ Returns the playback result status
This function reads WAV files from the SD card, plays audio in chunks after validating the format, outputs to the audio hardware through I2S, handles volume and buffer management, and releases all resources after playback.
That's all for the introduction of the bsp_audio component. It's sufficient for you to know how to call these interfaces.
To call them, we must also configure the "CMakeLists.txt" under the bsp_audio folder. This file, placed in the bsp_audio folder, mainly functions to tell the ESP-IDF build system (CMake) how to compile and register the bsp_audio component.
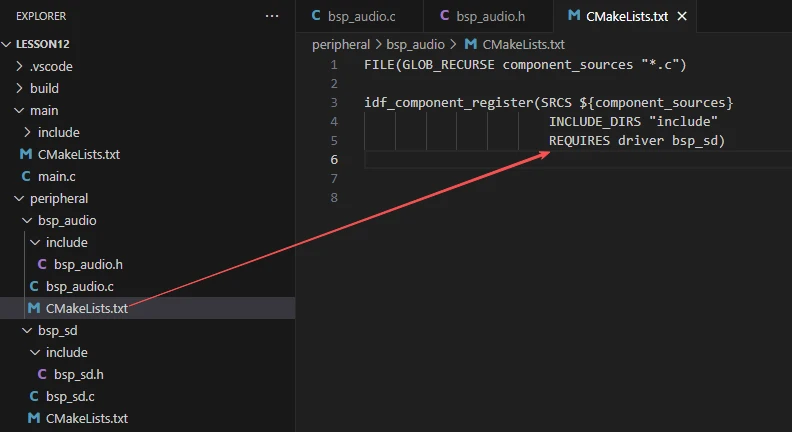
The reason why "driver" and "bsp_sd" are included here is that we have called them in "bsp_audio.h" (other libraries are system libraries, so no need to add them).
It uses interfaces from the SD component for SD card reading operations, among others.
As for the bsp_sd component, it was explained in detail in previous lessons, so it will not be repeated here. We will directly use this component.
Converting MP3 to WAV
As mentioned above, if you want to play audio based on the code of this lesson, the audio must meet the requirement of being a WAV file with 16kHz sampling rate, 16-bit bit depth, and stereo format (i.e., dual-channel).
Next, I will show you how to convert an MP3 audio file to a WAV audio file that meets the specifications of 16kHz, 16-bit, and stereo (dual-channel).
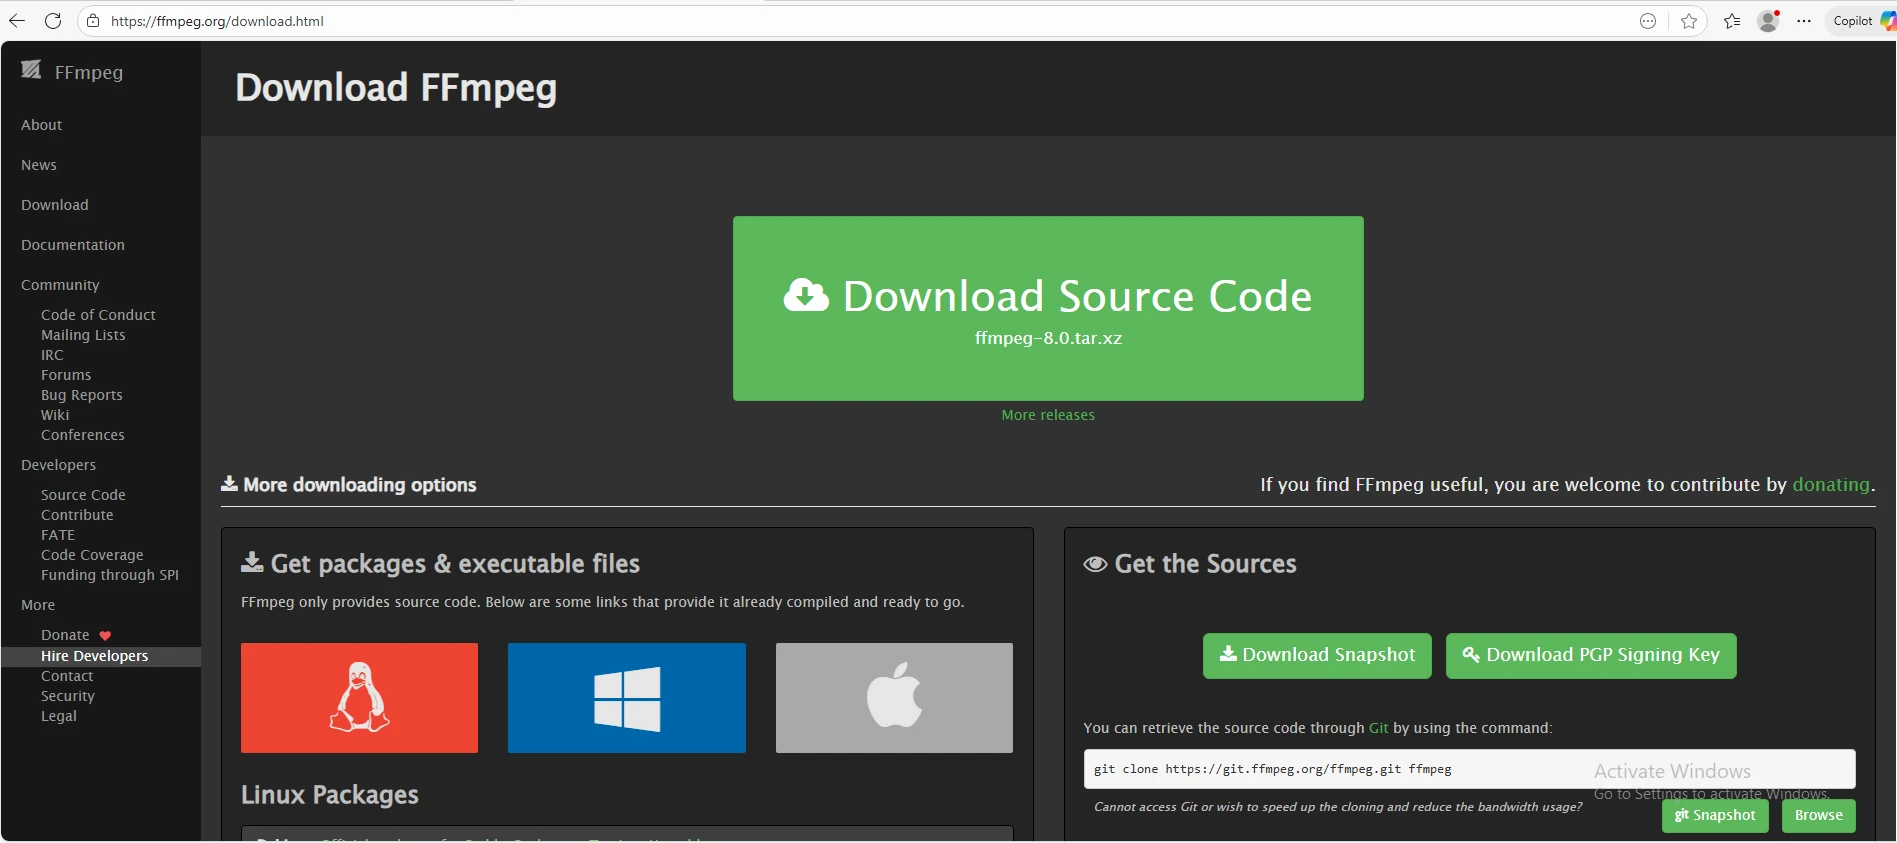
FFmpeg is an open-source toolkit for processing multimedia files such as video and audio. It supports conversion, cutting, and editing of almost all multimedia formats, making it an essential tool for developers and >multimedia professionals. Open the following link to download FFmpeg:
FFmpeg Download Link
Taking Windows as an Example:
Select the installation package "Windows builds from gyan.dev".

Scroll down to find the "release builds" section, then select "ffmpeg-7.1.1-essentials_build.zip".
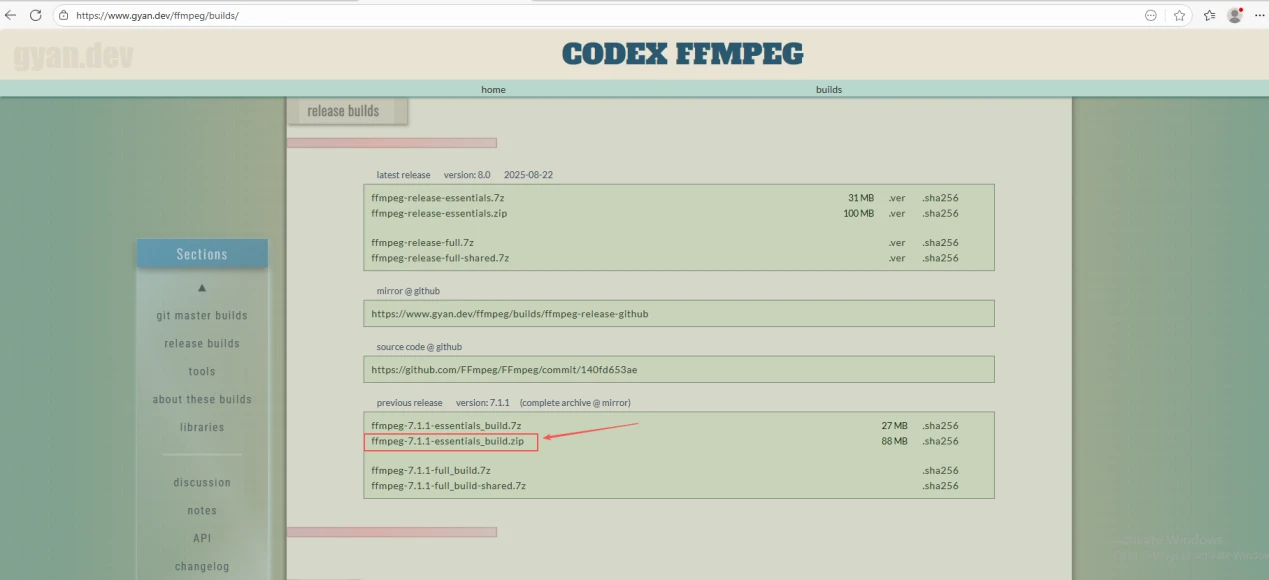
Once the download is complete, extract the file to get the "FFmpeg" folder.

Recommended Saving Path
It is recommended to extract and save the folder to a non-system drive (not the C drive). This avoids occupying space on the C drive (system drive), ensuring the stability and performance of the system.

Directory Structure of the Extracted Folder
The extracted folder should contain the following directories:
-
"bin": The folder containing FFmpeg executable files. All commands to run FFmpeg must be executed via the files in this directory.
-
"doc": Documentation and reference materials.
-
"presets": Preconfigured formats and encoding schemes.
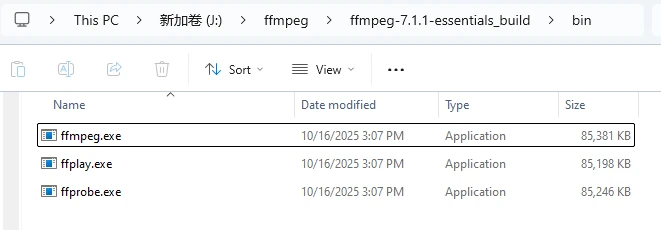
Navigate to the "bin" directory, and you will see three core executable files of FFmpeg: "ffmpeg.exe", "ffplay.exe", and "ffprobe.exe".
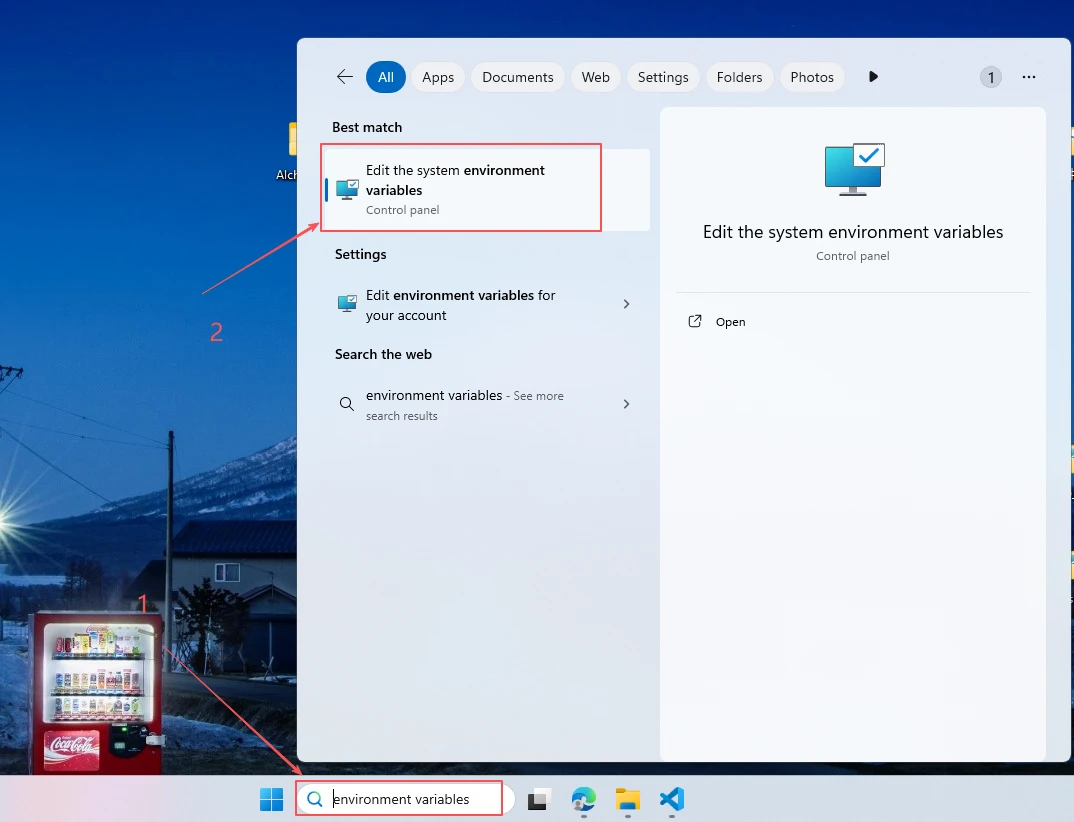
To conveniently call FFmpeg directly in the command line, you need to add it to the system's environment variables.
Search for "Environment Variables" in the Start Menu at the bottom left of the desktop, find "Edit the system environment variables", and click to open it.
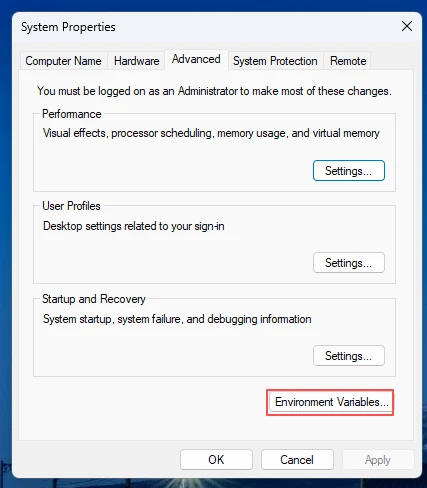
Click the "Environment Variables" button.
Locate the "Path" entry under "System Variables" and click "Edit".
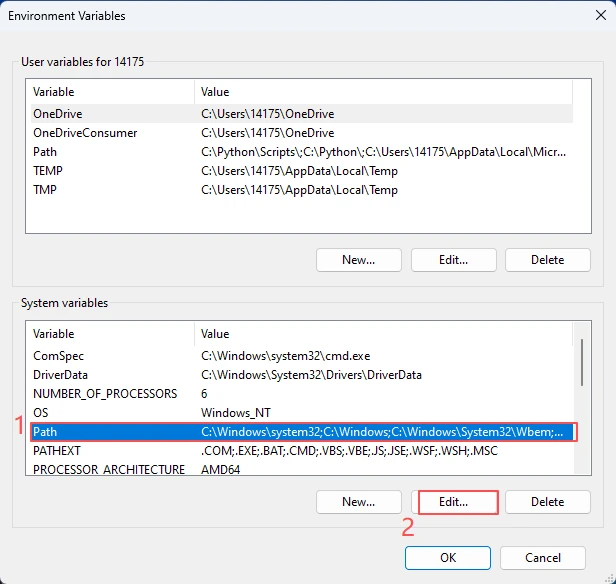
In the "Edit environment variable" window, click "New".
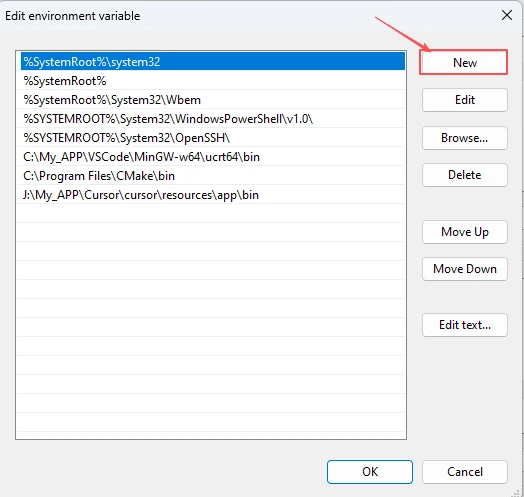
Enter the path to the "bin" folder of FFmpeg (use your own FFmpeg path)

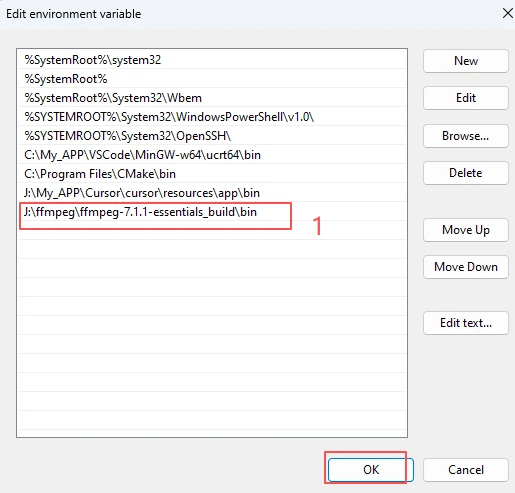
Remember to save the settings after entering the path.
Note: Ensure the path is accurate so the system can correctly locate the FFmpeg files.
"Verifying Successful FFmpeg Installation "
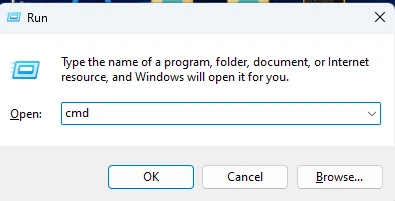
Press the "Win + R " keys, then type "cmd" to open the command line window.
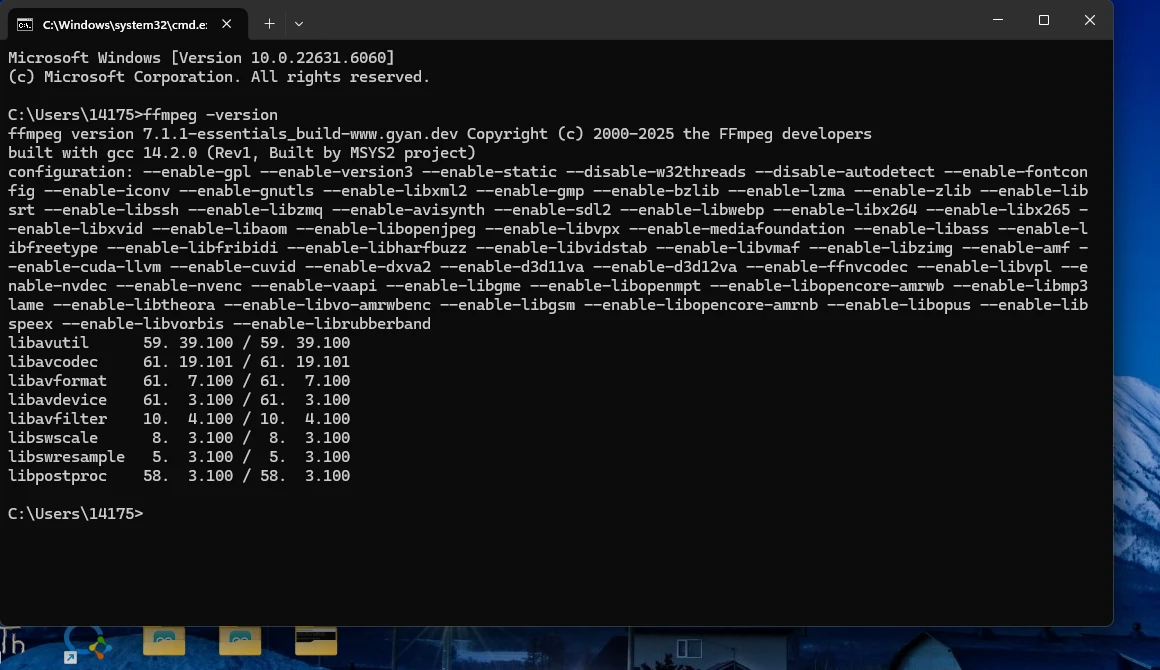
Type the following command in the command line to check the FFmpeg version:
ffmpeg -version
If the FFmpeg version number and related information are displayed correctly, it indicates that the installation is successful (as shown in the figure below).
Then, still in the command window, install the dependency by running:
pip install pydub

After installation, open the script code we prepared for converting MP3 to WAV format (meeting the specifications of 16kHz, 16-bit, and stereo/dual-channel) in the provided code package. Click the link below to open the script code:
GitHub Link
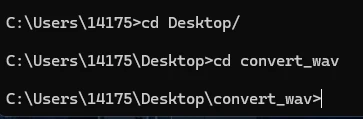
Now I have placed this script on my desktop.
In the command window, I navigate to this path.
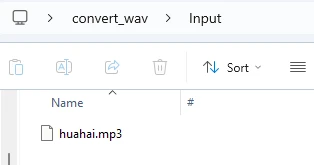
Then put your MP3 files in the "Input" folder.
Run this script code. (Ensure your Python environment is Python 3.11.2.)

Starting from Python 3.13:The official team removed the audioop module (which pydub depends on).Some third-party libraries (such as pyaudio, pygame, pydub) are not yet fully compatible.
For Python 3.11.x:
✅ Stable, mature, and highly compatible;
✅ Includes audioop;
✅ Perfectly compatible with most AI, audio, and data analysis libraries.
Run our script:

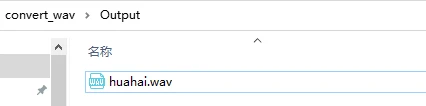
You will find the generated WAV files in the "Output" folder.
Then move this file to a USB flash drive.
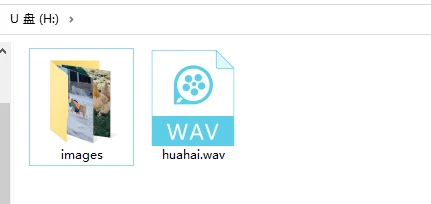
Finally, remove the SD card and insert it into the "Advance-P4 " board.
Main Function
The main folder is the core directory for program execution, containing the main function executable file main.c.
Add the main folder to the "CMakeLists.txt" file of the build system.

This is the entry file of the entire application. In ESP-IDF, there is no int main(), and execution starts from void app_main(void).
Let's first explain main.c.
Init:
The Init() function is used to initialize the hardware required for the audio playback system, including configuring and obtaining LDO3 (2.5V) and LDO4 (3.3V) channels, initializing the SD card for reading WAV files, initializing the audio controller and turning off the audio hardware, as well as initializing the I2S audio channel to prepare for WAV playback. If any step fails, it will call init_fail() to print an error and stop program execution.
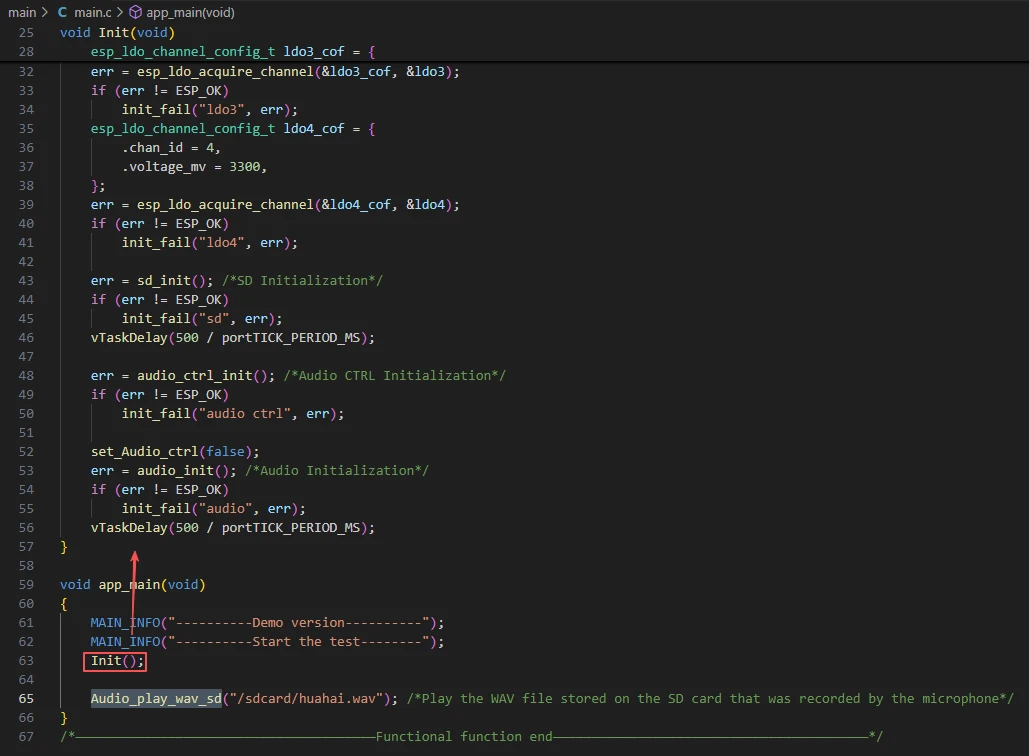
After waiting for the SD card and other components to complete initialization, the next step is to execute Audio_play_wav_sd from the bsp_audio component to play the converted WAV audio files stored in the SD card.
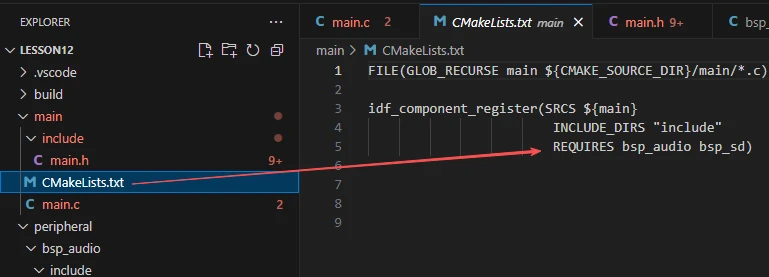
Finally, let's look at the "CMakeLists.txt" file in the main directory.
The role of this CMake configuration is as follows:
-
Collect all .c source files in the main/ directory as the component's source files.
-
Register the main component with the ESP-IDF build system and declare its dependencies on the custom components bsp_audio and bsp_sd.
This ensures that during the build process, ESP-IDF knows to build these two components first, followed by the main component.
Note: In subsequent courses, we will not create a new "CMakeLists.txt" file from scratch. Instead, we will make minor modifications to this existing file to integrate other drivers into the main function.
Complete Code
Kindly click the link below to view the full code implementation.
GitHub Link
Programming Steps
Now that the code is ready, the next step is to flash it to the ESP32-P4 so we can observe the results.
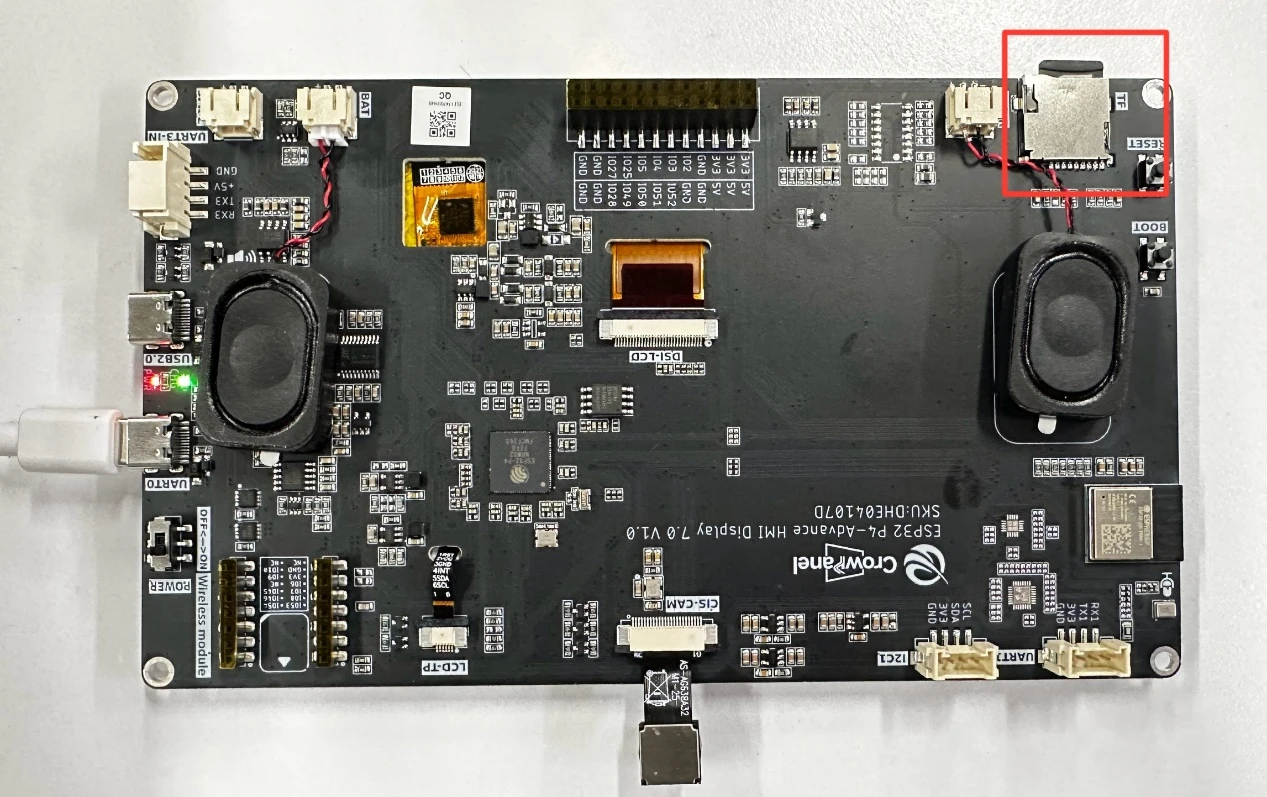
First, connect the "Advance-P4 " device to your computer using a USB cable.

First, double-check two things: whether the converted
WAV audio file has been placed in the SD card, and whether the SD card is inserted into the SD card slot of the "Advance-P4 ".
Before starting the preparation for flashing, delete all files generated by compilation to restore the project to its initial "unbuilt" state. This ensures that subsequent compilations are not affected by your previous operations.
First, follow the steps in the first section to select the ESP-IDF version, code upload method, serial port number, and target chip.
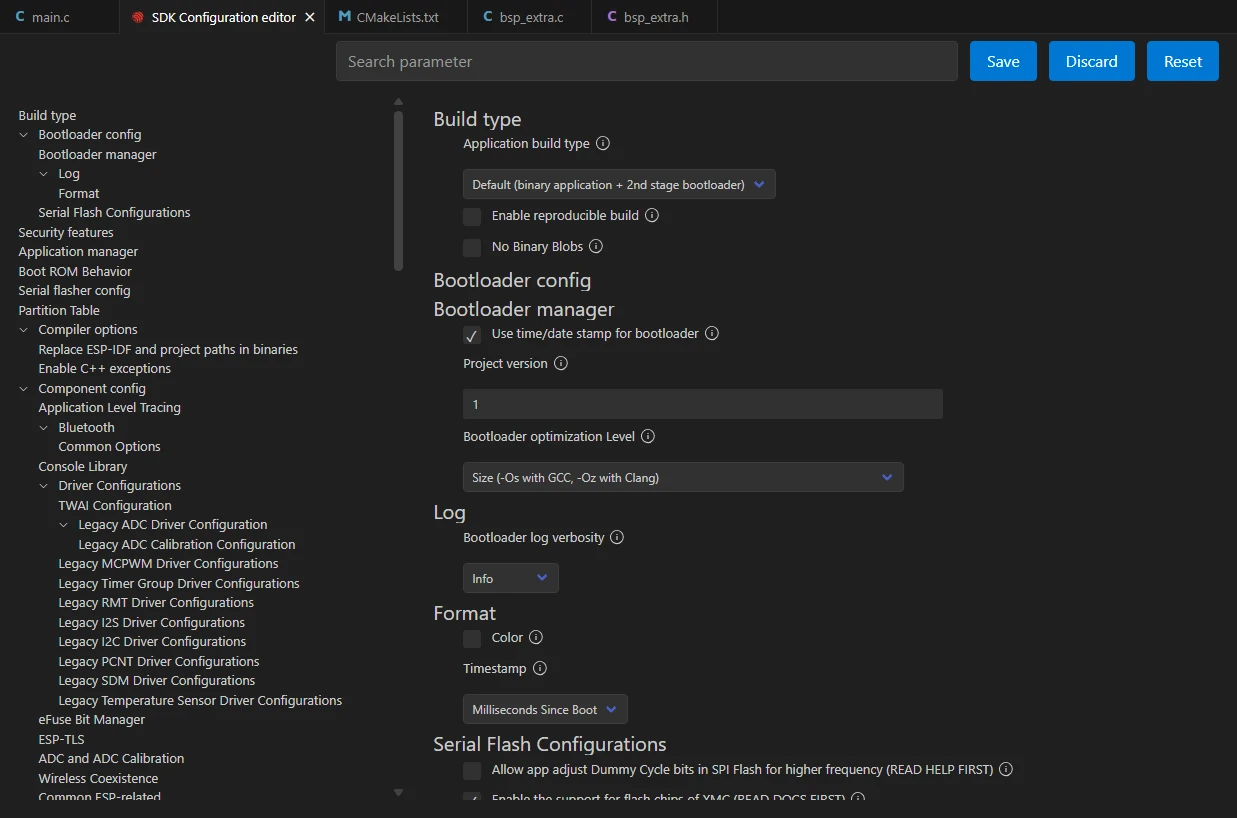
Next, we need to configure the SDK.
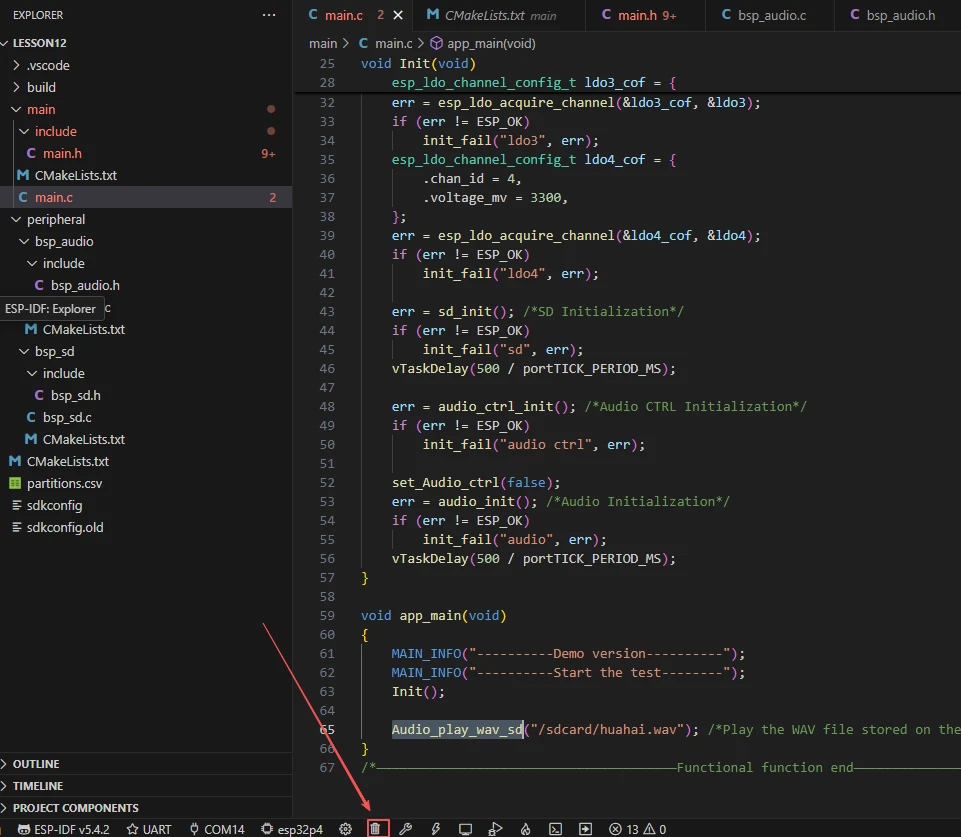
Click the icon in the figure below.

Wait for a short loading period, then you can proceed with the relevant SDK configuration.
Next, enter "flash" in the search box.
(Make sure your flash configuration matches mine.)
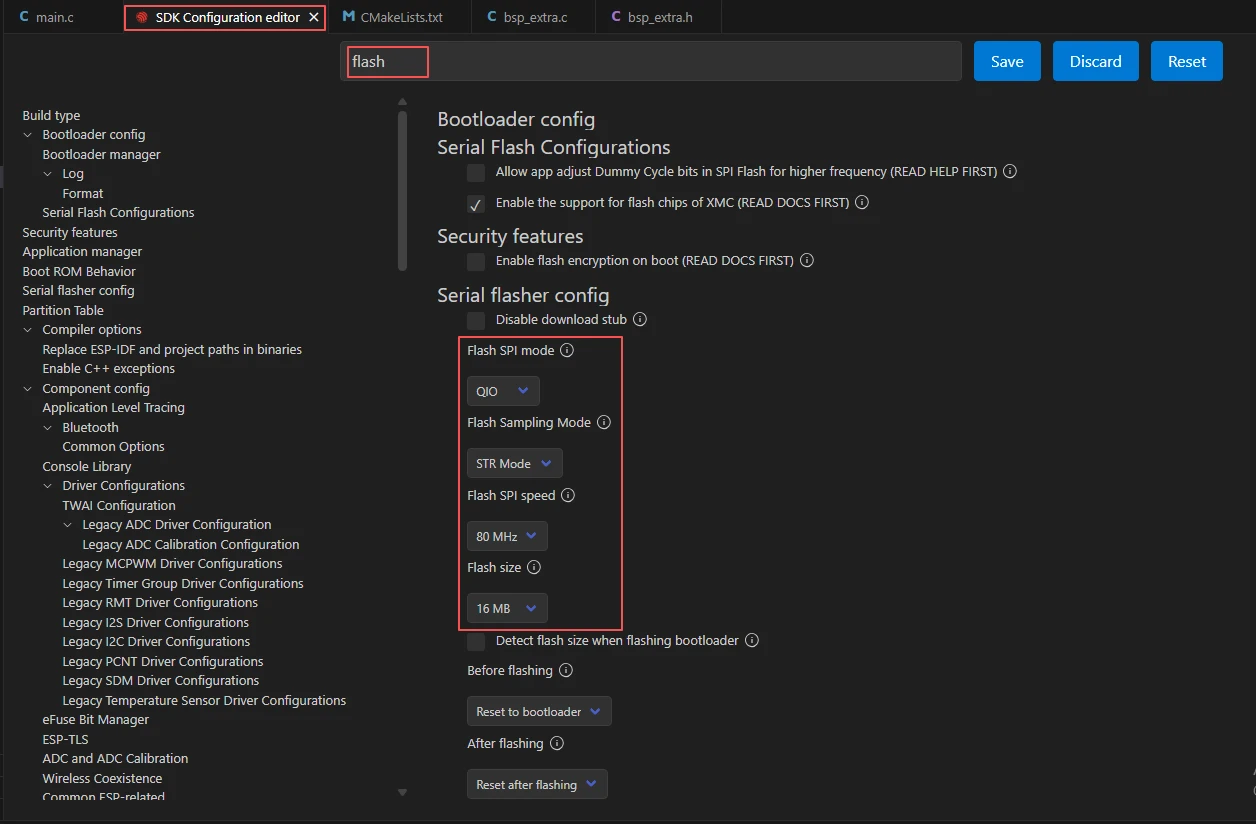
After completing the configuration, remember to save your settings.
Next, we will compile and flash the code (detailed in the first lesson).
Here, we'd like to share a very convenient feature: a single button can execute compilation, upload, and monitor opening in one go (provided the entire code is error-free).

After waiting for a while, the code will finish compiling and uploading, and the monitor will open automatically.
Once the code runs, you will hear the speaker on the "Advance-P4" playing the WAV audio stored in your SD card.