1.28 ESPHOME Lesson04 Adjust Brightness in LVGL Interface
Lesson04---LVGL Interface to Adjust Screen Brightness
1. Course Overview
In the previous lesson, we have already mastered how to write code on the ESPHome platform to adjust screen brightness. In this lesson, based on the previous lesson, we will add a beautiful LVGL interface to adjust the screen brightness display, making it more interactive. This is also a tutorial to deepen our understanding of LVGL.
2. Learning Objectives
Learn how to create a screen interface using LVGL
Learn how to integrate LVGL controls with the product
3. Project Effect
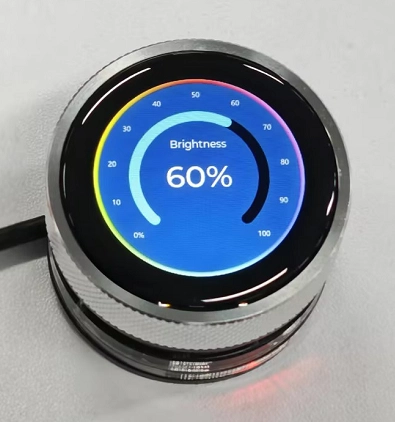
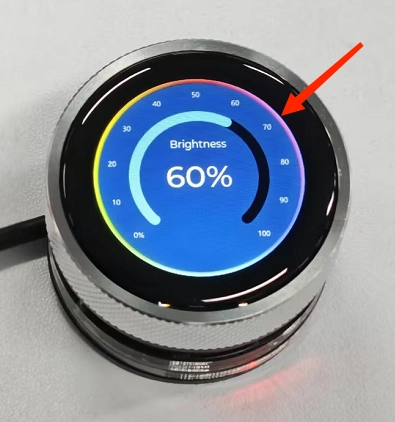
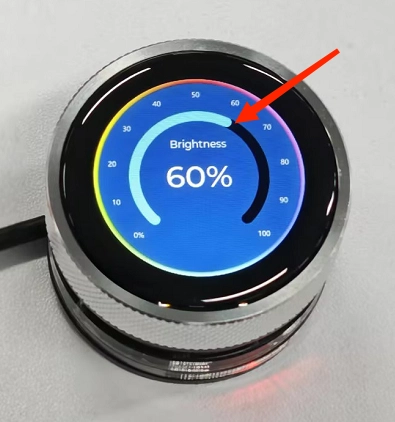
You can adjust the screen brightness by rotating the knob, and the current brightness value will be displayed in real-time on the screen. The slider on the screen will also change in real-time as you rotate.
(Clockwise to increase brightness, counterclockwise to decrease brightness)
4. Example Code Download Link and Key Code Explanation
Click the Github link below to download the complete code:
Next, let's explain the key parts of this code, specifically how to write code on the ESPHome platform to link the LVGL interface with the rotary effect, allowing the slider to adjust as you turn the knob.
The following code explanation only covers new code content, i.e., how to connect the LVGL interface with the product rotation so that turning the knob adjusts the slider.
(Since this function is based on the screen brightness adjustment from Lesson 3 of ESPHome, please refer back to Lesson 3 if you encounter any unclear code)
(1) Lambda Section (ESPHome Block)
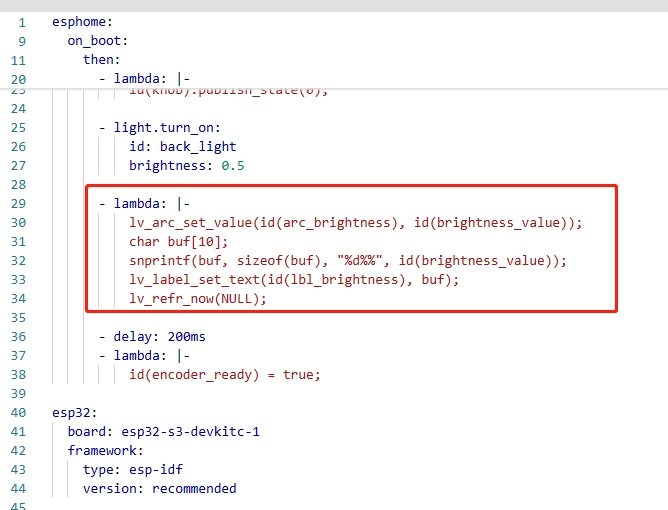
This Lambda code is the key synchronization logic for the LVGL visual interface during device startup. Its core function is to initialize the global brightness variable to 50, synchronize it accurately to the LVGL arc brightness component and the central percentage label, and force LVGL to refresh the screen immediately, so the screen instantly and accurately displays 50% brightness at startup, unifying hardware backlight brightness with the visual interface.
In the code, the LVGL native API lv_arc_set_value is used with the arc component ID and the initial brightness value to set the arc progress display.

lv_arc_set_value is a core LVGL library API for setting the current value of an arc component. It is the basic function for controlling arc widgets and is the key instruction for beginners to link arc display with business data (e.g., brightness).
In our code, it passes the initial global brightness value of 50 to the pre-defined arc_brightness component, making this 270° arc directly display 50% progress, achieving precise mapping from data to visual arc.
The function call format is lv_arc_set_value(arc_component_ID, target_value). The first parameter must be the unique ID of the arc component defined in LVGL widgets (called via id() in ESPHome YAML), and the second parameter is the target arc value. It must match the min_value and max_value range of the arc (here 0-100), and the parameter is an integer type, so no type conversion is needed.
After calling this function, LVGL automatically adjusts the colored indicator segment length of the arc according to the value, and the knob at the end moves to the corresponding position. The process is automatically rendered by LVGL. You only need to pass the correct component ID and matching value range to achieve the linkage between the arc progress and business data without worrying about low-level drawing details. This is ideal for first-time users of LVGL arc components.

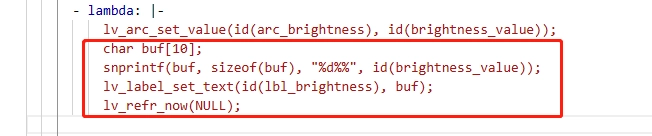
Then define a 10-character buffer buf. Using the safe string formatting function snprintf, convert the integer brightness value to a string with a percent sign (e.g., 50 → "50%") and store it in the buffer. Next, call the LVGL API lv_label_set_text to set the formatted string to the central text label component, and finally call lv_refr_now(NULL) to force LVGL to refresh the screen immediately, avoiding display delay due to the default refresh cycle.
Lambda Usage Notes:
-
When writing this code in ESPHome Lambda, follow core syntax rules: Lambda is a C++ code snippet embedded in YAML. All YAML components and global variables must be called via id(xxx); direct IDs cannot be used.
-
Each statement must end with a semicolon;
-
After lambda: use |- followed by properly indented code. Do not wrap multi-line code with {} or manually include standard C headers. Functions like snprintf can be called directly;
-
Allocate sufficient buffer space to prevent overflow, avoid time-consuming operations inside Lambda to prevent blocking ESP32 main loop, and LVGL native APIs can be called directly without extra initialization.
(2) Adjust Brightness with Knob and Sync LVGL Interface
First, complete the hardware configuration of the encoder, which was explained in detail in the previous lesson.
Next, we focus on the important part relevant to this lesson: how to sync the LVGL interface after the knob adjusts brightness.
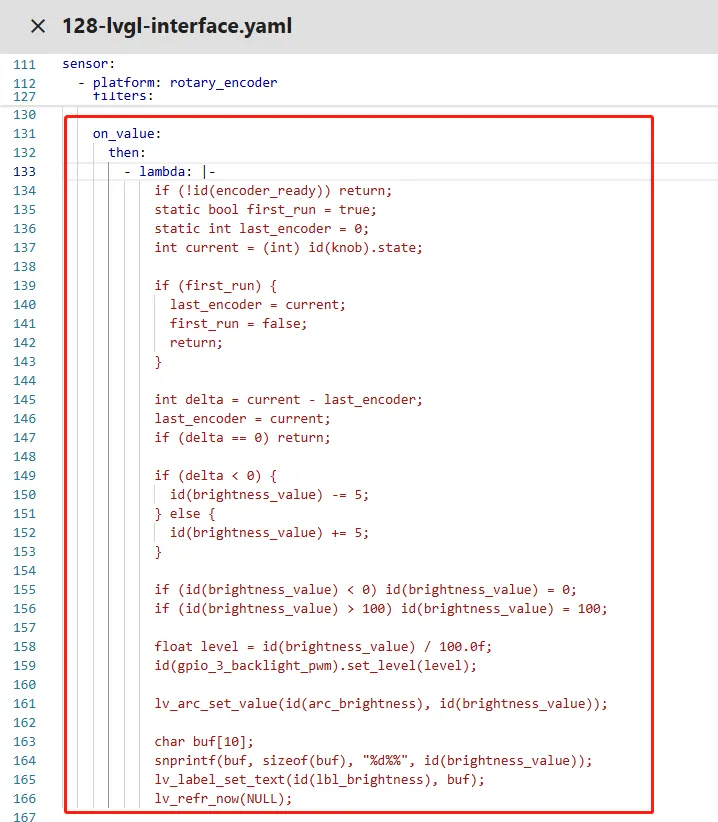
The Lambda code under on_value is the core logic to adjust the backlight brightness via the rotary encoder and sync with the LVGL interface. Each rotation step triggers execution, following a closed-loop process: "validate to prevent misoperation → calculate rotation increment → adjust brightness with range limit → update hardware backlight → sync visual interface".
First, filter out invalid operations during device startup using the global variable encoder_ready, then define static variables first_run and last_encoder (initialize the first execution baseline and store the previous encoder value). Obtain the current float cumulative value of the encoder, cast to integer. On first trigger, initialize the baseline and exit to avoid increment miscalculation.
Calculate delta from current and previous values to determine rotation direction (positive for clockwise, negative for counterclockwise), update the baseline, filter out zero increments, adjust the global brightness_value by step 5, and clamp brightness to 0-100 to prevent exceeding valid PWM duty cycle range. Then convert integer brightness 0-100 to float 0.0-1.0 and assign to the backlight PWM component using set_level, achieving actual hardware brightness adjustment.

Divide the global integer brightness_value (0-100) by 100.0f to convert to the float range 0.0-1.0 for ESP32 LEDC PWM, assign to level, and call gpio_3_backlight_pwm.set_level(level) to apply the duty cycle immediately. Higher duty cycle increases brightness.
Next, call lv_arc_set_value with the arc_brightness ID and the current integer brightness. LVGL automatically updates the arc segment length and knob position, mapping brightness value to the visual arc directly.
To make brightness more intuitive, define a 10-character buffer buf, format the integer brightness to a string with % using snprintf (e.g., 50 → "50%"), set it to the central label lbl_brightness with lv_label_set_text, and call lv_refr_now(NULL) to force immediate screen refresh, ensuring real-time display of arc progress and percentage text. lv_arc_set_value connects the brightness value with arc display, as long as the value is within 0-100, achieving precise automatic linkage, which is the basic and core instruction for first-time LVGL arc component usage.
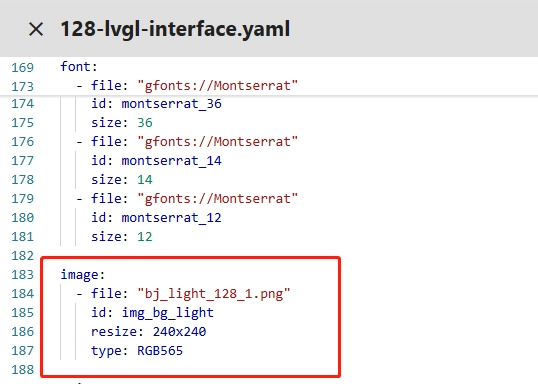
(3) Import Assets
The beautiful image in our effect display can be uploaded and used in ESPHome as described below.

Before starting, click the link below to download the provided assets.
Next, we will teach you how to upload your own assets to use on the ESPHome platform.
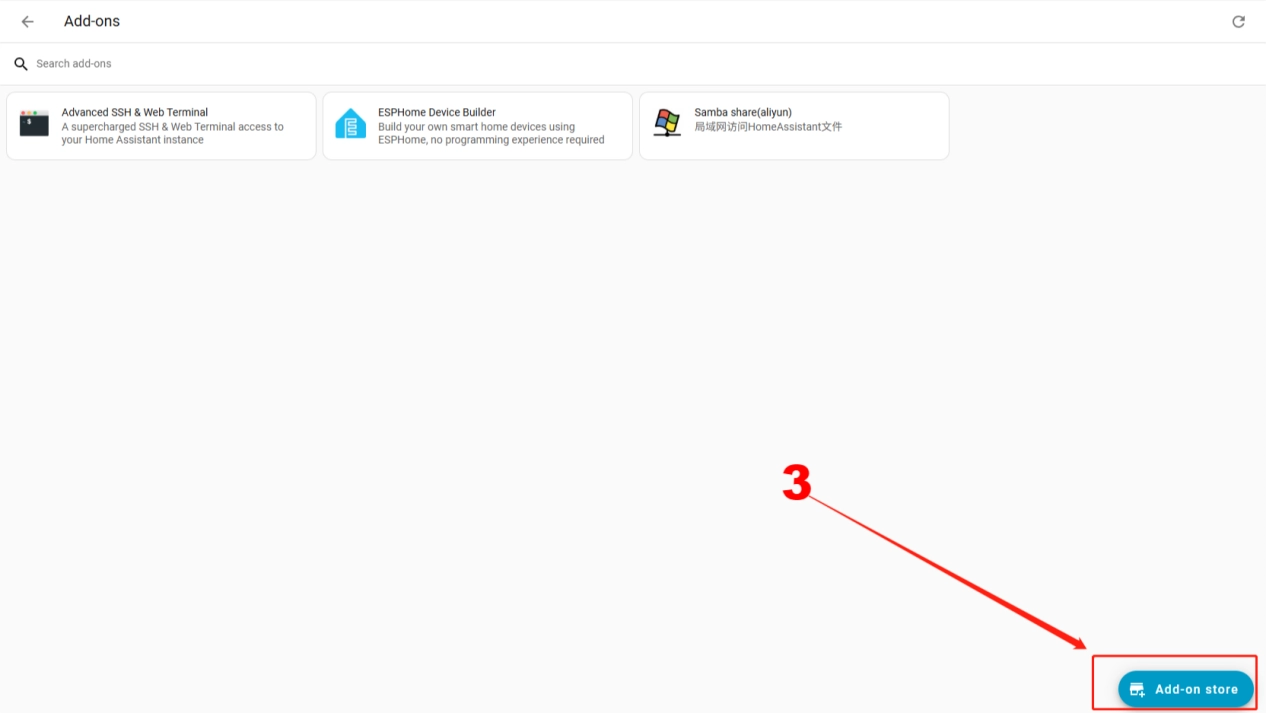
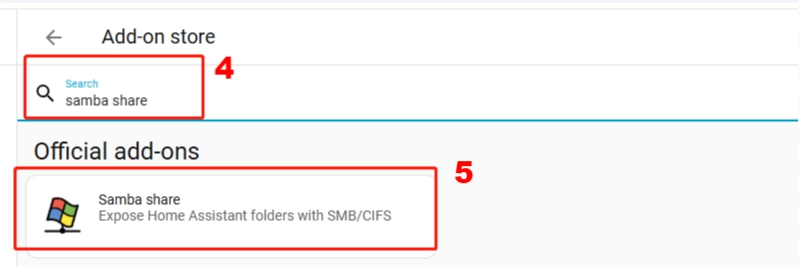
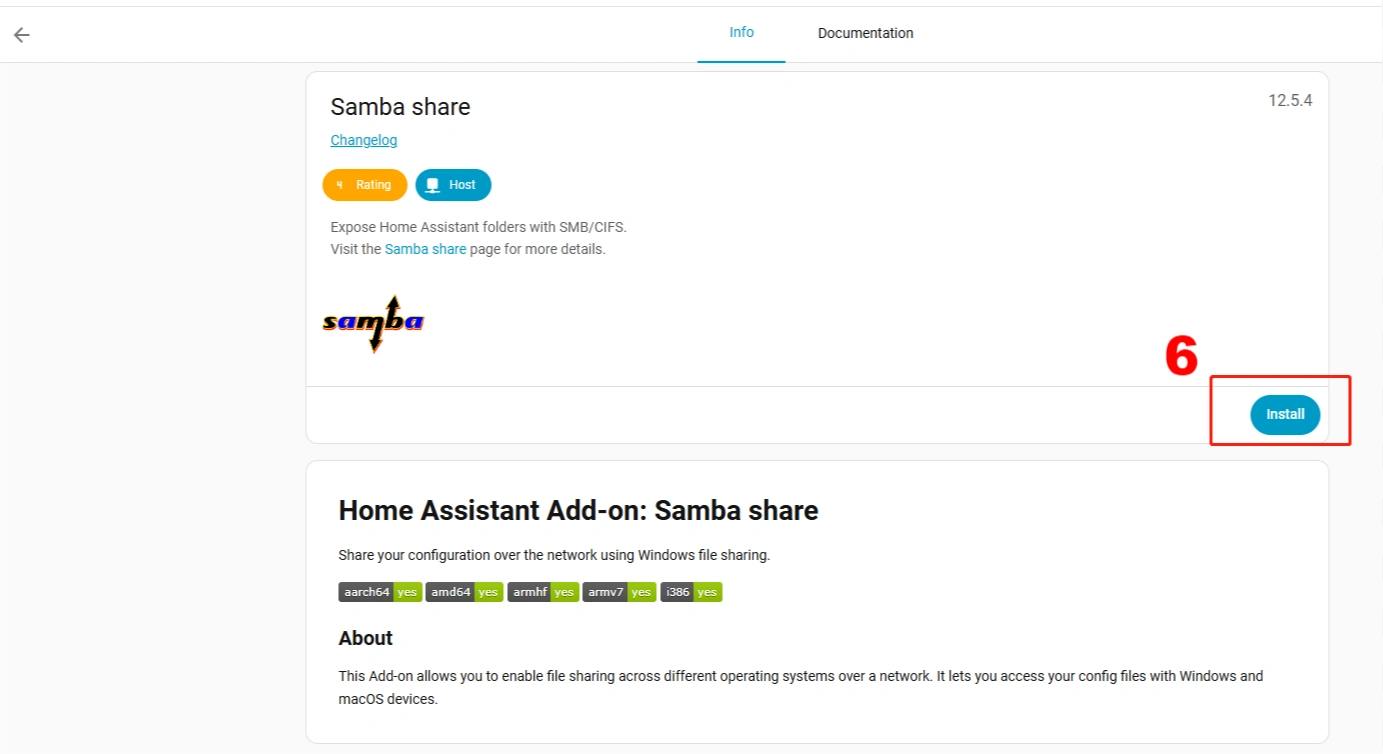
First, download the Samba Share tool. This tool allows convenient uploading of image assets.
Follow the steps step by step to complete the download.
After downloading, configure your account on this tool, using the Home Assistant username and password.
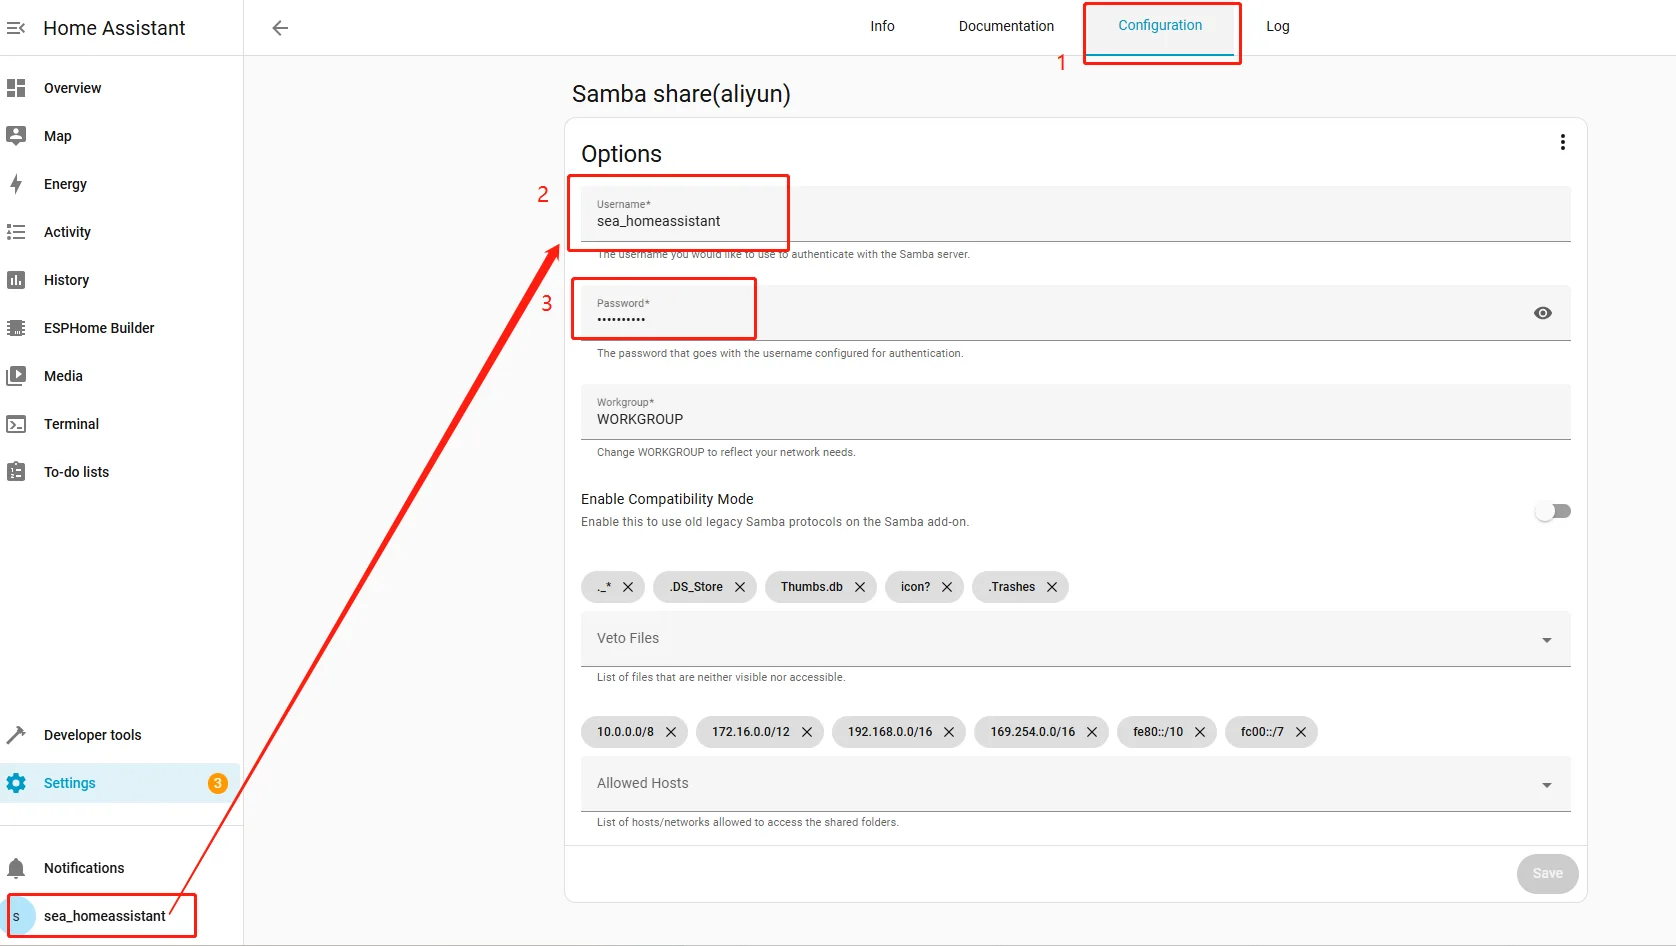
After configuration, remember to click Save at the bottom right.
Then, you can open a file explorer on your computer and enter + your Home Assistant IP address.
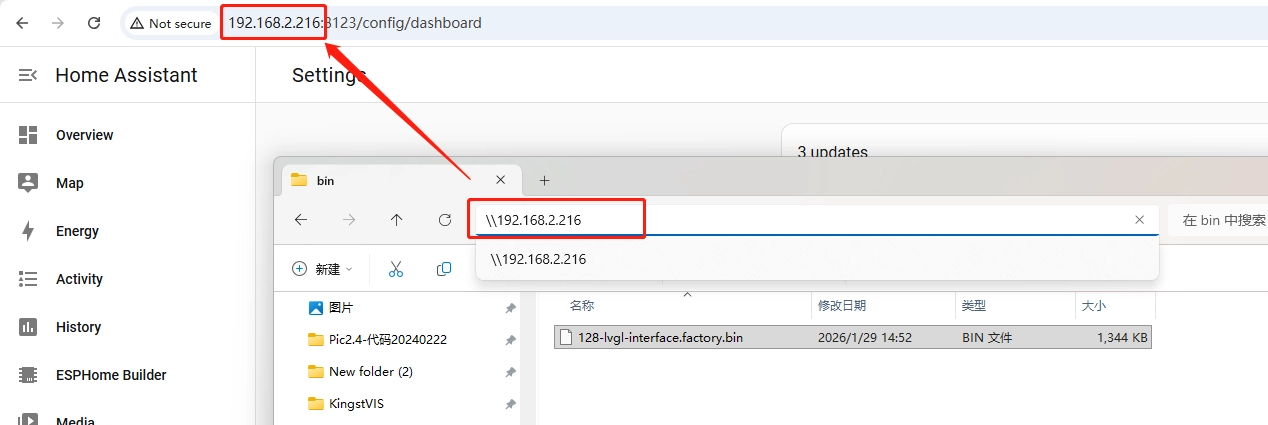
This brings you to the current ESPHome file management interface.

Enter the config folder, then the esphome folder
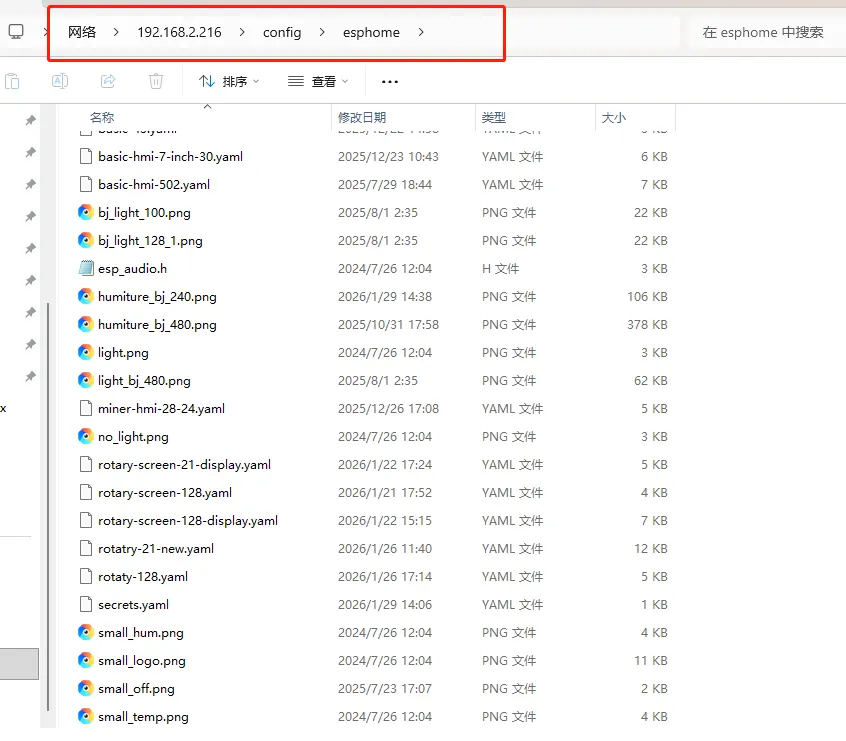
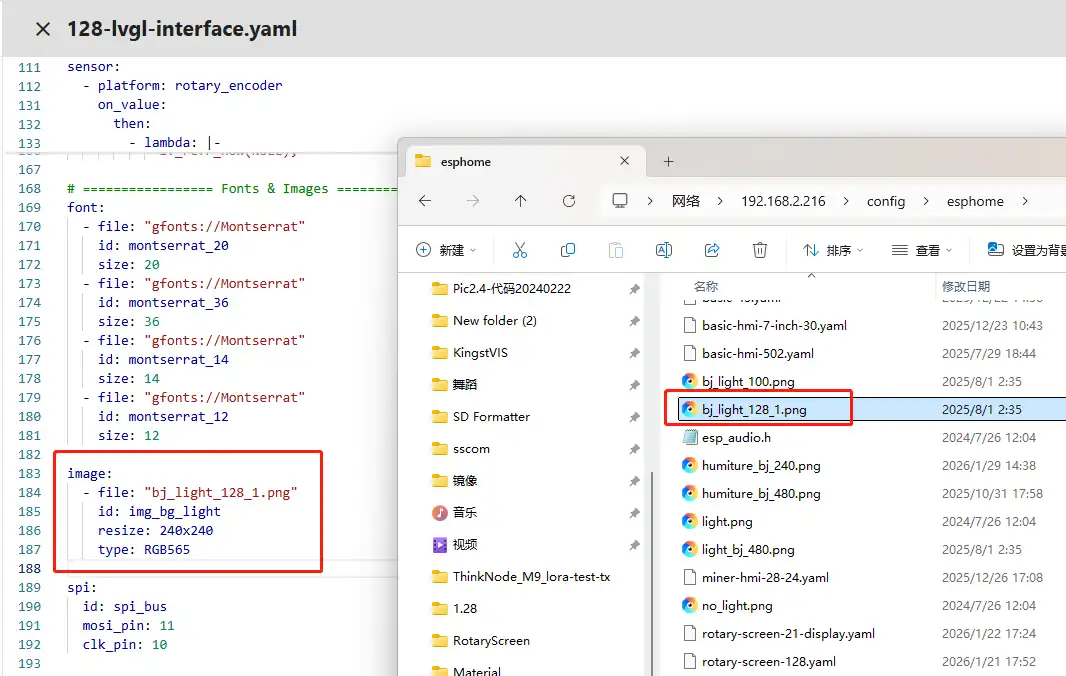
Place the assets you want to use here. Ensure the asset filenames match those in your code.
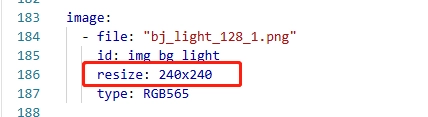
Note: We are using CrowPanel 1.28inch-HMI ESP32 Rotary Display. Our assets have a resolution of 240x240.
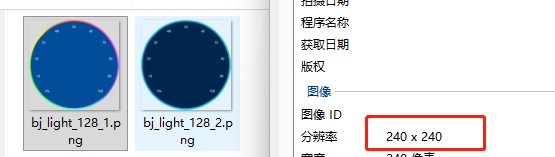
Ensure your code matches this resolution.
Then, during compilation, your code will locate the assets and display them on the screen.
(4) LVGL Configuration
This code is the complete LVGL configuration in ESPHome, building a brightness adjustment interface for the 240x240 1.28-inch round GC9A01A screen. It first associates LVGL with the screen, then defines four layered widgets from bottom to top to create a clear, circular brightness display interface.
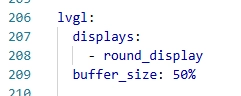
First, associate the pre-configured round_display and set LVGL cache to 50% of screen memory to ensure smooth rendering.
Next, define widgets in order:
The bottom layer is the centered 240x240 background image img_bg, with anti-aliasing enabled for smoother display, serving as the interface background.

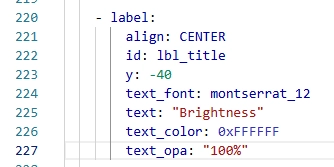
The second layer is the centered title label lbl_title, offset 40 pixels upward, using 12pt Montserrat white font to display "Brightness", clarifying interface function.
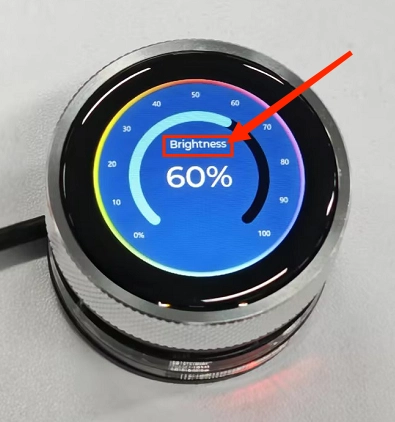
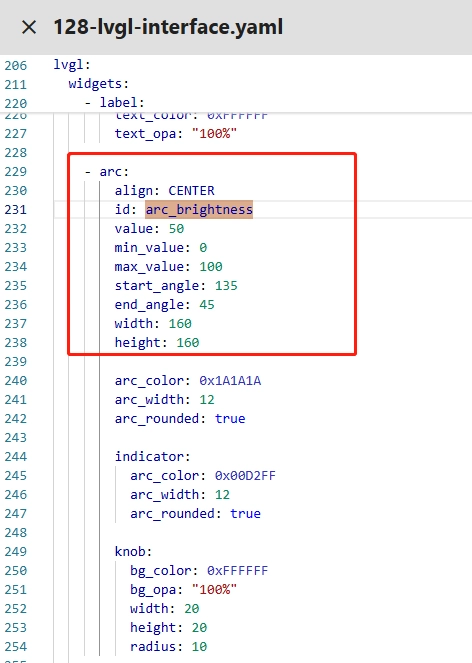
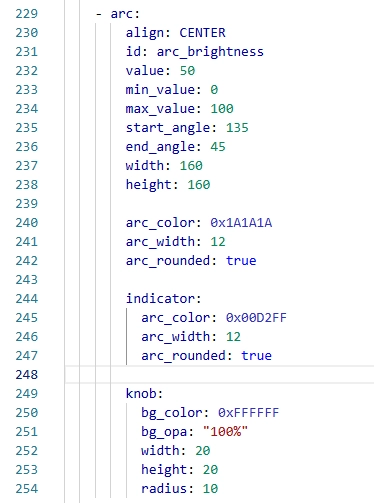
The core third layer is the centered arc component arc_brightness, the visual focus of the interface. Its initial value is 50, range 0-100, matching the brightness variable. It spans 270° from 135° start to 45° end, with dark gray background line width 12 and rounded ends, a sky-blue indicator segment, and a 20x20 white knob at the end to indicate current brightness.
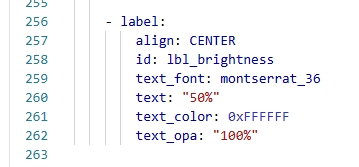
The top layer is the centered percentage label lbl_brightness, using 36pt Montserrat white font to display the initial "50%", clearly showing current brightness. All widgets are centered, layered according to drawing order, and arc parameters match subsequent encoder adjustment and lv_arc_set_value logic, providing real-time visual synchronization for brightness changes.

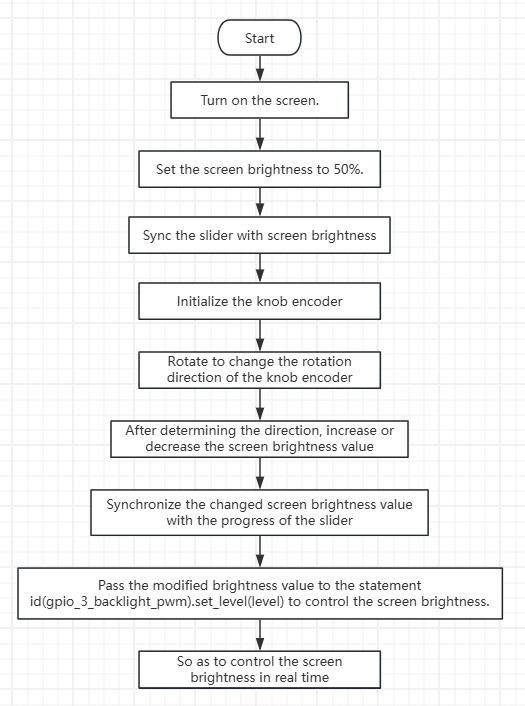
5. Code Logic Flowchart
6. Flashing Steps
Next, we will guide you to write code with ESPHome and complete the operation step by step.
Here we emphasize again:
The following devices need to be on the same LAN:
① Your computer
② CrowPanel HMI ESP32 Rotary Display
③ Raspberry Pi with the Home Assistant system
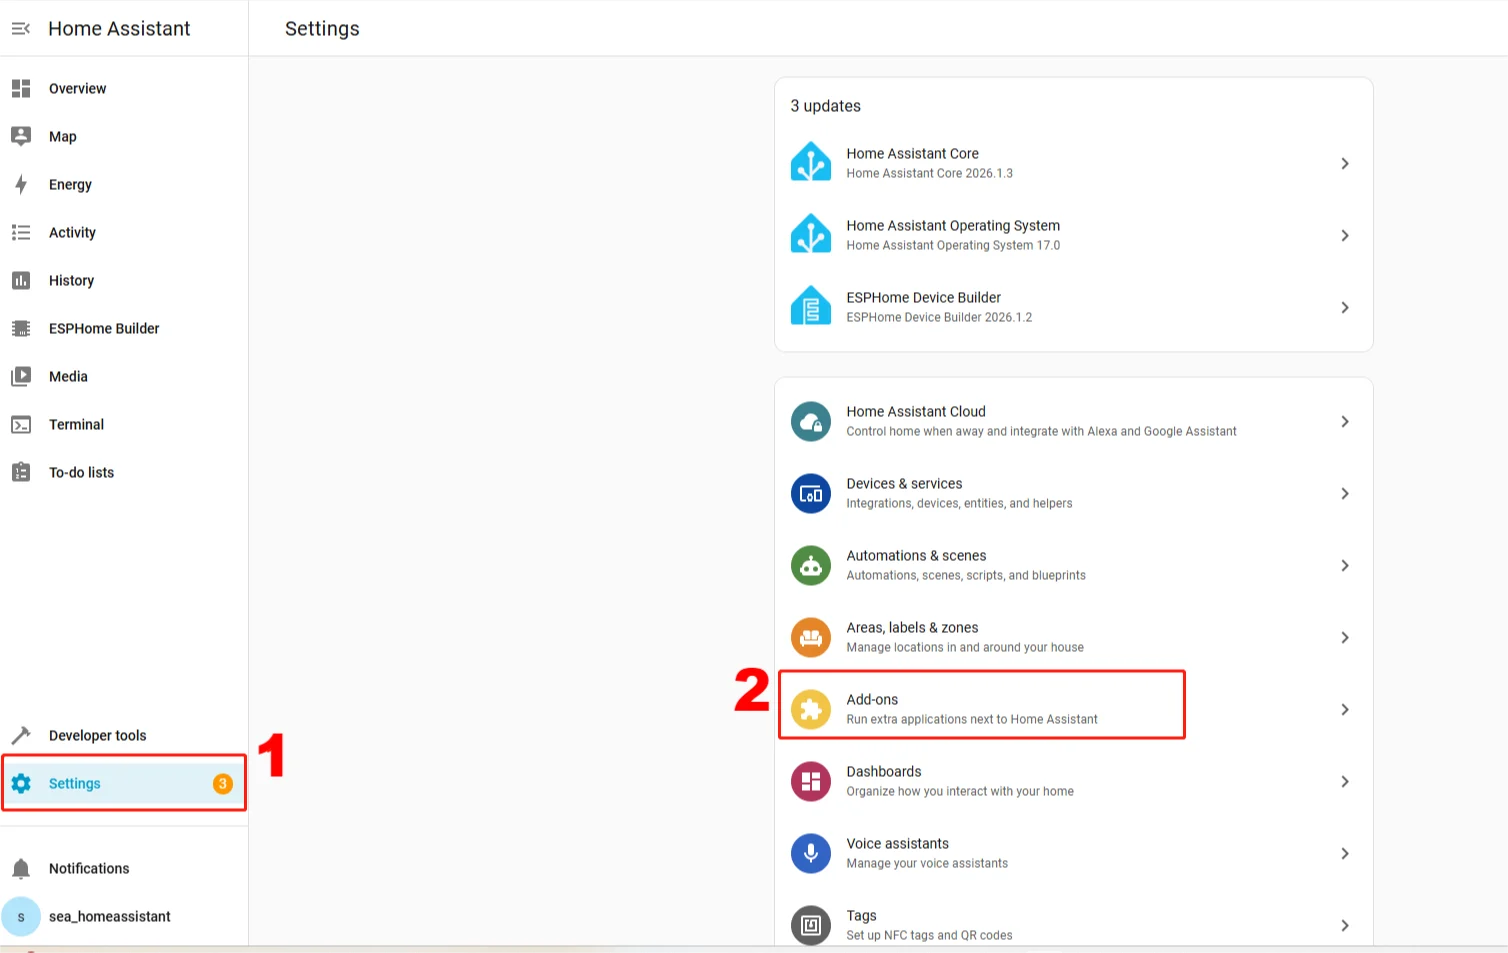
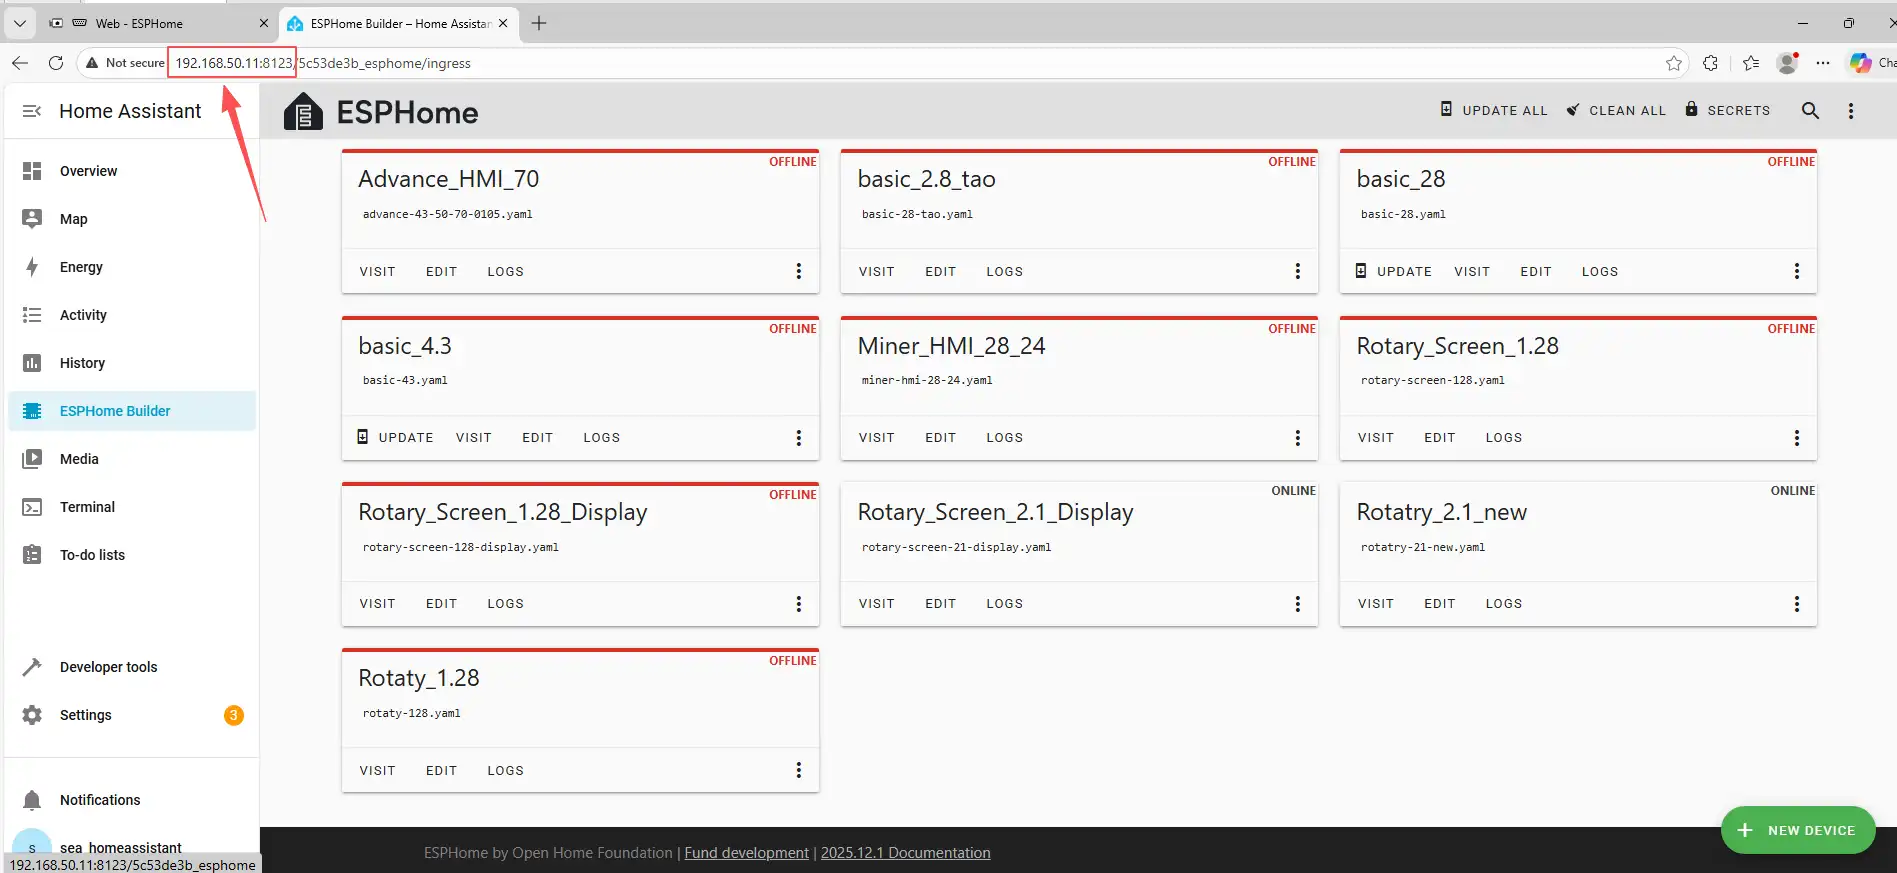
In our project, the Raspberry Pi with Home Assistant serves as the server, so entering its IP address opens Home Assistant.
Only after entering this page can you perform the following operations.
We assume you have completed the installation in Lesson 1 and reached the ESPHome main page.
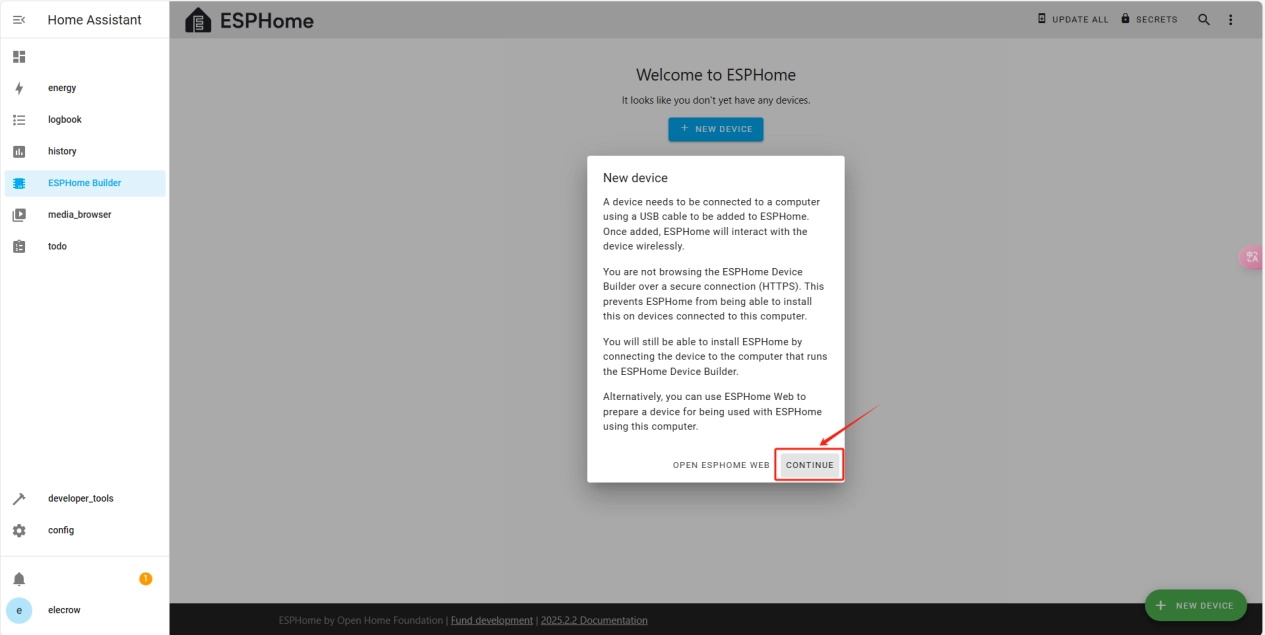
Once installation is complete, start adding devices. Click + New Device -> Continue.

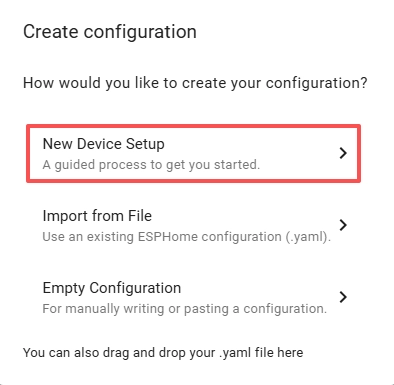
Click "New Device Setup"
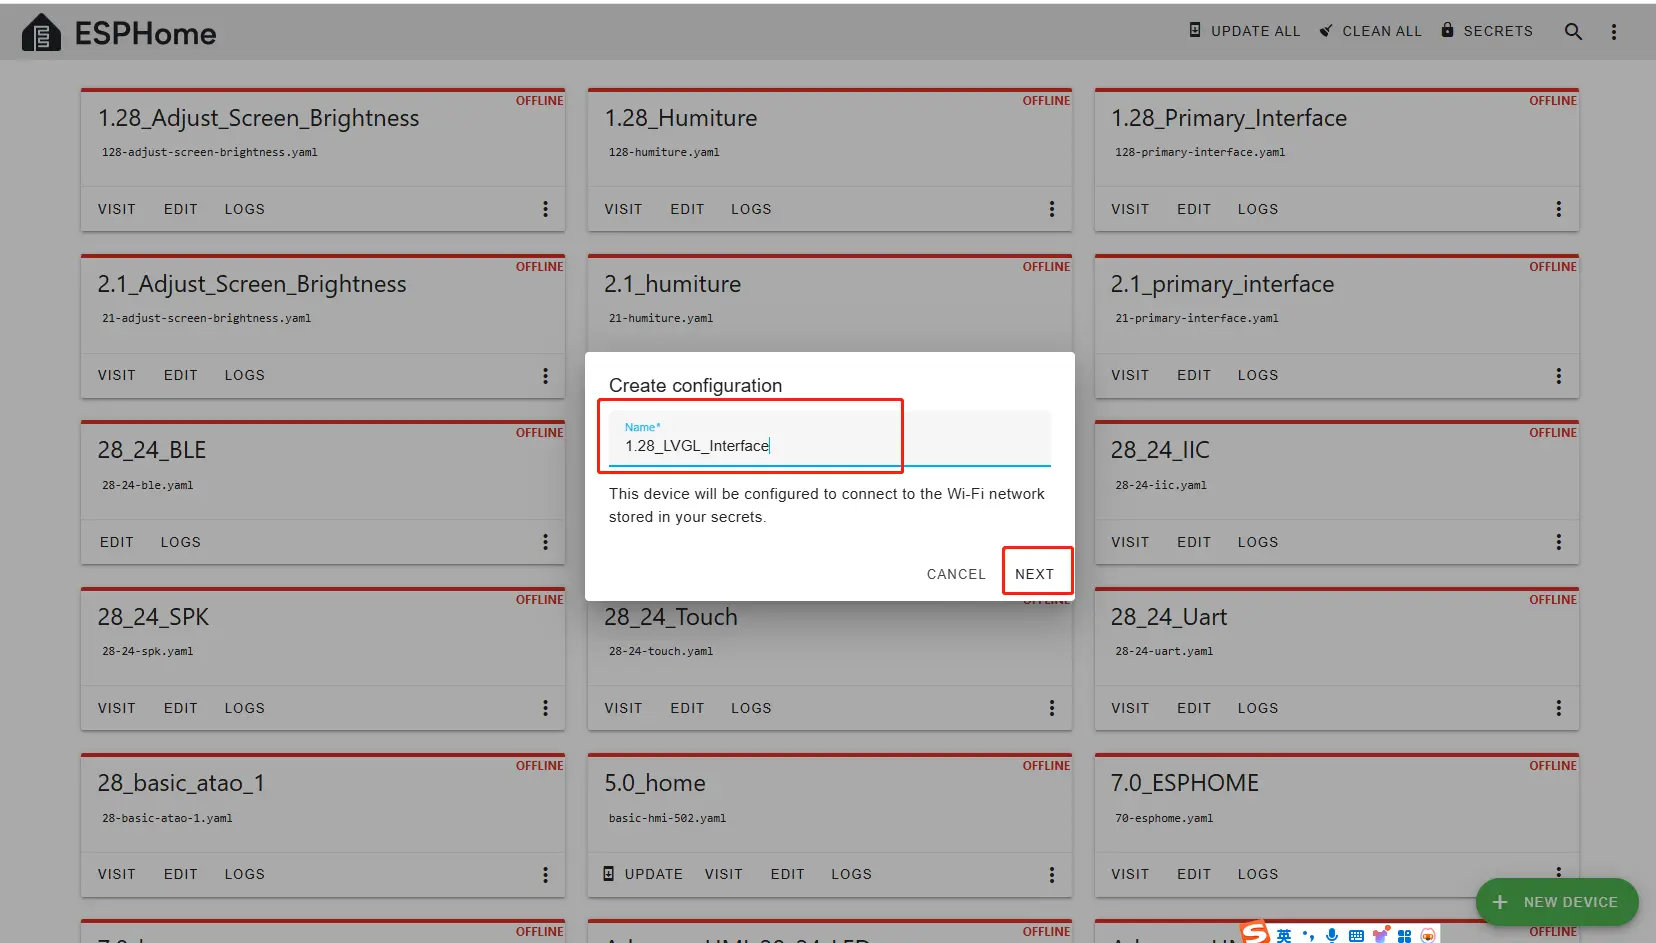
Enter a name and click Next.
(You can use any custom name. Avoid special symbols such as @, #, etc.)
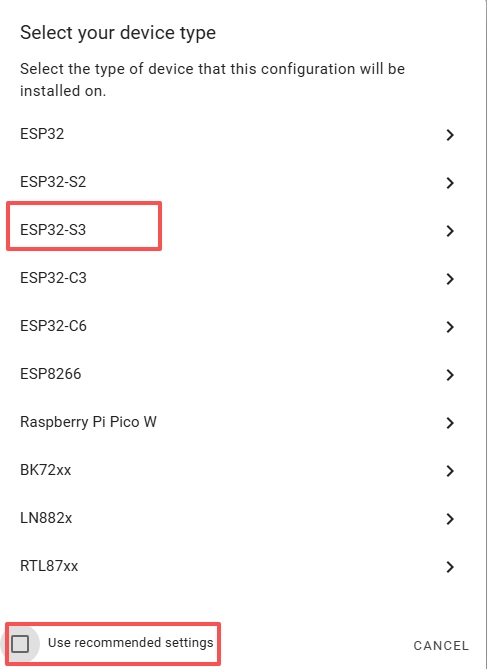
Here, do not check "Use recommended settings."
Select the main chip of the CrowPanel 1.28inch-HMI ESP32 Rotary Display, ESP32-S3.
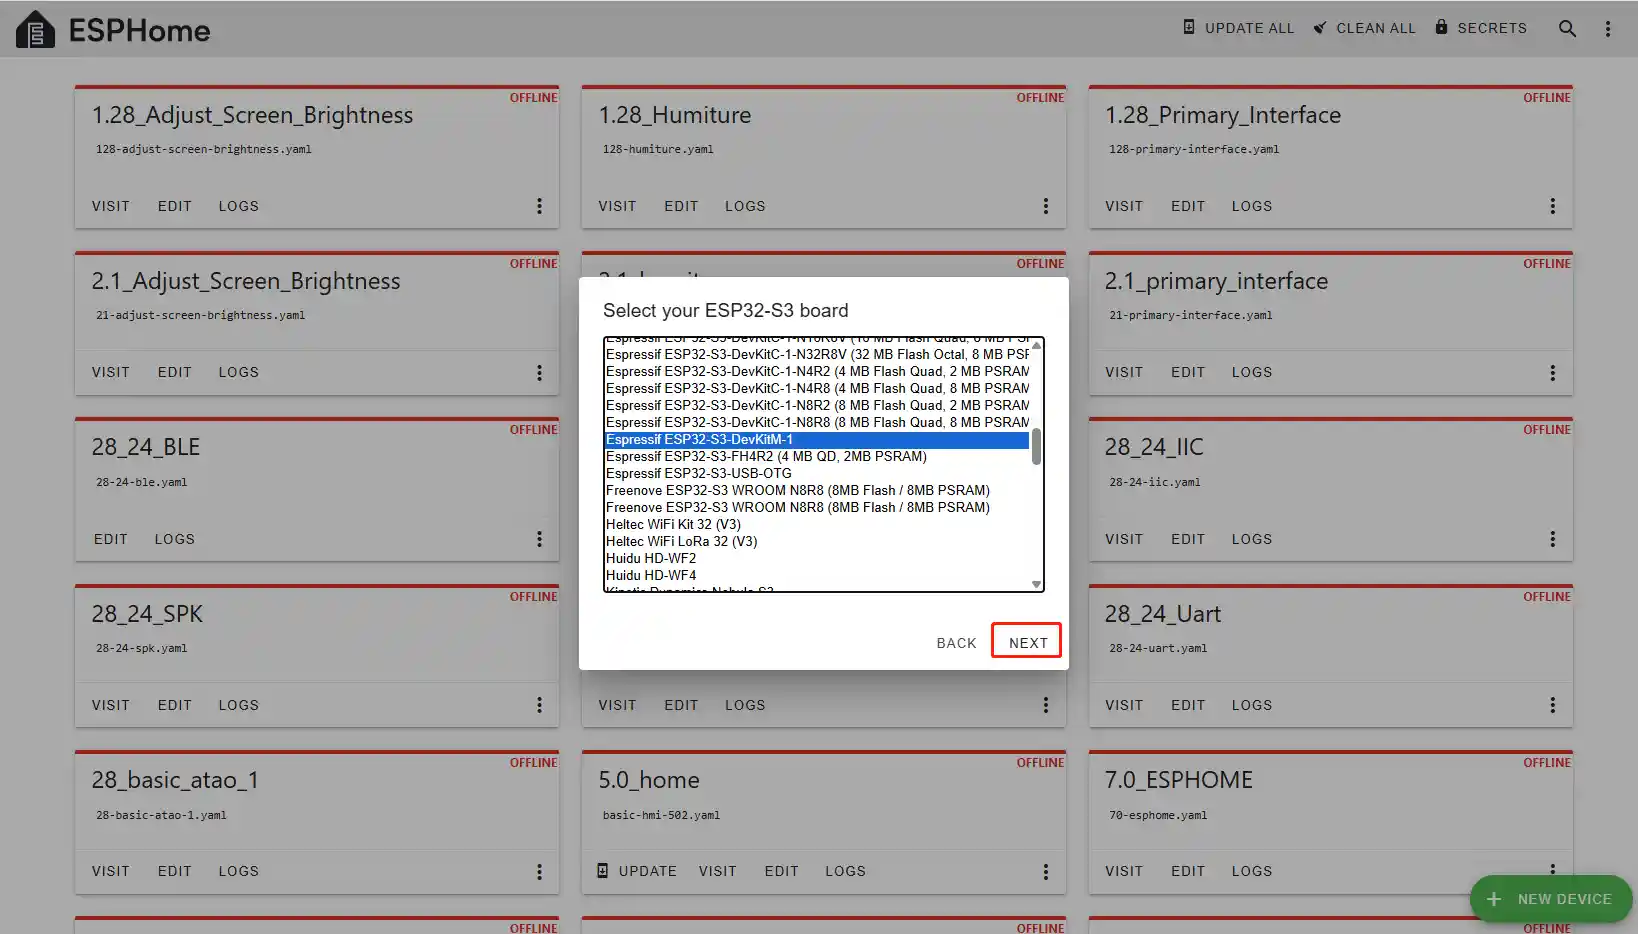
Next, choose any option (we will replace it in the code later).
Here, click "SKIP".
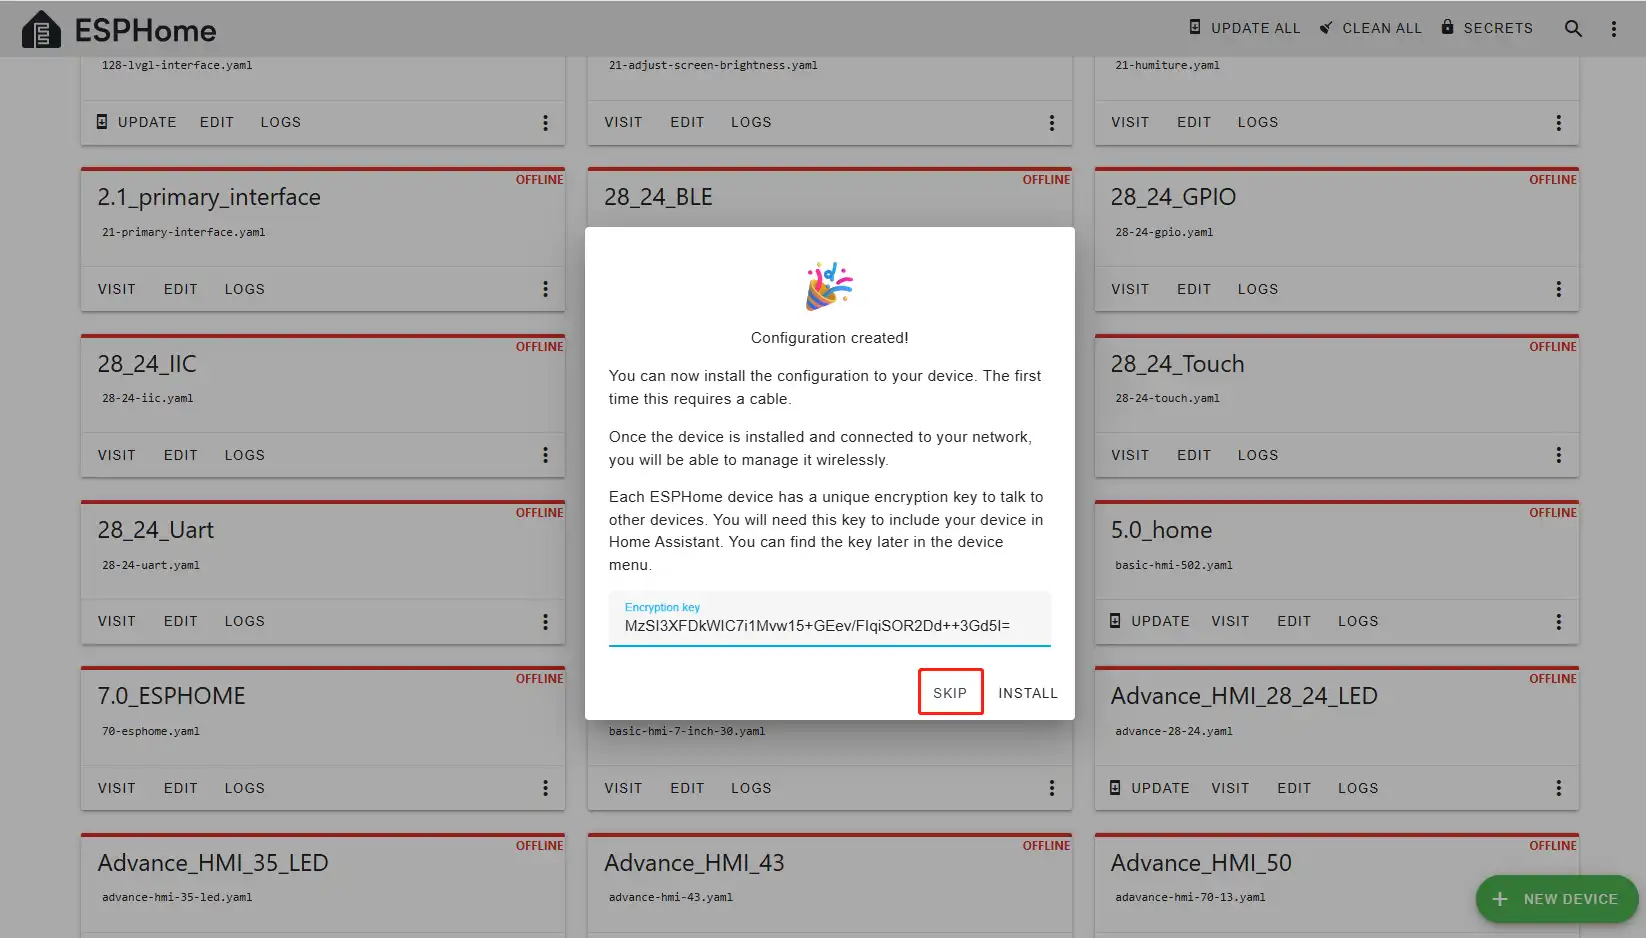
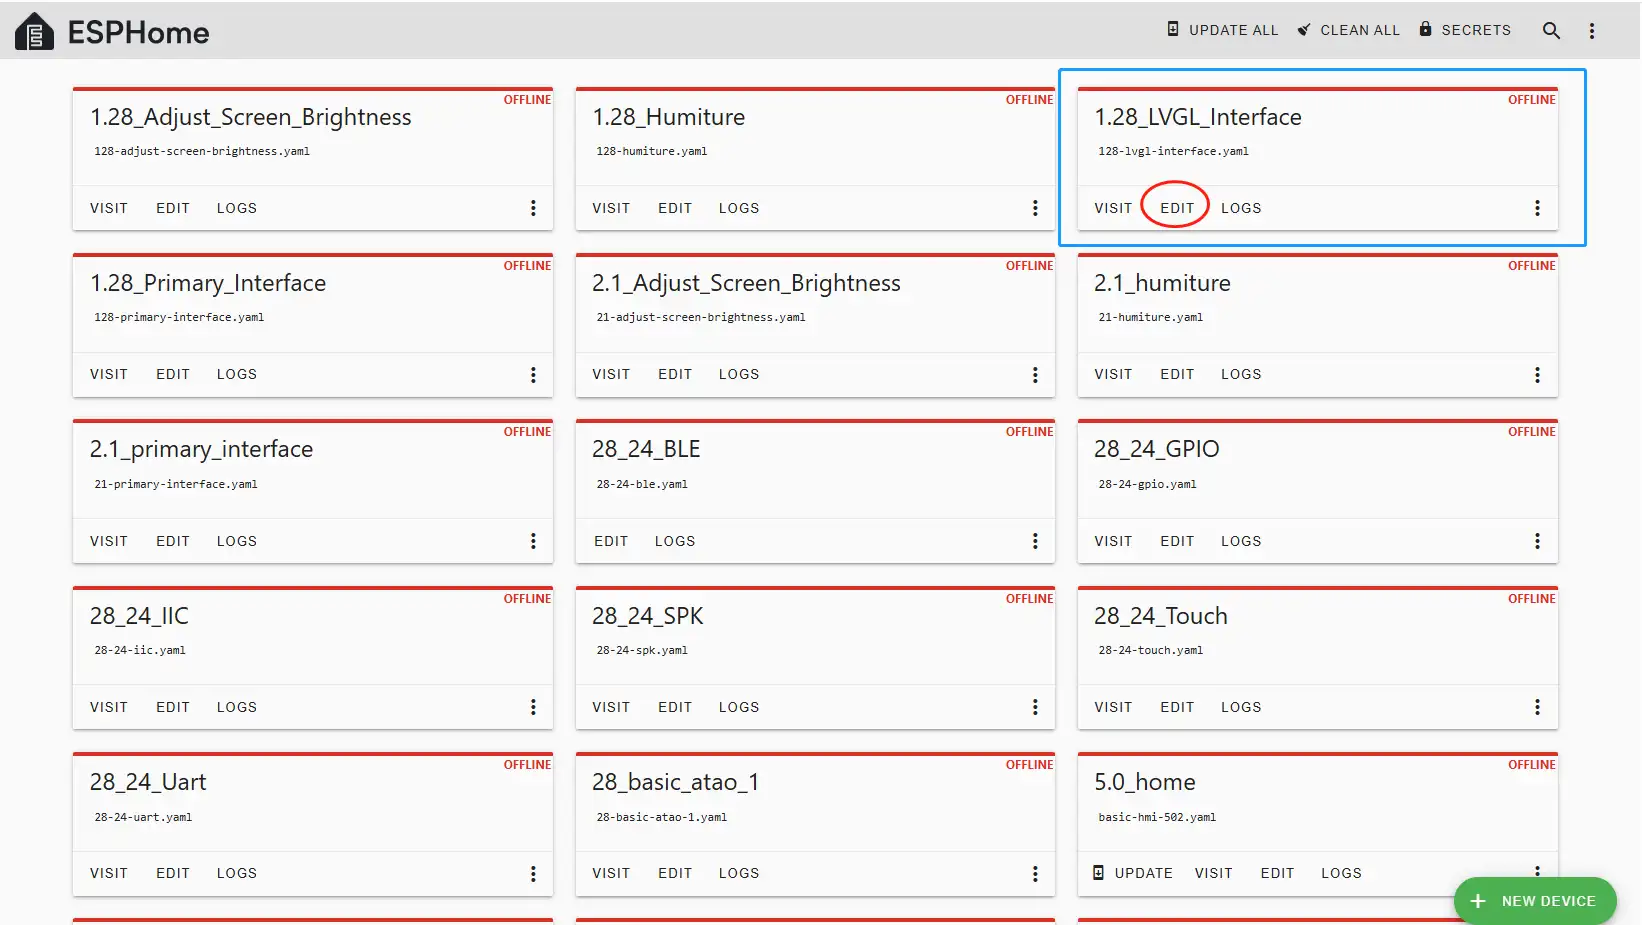
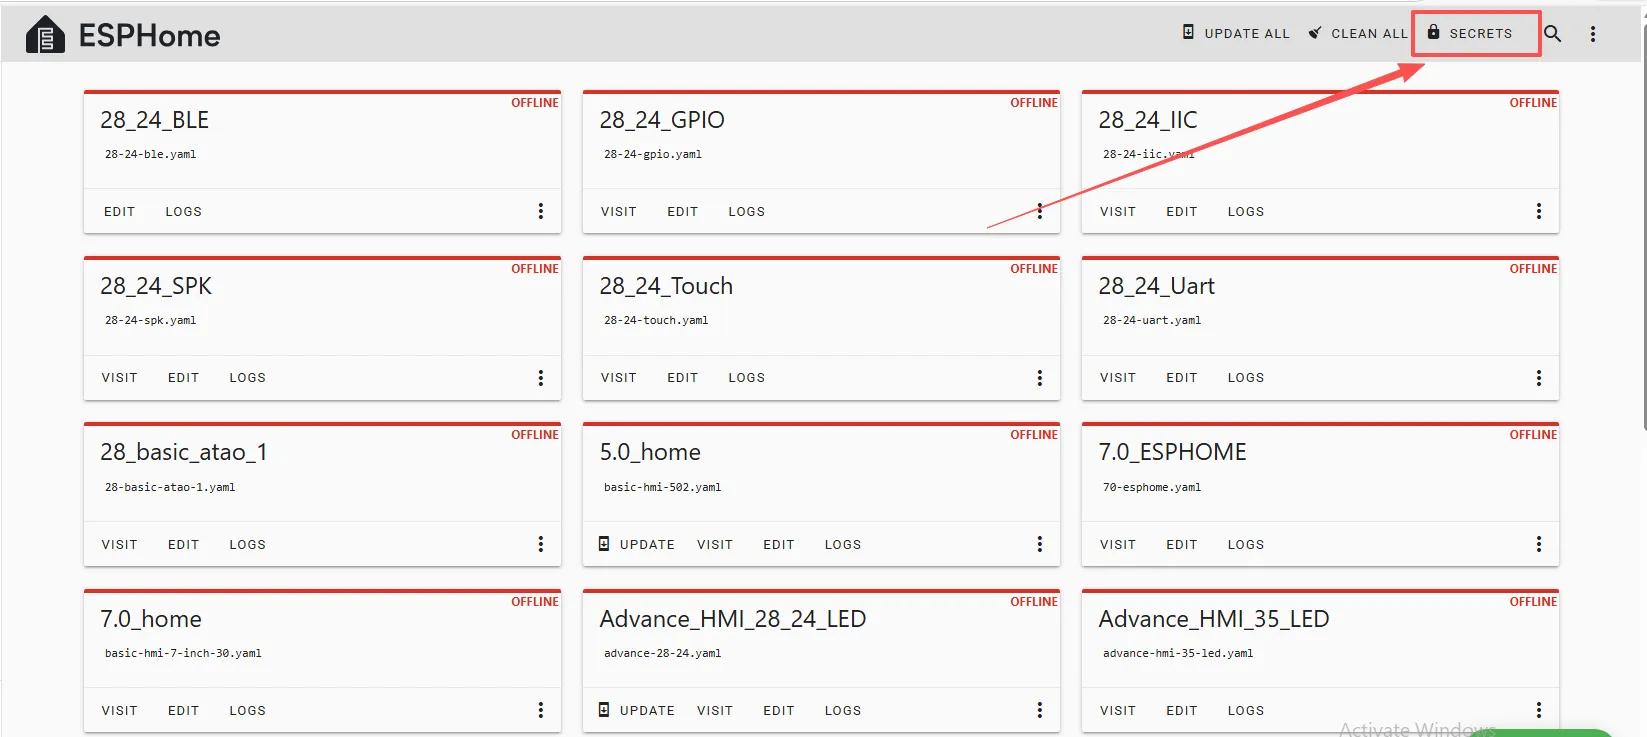
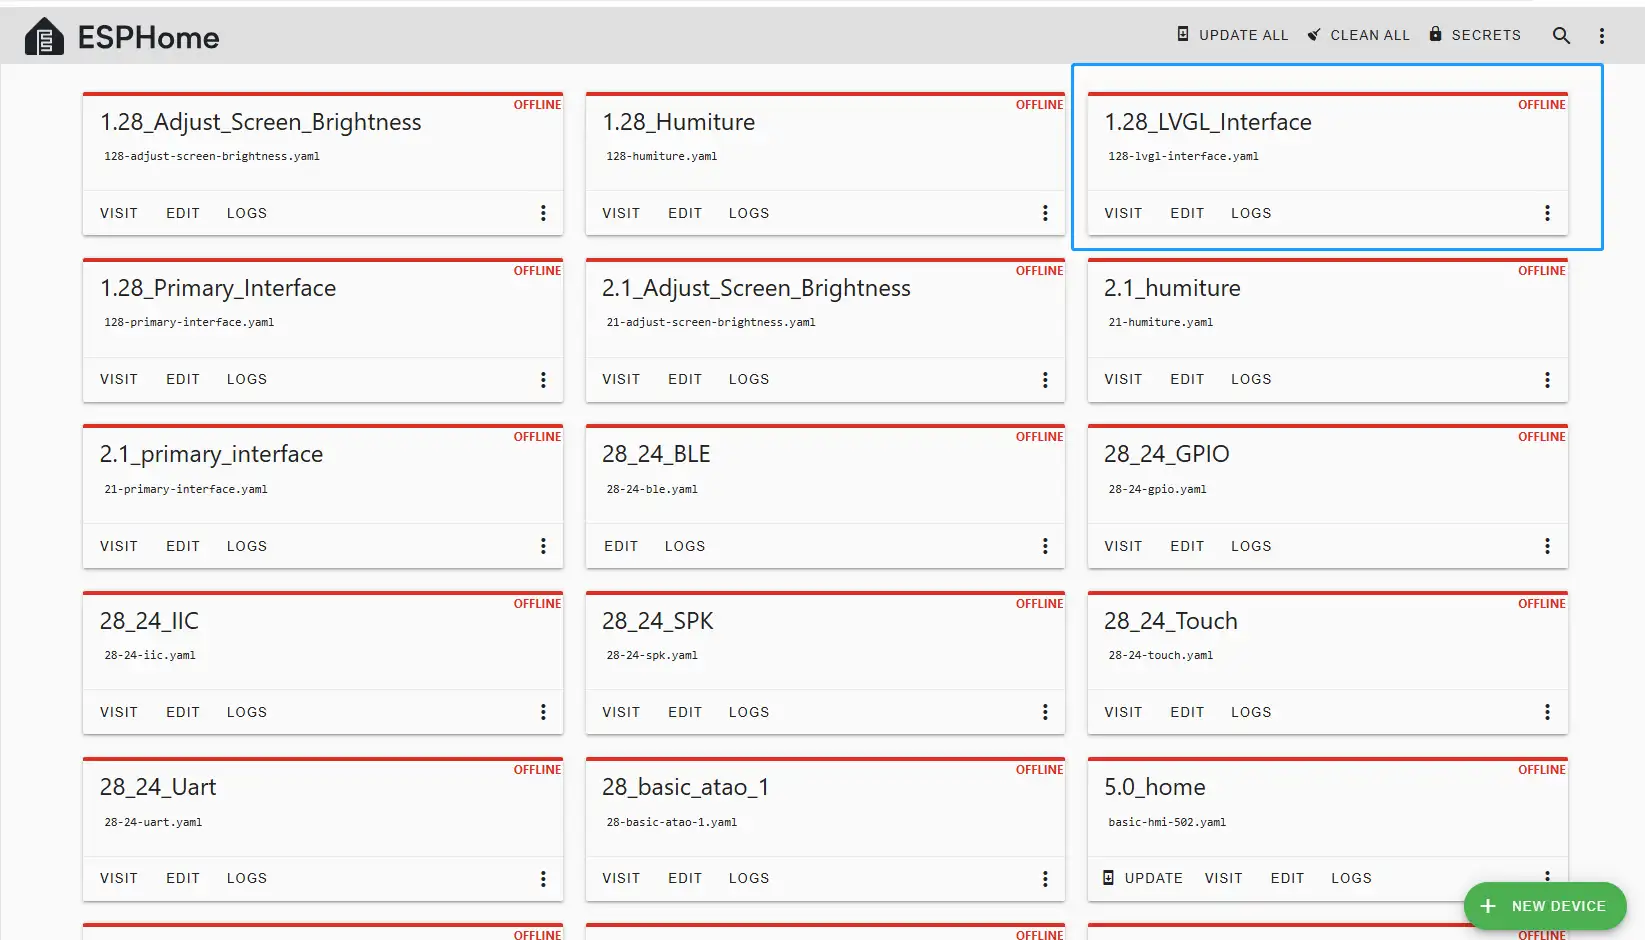
Then, return to the main interface, find the 1.28_LVGL_Interface you just created, click "EDIT", and enter the code editor.
This code is automatically generated based on the previous steps. Next, we will make replacements in it, which will help optimize the code for more efficient operation.
Automatically generated code:
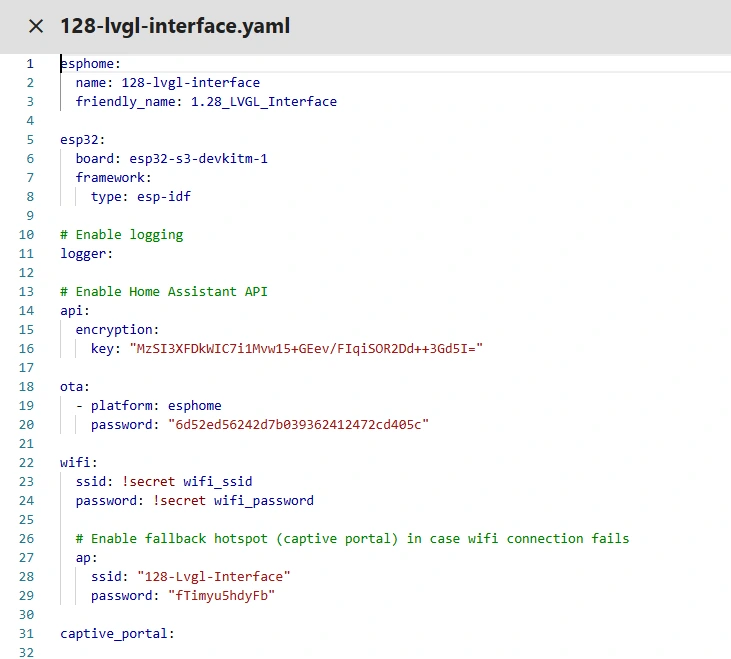
This is the complete code. You can click the code link below to obtain it.
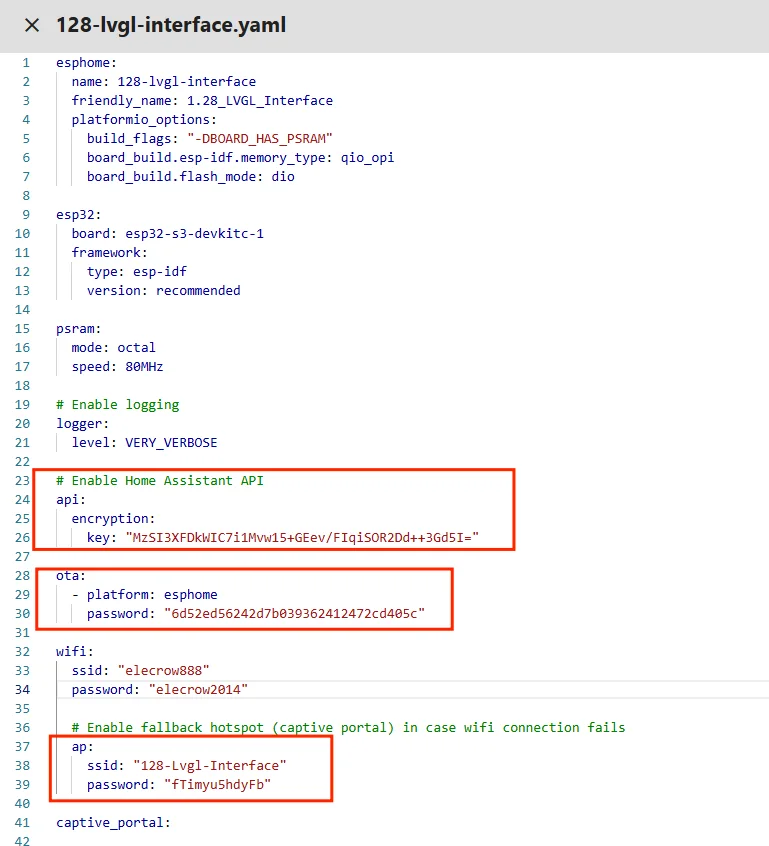
Next, you can replace the relevant content in esphome and ESP32 as needed.And add the item "PSRAM".
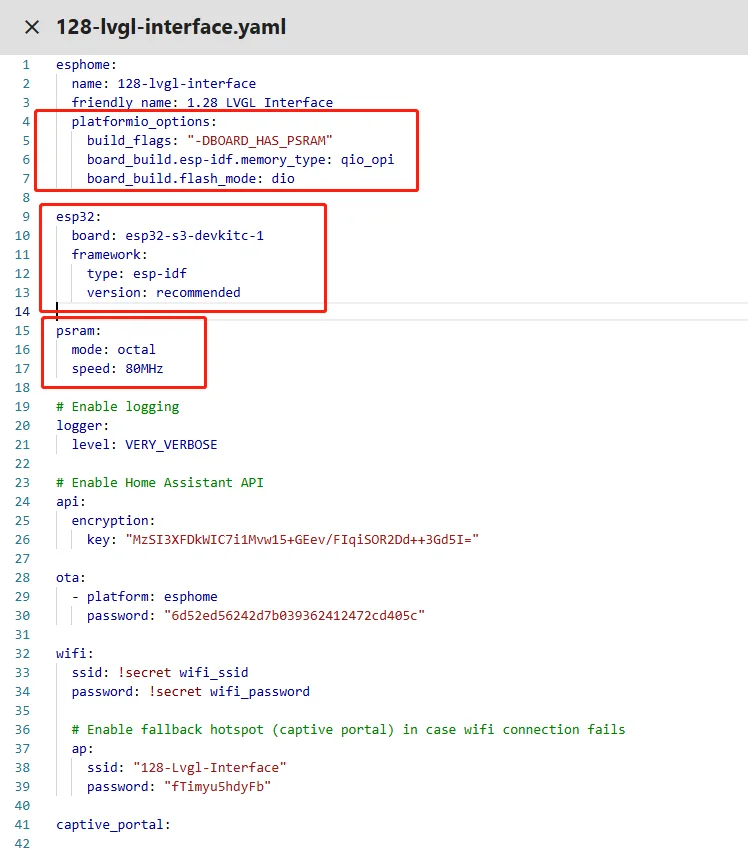
Then, based on your existing code, follow the format shown in the figure to add or replace these codes.
(Other configurations remain unchanged)
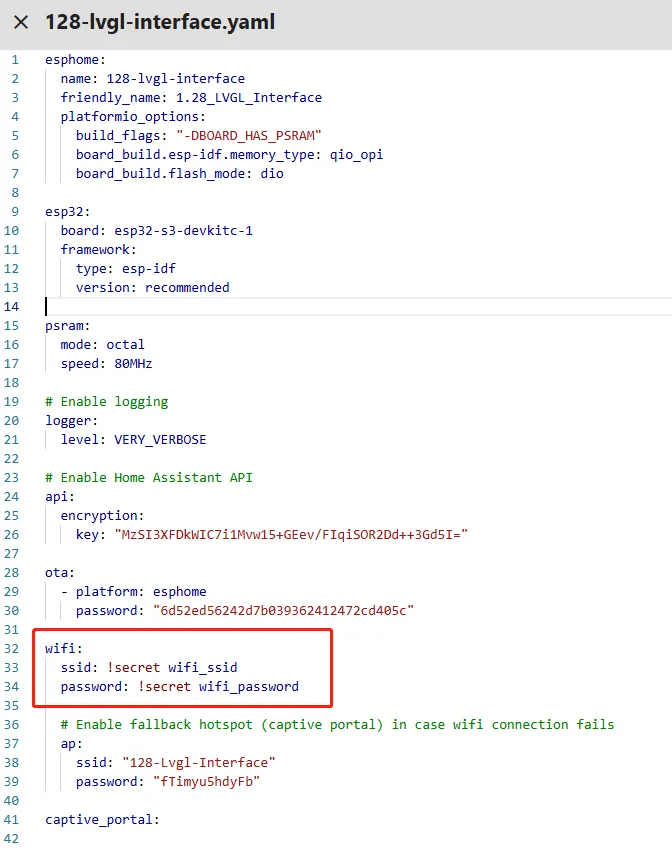
Remember to replace your own Wi-Fi name and password.
Note: This Wi-Fi connection must be in the same local network as your computer and Raspberry Pi!
Wi-Fi credentials are set on the ESPHome main page.
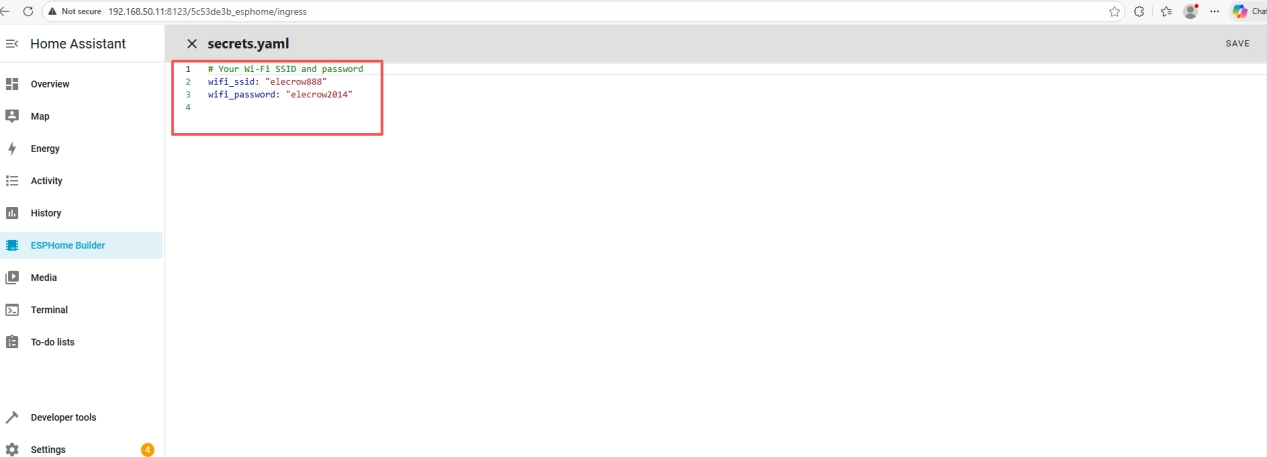
In code, we use "elecrow888" as Wi-Fi.
Of course, you can also specify your own Wi-Fi name and password.

These credentials are unique to your created device; keep your original ones.
You can copy other functional code from ours.
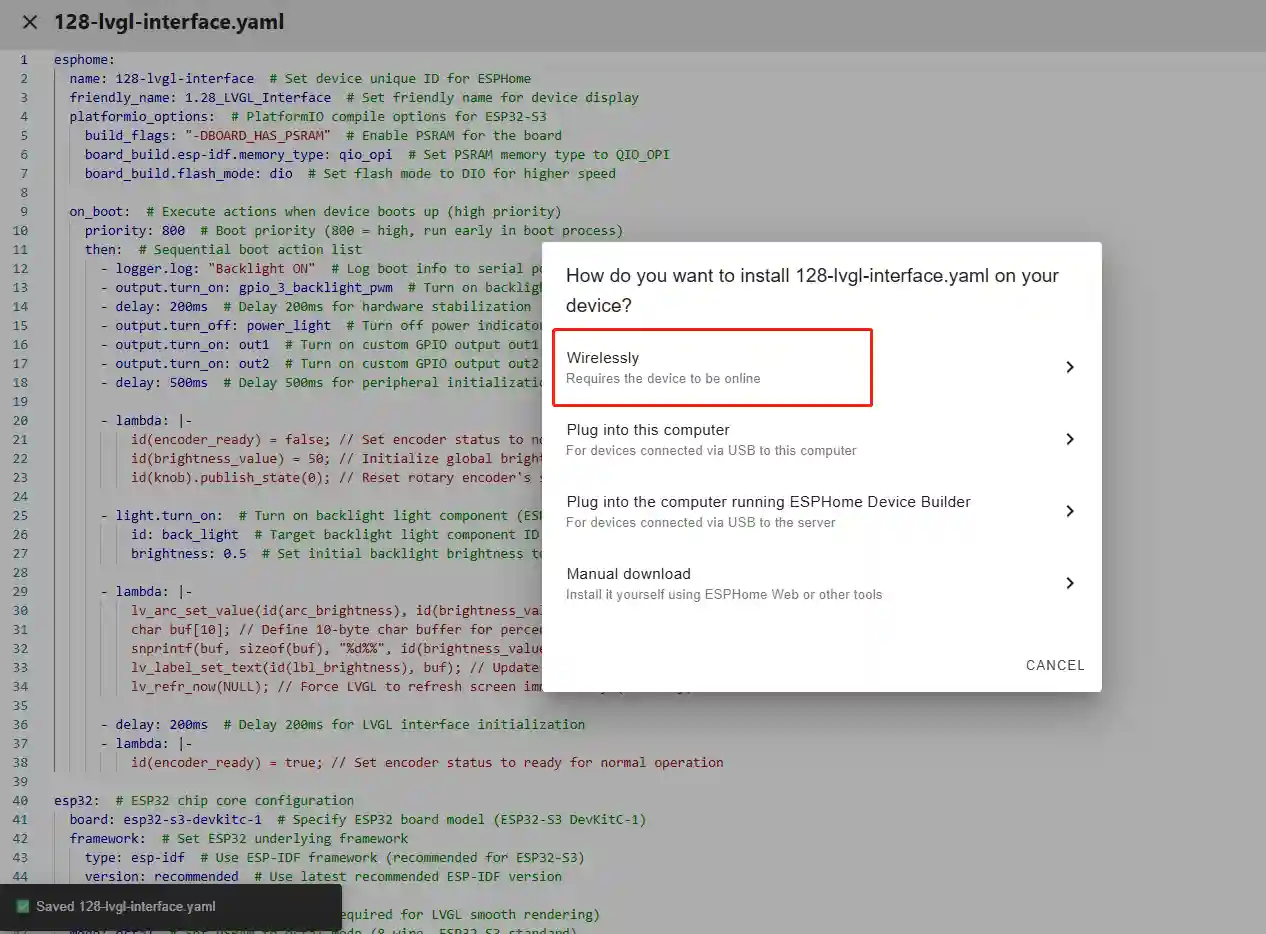
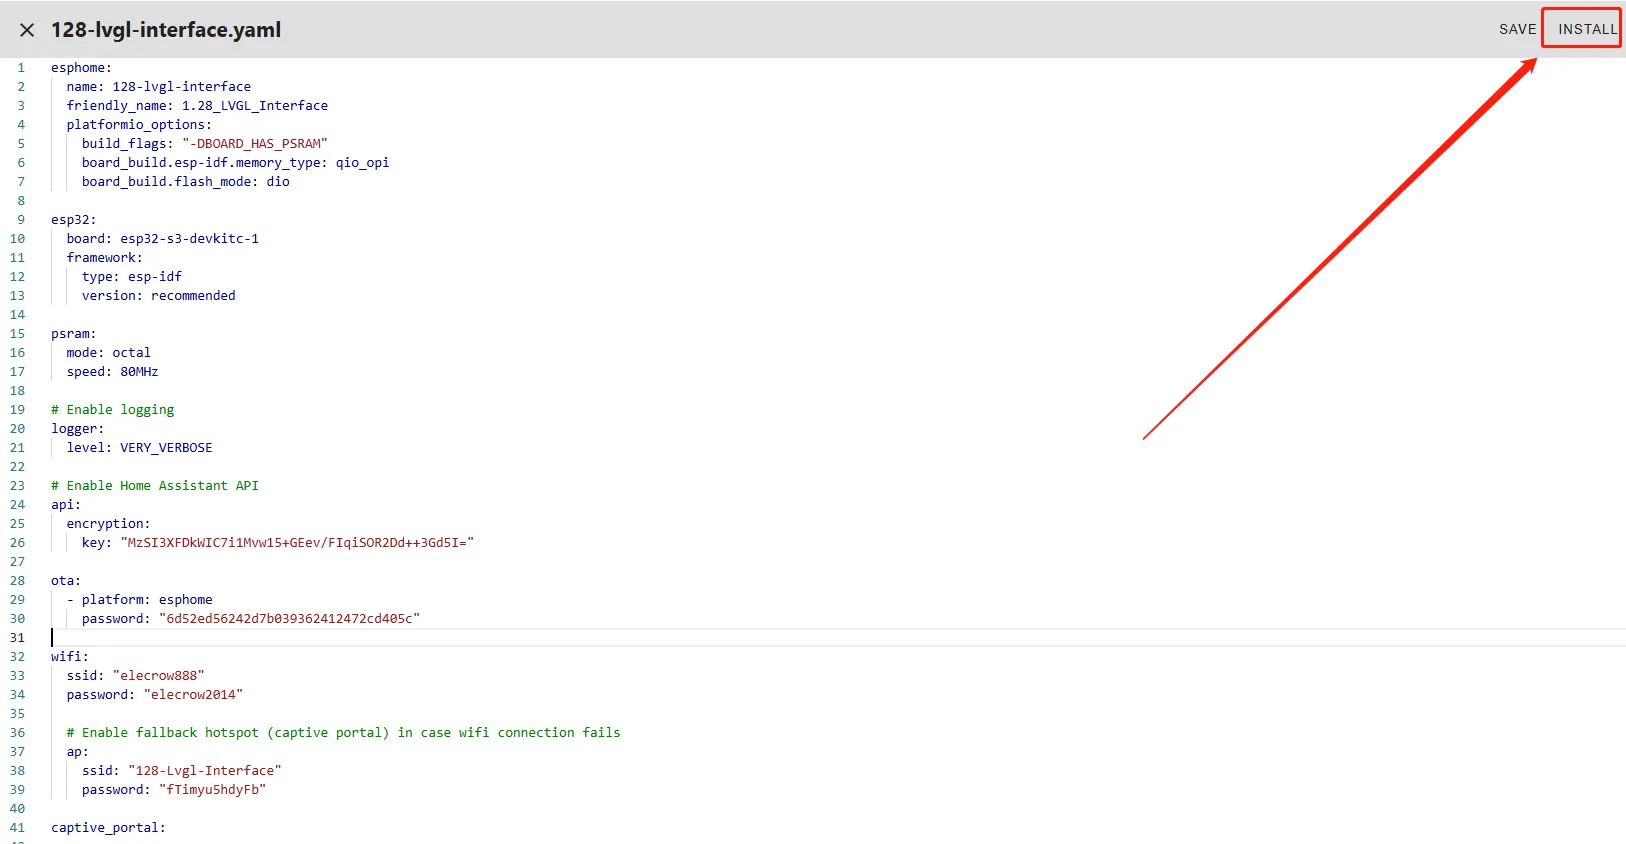
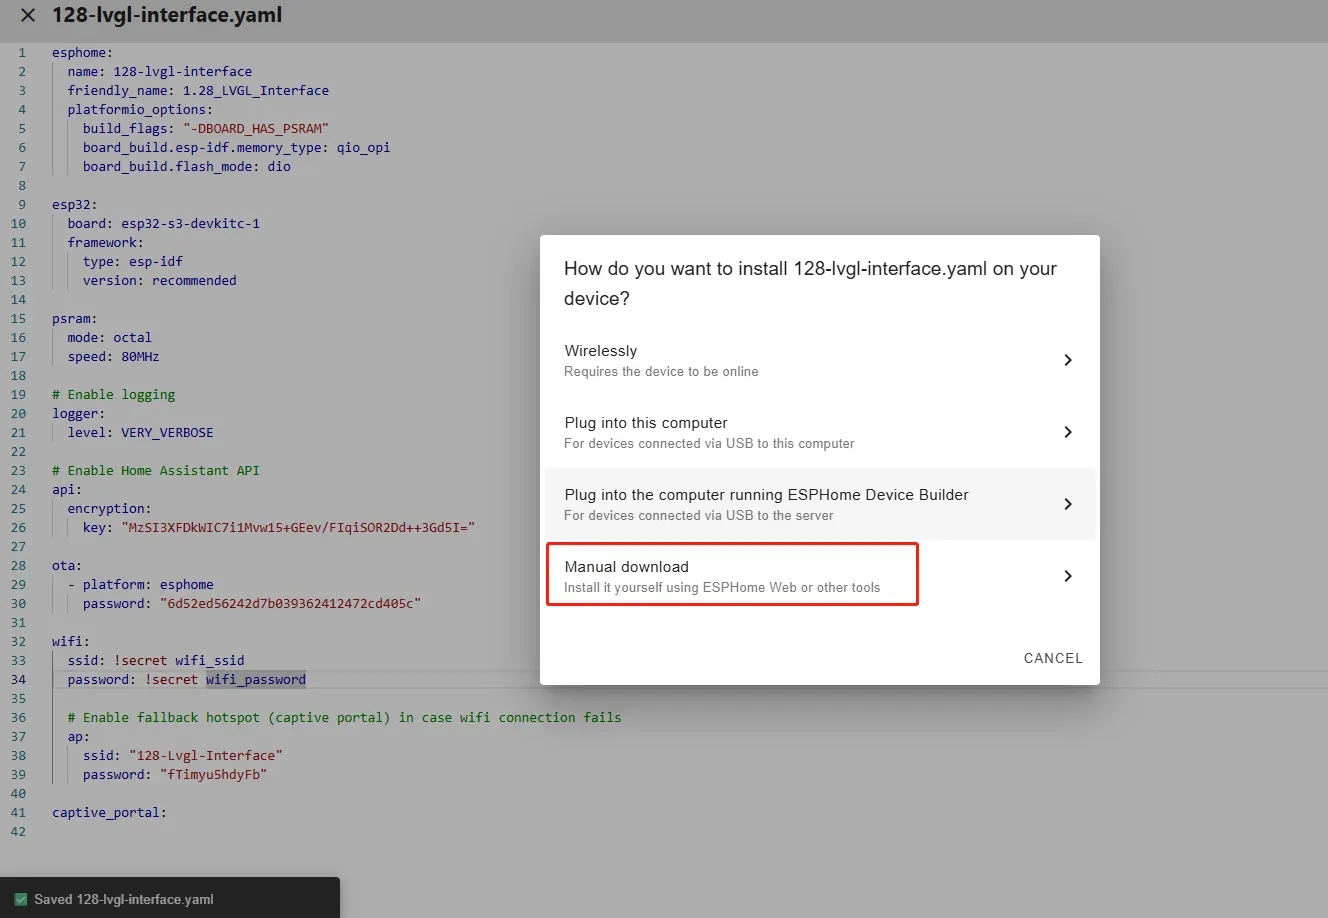
Once code replacement is complete, click "INSTALL" at the top right.
Select "Manual download".
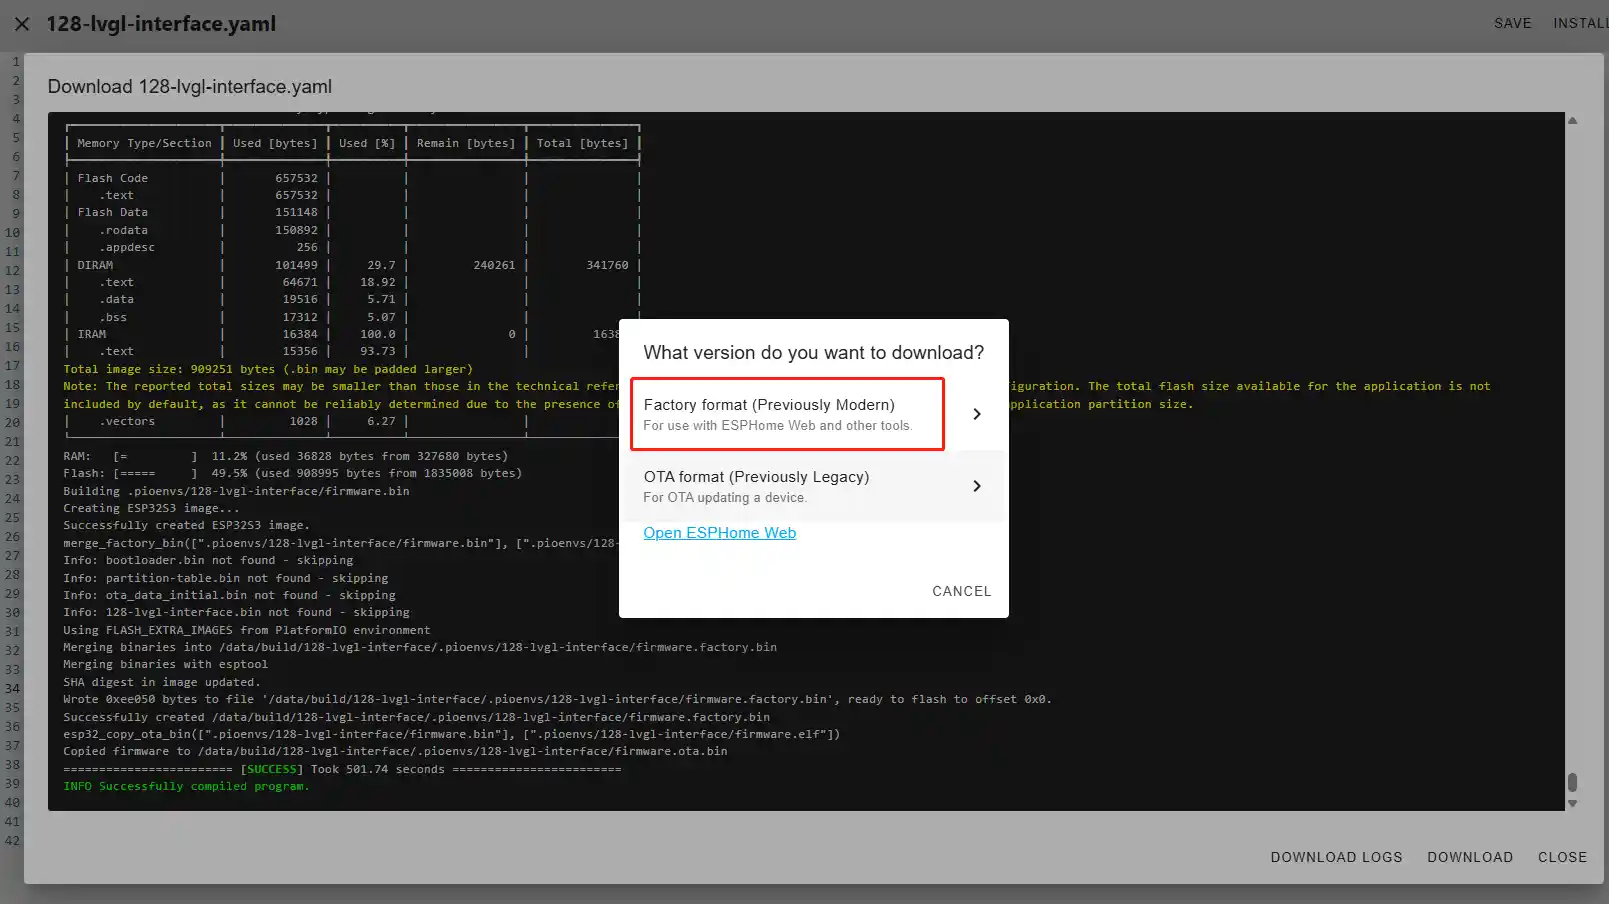
Wait for a few minutes until the installation is complete.
Then select "Factory format".
Once the download is complete, you will see the .bin file.
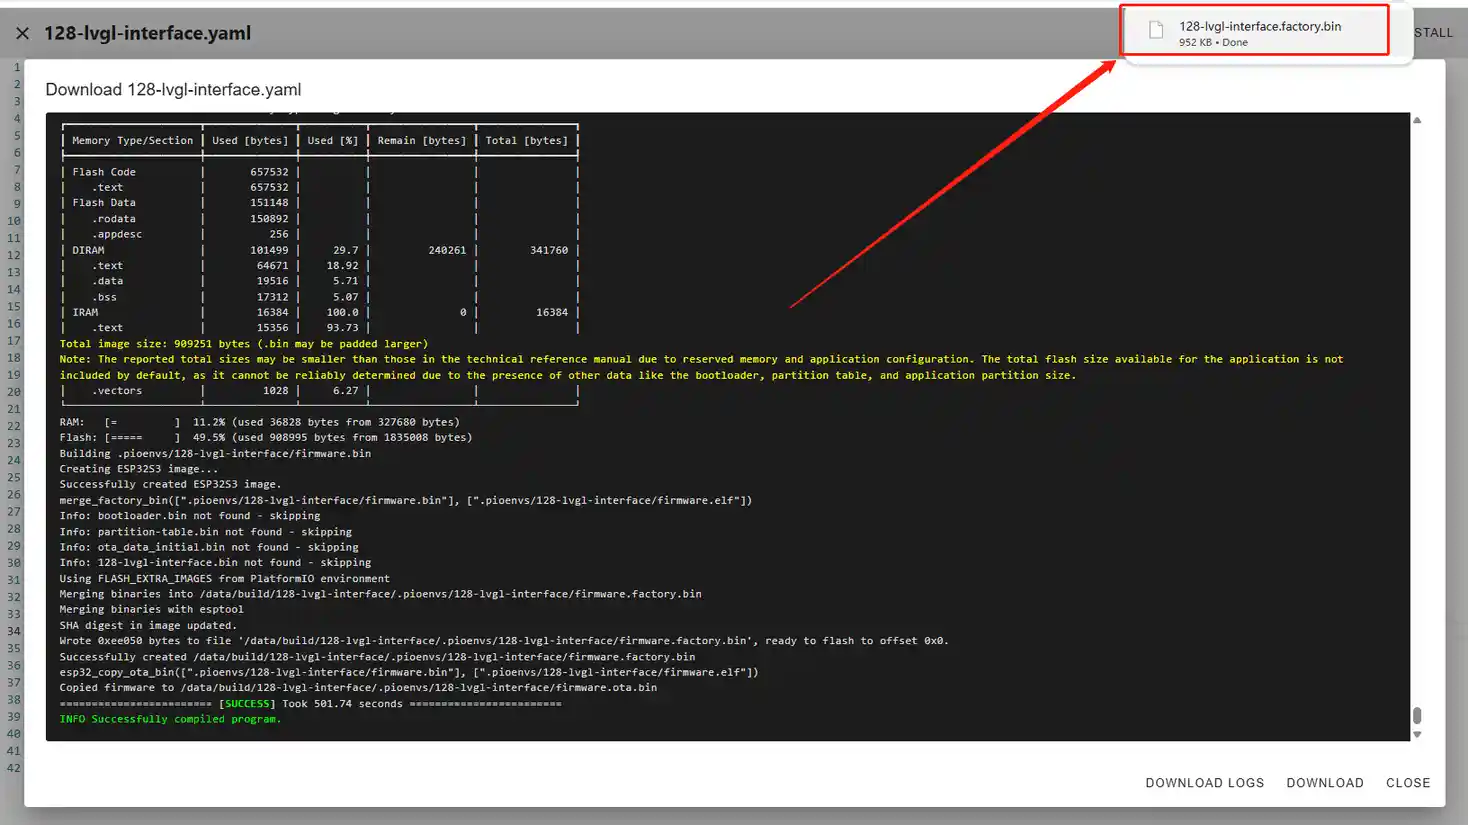
Remember the path of this .bin file.
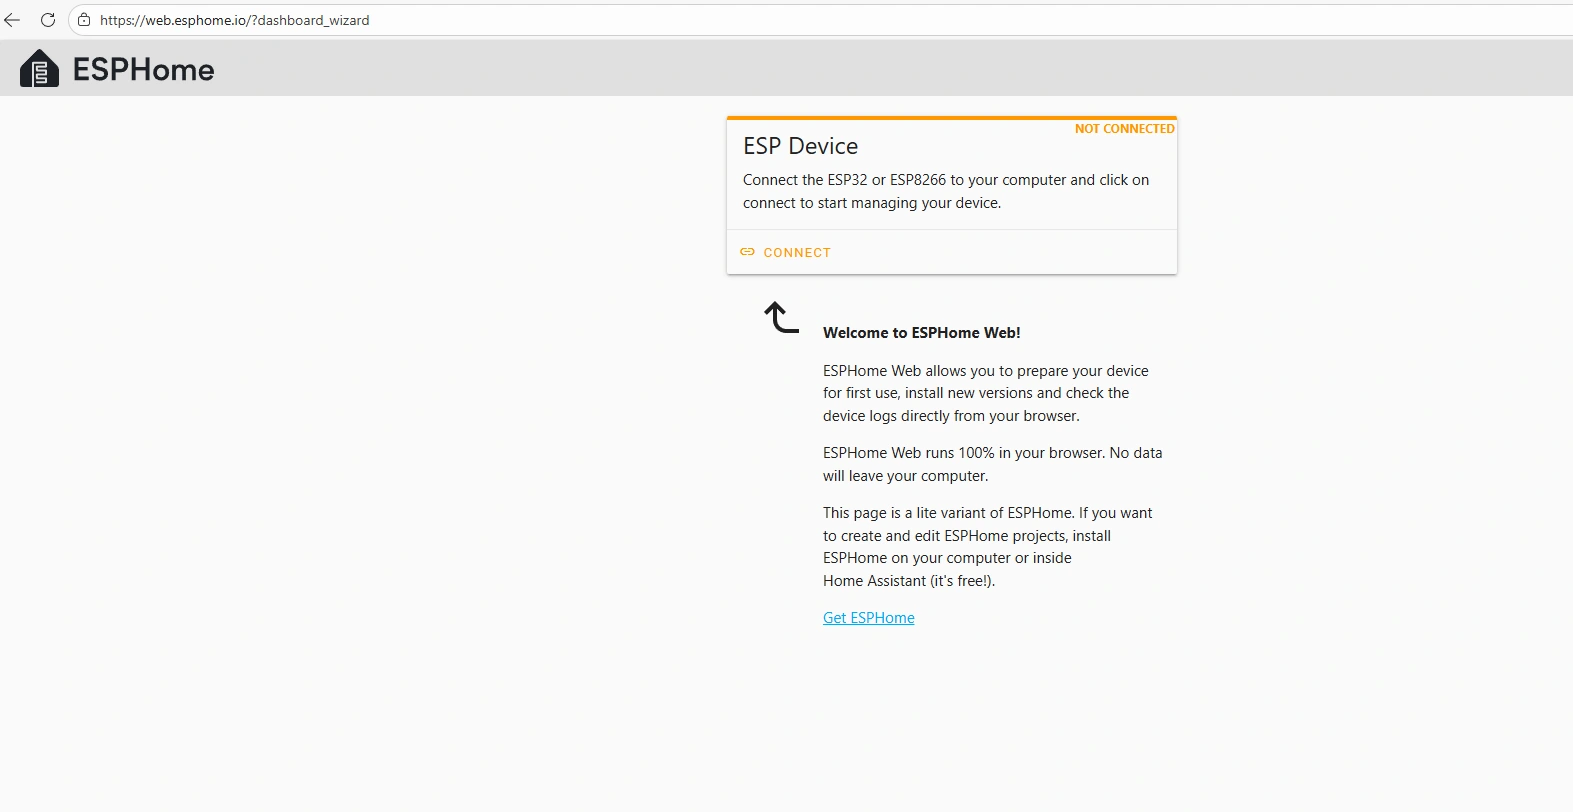
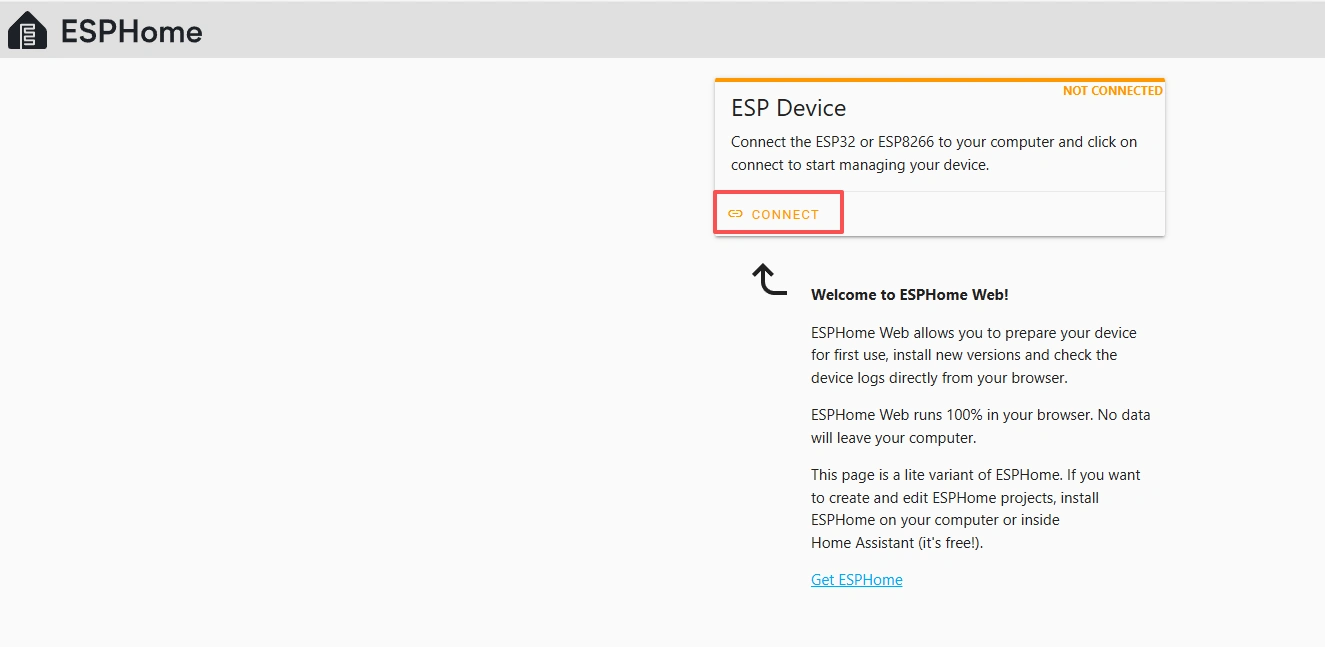
Open the following website: https://web.esphome.io/?dashboard_wizard
After opening this website, you will arrive at this interface:
Next, we will flash this .bin file into the CrowPanel 1.28inch-HMI ESP32 Rotary Display .
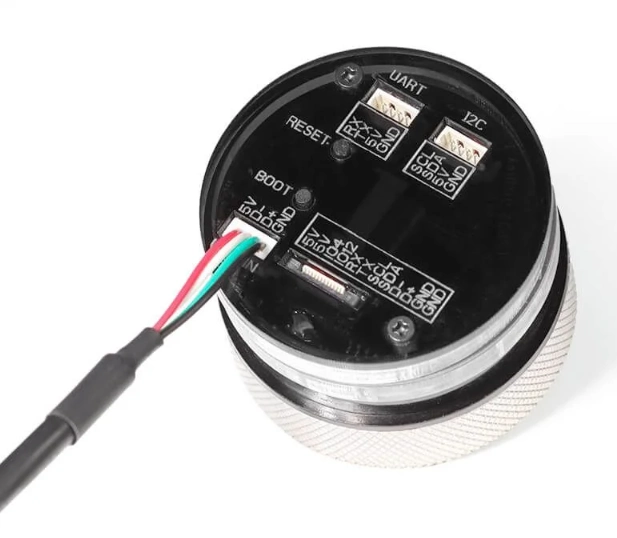
Connect the CrowPanel 1.28inch-HMI ESP32 Rotary Display to your computer.
Click "Connect"
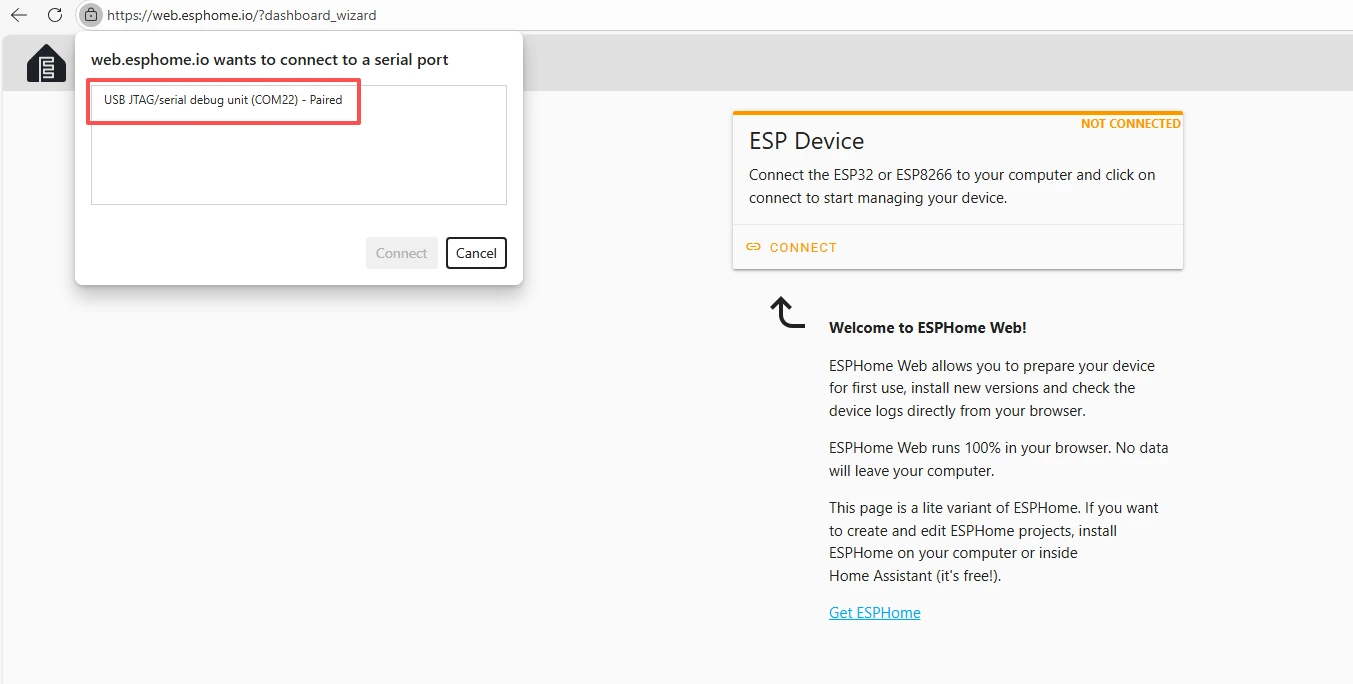
Select the COM port and connect.
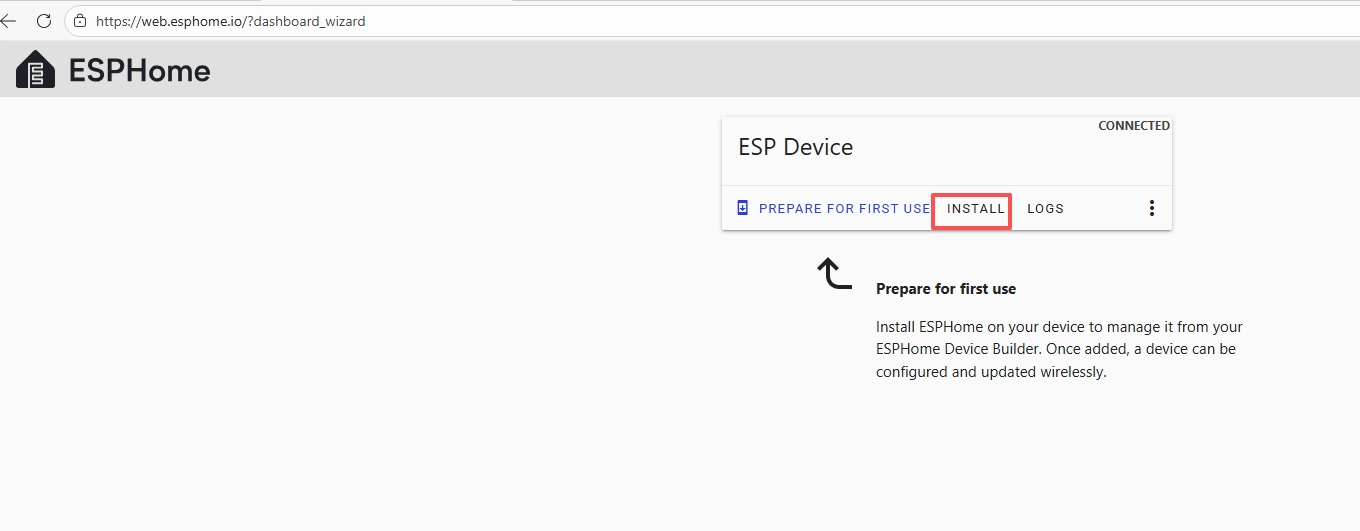
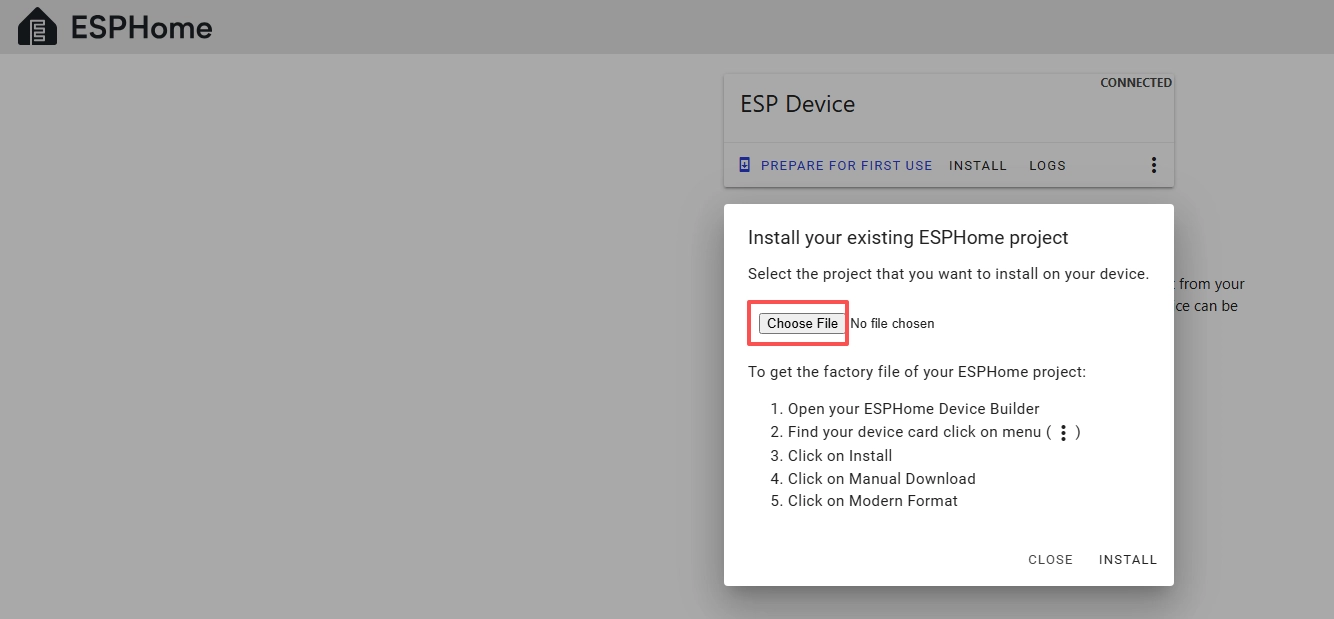
 After connecting the CrowPanel 1.28inch-HMI ESP32 Rotary Display , click "Install".
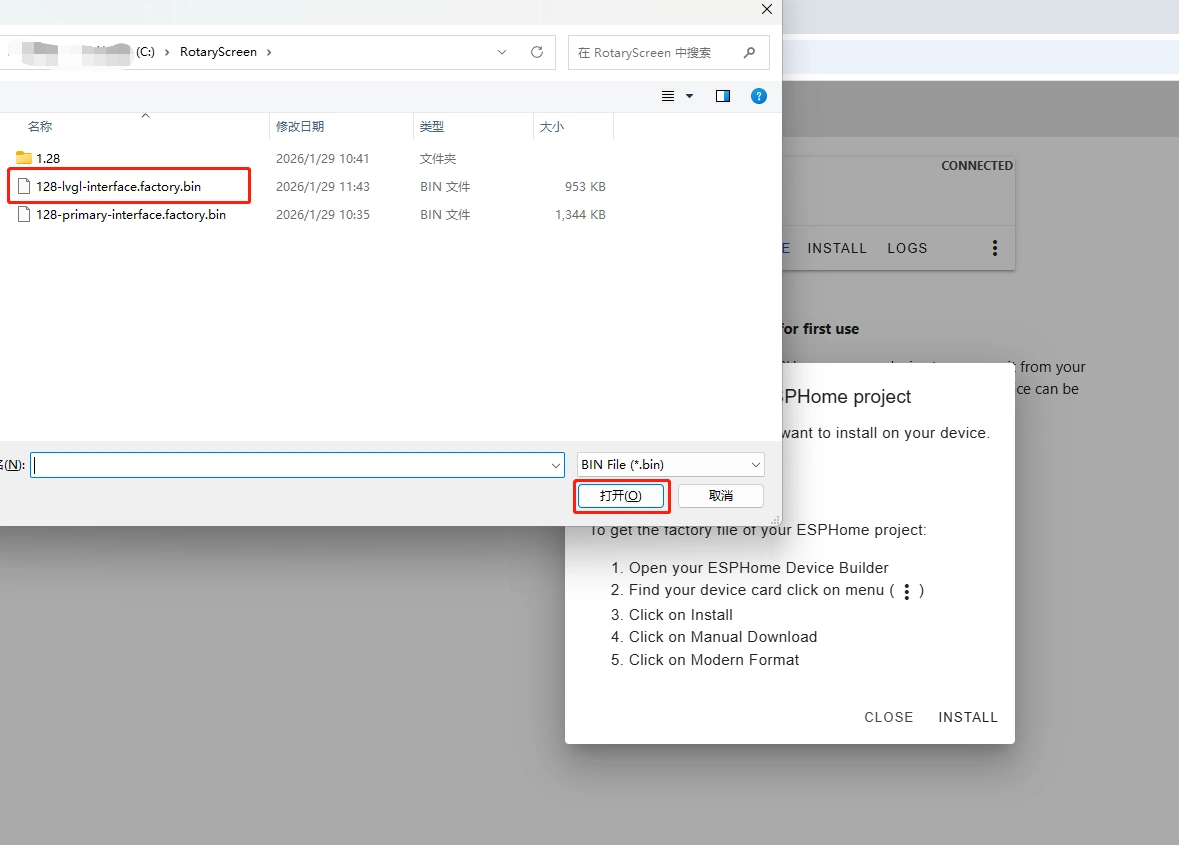
Add the .bin file you just downloaded, then click "Install".
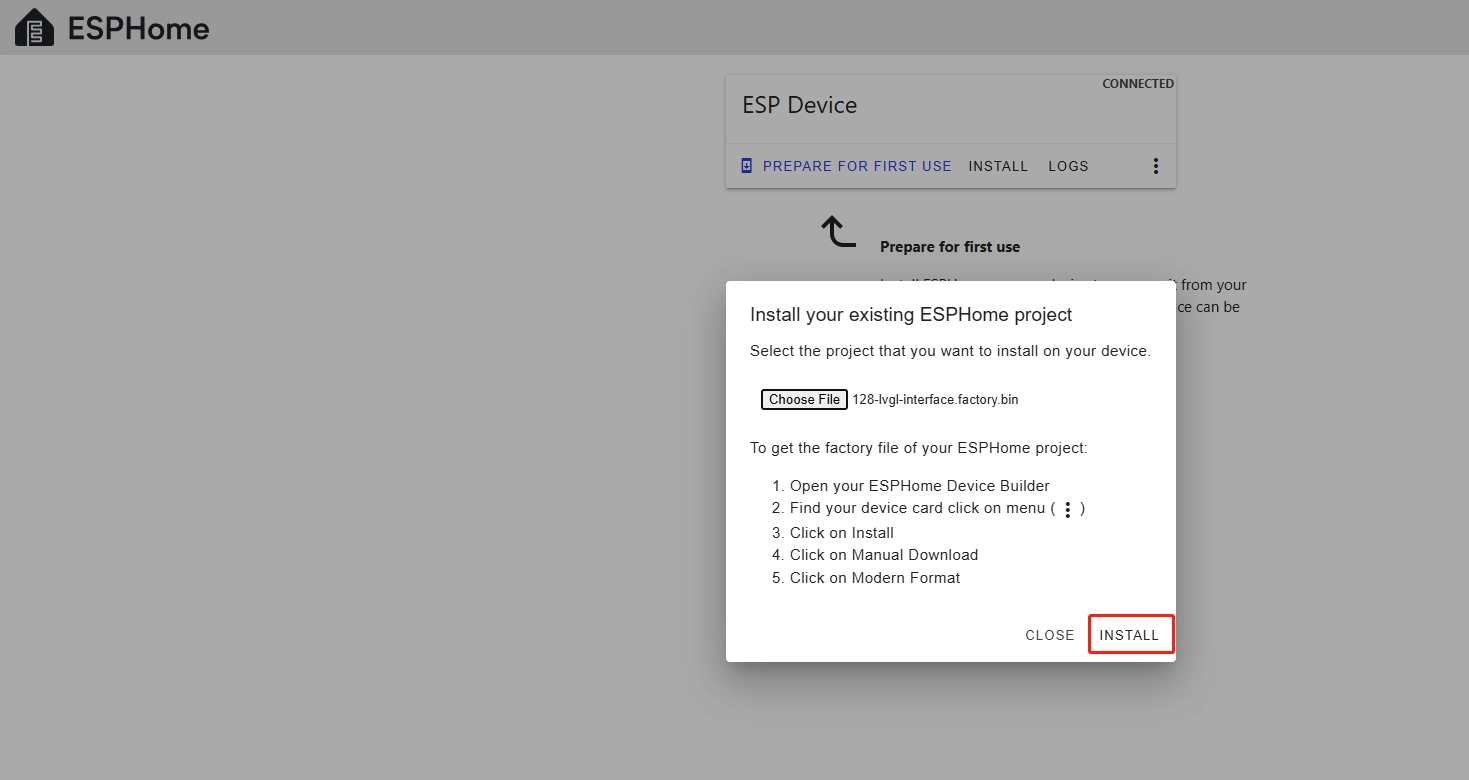
Then select the bin file that you just downloaded.
Click "INSTALL"
Wait for a few minutes.
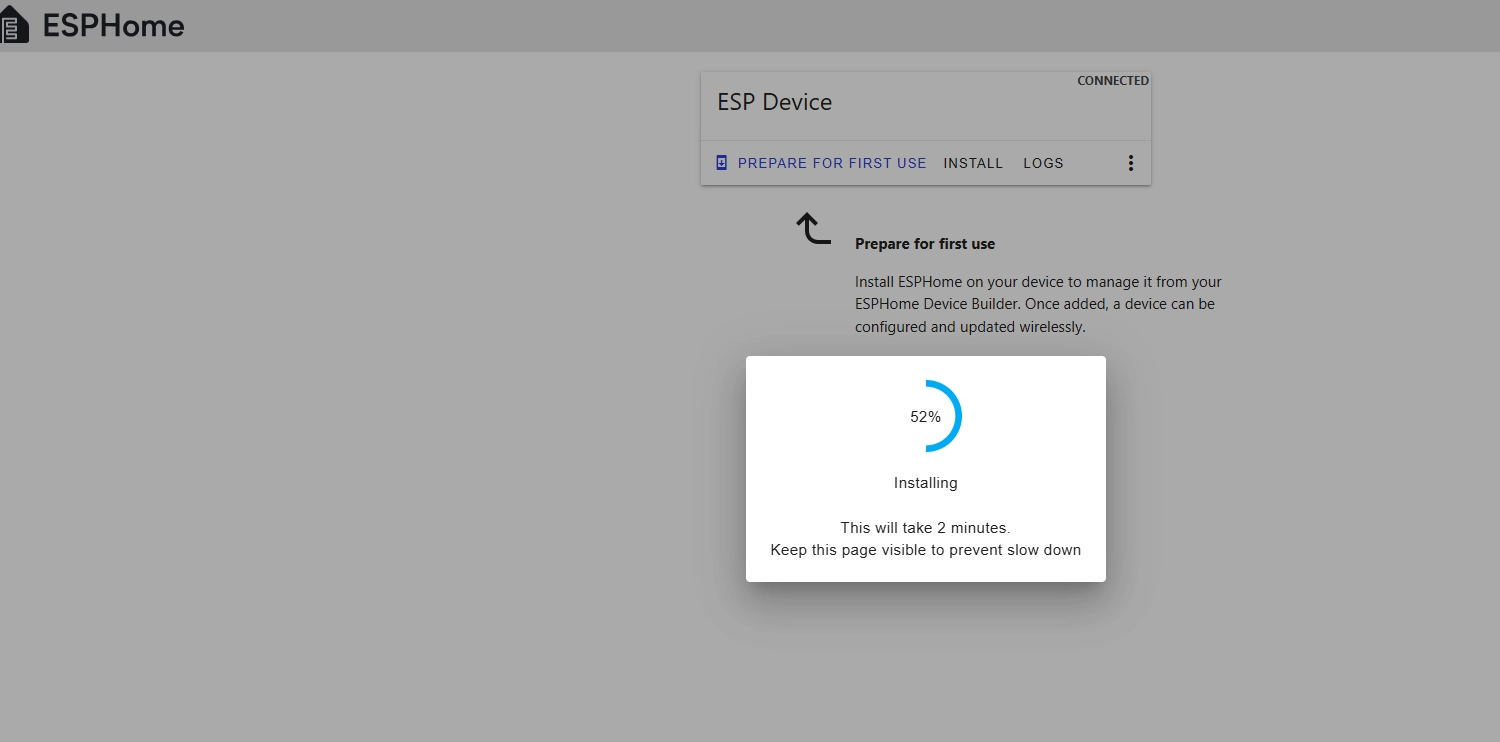
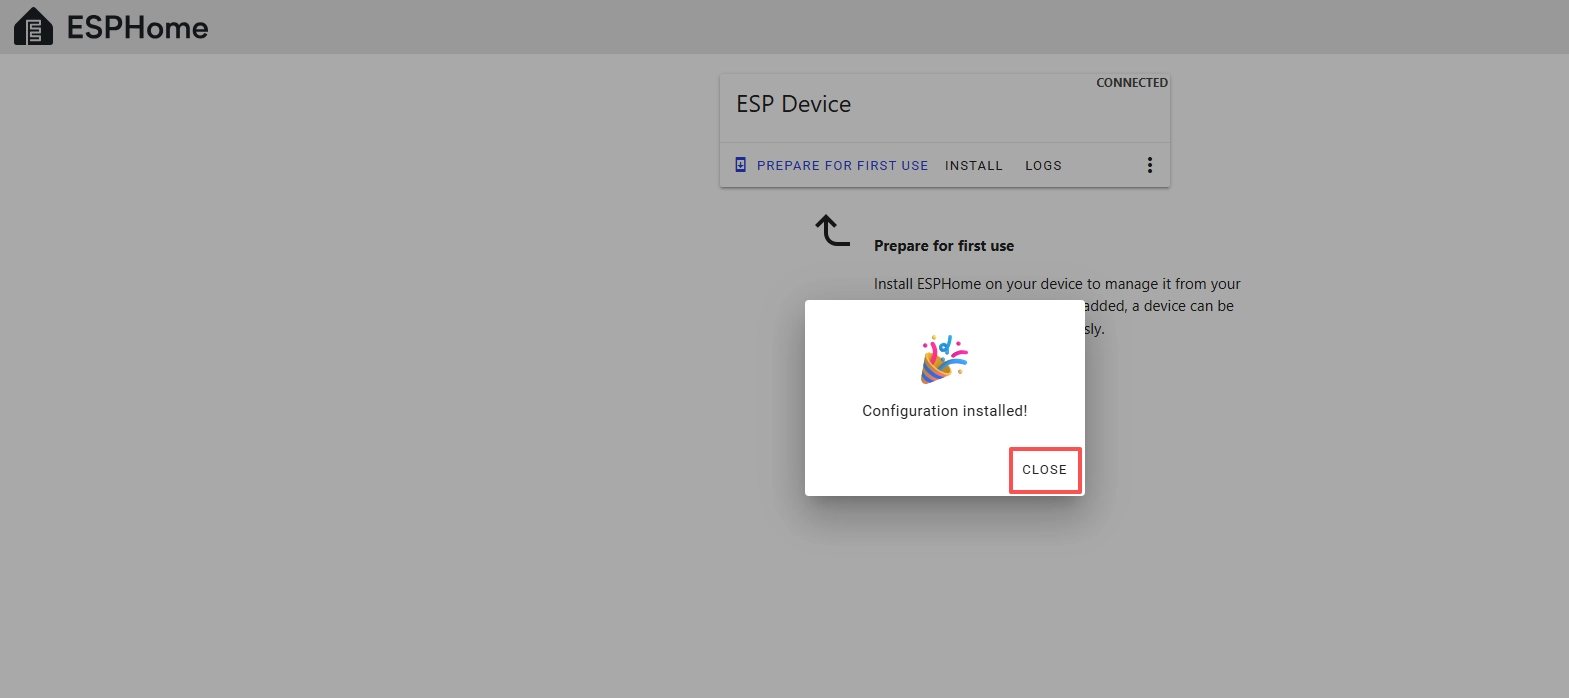
After the installation is complete, click "Close".
After successfully flashing the .bin file, return to the ESPHome page in Home Assistant.
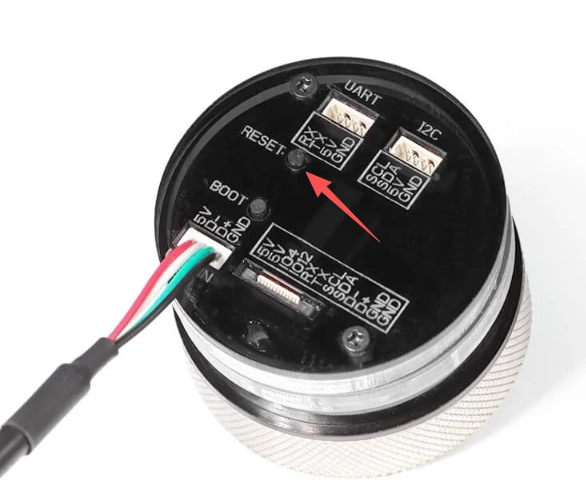
Press the RESET button on the CrowPanel 1.28inch-HMI ESP32 Rotary Display .
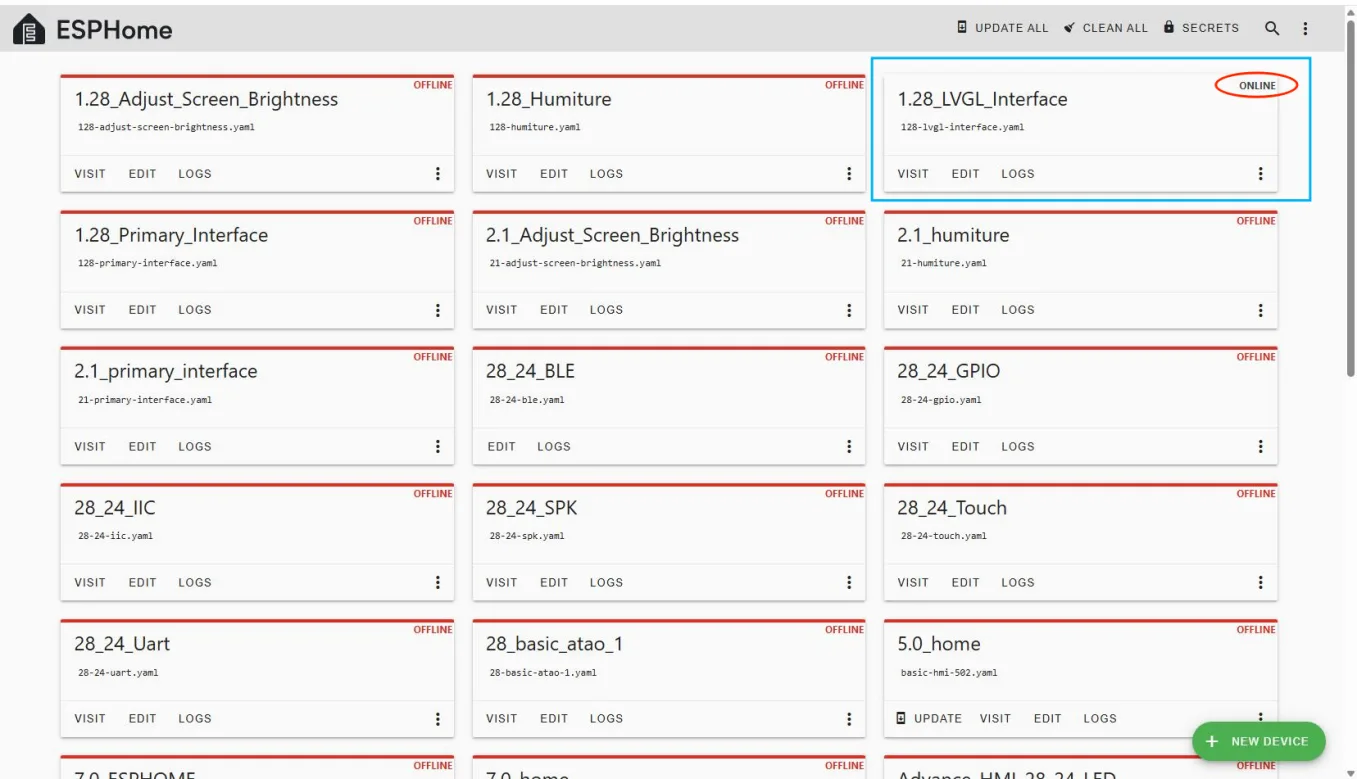
Restart the ESP32 display, and you should see the device you created earlier show as ONLINE in the top right corner.
If you have added the provided code features, the screen will display the current brightness value, and rotating the knob will update the slider and value in real-time.
(Clockwise to increase brightness, counterclockwise to decrease brightness)

Once ONLINE, any future code modifications can be uploaded wirelessly, making the process more convenient.