2.1 ESPHome Lesson 05 — Adjust Brightness by Touch in an LVGL Interface
1. Course Introduction
In the previous lesson, we adjusted screen brightness with the rotary encoder and synchronized the LVGL arc and percentage label. This lesson adds the CST816 capacitive touchscreen, allowing users to adjust the backlight either with the physical knob or by dragging the arc directly on the display.
This lesson targets the CrowPanel 2.1-inch HMI ESP32 rotary display (480 × 480).
2. Learning Objectives
- Configure the ESP32-S3, I²C, SPI, ST7701S display, and CST816 touchscreen.
- Bind a touchscreen to LVGL in ESPHome.
- Make an LVGL arc accept touch input.
- Synchronize touch, encoder, PWM backlight, and percentage label states.
- Compile, perform the first USB installation, and verify that the device is online.
3. Project Demonstration
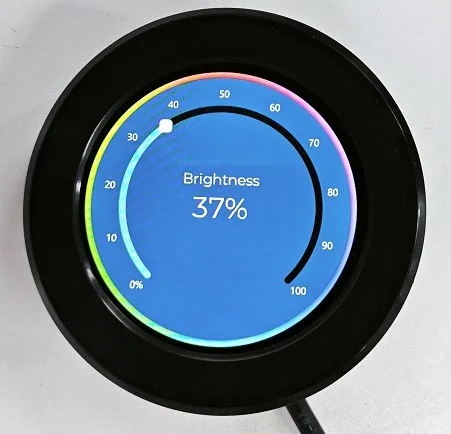
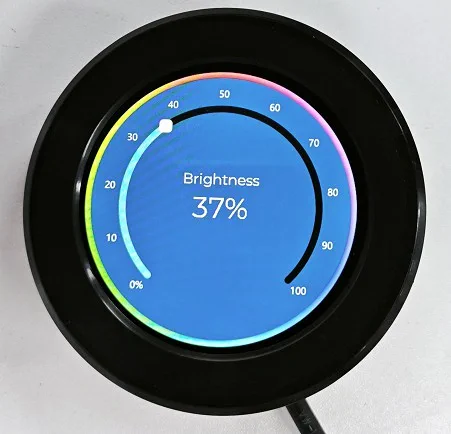
After startup, the display shows a brightness arc and the current percentage. Dragging along the arc updates the arc value, percentage label, and physical backlight together. The rotary encoder remains available and controls the same value.
4. Example Code and Key Configuration
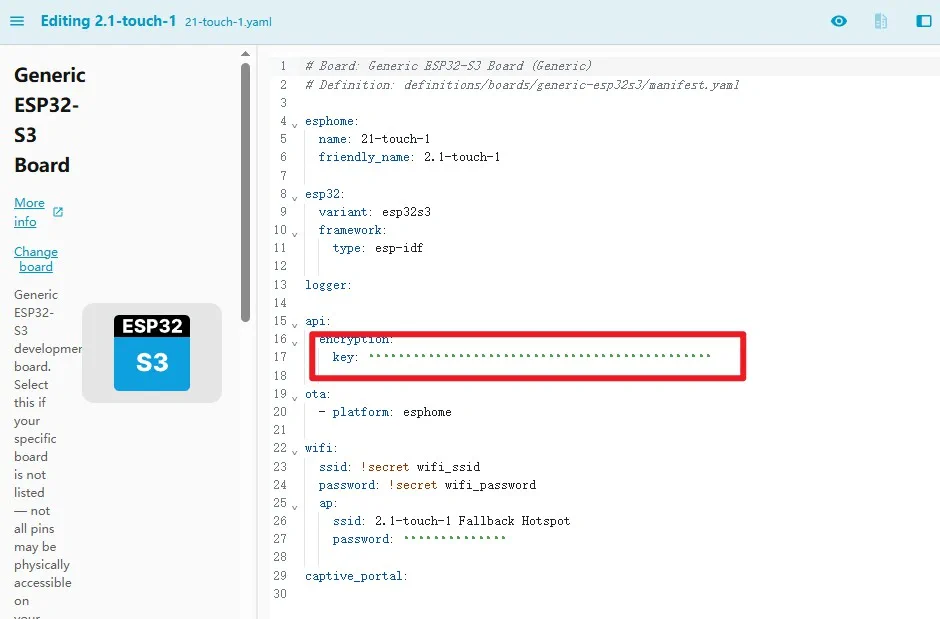
When replacing a newly generated ESPHome configuration, keep the device-specific api.encryption.key and use your own Wi-Fi credentials. The background file bj_light_21_1.png must be placed where the device YAML can access it.
4.1 Base Configuration and Startup
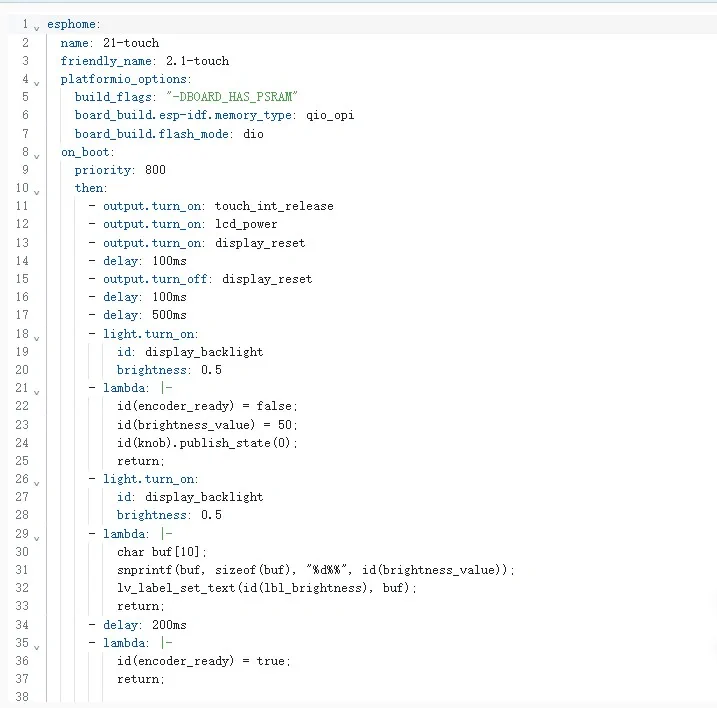
The esphome section defines the project, PSRAM build flags, and on_boot sequence. Startup releases the touch interrupt, powers the LCD, resets the panel, applies 50% brightness, and initializes the LVGL label. encoder_ready is enabled only after the hardware is stable, preventing false encoder events during boot.
4.2 ESP32, Logs, API, and OTA
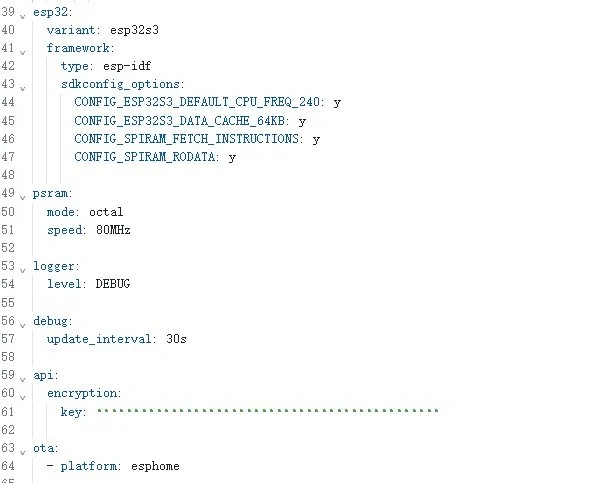
The board uses an ESP32-S3 with ESP-IDF and octal PSRAM. logger assists debugging, api connects the node to Home Assistant, and ota enables convenient wireless updates after the first USB installation.
4.3 Wi-Fi, I²C, and SPI
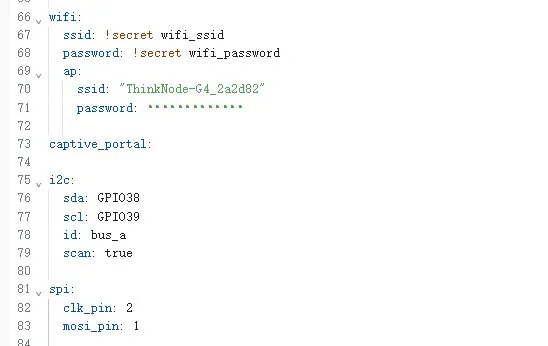
Use !secret wifi_ssid and !secret wifi_password to reference your secrets.yaml. The I²C bus on GPIO38/39 communicates with the PCF8574 expander and CST816 touchscreen. SPI clock and data pins are used to initialize the ST7701S.
4.4 LCD Display
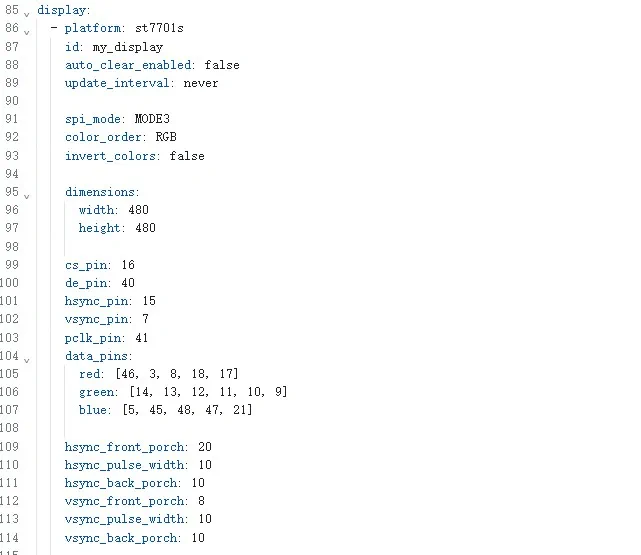
The display component uses the st7701s platform at 480 × 480. RGB pins, timing values, pixel clock, and initialization commands must match the hardware. LVGL handles screen refreshes, so the configuration uses auto_clear_enabled: false and update_interval: never.
4.5 Touchscreen
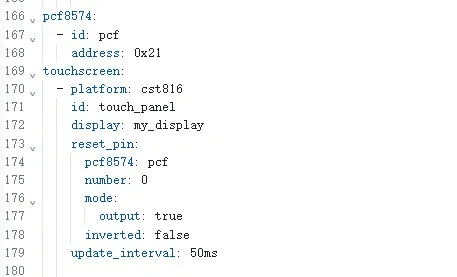
The central addition in this lesson is the touchscreen component:
touchscreen:
  - platform: cst816
    id: touch_panel
    display: my_display
    reset_pin:
      pcf8574: pcf
      number: 0
      mode:
        output: true
      inverted: false
    update_interval: 50ms
display: my_display maps touch coordinates to the display. PCF8574 pin 0 controls touchscreen reset, while the 50 ms update interval balances responsiveness and processor load.
4.6 Globals and PWM Outputs
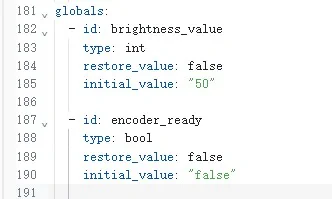
brightness_value stores a value from 0 to 100, while encoder_ready protects startup. The LEDC output bl_pwm receives a normalized 0.0–1.0 level. Three GPIO outputs release the touch interrupt, power the LCD, and reset the display.
4.7 Backlight and Encoder Synchronization
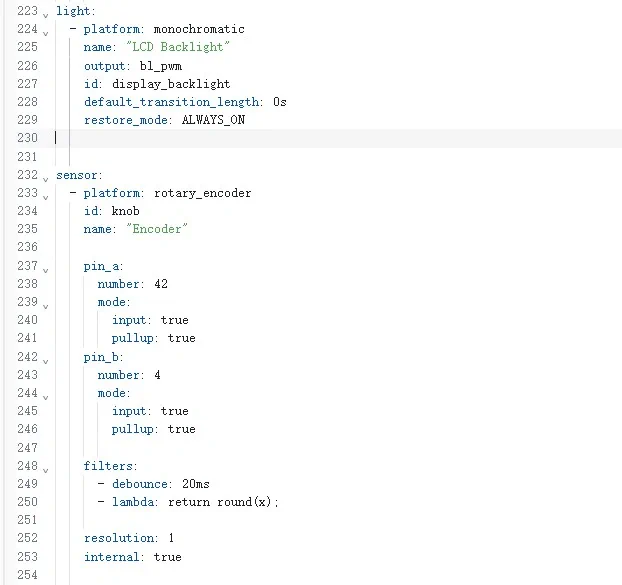
When the encoder changes, the code calculates its delta and clamps brightness to 0–100. It then updates PWM, the LVGL arc, and the percentage label. Touch and encoder input therefore share the same brightness_value state.
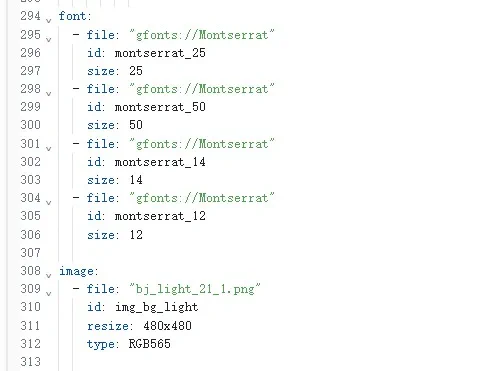
4.8 Fonts and Background Image
The interface uses Montserrat fonts and converts a 480 × 480 background image to RGB565. The filename must exactly match the value of image.file in YAML.
4.9 Touch-enabled LVGL Interface
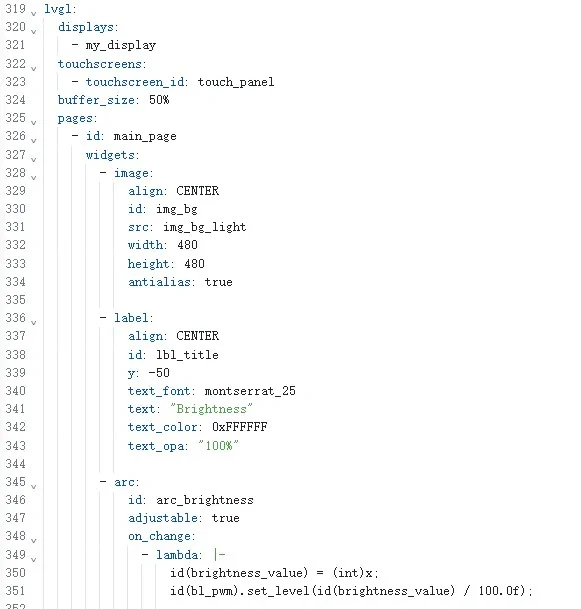
LVGL binds both the display and touchscreen:
Setting adjustable: true makes the arc draggable. In on_change, x contains the new arc value. The lambda saves it, updates the PWM duty cycle, and changes the center label:
adjustable: true
on_change:
  - lambda: |-
      id(brightness_value) = (int)x;
      id(bl_pwm).set_level(id(brightness_value) / 100.0f);
      char buf[10];
      snprintf(buf, sizeof(buf), "%d%%", id(brightness_value));
      lv_label_set_text(id(lbl_brightness), buf);
5. Logic Flow
- The device initializes power, display, touch input, and 50% backlight.
- CST816 periodically sends touch coordinates to LVGL.
- Dragging the adjustable arc triggers
on_change. - The new value updates
brightness_value, PWM, and the percentage label. - Turning the encoder updates the same state, arc, and label.
6. Create the Device and Add the Configuration
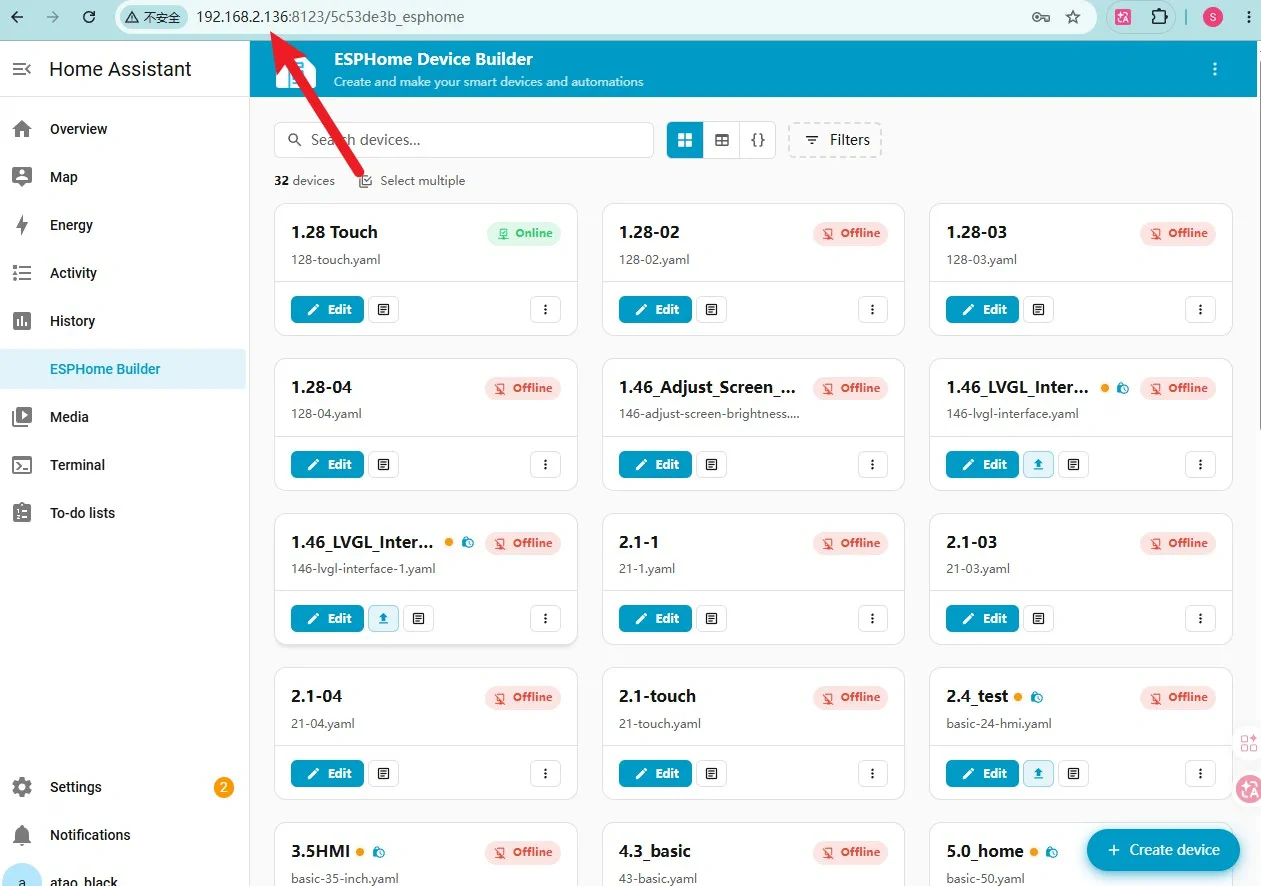
The Home Assistant host, computer, and CrowPanel must be on the same local network. Open the ESPHome dashboard in Home Assistant before continuing.
6.1 Create a Device
Go to the ESPHome home page.
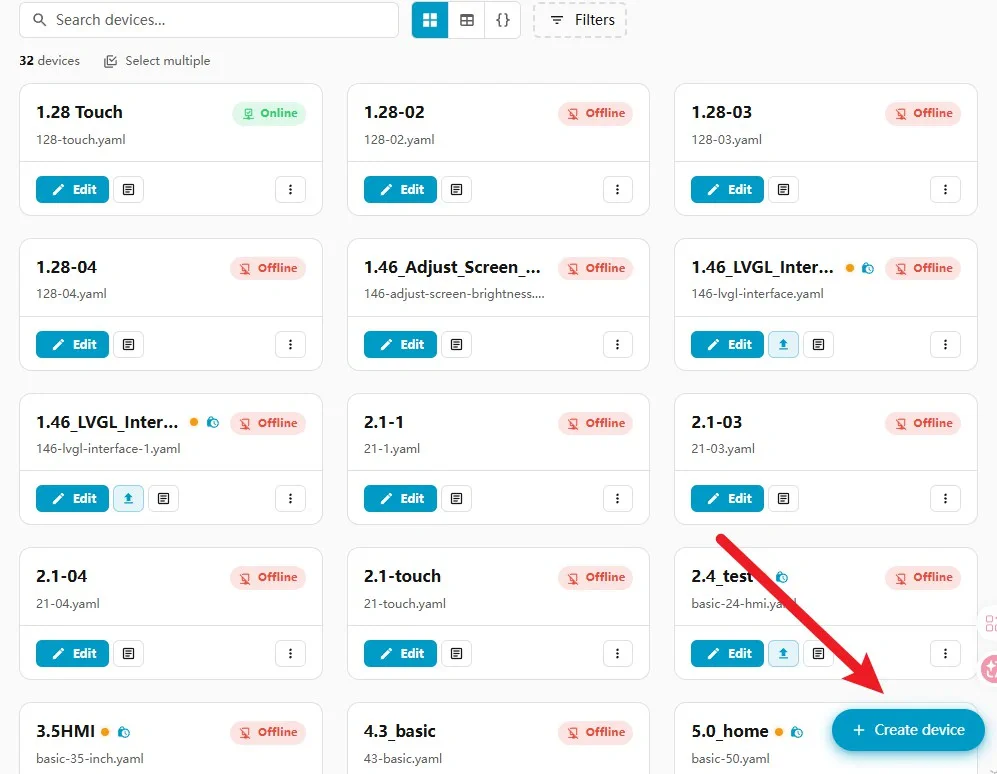
Click NEW DEVICE.
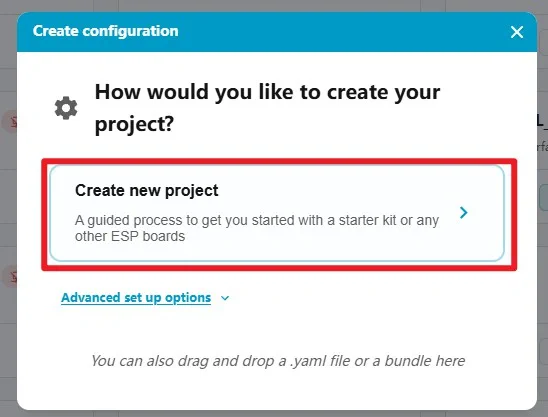
Choose to create a new project.
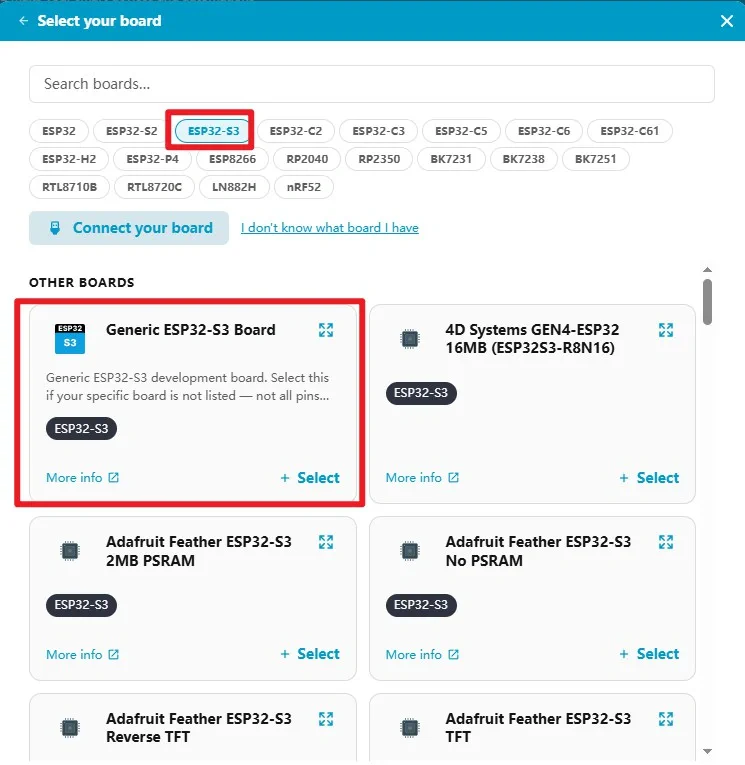
Select an ESP32-S3 board. If the exact model is unavailable in the wizard, choose a compatible option and replace the generated configuration afterward.
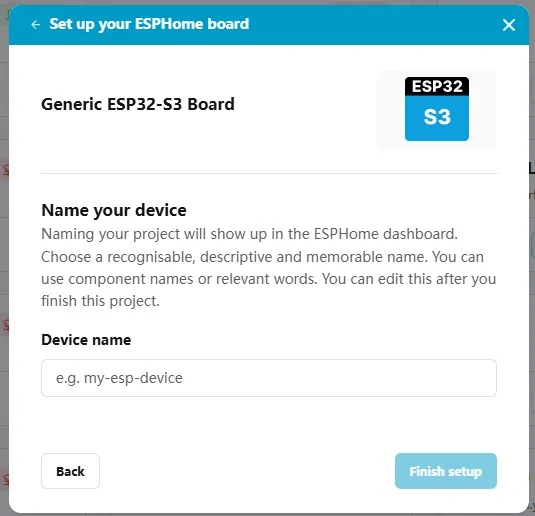
Enter a project name using letters, numbers, and hyphens only.(For example, enter here: 2.1-touch)
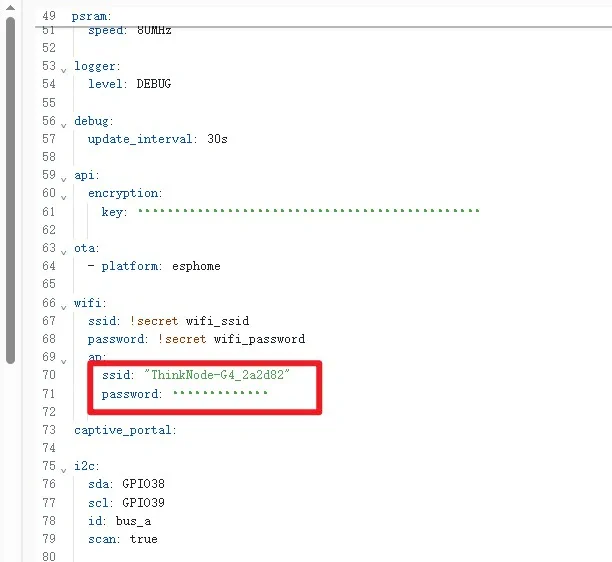
After generation, keep the automatically created API encryption key and replace the remaining configuration.
Set your own Wi-Fi SSID and password. Never copy credentials from the example.
6.2 Compile the Firmware
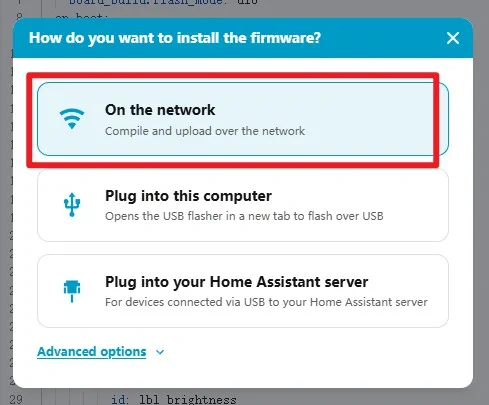
Save the configuration and click INSTALL.
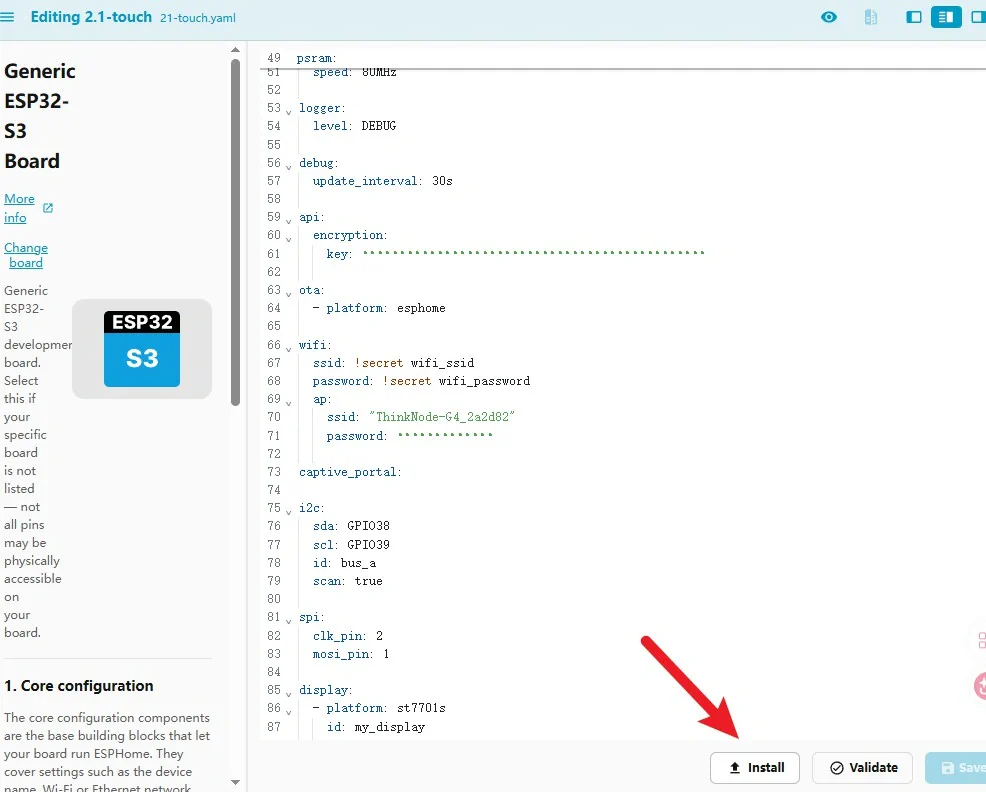
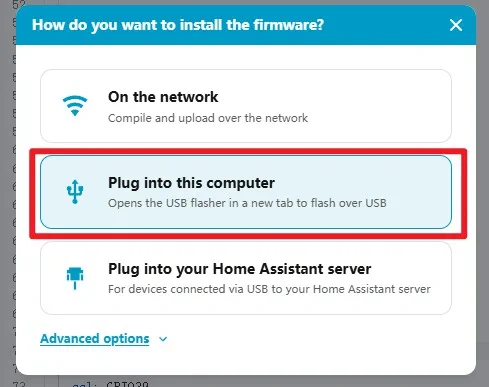
For the first installation, select the USB/manual download method.
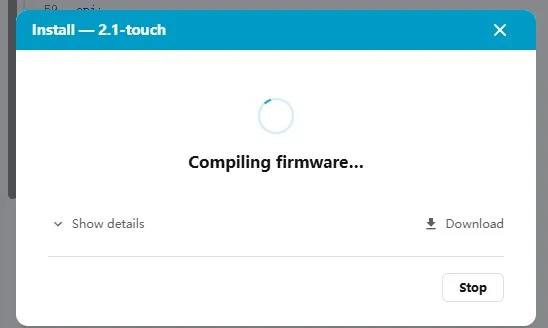
Wait for ESPHome to validate and compile. If bj_light_21_1.png is missing, place it in the correct directory before compiling again.
7. Flash over USB
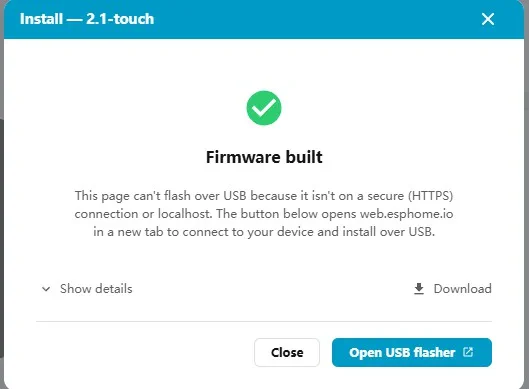
Open ESPHome Web Flasher and click Open USB Flasher.
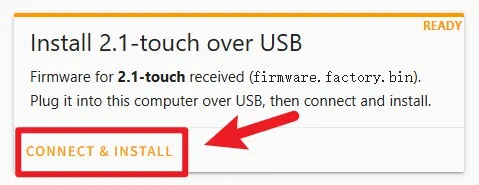
Click Connect & Install.
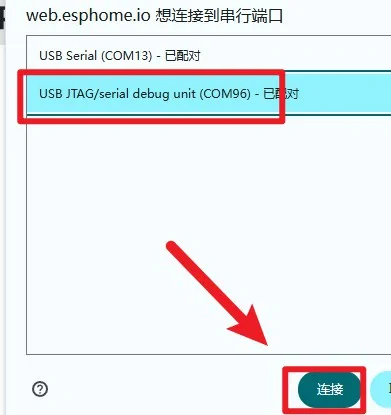
Select the serial port for the CrowPanel and click Connect. If no port appears, try a USB cable that supports data and verify the USB driver.
Confirm the erase operation and wait.
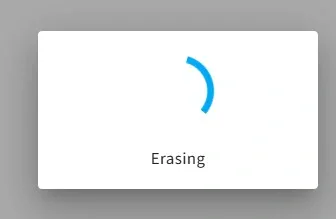
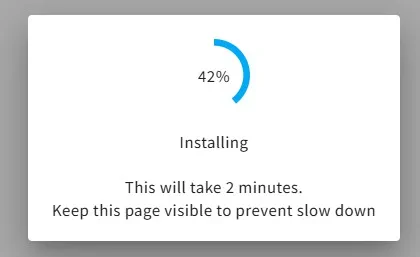
Do not disconnect USB or close the page while the firmware is downloading.
Close the installer after the success message appears.
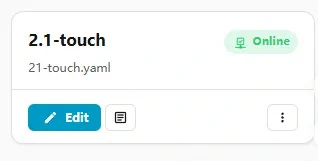
After reboot and Wi-Fi connection, the device card should show ONLINE.
8. Verify the Result
Drag along the on-screen arc and confirm that its position, the center percentage, and the backlight change together. Then turn the physical encoder and verify that both input methods can be used interchangeably.
Once the node is online, later changes can be installed wirelessly without reconnecting USB.
9. Troubleshooting
- No touch response: Check I²C GPIO38/39, the PCF8574 address, CST816 reset pin, and the
lvgl.touchscreensbinding. - Incorrect touch position: Confirm that the touchscreen uses
my_displayand that display resolution and orientation are both correct for 480 × 480. - Arc displays but cannot be dragged: Ensure the arc contains
adjustable: trueand anon_changeaction. - Brightness moves in the opposite direction: Verify the backlight circuit polarity for your hardware revision before inverting the output.
- Image not found during compilation: Check the exact spelling, capitalization, and location of
bj_light_21_1.png. - Device remains offline: Verify Wi-Fi credentials and ensure the computer, Home Assistant host, and device share the same LAN.