2.4_2.8inch_Lesson02_Network_Audio_Playback
1. Course Introduction
In this lesson, we use the CrowPanel Advance 2.4-inch development board to connect to Wi-Fi and play songs through an online audio URL. After the program starts running, it first connects to the wireless network, then opens the MP3 network audio stream via audio.connecttohost(), and finally the Audio library handles network reading, audio decoding, and I2S output, allowing the speaker to play the online song.
2. Learning Objectives
- Be able to configure the Wi-Fi SSID and password.
- Be able to understand the relationship between the online song URL, the song ID, and
audio.connecttohost(). - Be able to explain why this lesson requires a directly accessible MP3 audio stream.
- Be able to complete compilation, flashing, and serial monitoring in the Arduino IDE.
- Be able to determine, based on the serial log and speaker sound, whether network connection, decoding, and I2S output are working properly.
3. Preparation
- CrowPanel Advance 2.4-inch development board.
- A USB data cable that supports data transfer.
- A Wi-Fi network with internet access.
- An external speaker connected to the audio output port of the development board.
- The Arduino IDE, along with the ESP32 Arduino development environment and course library files already configured in Lesson 01.
- This lesson's project:
OnlineAudio_small.ino
Note: To play online songs, you must ensure that the Wi-Fi network connected to the development board can access the corresponding audio URL. Corporate networks, campus networks, or hotspots that require web-based login authentication may result in the Wi-Fi being connected but the song failing to play.
Code and Resource Download
Code download: - OnlineAudio_small
4. Software Operation Steps
Open this lesson's project OnlineAudio_small.ino using the Arduino IDE. 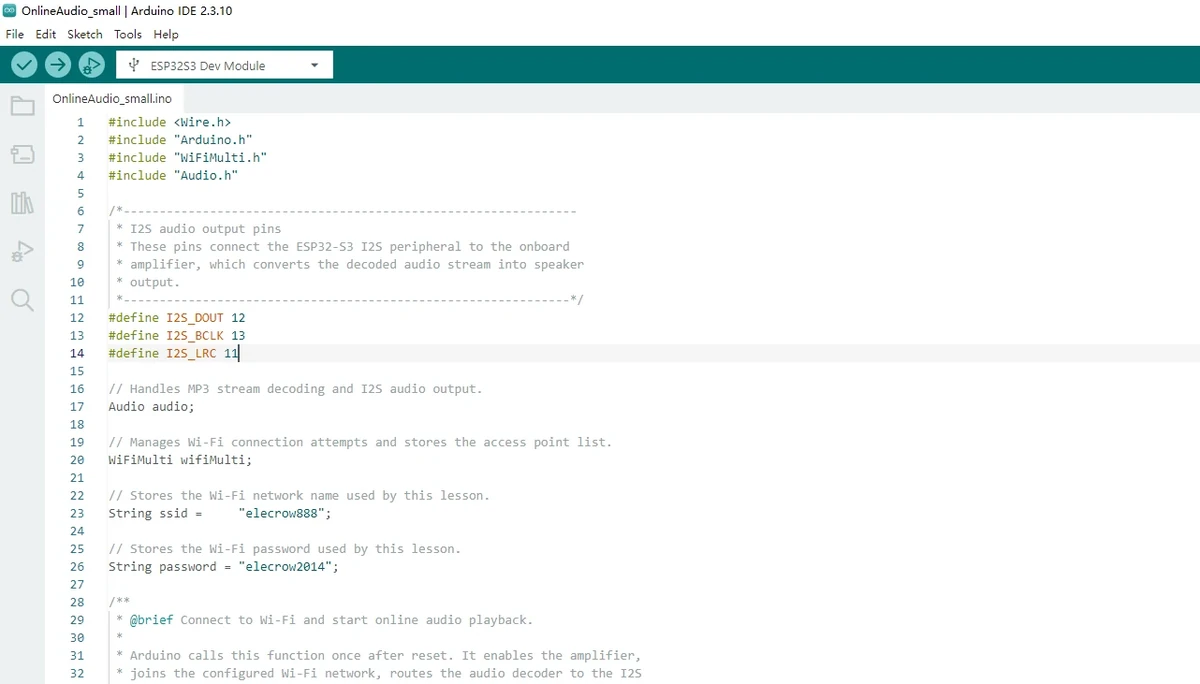
Connect the external speaker, and use a USB cable that supports data transfer to connect the development board to the computer. 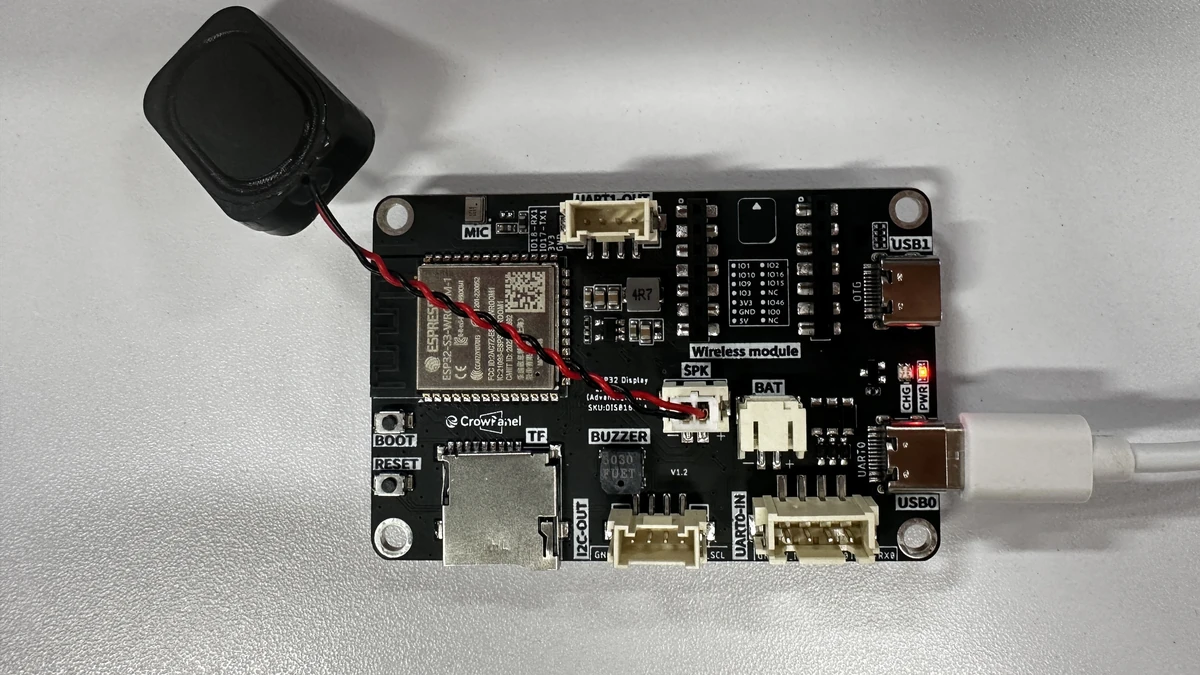
Complete the development environment configuration in the Tools menu in sequence: configure the Arduino IDE with the following common settings:
-
Board:ESP32S3 Dev Module -
Port: Select the serial port corresponding to the current development board -
Flash Size:16MB (128Mb) -
PSRAM:OPI PSRAM -
Partition Scheme:Huge APP (3MB No OTA/1MB SPIFFS)
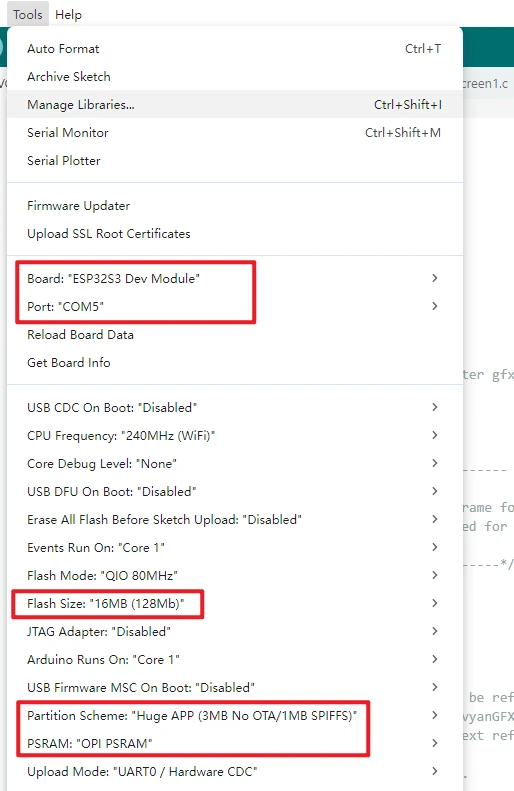
Note: If the Arduino IDE reports a compilation error, go back to Lesson 01 first to check whether the ESP32 Core, board model, PSRAM, Flash Size, and course library files are consistent.
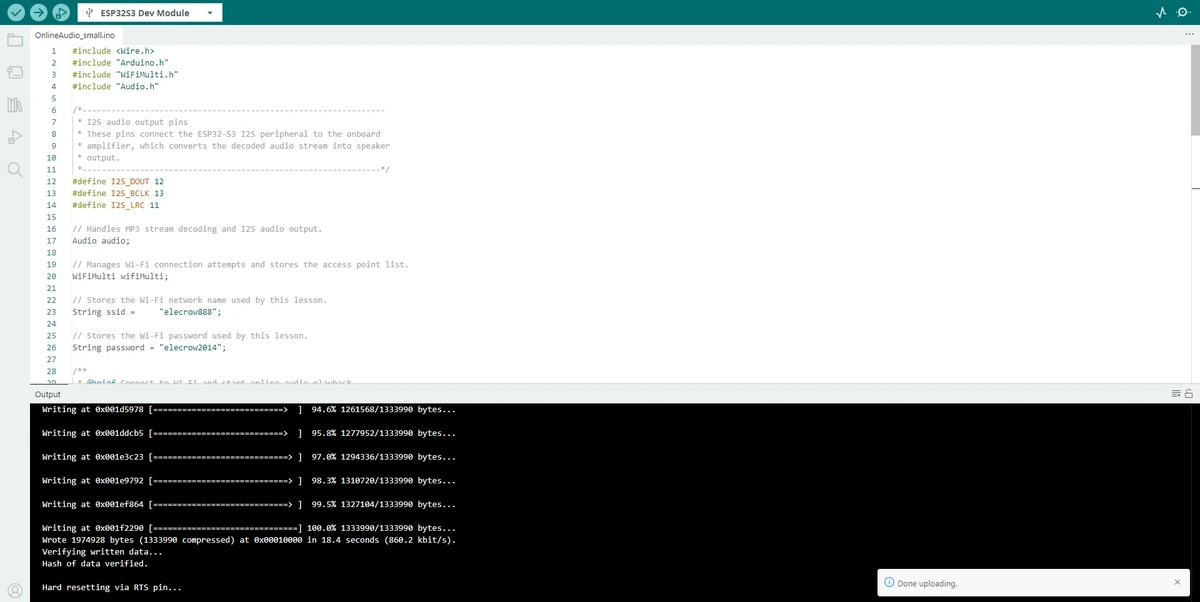
Click Upload to compile and wait for the upload to complete. If it gets stuck at Connecting..., check for port conflicts and use the BOOT/RESET download mode as required by the board. 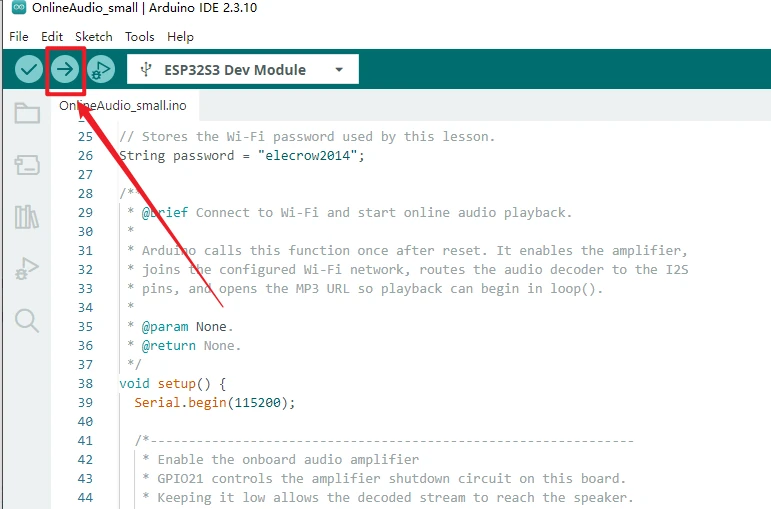
Open the Serial Monitor in the top-right corner and set the baud rate to 115200 to observe the Wi-Fi connection and audio playback logs. 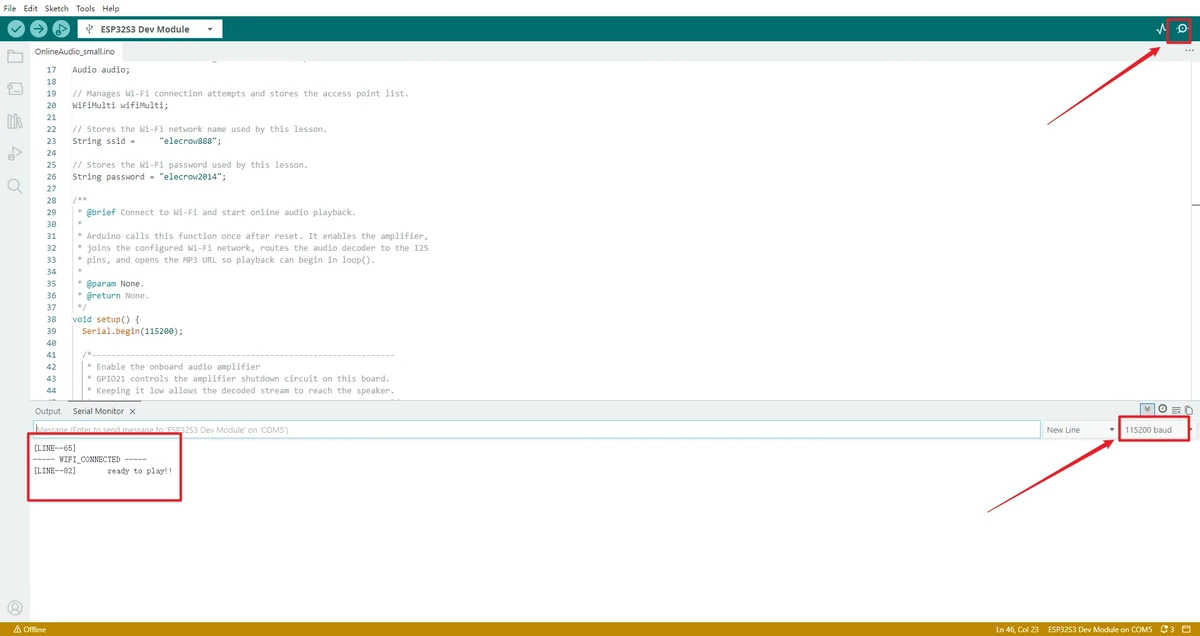
Note: Small-size products do not require DIP switch configuration; once the environment is confirmed, you can flash directly. If it remains stuck at Connecting..., check for port conflicts, the USB data cable, and the download mode.
Note: Before flashing, configure the code execution environment, including the board model, port, course library files, and the ESP32 Arduino Core. Inconsistent environments may cause compilation errors or no sound after running.
5. Modifying the Wi-Fi and Song ID
5.1 Modifying the Wi-Fi SSID and Password
Before flashing, you must change the Wi-Fi name and password in the code to the currently available network.
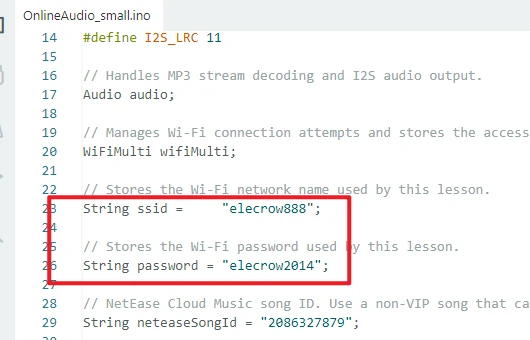
Note: The Wi-Fi in the official code is a sample environment and cannot be used directly on your network. If the Wi-Fi name or password is entered incorrectly, the program will stall at the connection stage and audio playback will not start.
5.2 Modifying the NetEase Cloud Music Song ID
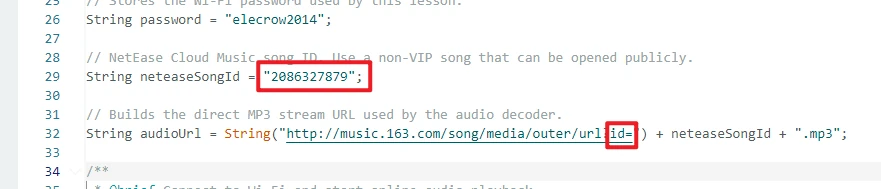
In the upgraded code, the NetEase Cloud Music song ID has been separated out, so to change songs you only need to modify neteaseSongId.
String neteaseSongId = "2086327879";
String audioUrl = String("http://music.163.com/song/media/outer/url?id=") + neteaseSongId + ".mp3";
The song page URL of NetEase Cloud Music usually contains an id= parameter, for example:
Copy the 2086327879 from it, replace the neteaseSongId in the code, then recompile and flash.
Next, I will use NetEase Cloud Music as an example to show how to search for the ID number. Use a browser to search for "NetEase Cloud Music" and open it.
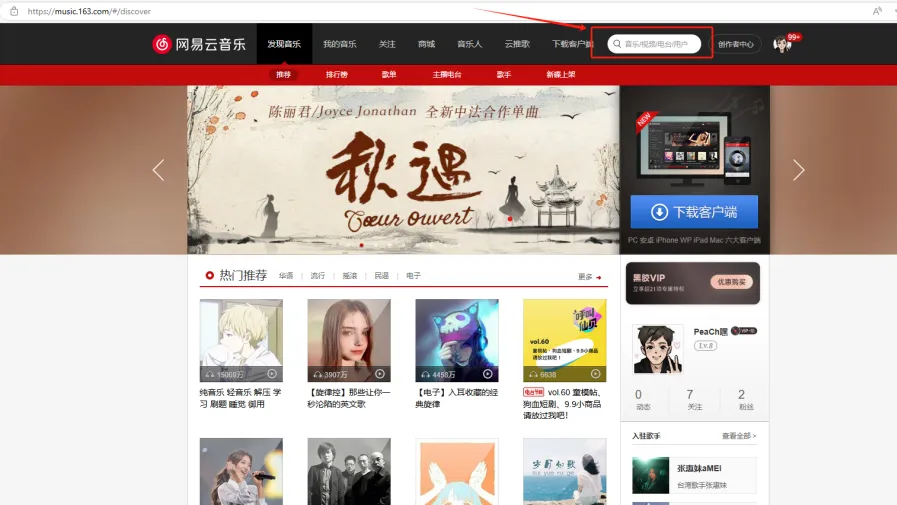
Select and play the song you want to listen to.
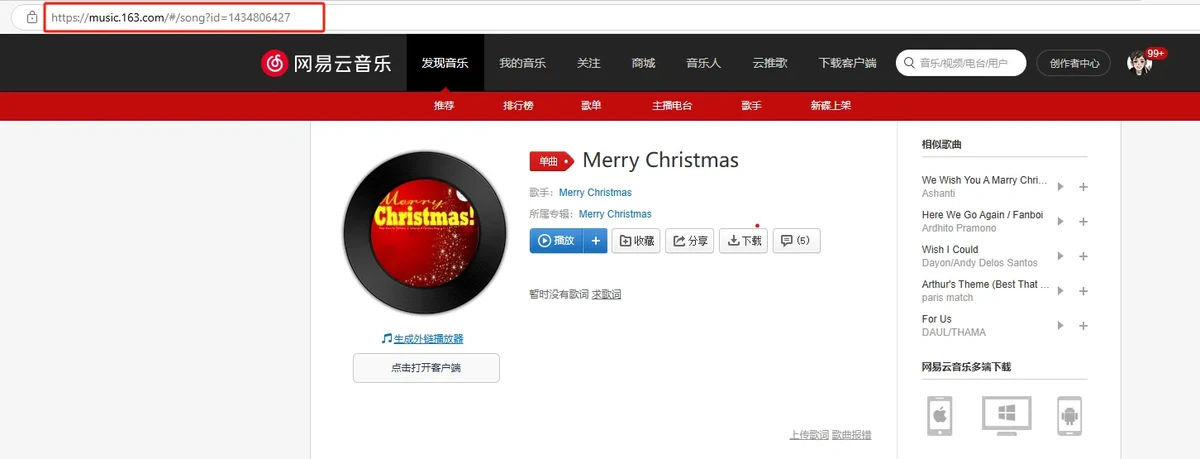
Obtain the ID number from the link and replace the ID number in the code. On NetEase Cloud Music or other music platforms, each song has a unique identifier used as its ID. Therefore, what you need to do is replace the ID number in the URL link within the code.
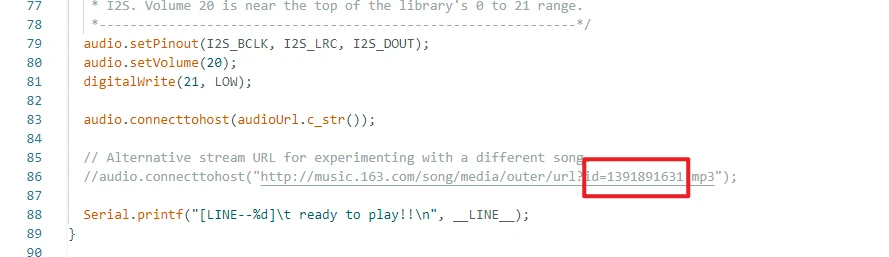
Note: You can only select publicly playable, non-VIP songs. VIP, paid, copyright-restricted, region-restricted, or login-required songs typically cannot be played through this external link method.
Note: After modifying the song ID, you must re-flash the program. Only changing the song in the web page on your computer will not automatically change the firmware currently running on the development board.
6. Key Code Explanation
6.1 I2S Audio Pins
These three lines send the audio data decoded by the ESP32-S3 to the audio amplifier. DOUT carries the audio data, BCLK provides the bit clock, and LRC is used for left/right channel synchronization. When the pin configuration is incorrect, the Wi-Fi and audio URL may both be fine, but the speaker will produce no sound.
6.2 Amplifier Mute Control
The 2.4-inch / 2.8-inch V1.1 / V1.2 boards optimize the audio amplifier circuit and use IO21 to control muting. In the code, GPIO21 is pulled low to enable the audio output path.
6.3 Setting the Volume and Opening the Audio Stream
audio.setPinout(I2S_BCLK, I2S_LRC, I2S_DOUT);
audio.setVolume(20);
audio.connecttohost(audioUrl.c_str());
setPinout() sets the I2S output pins, setVolume(20) sets the software volume, and connecttohost() opens the online audio stream. The Audio library automatically handles server connection, audio data download, MP3 decoding, and PCM data output.
6.4 Keeping Audio Playback Running
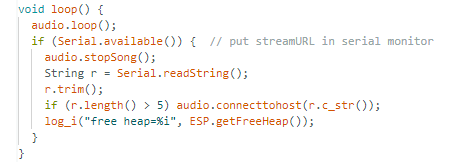
audio.loop() is the core scheduling function for audio playback and needs to run continuously within loop(). It is responsible for receiving network data, maintaining the buffer, decoding audio, and outputting it to I2S. If it is not called continuously, the song will not play properly even if the Wi-Fi is connected and the audio link is correct.
Note: V1.1 / V1.2 boards do not have an onboard volume knob, so do not look for R51 to adjust the volume as you would on V1.0. For V1.1 / V1.2, prefer adjusting the volume via audio.setVolume() in the code.
7. Experimental Observations
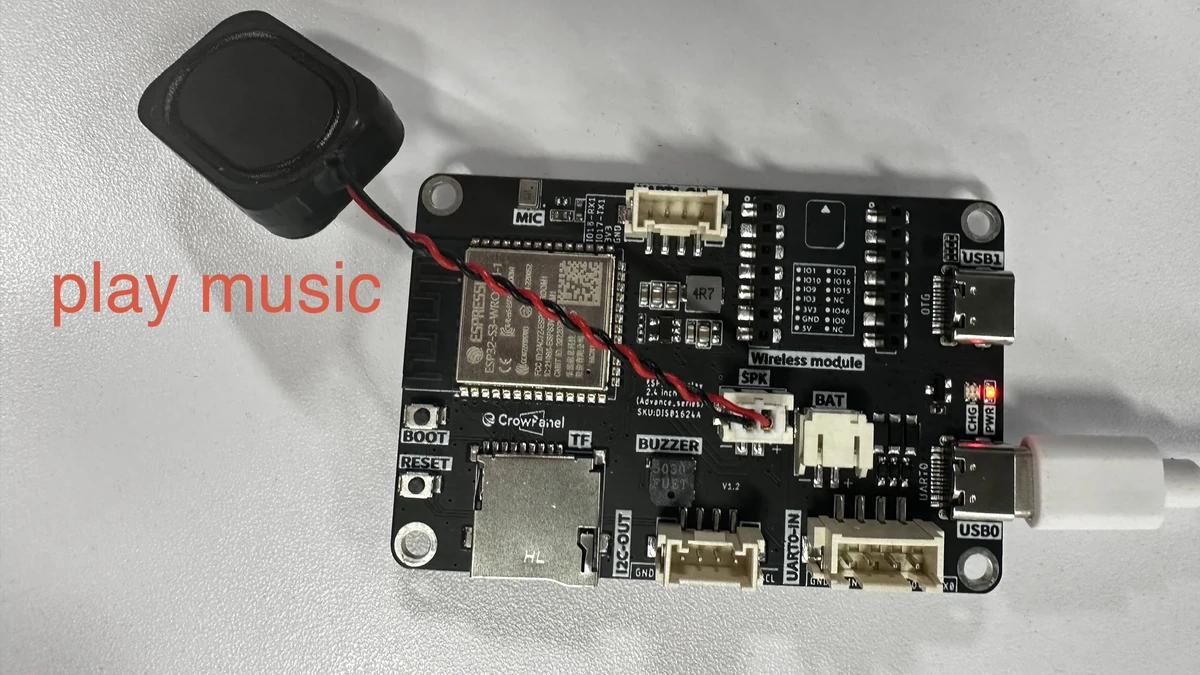
After flashing is complete, the Serial Monitor first outputs the Wi-Fi connection process, and upon successful connection enters the audio playback flow. The speaker should start playing the online song.
In the Serial Monitor, you can see messages about program startup, Wi-Fi connection, and playback preparation.
When the hardware connection is normal, the external speaker will play the online song.
8. Code Download
Code download link: OnlineAudio_small