4.3_5.0_7.0inch_Lesson02_WiFi_Audio_Playback
1. Course Introduction
This lesson uses the CrowPanel Advance 4.3 / 5.0 / 7.0 inch ESP32-S3 HMI development board. It uses WiFiMulti to establish a network connection, reads network MP3 streams through the Audio object from the ESP32-audioI2S library, and outputs audio via the I2S clock, channel-select, and data pins mapped to GPIO 5, 6, and 4. The serial port is used to display the connection progress and audio library status, and can also be used to enter a new streaming URL.
2. Learning Objectives
- Be able to explain the data path of Wi-Fi, network audio decoding, and I2S output.
- Be able to configure network credentials and complete project compilation and flashing.
- Be able to identify, from the serial logs and speaker output, at which stage a connection or playback failure occurs.
3. What You Need
- Hardware: One CrowPanel Advance 4.3 / 5.0 / 7.0 inch ESP32-S3 HMI development board.
- Cable: A USB data cable that supports data transfer.
- Audio device: An external speaker connected to the development board's audio output port.
- Network: A 2.4 GHz Wi-Fi network with internet access.
- Software: The Arduino IDE, along with the ESP32 Arduino development environment and course library files already configured in Lesson 01.
- The
WiFiMultiandWirelibraries, and the ESP32 audio library that providesAudio.h. - Project:
OnlineAudio_large.ino.
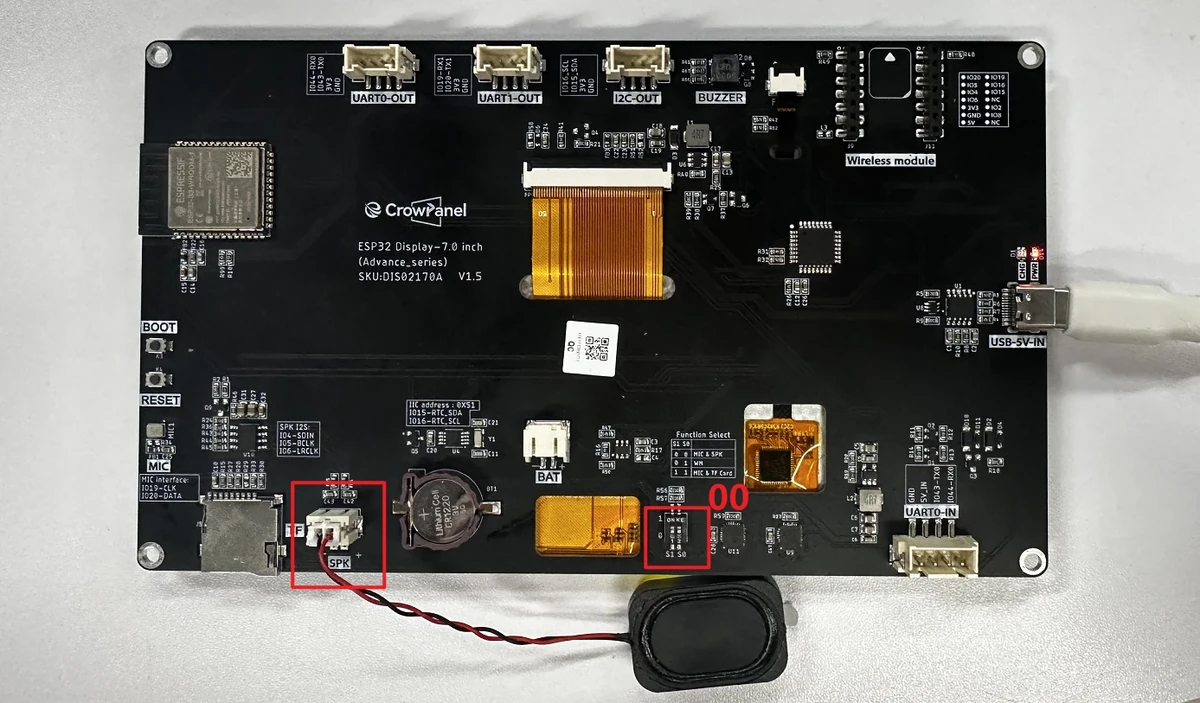
Note: The large-size 4.3 / 5.0 / 7.0 inch boards have a function-select switch. 00 corresponds to MIC&SPK, 01 corresponds to WM (wireless module), and 11 corresponds to MIC&TF Card. This lesson plays audio through the speaker, so please set the function-select switch to 00 while powered off, and make sure the output is set to SPK.
Note: Playing online songs requires that the Wi-Fi the board connects to can reach the corresponding audio URL. Corporate networks, campus networks, or hotspots that require web-based login authentication may result in a connected Wi-Fi but the song failing to play.
Code and Resource Download
Code download:
4. Software Operation Steps
Open the lesson project OnlineAudio_large using the Arduino IDE. 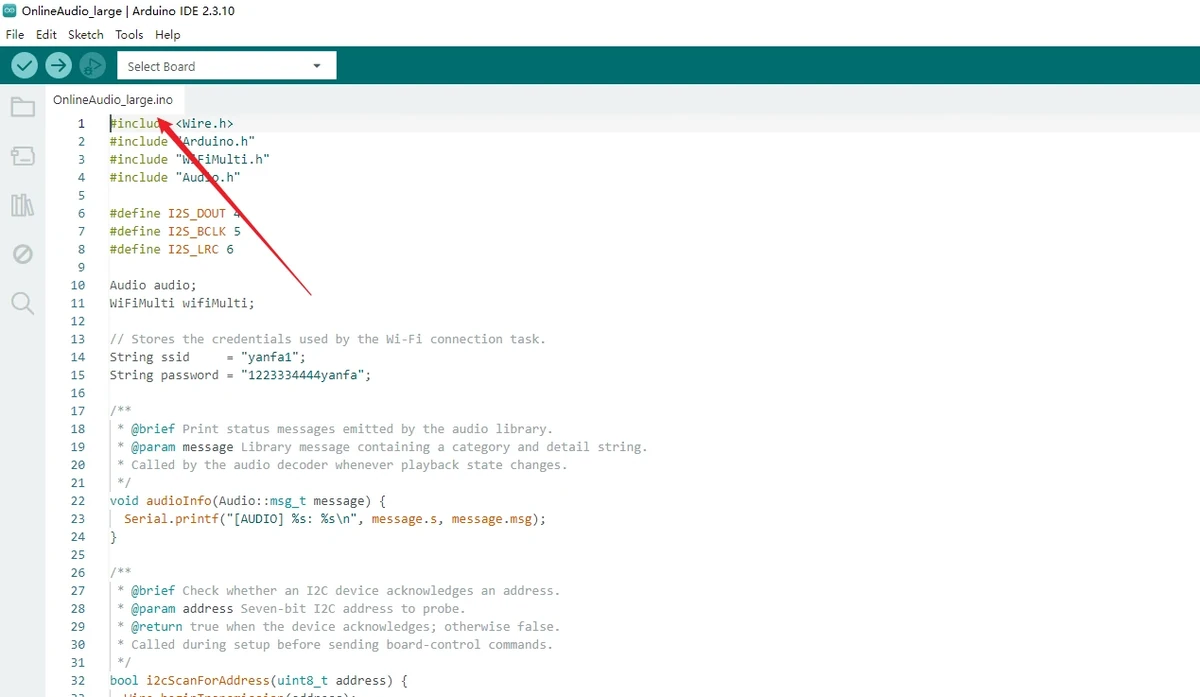
Connect the external speaker, set the function-select switch to 00, confirm the output is set to SPK, and use a USB cable that supports data transfer to connect the CrowPanel Advance 4.3 / 5.0 / 7.0 inch ESP32-S3 HMI development board to the computer.
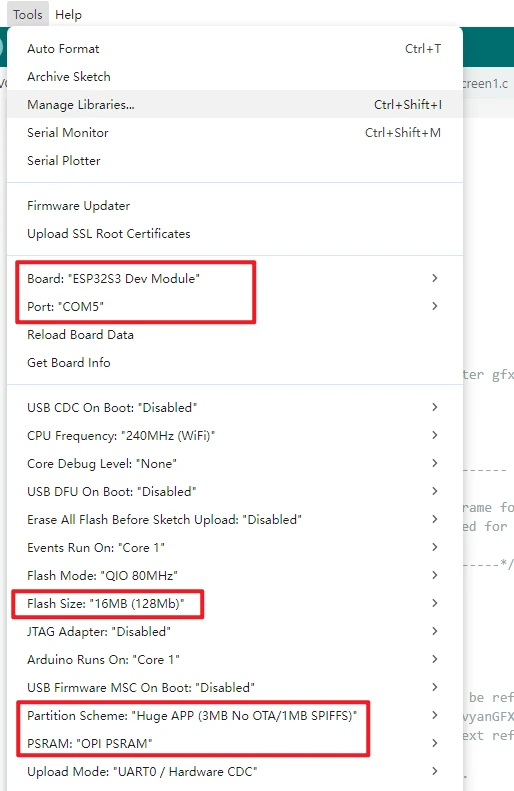
Complete the development environment configuration in the Tools menu as follows. Configure the Arduino IDE with these common settings:
-
Board:ESP32S3 Dev Module -
Port: Select the serial port corresponding to the current board -
Flash Size:16MB (128Mb) -
PSRAM:OPI PSRAM -
Partition Scheme:Huge APP (3MB No OTA/1MB SPIFFS)
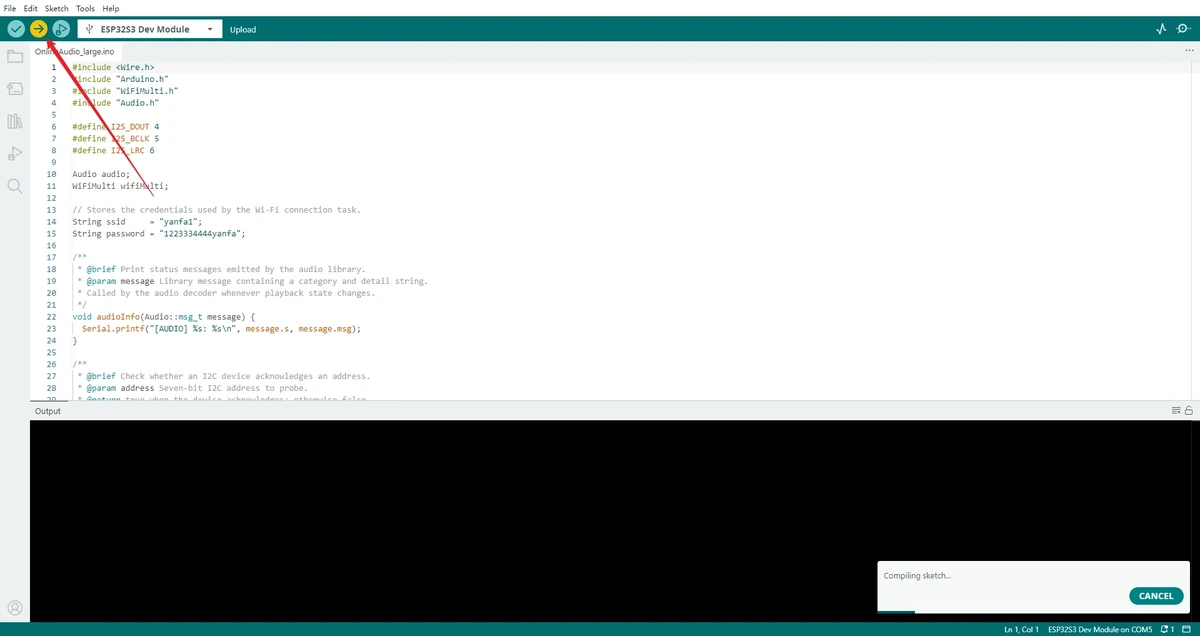
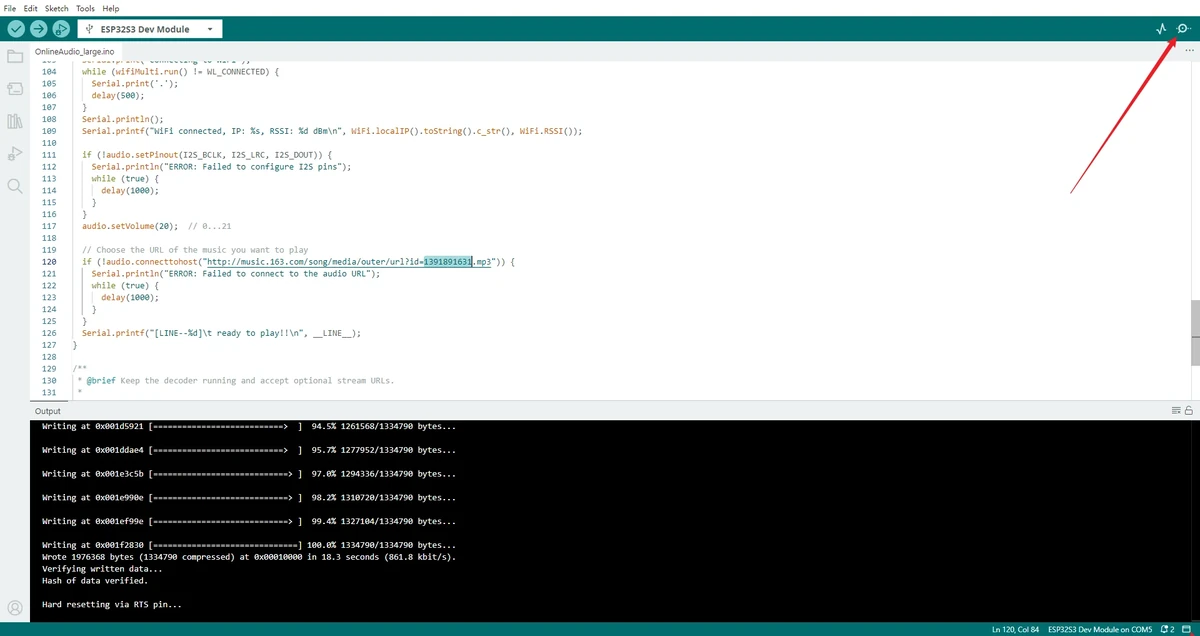
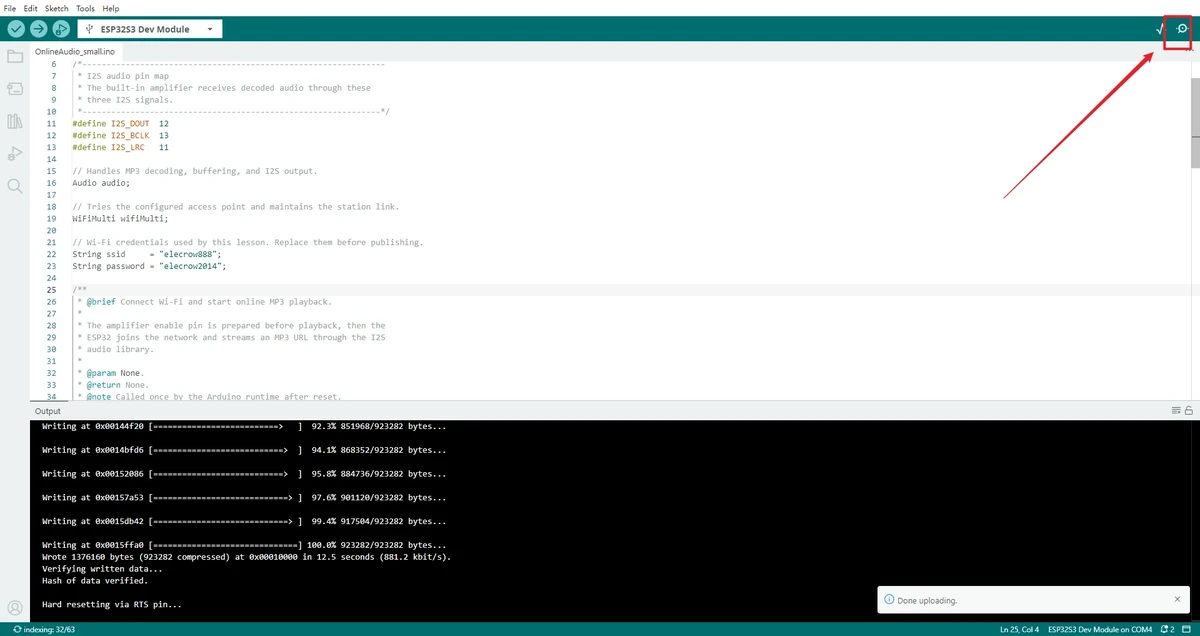
Click Upload to compile and wait for the upload to finish. If it gets stuck at Connecting..., check whether the port is occupied and use the BOOT/RESET download mode as required by the board.
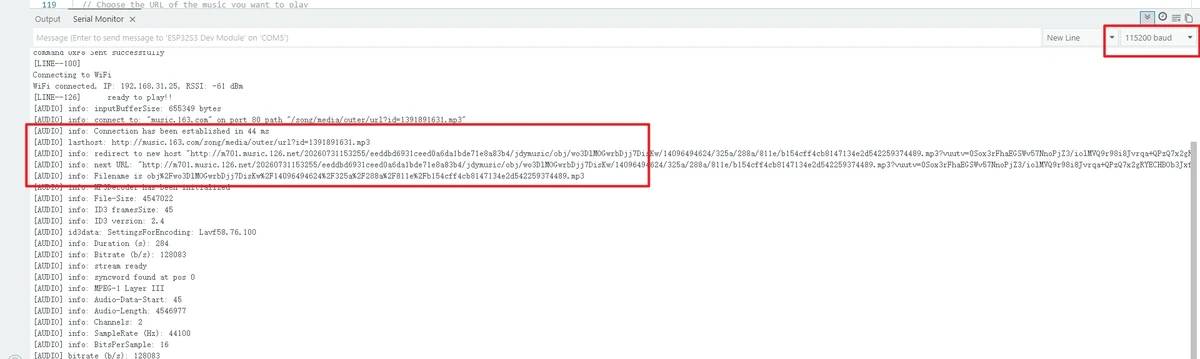
Open the Serial Monitor in the top-right corner, set the baud rate to 115200, and observe the Wi-Fi connection and audio playback logs.
5. Modifying the Wi-Fi and Song Links
5.1 Changing the Wi-Fi SSID and Password
Before flashing, you must change the Wi-Fi name and password in the code to the currently available network.
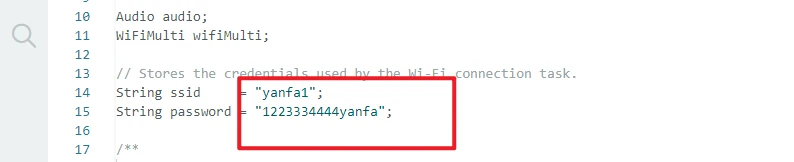
Note: The Wi-Fi in the official sample code is an example environment and cannot be used directly on your network. If the Wi-Fi name or password is entered incorrectly, the program will stall at the connection stage and audio playback will not start.
5.2 Changing the Online Song Link
The current project directly fills in the online MP3 address in audio.connecttohost(). To change the song, you can replace the URL in this line.

If you use a NetEase Cloud Music external link, the song page URL usually contains an id= parameter, for example:
Replace 1391891631 into http://music.163.com/song/media/outer/url?id=SongID.mp3, then recompile and flash.
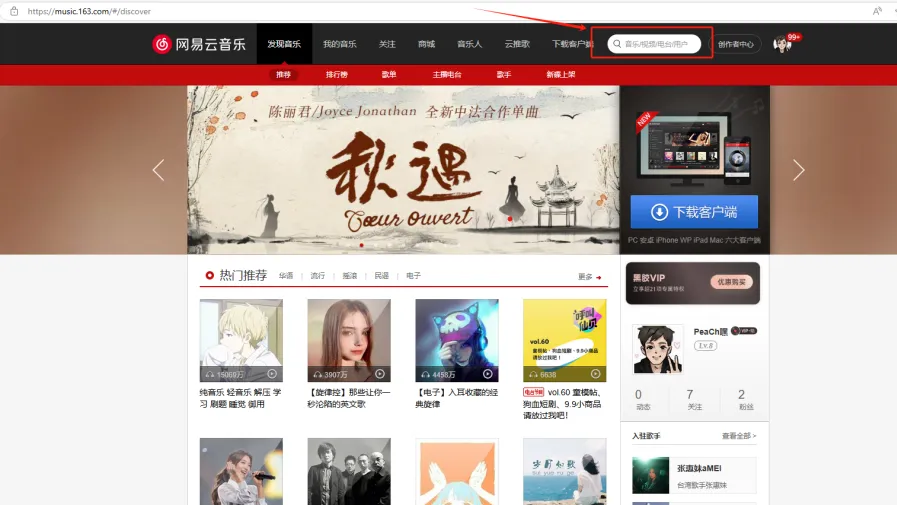
Note: You can only select non-VIP songs that are publicly playable. VIP, paid, copyright-restricted, region-restricted, or login-required songs generally cannot be played through this external link method.
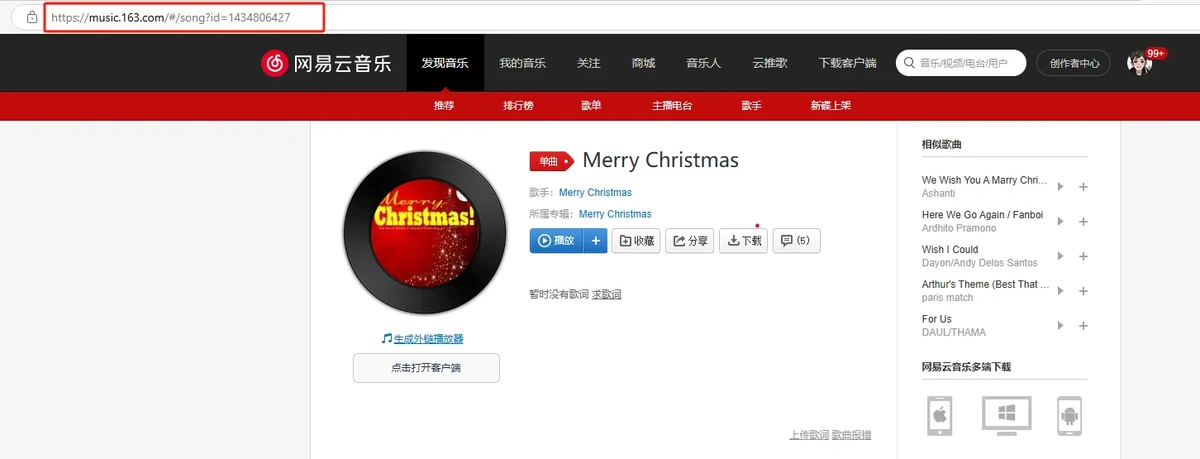
5.3 Temporarily Switching the URL via Serial
After the program starts running, you can also enter a new audio URL in the Serial Monitor and send it. The code will read the serial input and attempt to play the new address.
6. Music Platforms and Link Notes
This lesson uses an "audio stream link," not a regular web playback link. audio.connecttohost() needs direct access to the audio data so the Audio library can download, decode, and output it to I2S.
Link types that can be used:
- MP3 audio stream links that can be opened directly.
- Audio stream links in formats supported by the Audio library, such as AAC and FLAC.
- External links like
http://music.163.com/song/media/outer/url?id=SongID.mp3.
Link types not suitable for direct use:
- Song page links from platforms such as Spotify, Apple Music, and YouTube Music.
- Links that require login, membership, a Token, a Cookie, or a web player to play.
- URLs that only display the song page but are not the audio file itself.
Note: If the program reports no error but produces no sound, first copy the URL in
audio.connecttohost()into a computer browser to test it. When the browser cannot play or download the audio directly, the development board usually cannot play it either.
7. Hardware Operation Steps
With the board powered off, confirm that the audio output device is correctly connected to the course board, then connect the USB power and data cable.
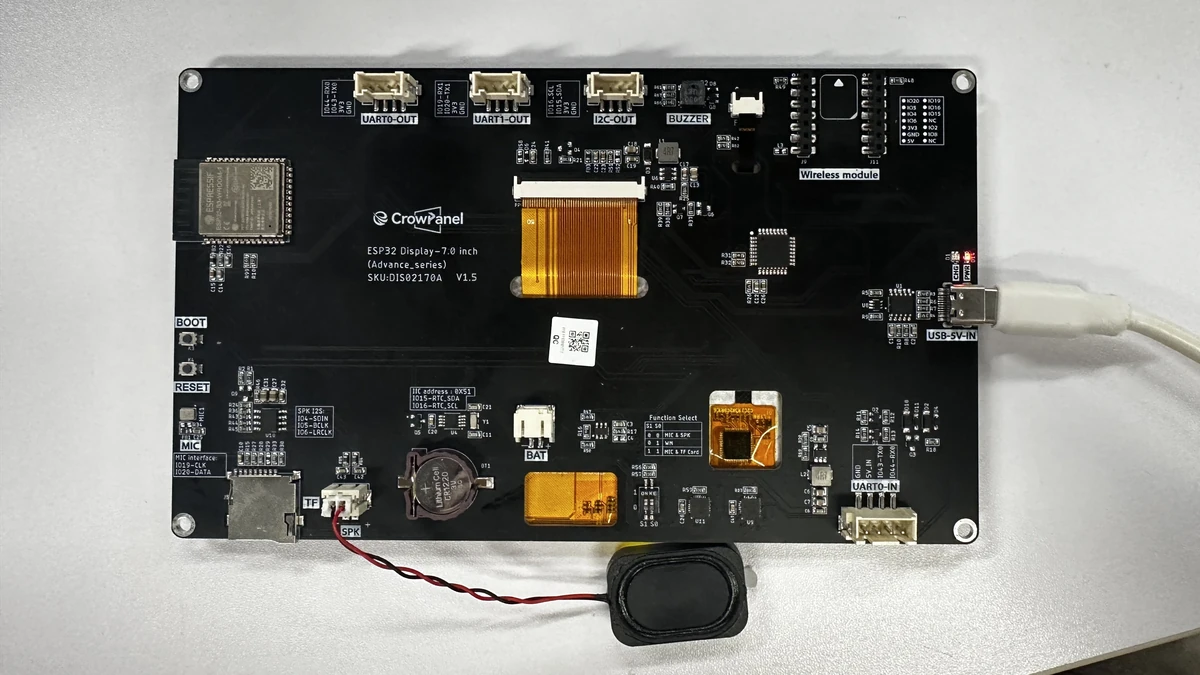
Make sure the function-select switch is set to 00 and SPK is selected. After powering on, wait for the network connection and check whether the speaker produces sound.
8. Key Code Explanation
These three pins define the digital audio connection. When the configuration does not match, the network may be connected but the speaker produces no proper audio.
The program only proceeds to initialize audio after a successful Wi-Fi connection. If it stays here for a long time, first check the credentials, signal strength, and network band.
audio.setPinout(I2S_BCLK, I2S_LRC, I2S_DOUT);
audio.connecttohost("http://music.163.com/song/media/outer/url?id=1391891631.mp3");
The first line configures I2S, and the second line connects to the default audio source. A failed URL does not prove I2S hardware damage; you should first switch to a verified direct link.
9. Experimental Phenomenon
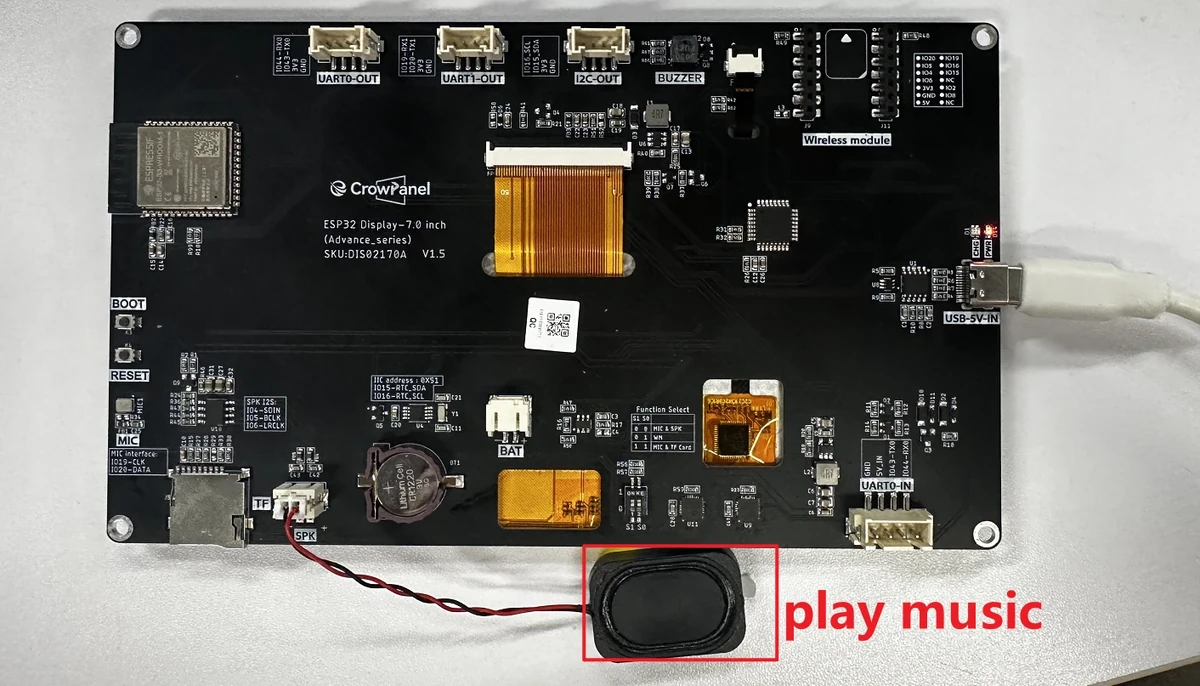
The code is expected to first output I2C and Wi-Fi status over the serial port, then, after a successful connection, display audio library information and play the network stream from the audio hardware. The actual sound, connection time, and URL availability must be verified on the actual device with a network connection.
10. Code Download
Local course project: OnlineAudio_large.