4.3_5.0_7.0inch_Lesson02_HTTP_MP3
1. Course Introduction
This lesson uses the Lesson02-Open_http_mp3_big project to connect the CrowPanel Advance 4.3inch, 5.0inch, and 7.0inch large-size displays to a network over Wi-Fi and play MP3 audio from an HTTP link. The project is built with ESP-IDF and reuses libraries such as WiFi.h, Audio.h, and Wire.h through the Arduino component.
This lesson is written for the 7.0inch board. All three large-size displays share a single tutorial, and their screen specifications are unified at 800 x 480. This lesson primarily verifies Wi-Fi, I2C expansion control, and speaker output; the screen is only initialized as part of the on-board hardware.
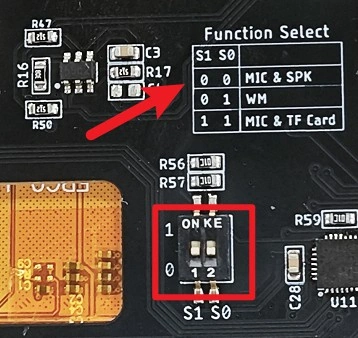
This lesson requires a speaker to play audio. Please set the large-size board's function DIP switch to 00 = MIC&SPK. The DIP switch mapping for the large-size board is: 00 = MIC&SPK, 01 = WM (wireless module), 11 = MIC&TF Card.
2. Learning Objectives
- Be able to open and compile the large-size audio playback project in ESP-IDF.
- Be able to modify the Wi-Fi
ssidandpassword. - Understand the HTTP MP3 playback flow.
- Understand the speaker I2S pins
BCLK=5,LRC=6,DOUT=4. - Understand how the large-size board controls peripheral functions via the I2C address
0x30.
3. What You Need
- CrowPanel Advance 4.3inch / 5.0inch / 7.0inch ESP32-S3 HMI.
- A VS Code environment with ESP-IDF
5.5.4installed. - Internet-connected 2.4 GHz Wi-Fi.
- An on-board or external speaker.
- Local project:
4.3_5.0_7.0_IDF_Code/Lesson02-Open_http_mp3_big.
Code and Resource Download
Code download: - Lesson02-Open_http_mp3_big
4. ESP-IDF Software Operation Steps
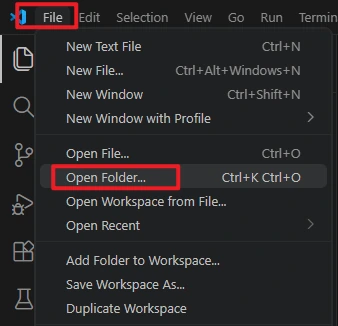
In VS Code, click File -> Open Folder and open this lesson's project:
Lesson02-Open_http_mp3_big
Open main/main.cpp and modify the Wi-Fi name and password.
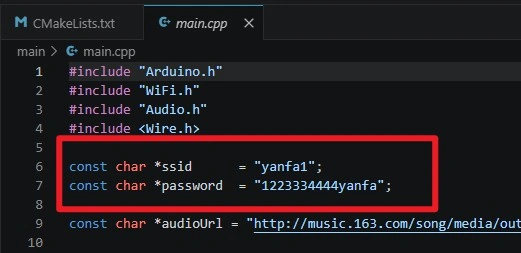
To change the playback content, you can modify audioUrl; this link should be a directly accessible MP3 URL.
Confirm that the ESP-IDF version is 5.5.4 and the target chip is esp32s3.

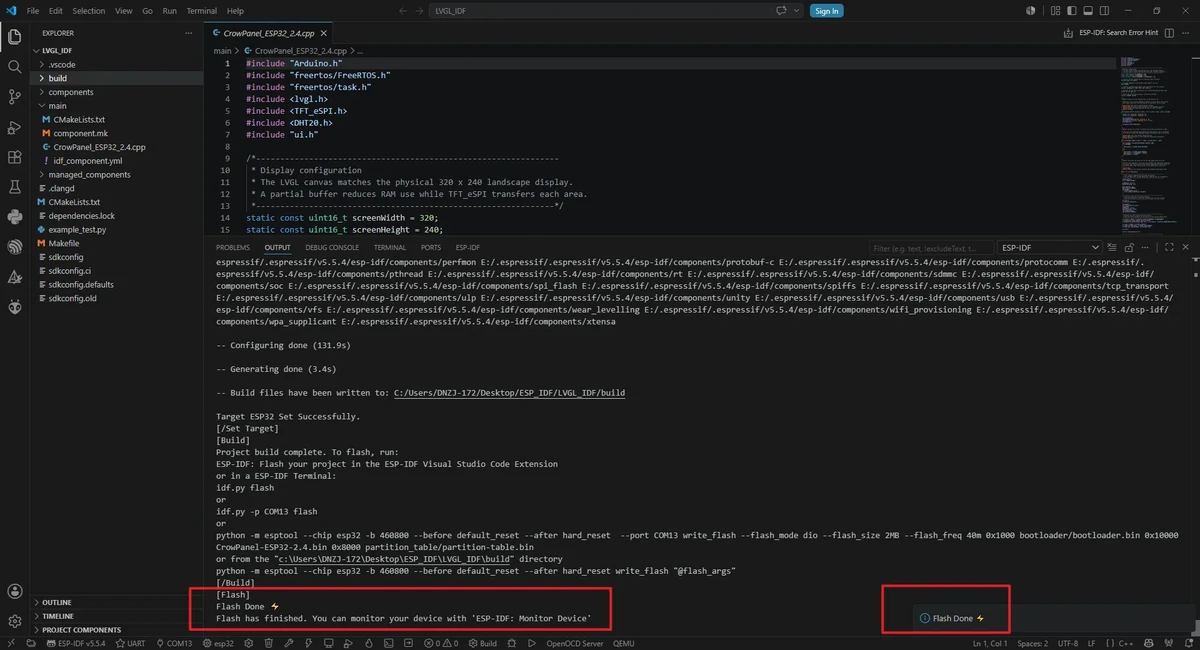
Click Build to compile the project.
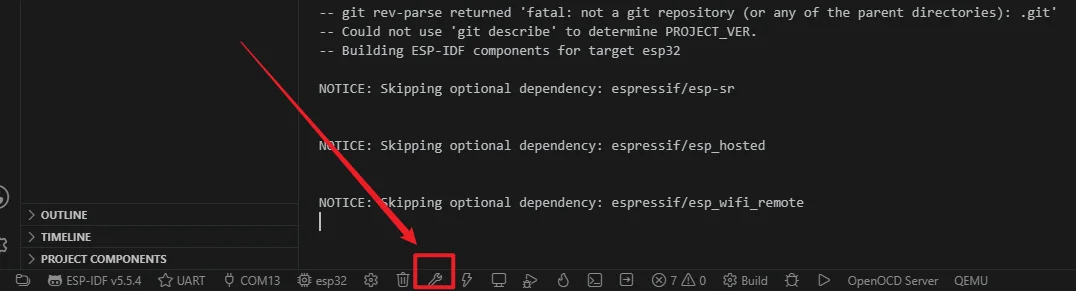
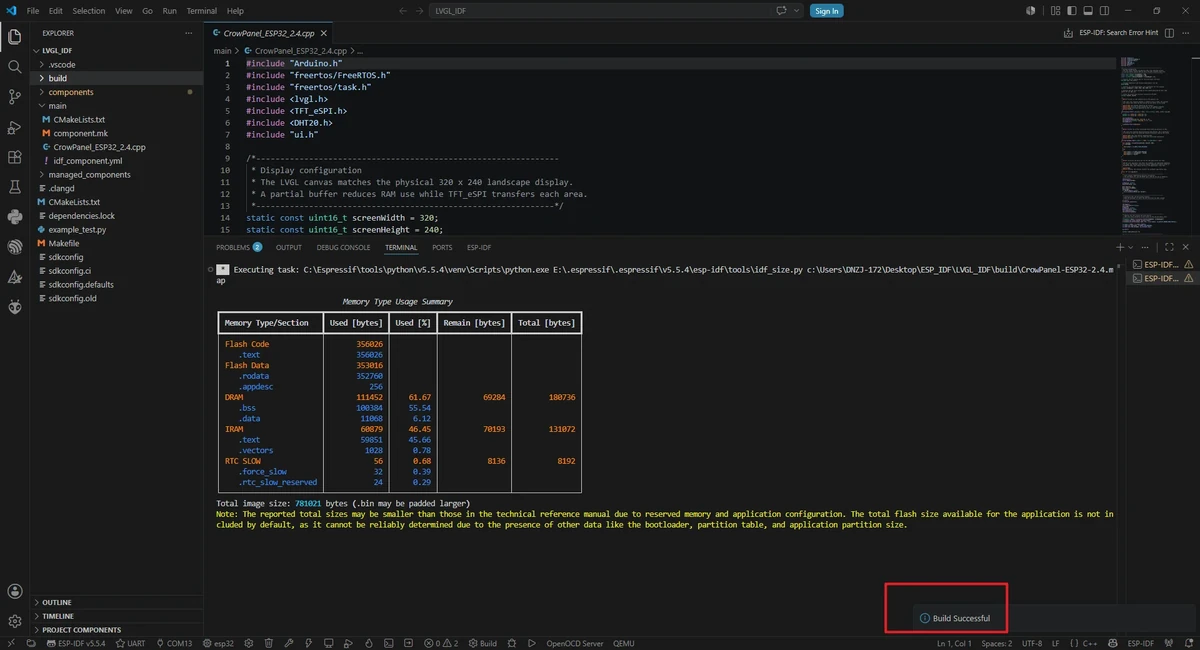
After selecting the correct serial port, click Flash to flash the firmware.
5. Hardware Operation Steps
Set the function DIP switch to 00 = MIC&SPK.
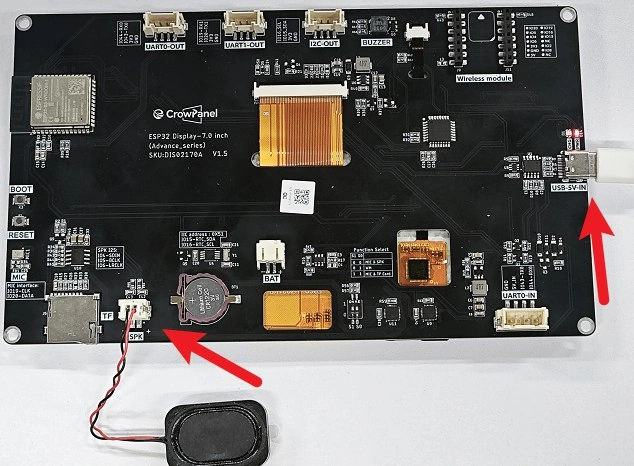
Connect the computer and the development board with a USB data cable.
Confirm that the speaker is connected properly.
After powering on, wait for the serial output "Wi-Fi connected".
Under normal conditions, the development board will play the MP3 audio through the speaker.
6. Key Code Explanation
The core code for this lesson is located at Lesson02-Open_http_mp3_big/main/main.cpp.
6.1 Wi-Fi Parameters
Before flashing, change the example Wi-Fi name and password to a usable 2.4 GHz Wi-Fi in your current environment. If the serial port keeps printing dots indicating "connecting", first check the SSID, password, and Wi-Fi signal.
6.2 MP3 Link
audioUrl is the address of an online MP3 file. If the link becomes invalid or the network is unreachable, Wi-Fi may connect successfully but you will not hear any sound.
6.3 I2S Speaker Pins
The project sets the I2S audio output pins via audio.setPinout(BCLK, LRC, DOUT). For this lesson, the large-size board uses BCLK=GPIO5, LRC=GPIO6, DOUT=GPIO4.
6.4 Large-Size Board Peripheral Initialization
Wire.begin(15, 16) initializes I2C using GPIO15/GPIO16. The program scans the two addresses 0x30 and 0x5D, and after detecting the peripheral, sends 248 to enable the speaker function.
6.5 Main Loop Playback
audio.loop() must be called continuously to receive MP3 data from the network and decode and output it. If the main loop is blocked for a long time, the audio may stutter or cut off.
7. Experimental Observations
- The serial port outputs "Wi-Fi connected".
- The serial port outputs detection of
0x30,0x5D. - The serial port indicates that it is playing
audioUrl. - The speaker plays the online MP3 sound.
If there is no sound, check in order: whether the DIP switch is set to 00 = MIC&SPK, whether the speaker is connected, whether Wi-Fi connected successfully, whether the MP3 link is accessible, and whether the serial port shows any I2C detection failure messages.
8. Code Download
GitHub code link: Lesson02-Open_http_mp3_big