Lesson06_USB_HID_Mouse: ESP32-P4 Touchscreen-to-USB HID Mouse
1. Course Introduction
In this lesson, the TinyUSB stack is used to emulate the ESP32-P4 as a USB HID mouse device, controlling the movement of the computer's mouse cursor through touchscreen swipe gestures. After the program is flashed, the development board connects to the computer via a separate USB cable and is recognized as a HID mouse; as the learner slides a finger across the touchscreen, the mouse cursor on the computer moves accordingly, and the serial monitor prints the movement deltas in sync.
Building on the Lesson05 touchscreen lesson, this lesson introduces USB HID device development and serves as an entry point to USB peripheral applications. Through this experiment, learners will complete end-to-end validation of the full chain: I2C touch reading, USB enumeration, and HID report transmission.
2. Learning Objectives
- Be able to open the Lesson06 project in ESP-IDF and set the target chip to
esp32p4. - Be able to explain the roles of the HID report descriptor, configuration descriptor, and string descriptor in USB enumeration.
- Be able to explain when to call
tud_hid_readyandtud_hid_mouse_report. - Be able to complete compilation and flashing, and confirm on the computer that the device is recognized as a mouse.
- Be able to control the computer cursor movement via touchscreen swipes and observe the movement deltas printed on the serial monitor.
3. Prerequisites
- Hardware: one CrowPanel Advanced 7 / 9 / 10.1-inch ESP32-P4 HMI AI Display development board (with onboard GT911 touchscreen); two USB data cables that support data transfer (one for flashing and monitoring, one for USB HID connection to the computer); or one data cable that supports simultaneous flashing and HID.
- Compatibility note: the 7 / 9 / 10.1-inch development boards share identical hardware and software code, differing only in board size; please select the appropriate model based on display size and use case.
- Software: VS Code, ESP-IDF Extension (ESP-IDF v5.5.4 or later).
- Project dependencies: retain the
main/main.c,peripheral/bsp_i2c,peripheral/bsp_display,peripheral/bsp_usbcomponents, as well as theesp_lcd_touch_gt911andtinyusbmanaged components. - Configuration: target chip
esp32p4; I2C port 0, SDA=GPIO45, SCL=GPIO46; USB uses the internal PHY.
Code download link:
4. Software Operation Steps
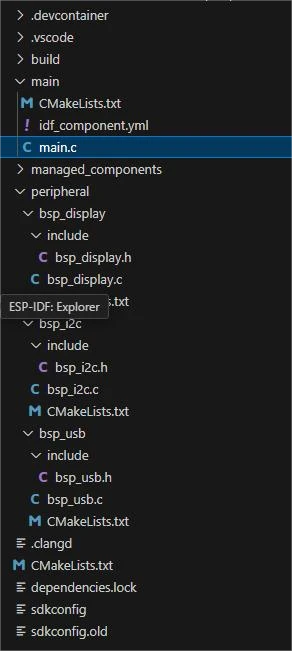
In VS Code, open the ESP-IDF Extension panel and click Open ESP-IDF Project, then select the Lesson06-USB2.0 folder.
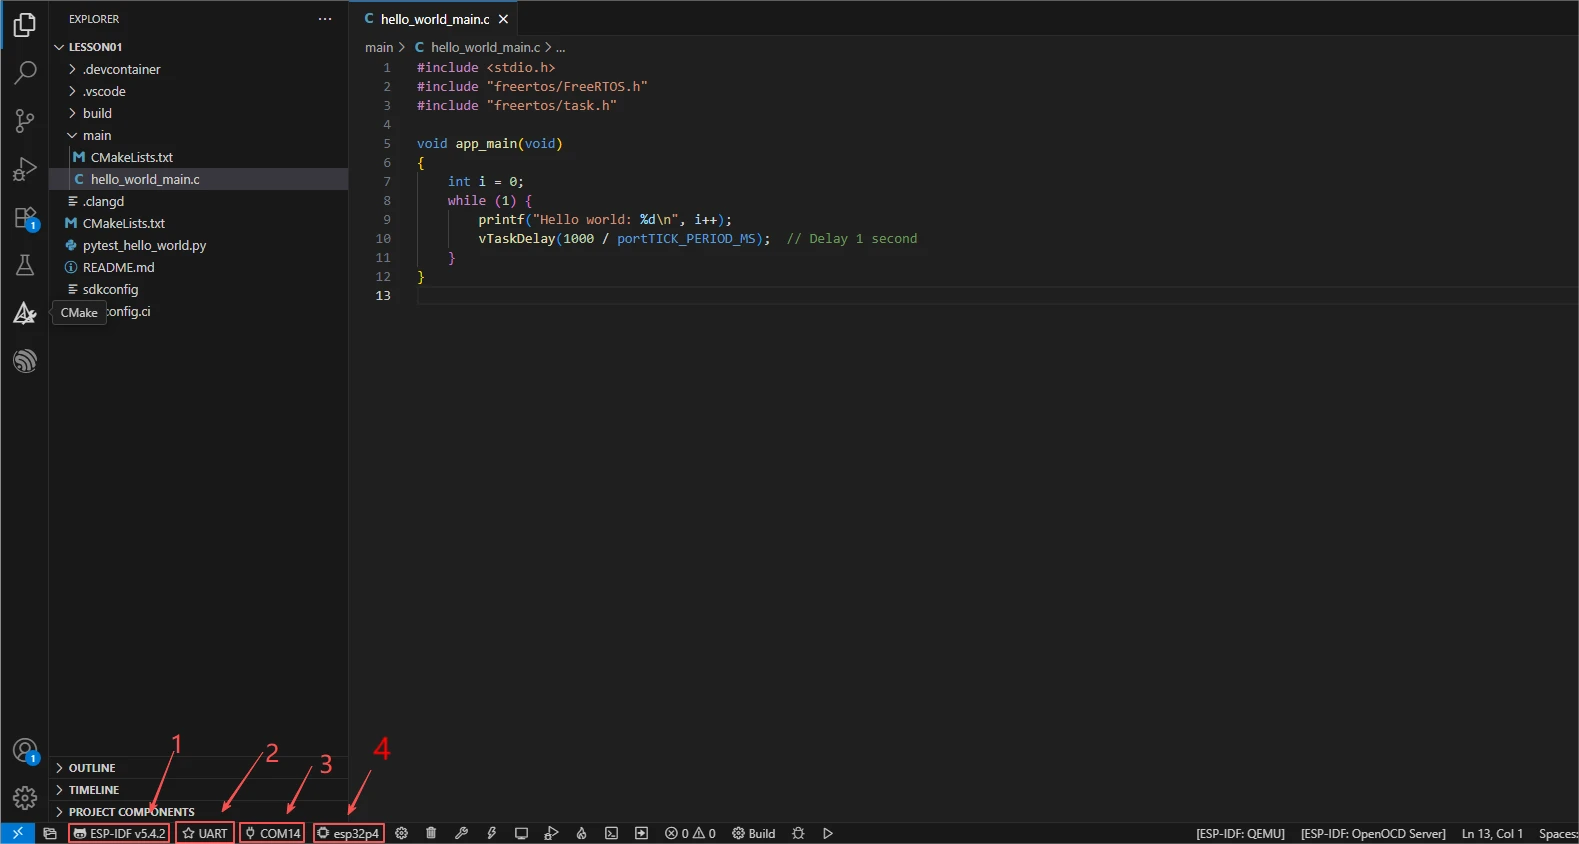
First select the code runtime environment ESP-IDF v5.5.4, set the flashing method to UART, and then select the serial port that actually corresponds to the development board. Next, click Set Espressif Device Target in the ESP-IDF Extension panel and select esp32p4. After configuration, the status bar should display ESP-IDF v5.5.4, UART, the required COM port, and ESP32-P4.
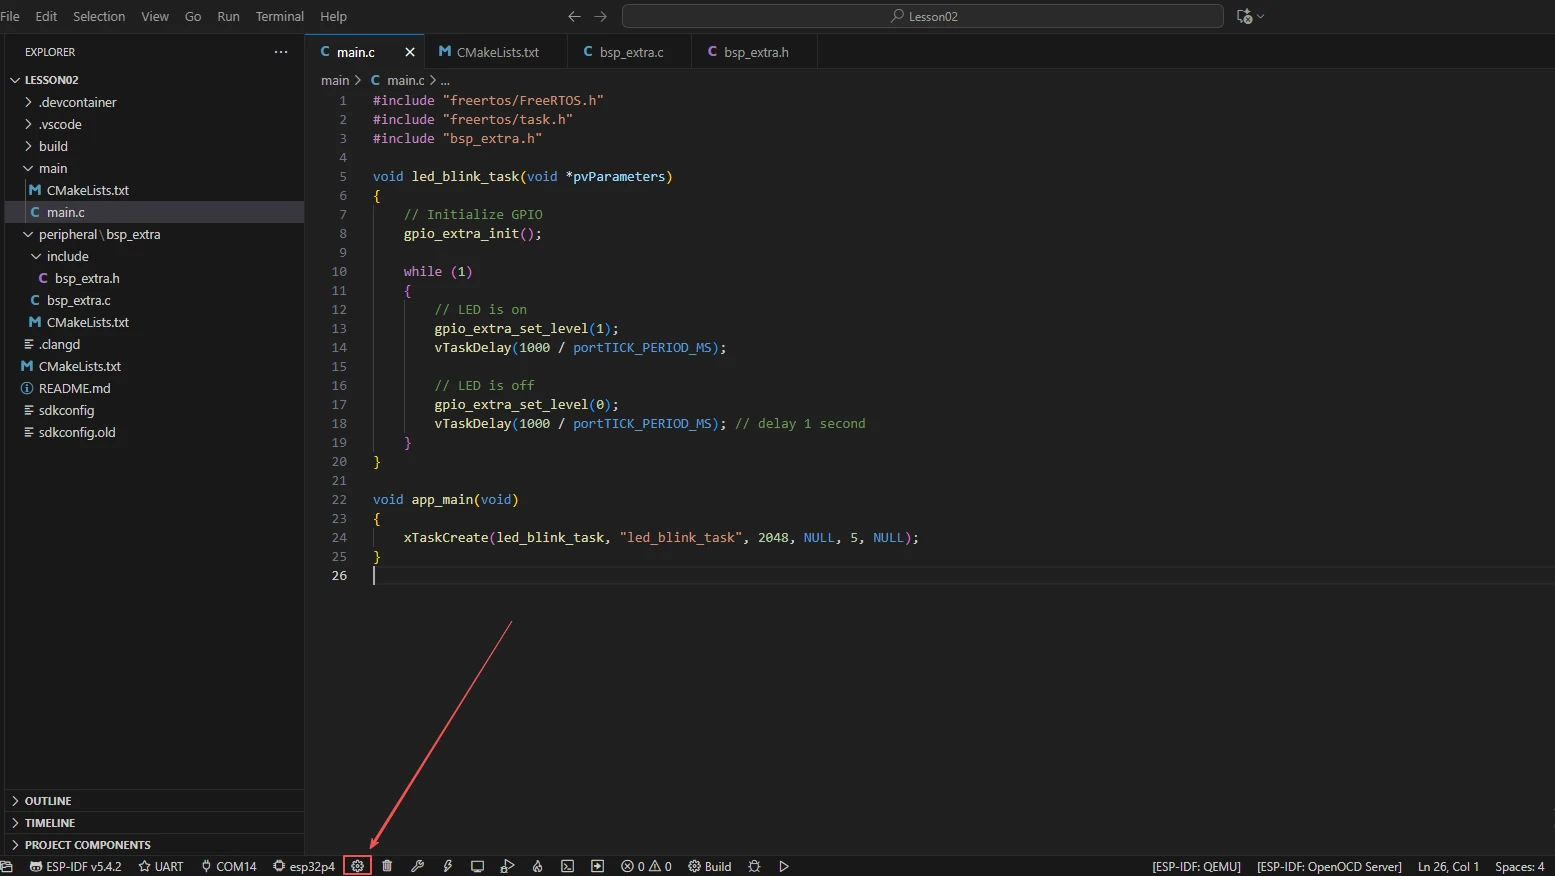
Click SDK Configuration Editor in the VS Code bottom status bar or the ESP-IDF extension panel, and wait for the configuration page to fully load before modifying parameters. If the page is still loading, do not immediately run Build.
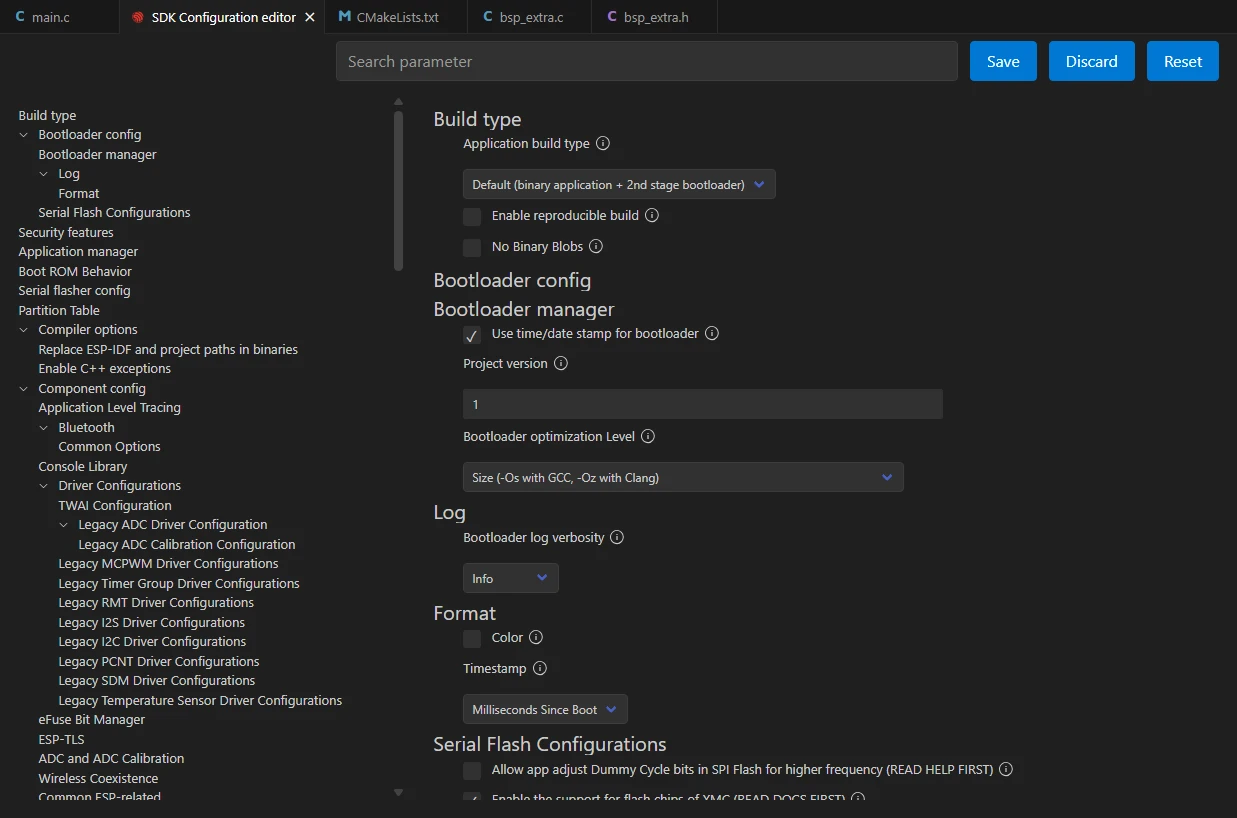
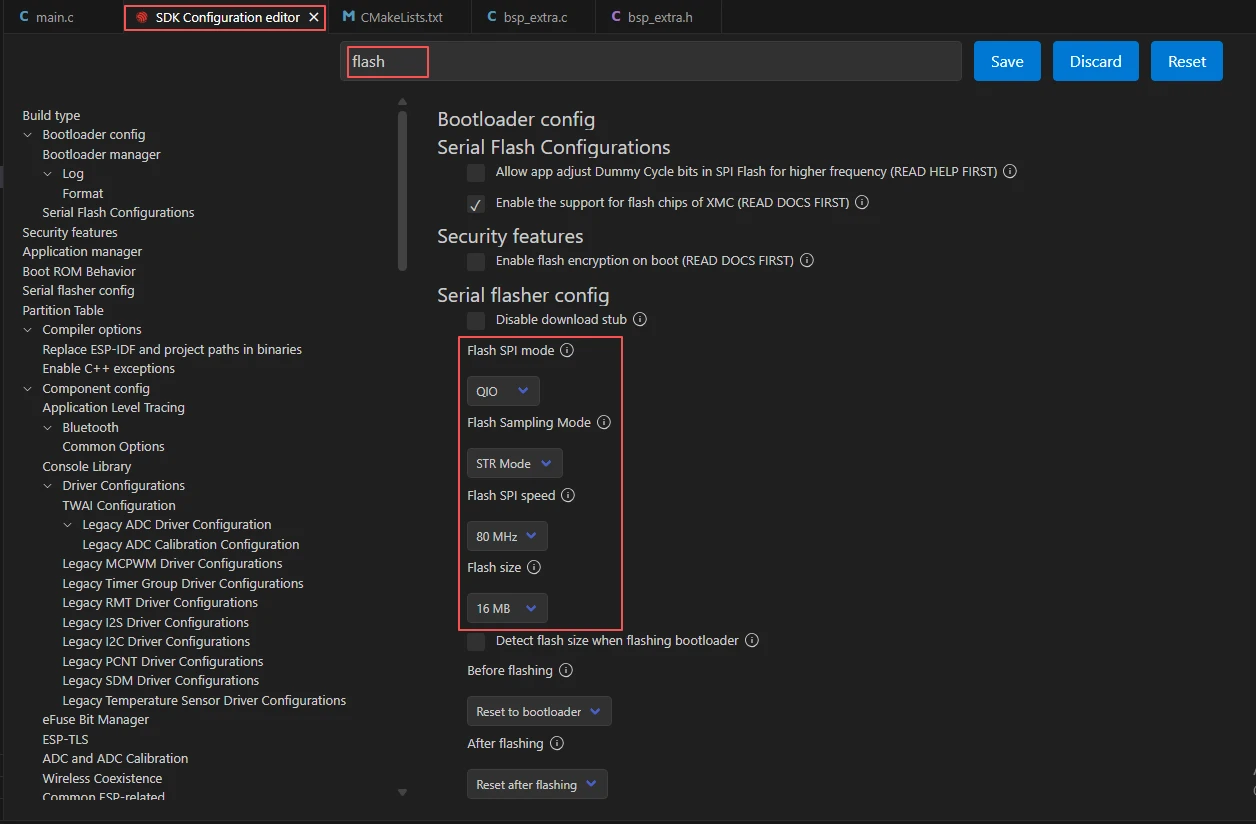
In the search box, type flash and ensure Flash SPI mode: QIO; Flash Sampling Mode: STR Mode; Flash SPI speed: 80 MHz; Flash size: 16 MB. These parameters should match the Advance-P4 onboard Flash.
Continue typing hid in the search box and set TinyUSB HID interfaces count to 1, so that the USB device enumerates as a single HID mouse interface.
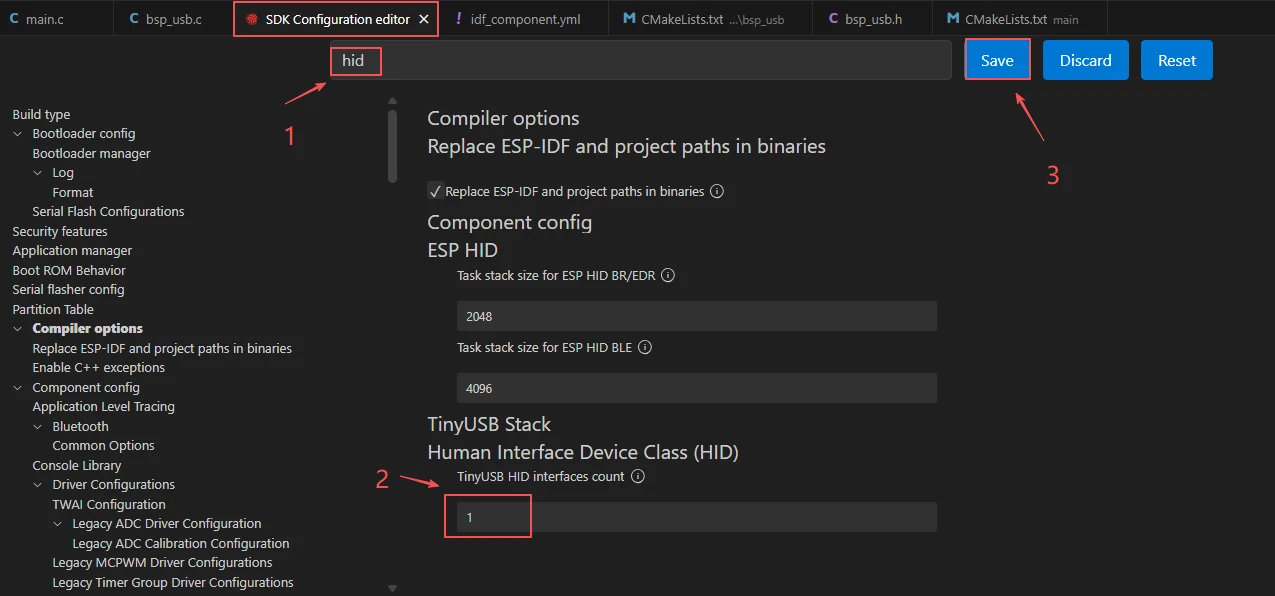
Click Save in the top-right corner to save the Flash and HID configuration, and confirm there is no unsaved-changes prompt before compiling.
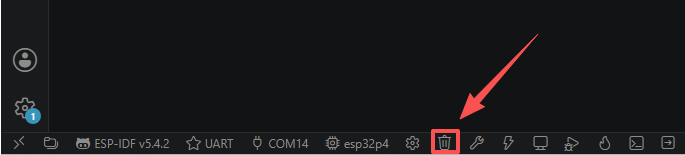
Click Full Clean to clear the cache left over from the previous compilation. Perform this operation after the first compilation, after switching project configuration, or after modifying SDK parameters, to prevent stale configuration from affecting new build results.
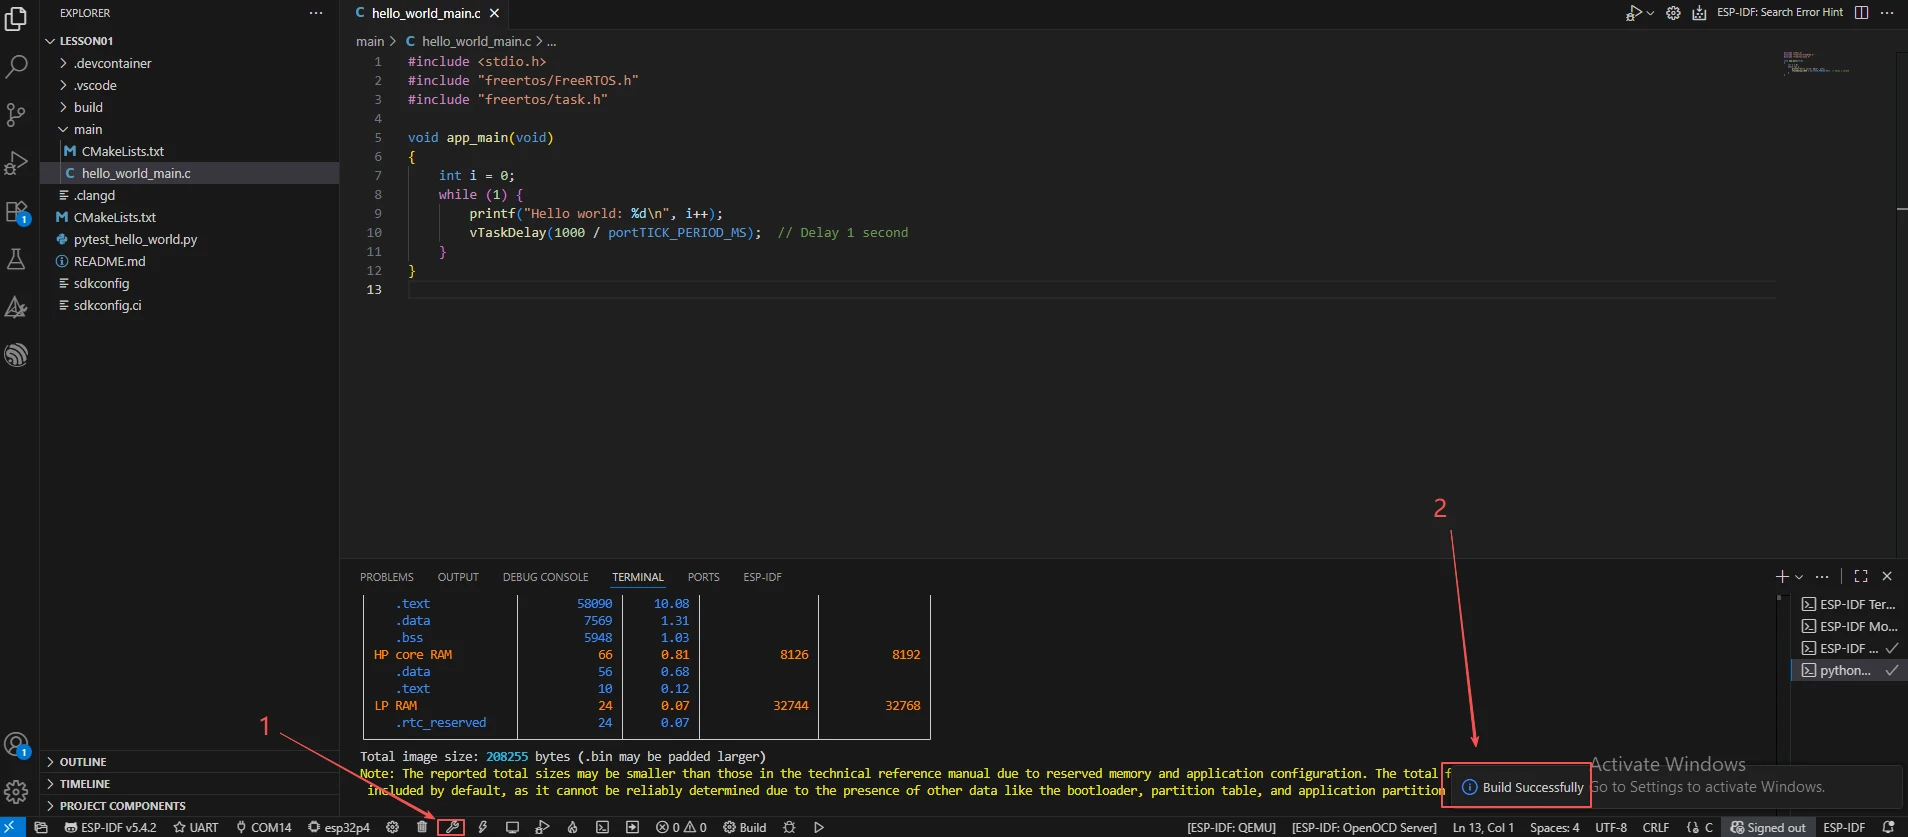
Click Build to compile the project. The first compilation automatically downloads components such as tinyusb; on success, Project build complete is output.
Confirm the development board is connected to the computer via USB, click Select Port to Use to choose the serial port, then click Flash to flash the firmware.
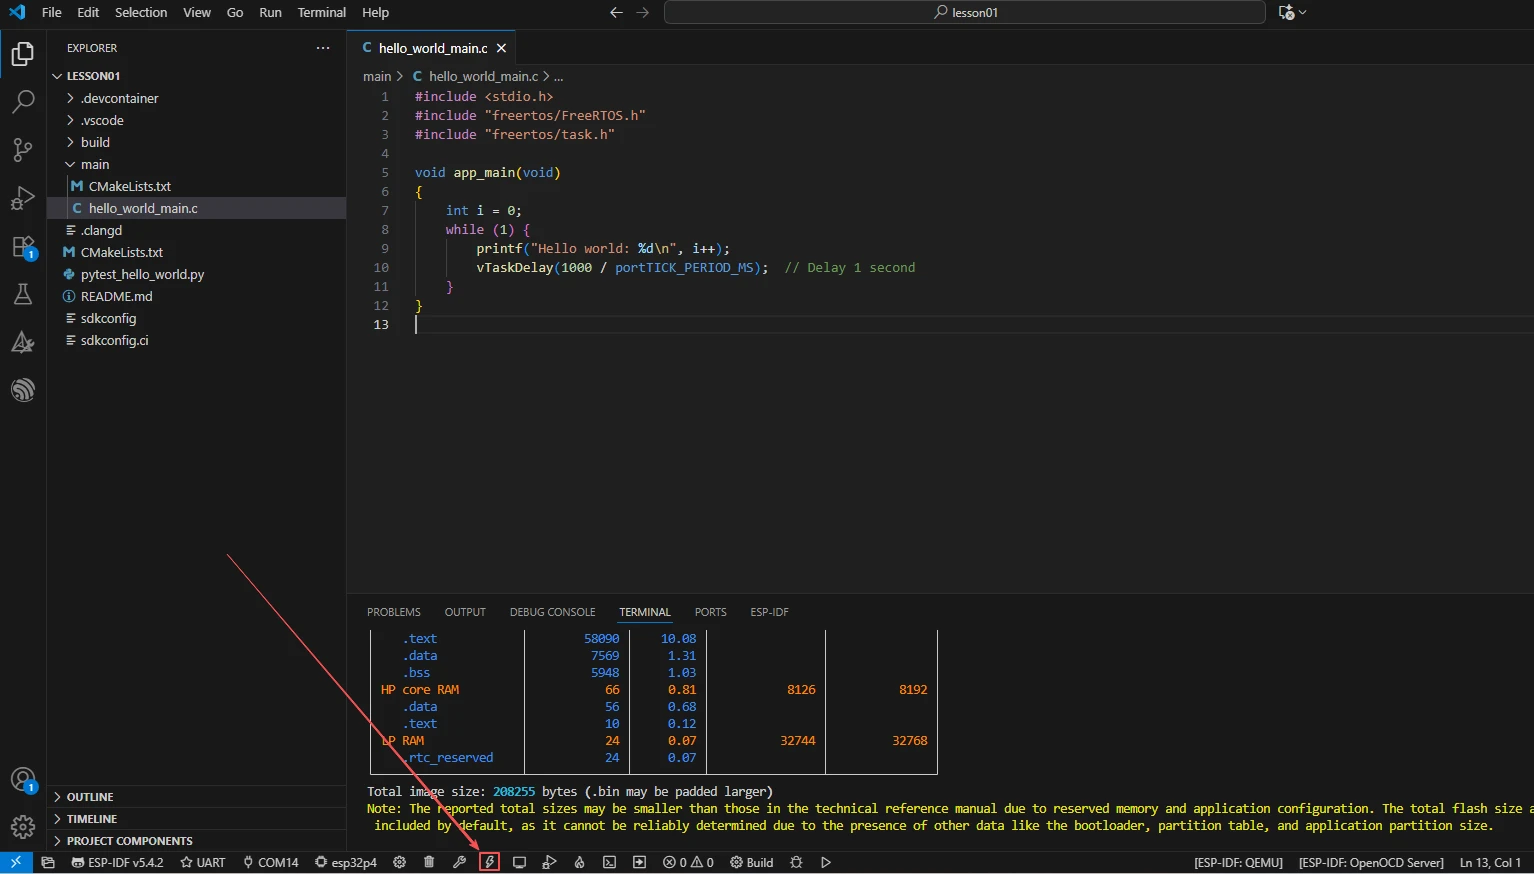
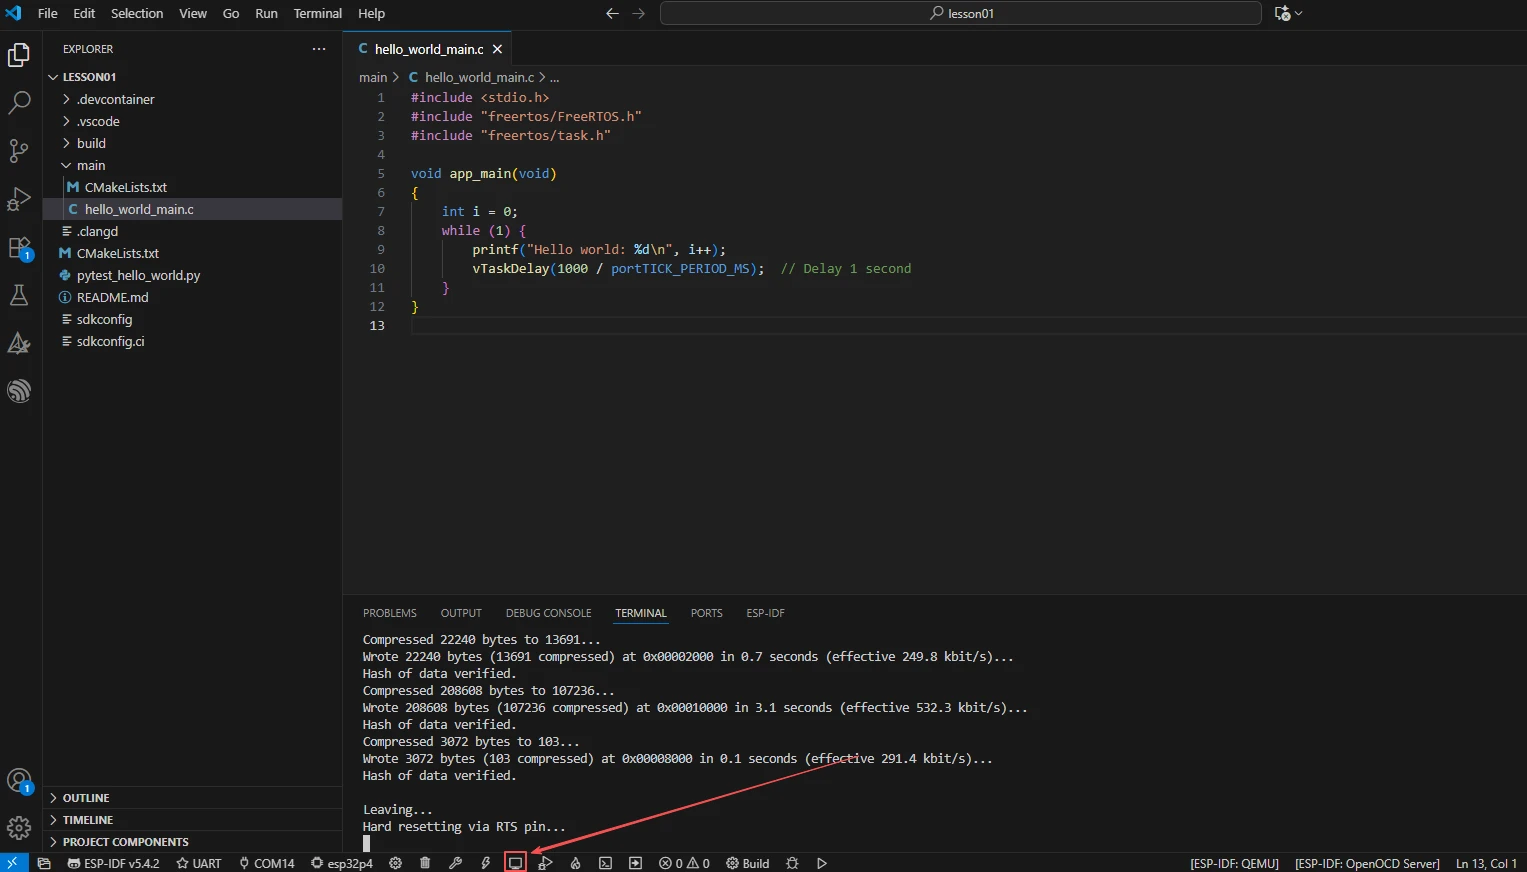
After flashing completes, click Monitor to open the serial monitor; you should see the Touch Mouse application started successfully log. Press Ctrl + ] to exit the monitor.
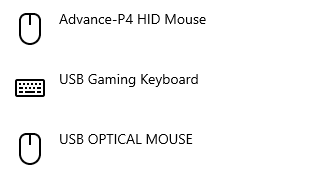
In the computer's Device Manager (Windows) or system information, confirm that a new mouse device appears with the product name Advance-P4 HID Mouse.
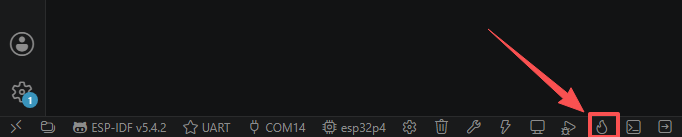
Finally, you may use the one-click operation button in the ESP-IDF status bar to sequentially execute compile, flash, and open serial monitor. Use this only after the project configuration, serial port, and code have all been confirmed correct; if you need to troubleshoot, still follow the steps above one by one.
5. Hardware Operation Steps
Connect the ESP32-P4 development board to the computer using a USB data cable. Confirm that the touchscreen ribbon cable is properly seated.
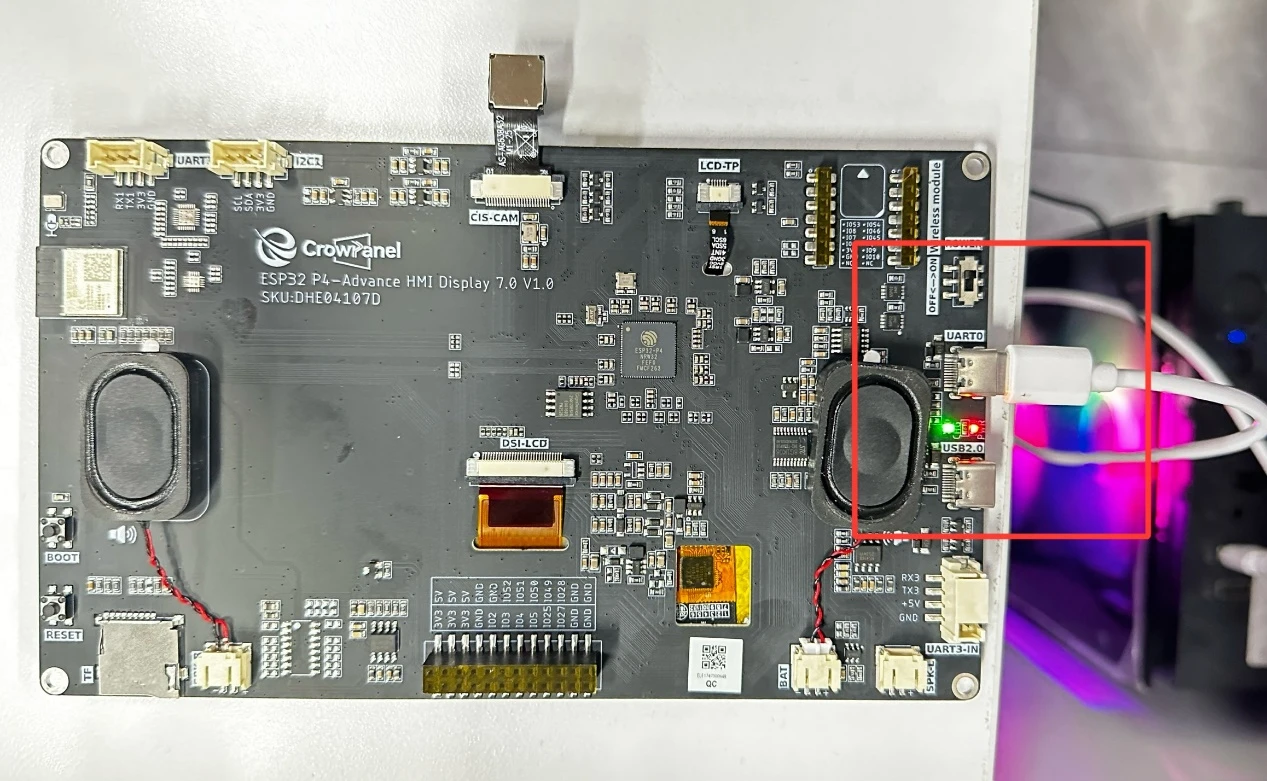
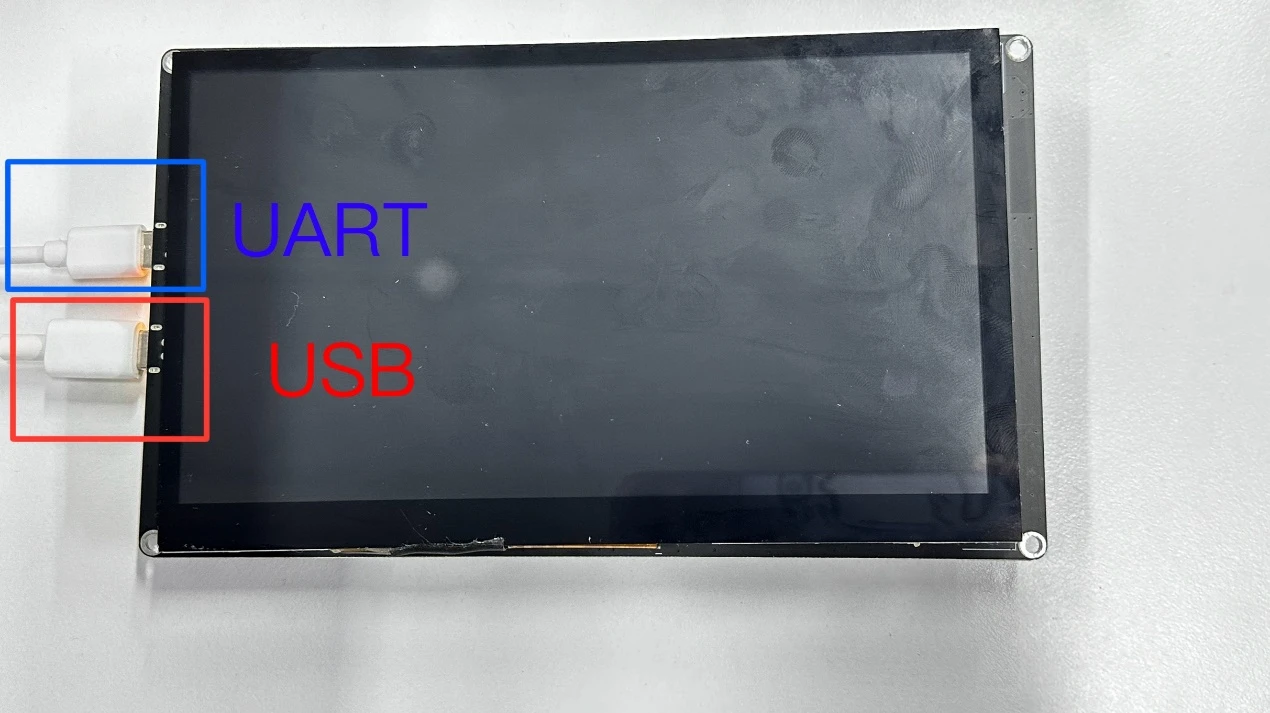
After flashing completes and the board resets, observe whether the computer shows a "new device connected" prompt, and an HID mouse should appear in Device Manager.
Slide a finger across the touchscreen and observe whether the mouse cursor on the computer moves in the direction of the finger movement.
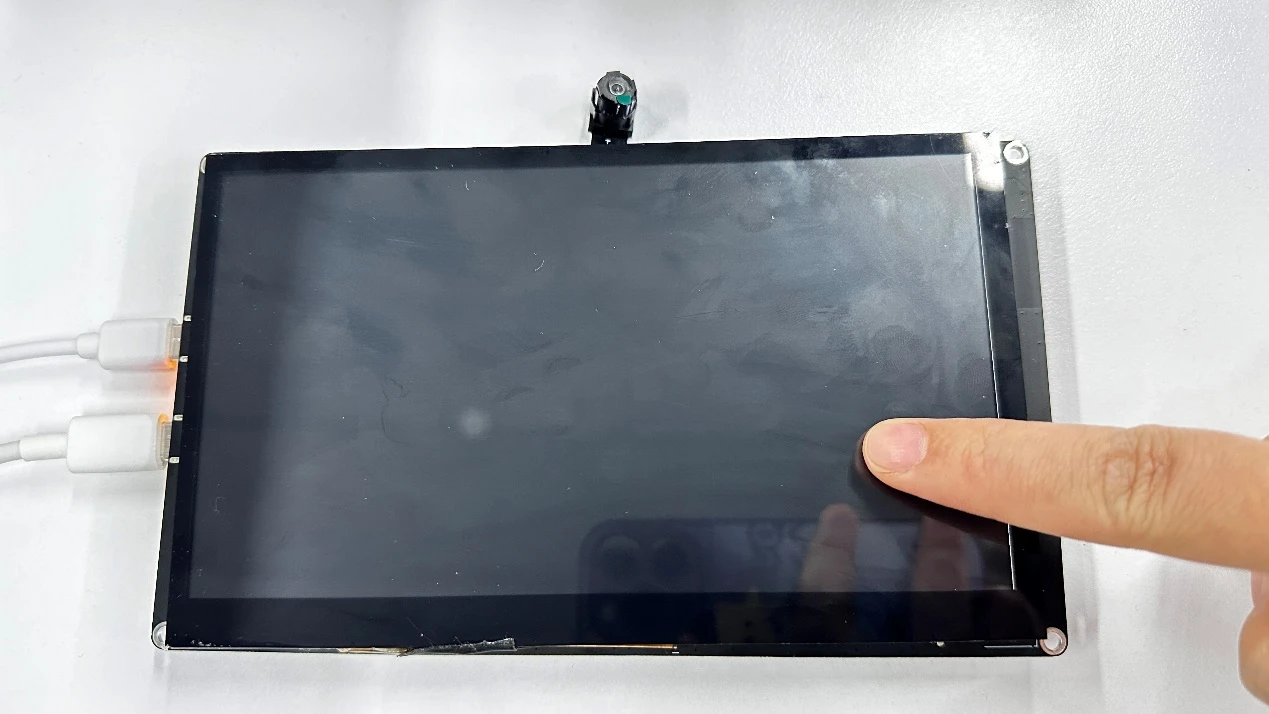
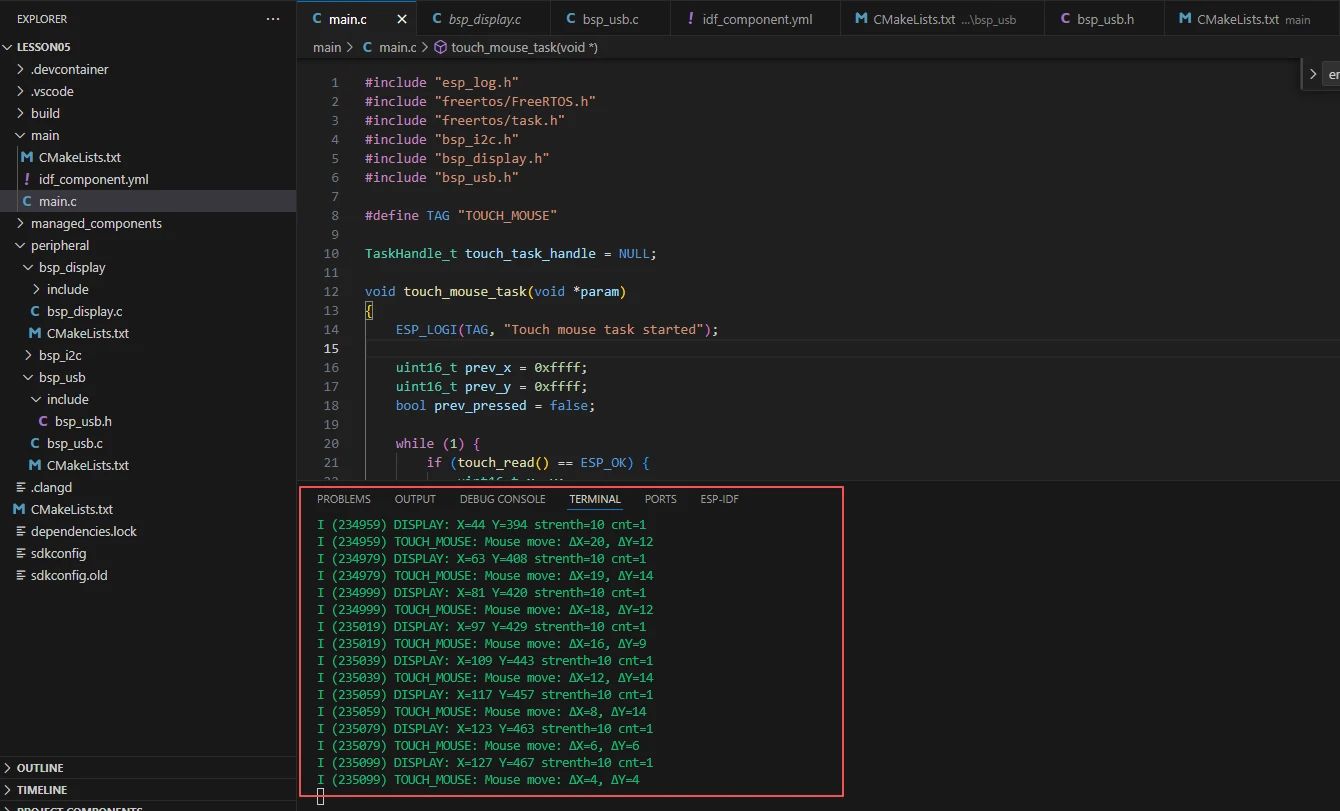
Observe whether the serial monitor prints Mouse move: dX=..., dY=...; the delta values should change sign (positive/negative) according to the direction of the finger swipe.
6. Key Code Explanation
const uint8_t hid_report_descriptor[] = {
    TUD_HID_REPORT_DESC_MOUSE(HID_REPORT_ID(HID_ITF_PROTOCOL_MOUSE))
};
The HID report descriptor tells the host that this device is a mouse and specifies the data format it sends. If the descriptor is incorrect or missing, the host cannot enumerate it as a mouse, and Device Manager will show a yellow exclamation mark. HID_REPORT_ID lets the host identify this as a mouse protocol report.
TUD_CONFIG_DESCRIPTOR(1, 1, 0, TUSB_DESC_TOTAL_LEN,
                      TUSB_DESC_CONFIG_ATT_REMOTE_WAKEUP, 100),
TUD_HID_DESCRIPTOR(0, 4, false, sizeof(hid_report_descriptor), 0x81, 16, 10),
The configuration descriptor declares the device's power capabilities (200 mA) and attributes; the HID interface descriptor declares endpoint 0x81, a maximum packet size of 16 bytes, and a polling interval of 10 ms. If the power current is configured unreasonably, some hosts may refuse to enumerate; the polling interval affects mouse responsiveness.
The updated USB component exposes is_usb_ready() and send_hid_mouse_report(). A report is sent only after enumeration is complete; the first argument keeps the primary button pressed while the finger is down. Sending before the host is ready drops the report.
int16_t delta_x = (int16_t)x - (int16_t)prev_x;
int16_t delta_y = (int16_t)y - (int16_t)prev_y;
while (delta_x != 0 || delta_y != 0) {
    int8_t step_x = (delta_x > INT8_MAX) ? INT8_MAX :
                    (delta_x < INT8_MIN) ? INT8_MIN : (int8_t)delta_x;
    int8_t step_y = (delta_y > INT8_MAX) ? INT8_MAX :
                    (delta_y < INT8_MIN) ? INT8_MIN : (int8_t)delta_y;
    send_hid_mouse_report(1, step_x, step_y);
    delta_x -= step_x;
    delta_y -= step_y;
}
Touch coordinates are absolute, whereas HID mouse movement uses signed 8-bit relative deltas. The new loop splits a large touchscreen jump into safe INT8_MIN..INT8_MAX steps, preventing overflow and preserving motion. When the finger is lifted, the task sends a zero-motion release report and resets prev_x/prev_y, so the next touch starts without a cursor jump.
7. Experimental Results
After the program is flashed and reset, the serial monitor outputs:
I (xxx) TOUCH_MOUSE: Starting Touch Mouse application
I (xxx) USB_HID: Initializing USB HID Mouse
I (xxx) USB_HID: USB HID Mouse initialization completed
I (xxx) TOUCH_MOUSE: Touch Mouse application started successfully
I (xxx) TOUCH_MOUSE: Touch mouse task started
A new mouse device Advance-P4 HID Mouse appears in the computer's Device Manager. When a finger slides across the touchscreen, the computer cursor follows the movement and the serial port prints the movement deltas in sync.
After the finger lifts, printing stops and the cursor stops moving. If the device is not enumerated, first check whether the USB data cable supports data transfer and whether external_phy is false; if the cursor does not move, check the return value of tud_hid_ready and whether the touch coordinates are normal.