Lesson07_MIPI_DSI_LCD: ESP32-P4 Lighting Up a MIPI DSI Screen
1. Course Introduction
In this lesson, we use ESP-IDF to drive and light up the EK79007 LCD panel (1024×600, RGB565) via MIPI DSI, and display the text "Hello Elecrow" at the center of the screen using LVGL. After the program is flashed and the development board is powered on and reset, LDO3/LDO4 first supply power to the panel's IO domain, the MIPI DSI bus and EK79007 panel complete initialization, and then the backlight (GPIO31 PWM) is turned on to maximum brightness, displaying a white background with black 42-point greeting text.
This lesson serves as the foundation of the display course, introducing for the first time the MIPI DSI high-speed bus, LDO power supply, and the LVGL graphics library. Through this experiment, learners will complete the full display chain validation covering power management, LCD panel initialization, LVGL rendering, and backlight control.
2. Learning Objectives
- Be able to open the Lesson07 project in ESP-IDF and set the target chip to
esp32p4. - Be able to explain the role of LDO3/LDO4 in the LCD power supply chain, and why the backlight must be turned on only after the LCD has been initialized.
- Be able to explain the relationship among the MIPI DSI bus, DBI I/O, and DPI panel configuration.
- Be able to complete compilation and flashing, and observe whether the screen displays the "Hello Elecrow" text.
- Be able to determine whether the power supply, DPI, and LVGL stages are functioning properly based on whether the screen lights up and whether the text is displayed.
3. Preparations
- Hardware: One CrowPanel Advanced 7 / 9 / 10.1inch ESP32-P4 HMI AI Display development board, and one USB Type-C data cable that supports data transmission.
- Compatibility note: The hardware and software code for the 7 / 9 / 10.1-inch development boards are all interchangeable; only the board dimensions differ. Please select the appropriate model based on the display size and use case.
- Software: VS Code, ESP-IDF Extension (ESP-IDF v5.5.4 and above).
- Project dependencies: Keep the
main/main.cfile, theperipheral/bsp_illuminatecomponent, and theesp_lcd_ek79007,esp_lvgl_port, andlvglmanaged components. - Configuration: Target chip
esp32p4.
Code download link:
4. Software Operation Steps
Open the ESP-IDF Extension panel in VS Code, click Open ESP-IDF Project, and select the Lesson07-Turn_on_the_screen folder.

First select the code runtime environment ESP-IDF v5.5.4, set the flashing method to UART, and then select the serial port that actually corresponds to the development board. Next, click Set Espressif Device Target in the ESP-IDF Extension panel and select esp32p4. After the setup is complete, the status bar should display ESP-IDF v5.5.4, UART, the required COM port, and ESP32-P4.

Click SDK Configuration Editor at the bottom status bar of VS Code or in the ESP-IDF extension panel, and wait until the configuration page is fully loaded before modifying any parameters. If the page is still loading, do not execute Build immediately.


Enter flash in the search box and ensure Flash SPI mode: QIO; Flash Sampling Mode: STR Mode; Flash SPI speed: 80 MHz; Flash size: 16 MB. These parameters should be consistent with the onboard Flash of the Advance-P4.

In the SDK Configuration Editor search box, enter CONFIG_IDF_EXPERIMENTAL_FEATURES and check this option to enable experimental features.

After enabling experimental features, search for PSRAM and enable PSRAM in the order shown in the figure, and set its operating frequency to 200 MHz to provide sufficient memory for the screen frame buffer.

Next, search for font and enable the LVGL Montserrat 42-point font used in the code; otherwise the corresponding font will not be found during compilation, or the text will not display properly after running.

Finally, import the custom partition table provided by the project to reasonably allocate the storage space of each partition in the Flash, ensuring that resources such as images, fonts, and local files can be read and written normally.

After checking that the configuration is correct, click Save in the upper right corner; confirm that the changes have been saved, then execute Build to compile.
Click Full Clean to clear the cache left by the previous compilation. Execute this operation after the first compilation, after switching project configurations, or after modifying SDK parameters, to avoid old configurations affecting the new compilation results.

Click Build to compile the project. The first compilation will automatically download components such as esp_lcd_ek79007, esp_lvgl_port, and lvgl. Upon success, Project build complete will be output.
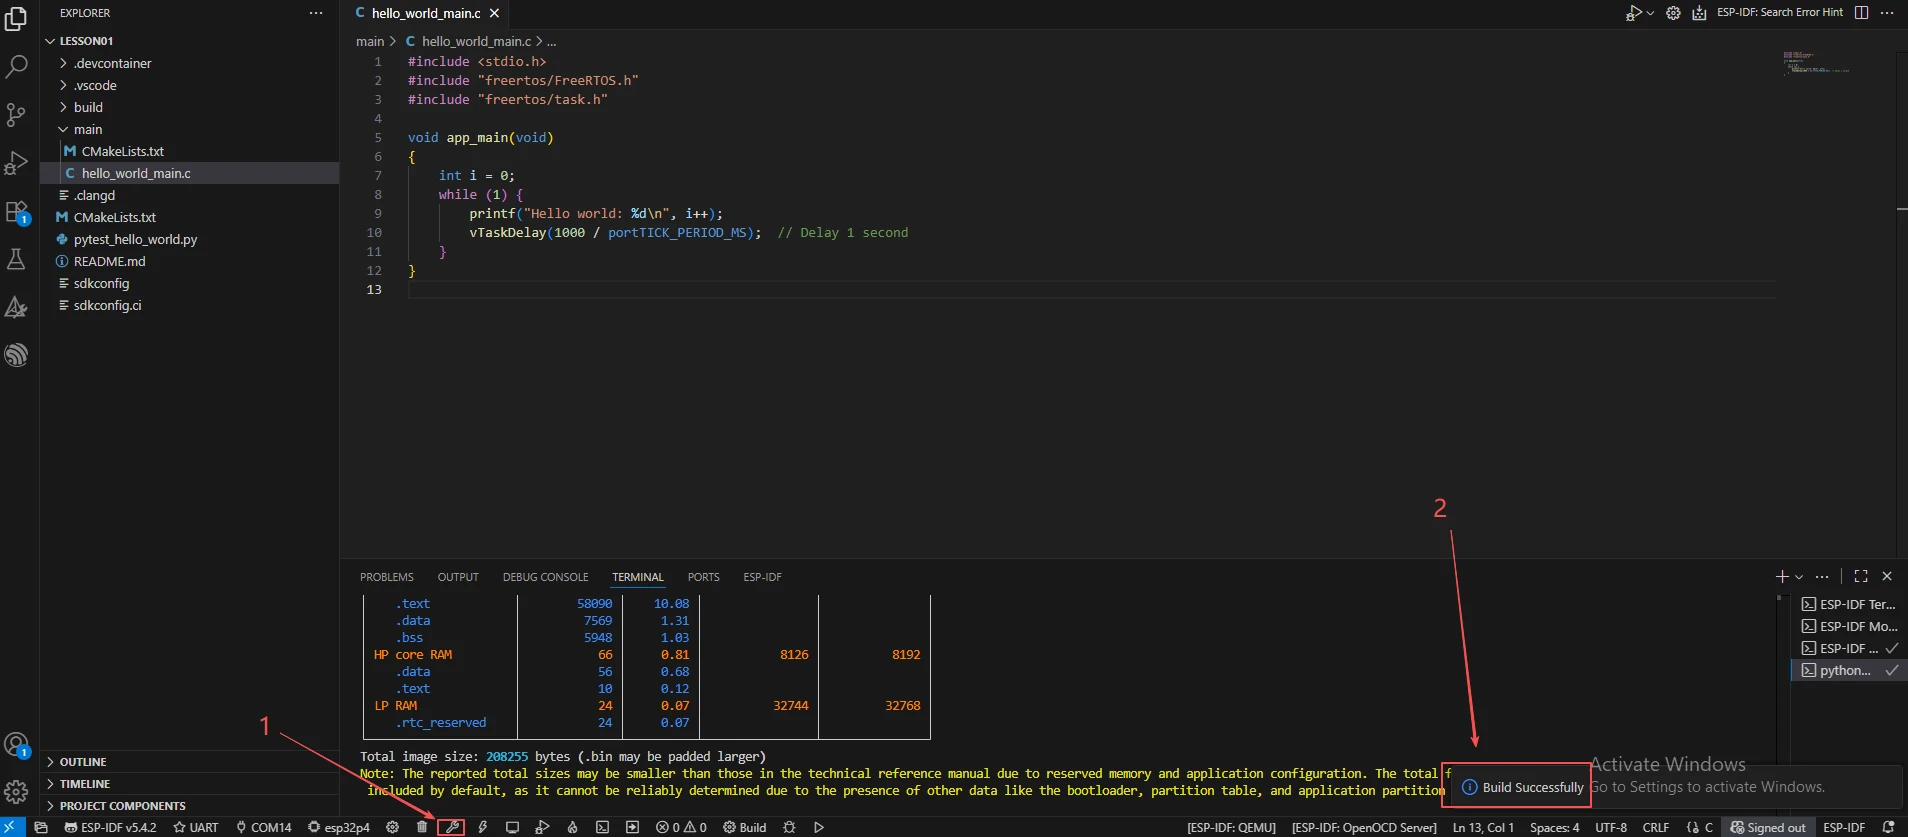
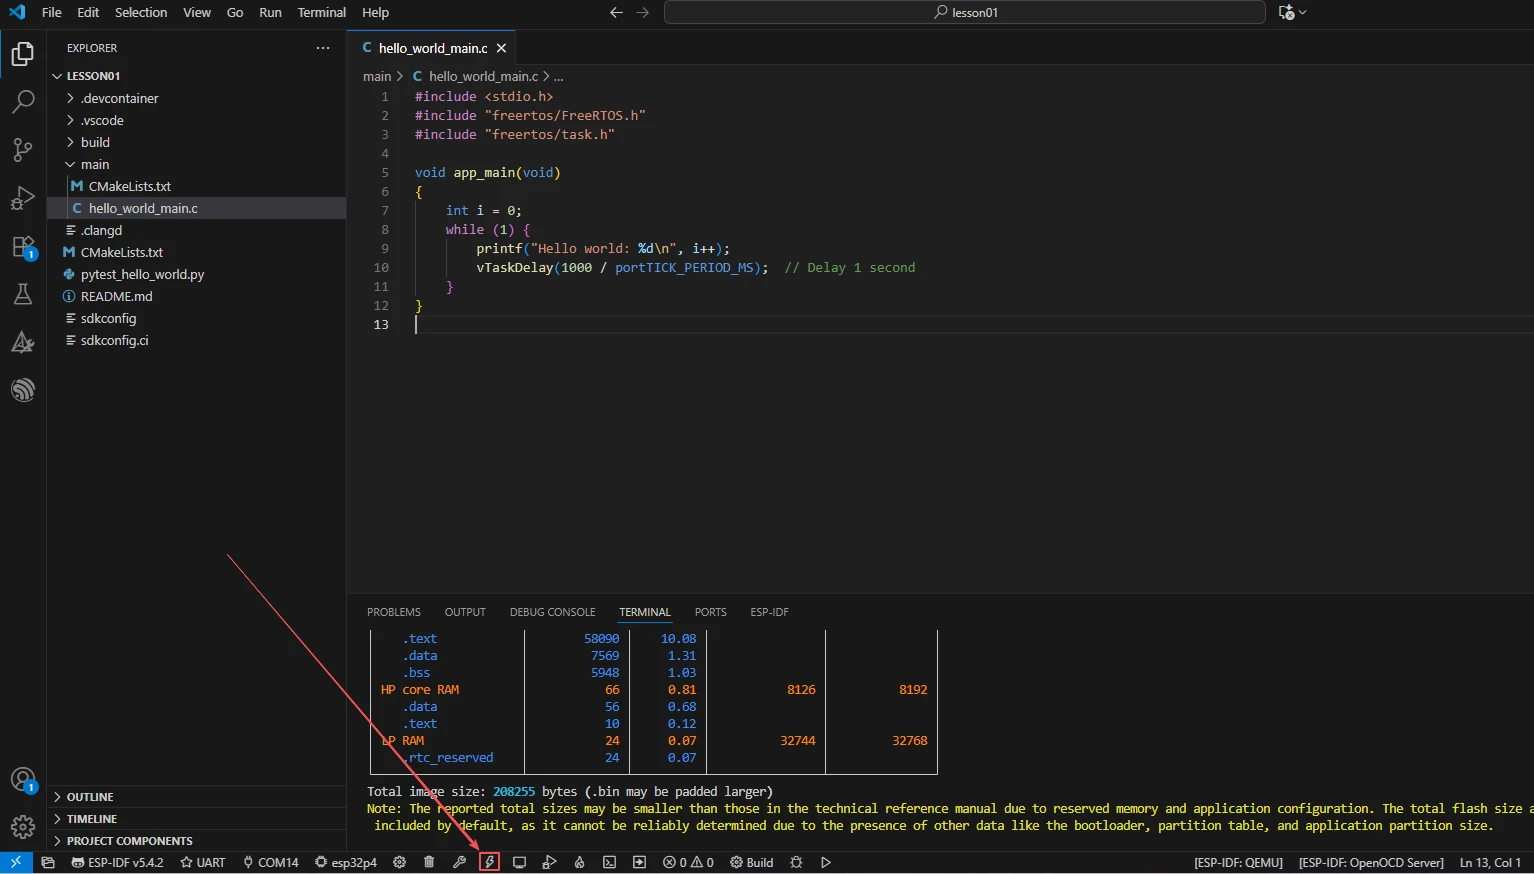
Confirm that the development board is connected to the computer via USB, click Select Port to Use to select the serial port, and click Flash to flash the firmware.
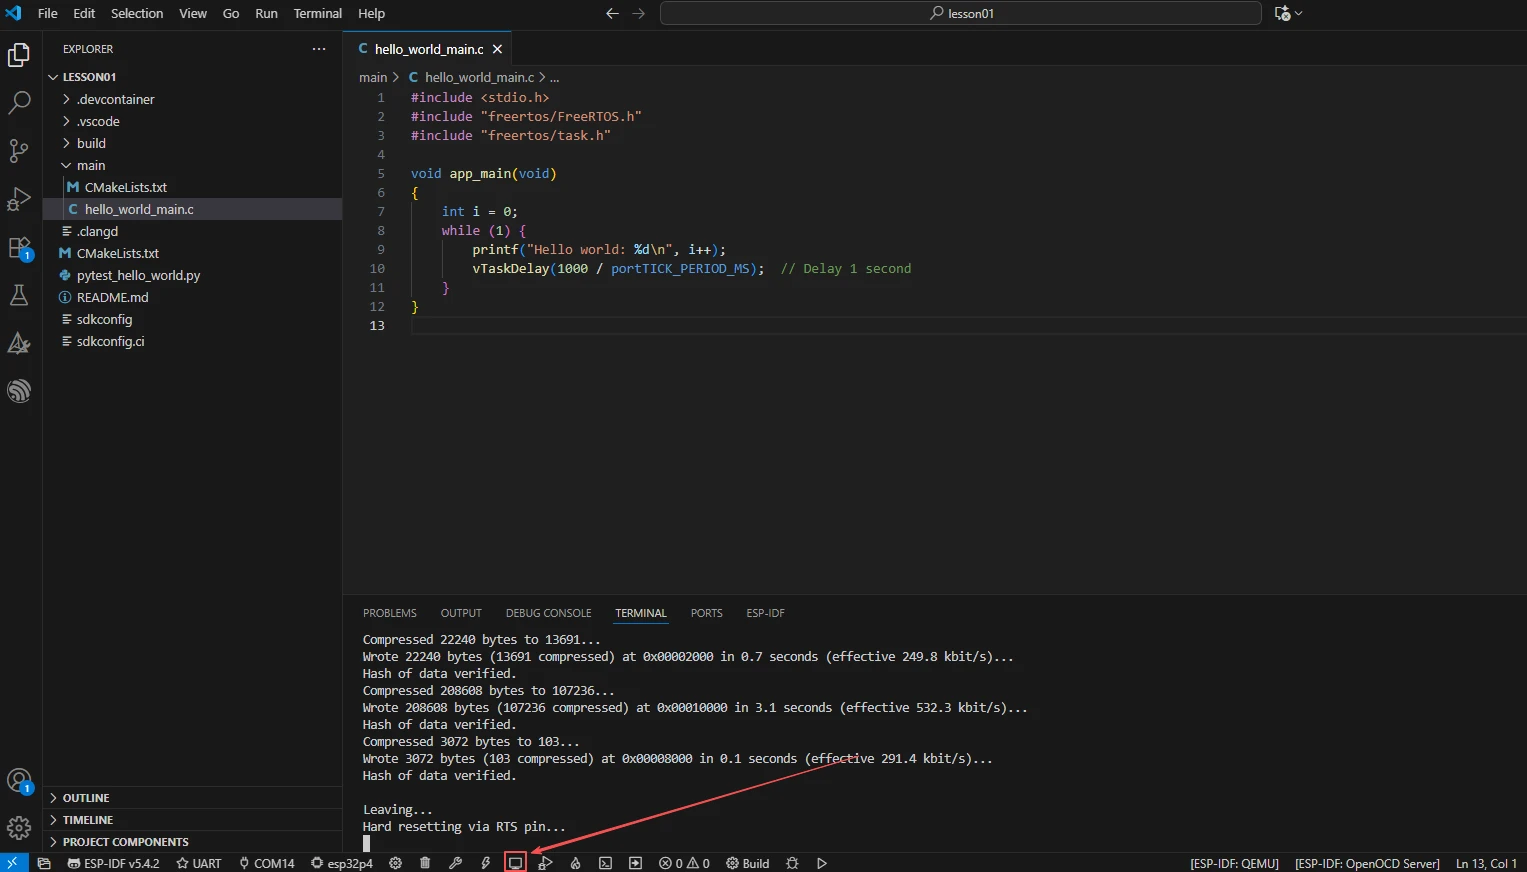
After flashing is complete, click Monitor to open the serial monitor; you should see the logs LCD init success and LCD backlight opened. Press Ctrl + ] to exit the monitor.
After flashing is complete, wait for the device to reset and observe whether the screen lights up and displays text.

Finally, you can use the one-click operation button in the ESP-IDF status bar to continuously execute compilation, flashing, and opening the serial monitor. Use this only after the project configuration, serial port, and code have all been confirmed correct; if you need to locate a problem, you should still follow the steps above and execute them one by one.

5. Hardware Operation Steps
Connect the ESP32-P4 development board to the computer using a USB data cable. Confirm that the LCD ribbon cable is properly connected to the FPC interface of the development board.

After flashing is complete and the device is reset, observe whether the screen backlight lights up. If the backlight does not light up, first check the LDO and backlight PWM configuration.

Observe whether the screen displays a white background with centered "Hello Elecrow" black text; the text should be clear, without screen tearing or misalignment.
As shown in the figure, an additional power cable may be used to supply power to the Advance-P4, to ensure stable screen display.

6. Key Code Explanation
esp_ldo_channel_config_t ldo3_cof = { .chan_id = 3, .voltage_mv = 2500 };
err = esp_ldo_acquire_channel(&ldo3_cof, &ldo3);
esp_ldo_channel_config_t ldo4_cof = { .chan_id = 4, .voltage_mv = 3300 };
err = esp_ldo_acquire_channel(&ldo4_cof, &ldo4);
LDO3 outputs 2.5 V to the IO domain, and LDO4 outputs 3.3 V to the panel's analog power supply. These two voltages must be ready before the DSI bus initialization; otherwise the panel will not be able to respond to commands. If the voltage is set incorrectly (for example, LDO4 set to 1.8 V), the panel may fail to light up at all or operate unstably.
err = display_init();
if (err != ESP_OK) {
    init_fail_handler("LCD", err);
}
err = set_lcd_blight(100);
if (err != ESP_OK) {
    init_fail_handler("LCD Backlight", err);
}
display_init() now runs only after both LDO channels are acquired and checked. Each critical step is validated; init_fail_handler() logs the module name and keeps reporting the error once per second. The backlight is enabled only after the LCD/LVGL stack is ready, avoiding a visible half-initialized frame.
esp_lcd_dsi_bus_config_t bus_config = {
    .num_data_lanes = 2,
    .lane_bit_rate_mbps = 900,
};
err = esp_lcd_new_dsi_bus(&bus_config, &mipi_dsi_bus);
The MIPI DSI bus is configured with 2 data lanes at 900 Mbps. The number of lanes must match the panel hardware; writing it incorrectly will result in no image or failure to refresh part of the area. A bit rate that is too low will cause insufficient frame rate and screen tearing.
const esp_lcd_dpi_panel_config_t dpi_config = {
    .dpi_clock_freq_mhz = 51,
    .video_timing = {
        .h_size = 1024, .v_size = 600,
        .hsync_back_porch = 160, ...
    },
};
The DPI video timing must match the EK79007 panel specifications. h_size/v_size are the active display area, and the porch values are the blanking area. If h_size/v_size are written incorrectly, the image will be misaligned or scaled abnormally; incorrect porch values will cause image shift or black borders.
lv_obj_t *screen = lv_screen_active();
lv_obj_t *hello_label = lv_label_create(screen);
lv_label_set_text(hello_label, "Hello Elecrow");
lv_style_set_text_font(&label_style, &lv_font_montserrat_42);
lv_obj_add_style(hello_label, &label_style, LV_PART_MAIN);
lv_obj_center(hello_label);
The updated LVGL flow obtains the active screen with lv_screen_active(), creates the label, applies a local style, and centers it. All object operations are enclosed by lvgl_port_lock()/lvgl_port_unlock() so they cannot race with the LVGL task. The Montserrat 42 font must remain enabled in the LVGL configuration.
7. Experimental Phenomena
After the program is flashed and reset, the serial monitor outputs:
I (xxx) MAIN: Start Hello Elecrow Display Demo
I (xxx) ILLUMINATE: ...
I (xxx) MAIN: LCD init success
I (xxx) MAIN: LCD backlight opened (brightness: 100)
I (xxx) MAIN: Show 'Hello Elecrow' success
Screen behavior: The backlight lights up to maximum brightness, displaying a white background, with black "Hello Elecrow" text (Montserrat 42-point font) appearing at the center of the screen. The text is clear, centered, and free of screen tearing. The image should remain stable without flickering, tearing, or partial loss. If the backlight is on but no text appears, check whether the LVGL font is enabled and whether lvgl_port_lock succeeded; if the screen does not light up at all, prioritize checking the LDO voltage and backlight PWM.