2.4_2.8inch_Lesson01_Serial_Output_and_Monitor
1. Course Introduction
This lesson uses the ESP32-S3 main controller on the Elecrow CrowPanel Advance 2.4 inch development board to complete board configuration, compilation, flashing, and serial monitoring in the Arduino IDE. The program does not initialize the LCD or touchscreen; instead, it outputs Hello, World! and an incrementing counter value through the USB debug serial port approximately once per second, in order to verify the "computer — USB — development board — program — serial monitor" chain.
This lesson serves as the starting point for the subsequent networking, display, wireless, and sensor lessons. Once you confirm that the board can reliably output logs, troubleshooting the later experiments will become much easier.
Reference materials:
2. Learning Objectives
- Be able to open the project and confirm that the board's serial communication is working properly.
- Be able to set the correct baud rate and observe the incrementing output in the Serial Monitor.
- Be able to determine, based on the serial output, whether the USB connection, upload, and monitor configuration are correct.
3. What You Need
- CrowPanel Advance 2.4inch development board.
- A USB data cable that supports data transfer.
- Arduino IDE and the ESP32 Arduino development environment.
esp32 by Espressif Systems3.3.8.- Project:
Serial_port_printing.ino.
Code and Resource Download
Code download: - Serial_port_printing
4. Software Operation Steps
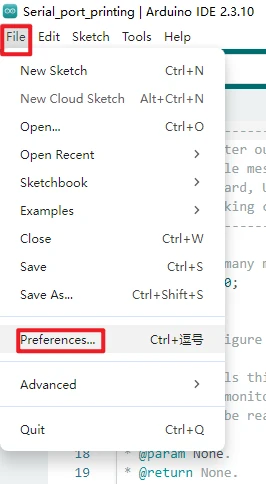
Open Arduino IDE 2.3.10 and go to File > Preferences. (There is no specific version requirement for the Arduino IDE.)
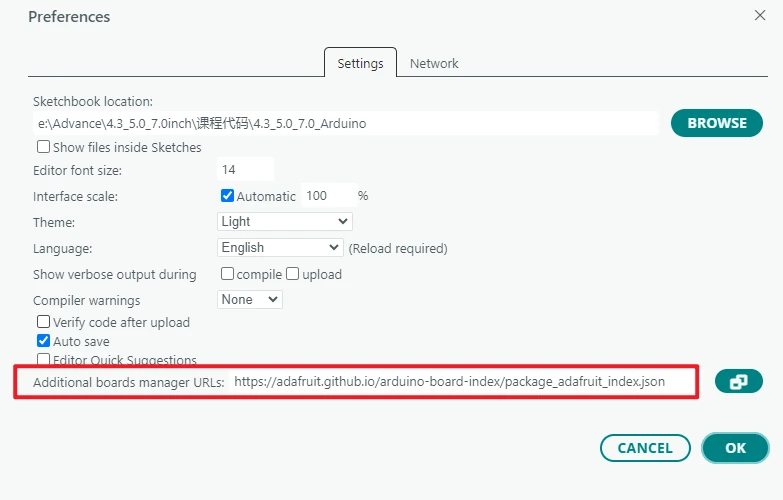
In Additional boards manager URLs, add the Espressif ESP32 board index URL:
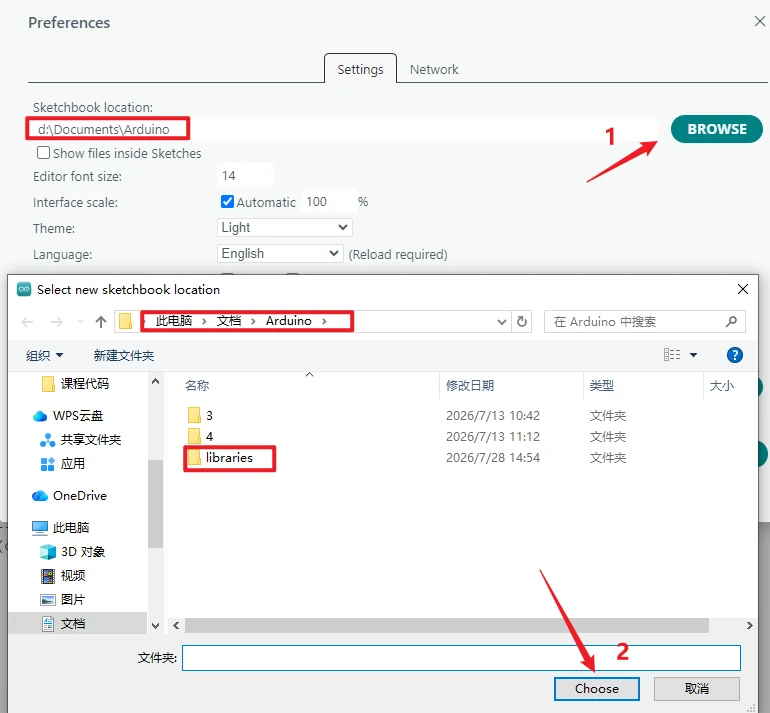
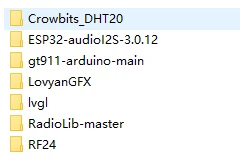
Import the Arduino library files: before running the example program, first import the Arduino library files required by the project. Go to File → Preferences, check the Sketchbook location, and navigate to the libraries folder under that path.
Link to two ways to import third-party Arduino IDE libraries: https://www.elecrow.com/wiki/Arduino_IDE_Library_Import_Guide.html
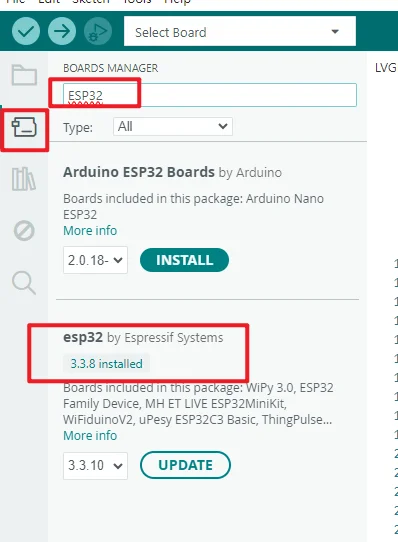
Open Tools > Board > Boards Manager, search for esp32, and make sure esp32 by Espressif Systems version 3.3.8 is installed.
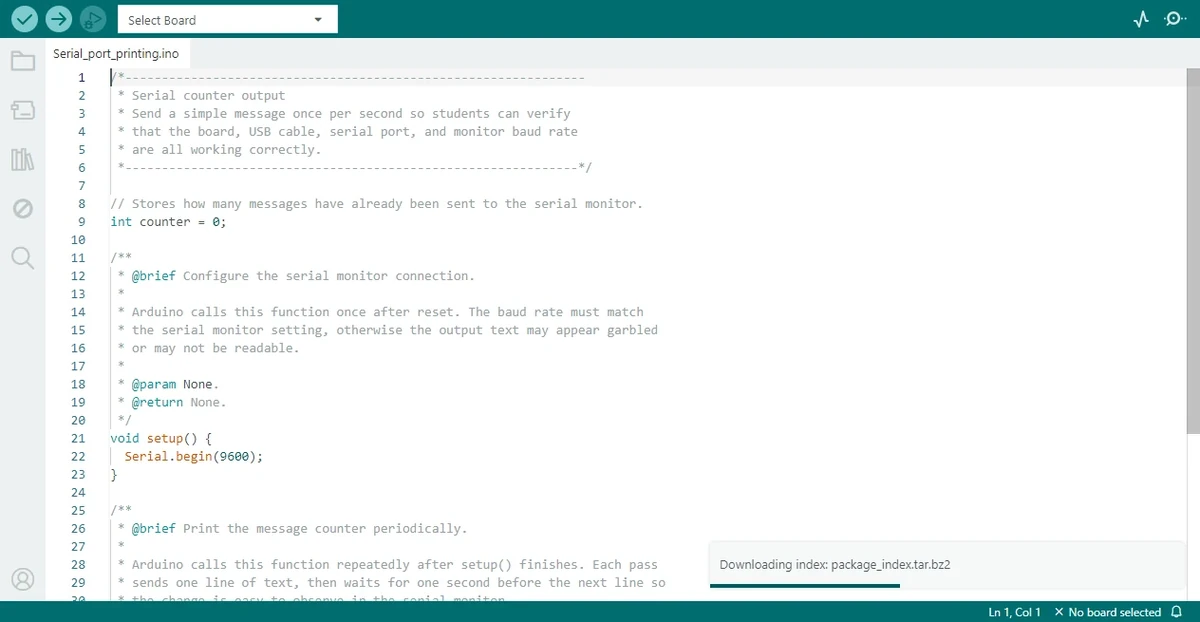
Open Serial_port_printing.ino with the Arduino IDE.
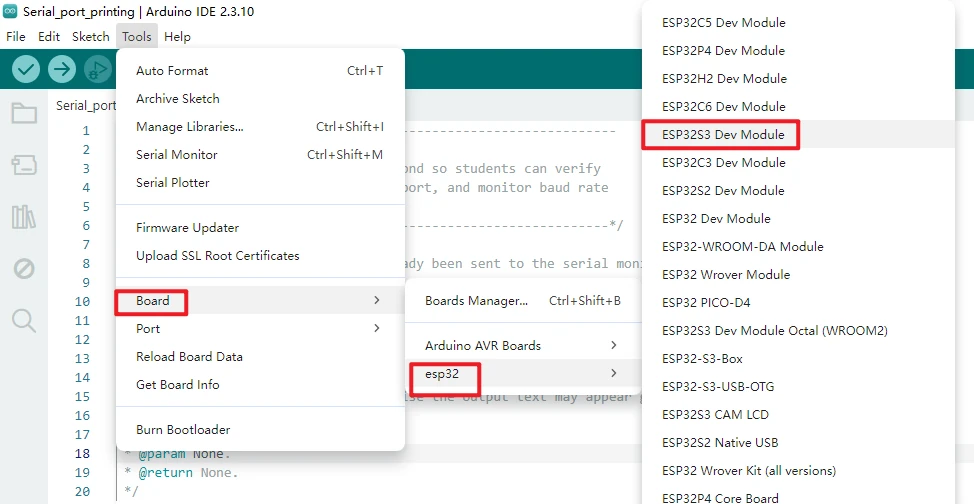
Under Tools > Board > esp32, select ESP32S3 Dev Module.
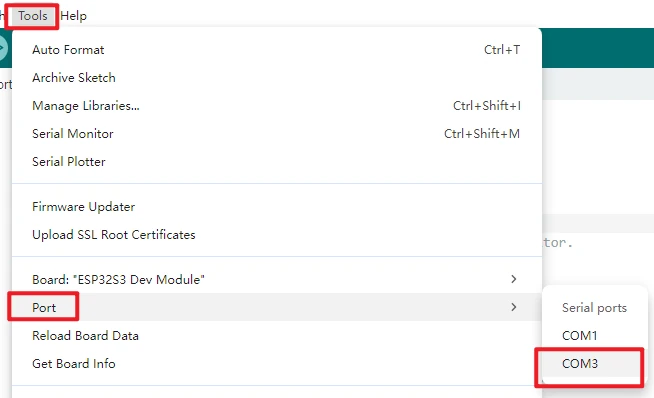
After connecting the board, select the newly appeared device port under Tools > Port.
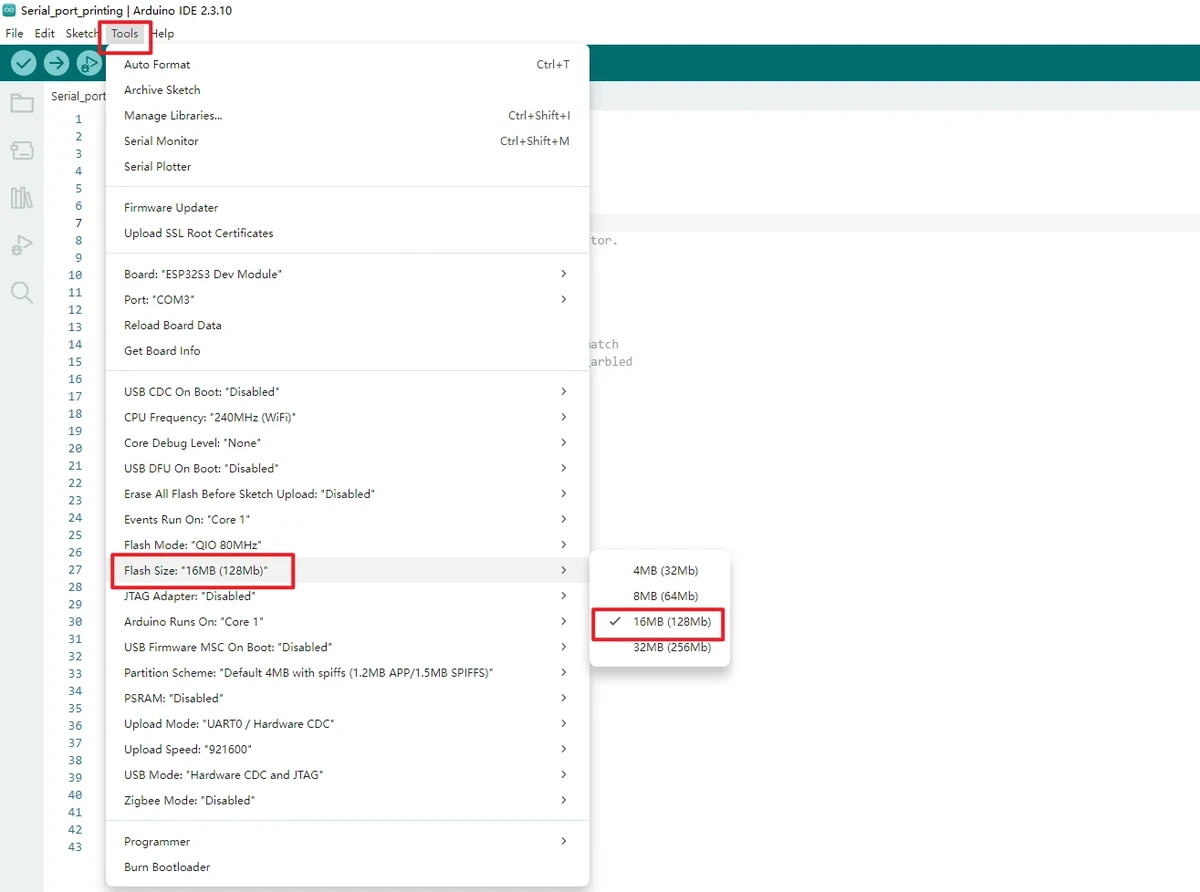
Set Flash Size to 16MB (128Mb).
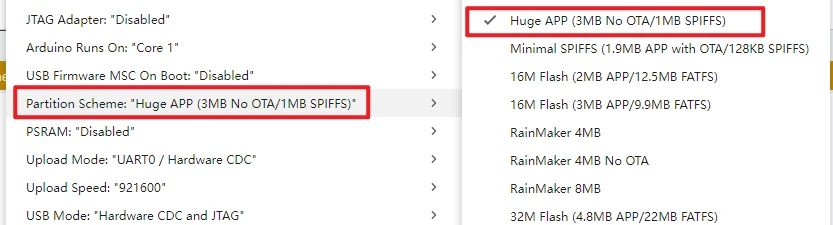
Set the Partition Scheme to Huge APP (3MB No OTA/1MB SPIFFS).
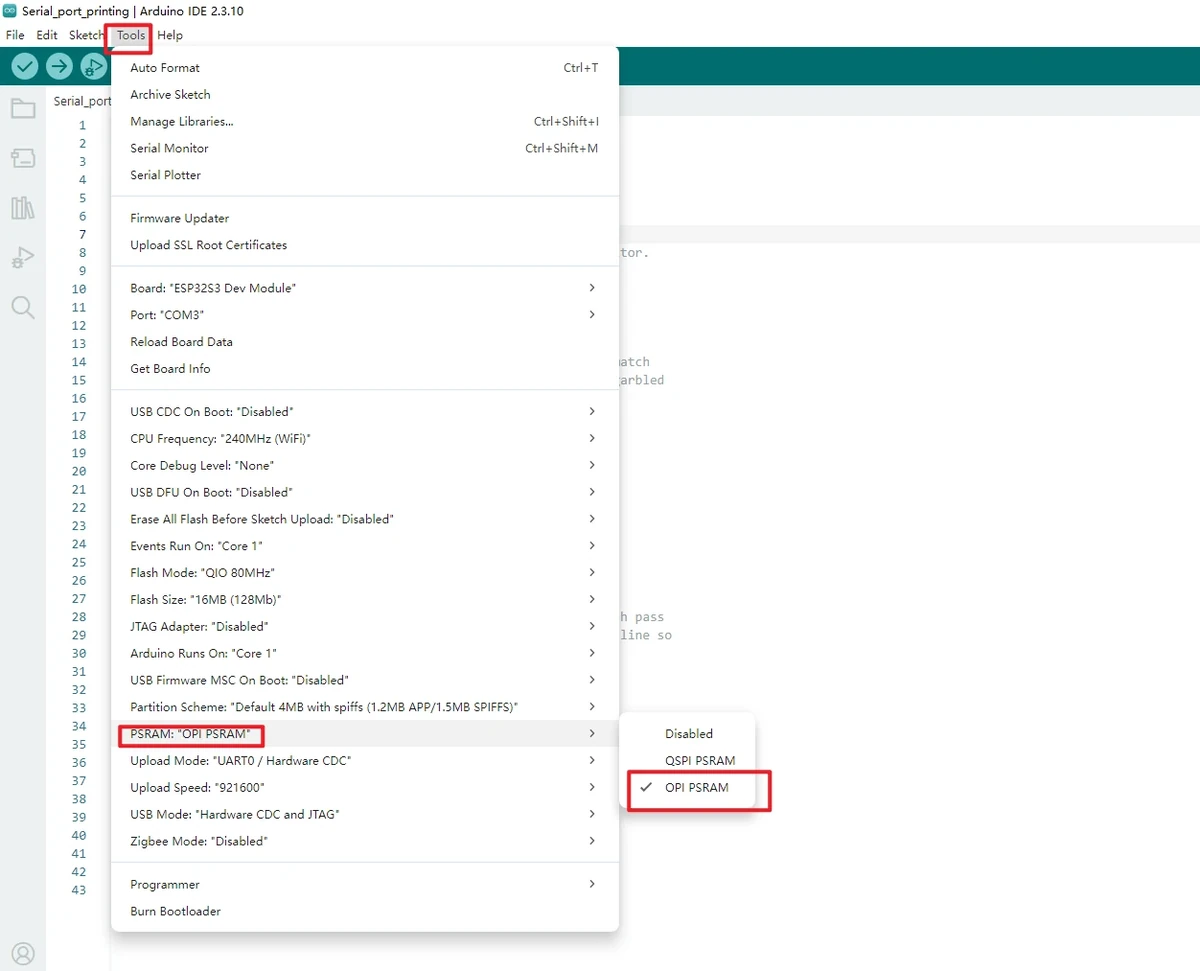
Set PSRAM to OPI PSRAM.
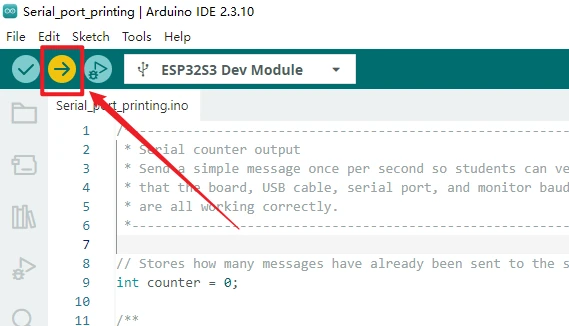
Click Upload to compile and wait for the upload to finish. If it is stuck at Connecting..., check for port conflicts and use the BOOT/RESET download mode as required by the board.
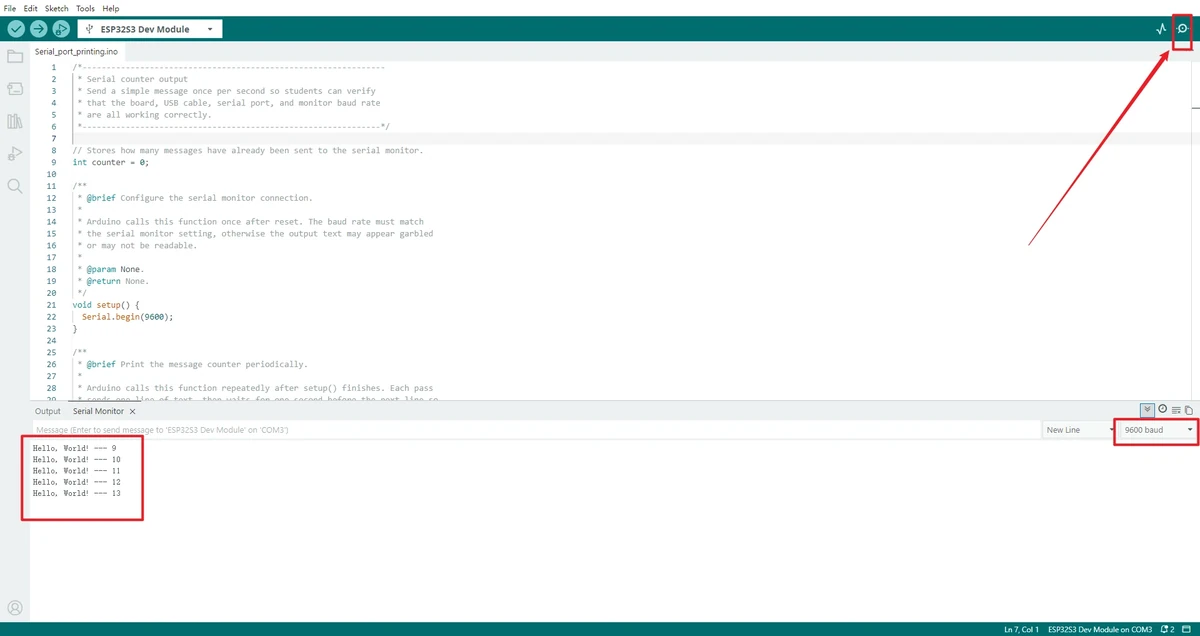
Open the Serial Monitor in the top-right corner, set it to 9600 baud, and observe the continuous output.
5. Hardware Operation Steps
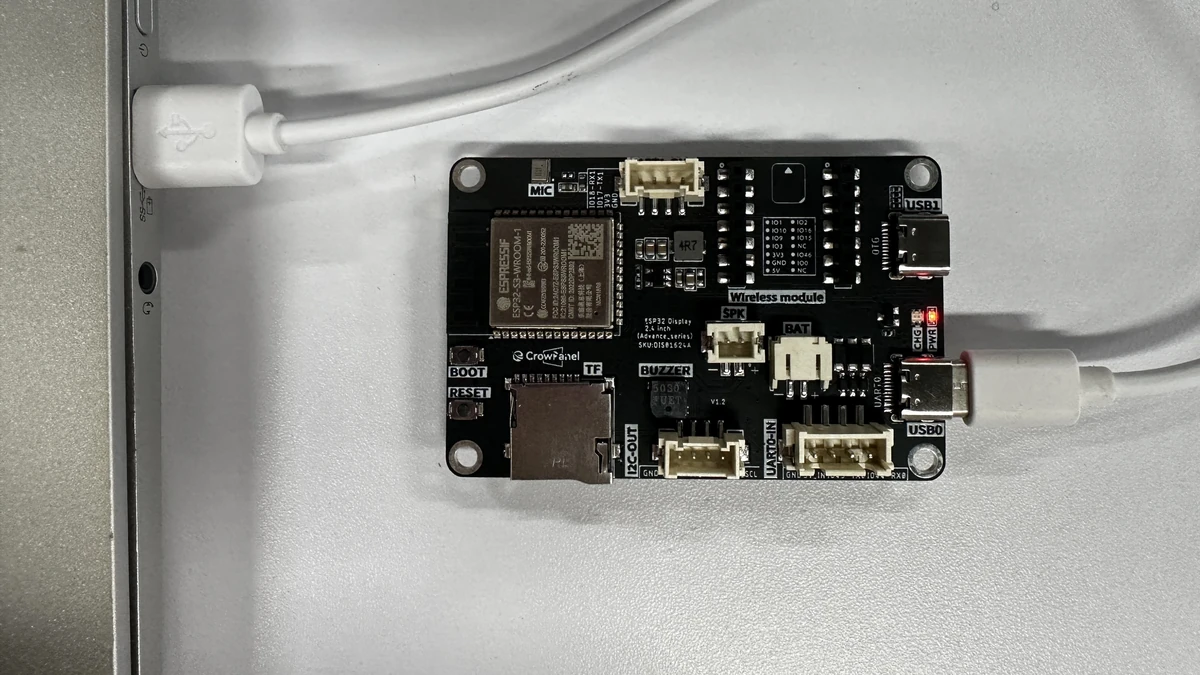
Connect the development board to your computer using a USB cable that supports data transfer.
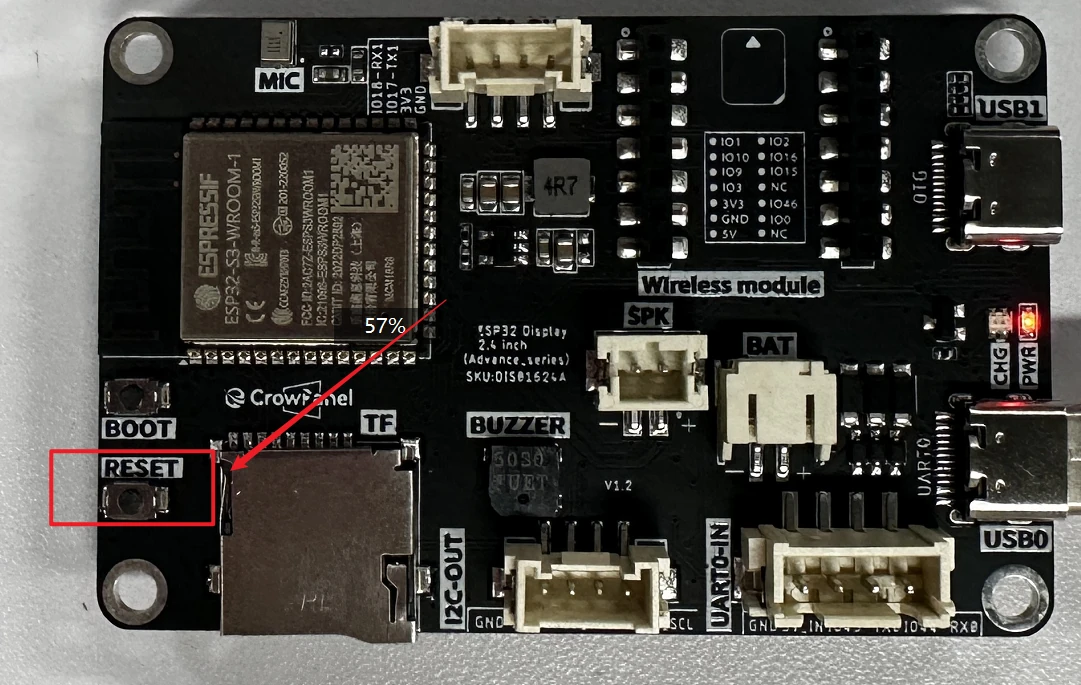
After flashing is complete, press RESET and observe the Serial Monitor to confirm that the output increments once per second. It is normal that the LCD does not display Hello, World!, because this lesson does not include any LCD drawing code.
6. Key Code Explanation
Serial.begin(9600);
Serial.print("Hello, World! ");
Serial.println(counter);
counter++;
delay(1000);
Serial.begin(9600) sets the monitor's communication speed, which must match the computer side. The counter is incremented by 1 on each loop, allowing the learner to confirm that the program is indeed running continuously rather than printing only once and then stopping. delay(1000) deliberately spaces out the output intervals to make it easier to visually inspect stability.
7. Observed Behavior
After reset, the Serial Monitor should display something similar to:
Acceptance criteria: the text shows no garbled characters; the number increases by 1 on each line; the interval between adjacent outputs is approximately 1 second; operation continues without interruption; after pressing RESET, the count restarts from 0. Whether the LCD displays the course text is not part of this lesson's acceptance criteria.
8. Code Download
Code download link: Serial_port_printing