2.4_2.8inch_Lesson02_Network_Audio_Playback
1. Course Introduction
In this lesson, we use the CrowPanel Advance 2.4-inch development board to connect to Wi-Fi and play a song through an online audio URL. After the program starts running, it first connects to the wireless network, then opens the MP3 network audio stream via audio.connecttohost(), and finally the Audio library handles network reading, audio decoding, and I2S output so that the speaker can play the online song.
This lesson's project runs in ESP-IDF 5.5.4, with the target chip being esp32s3. The project code uses the Arduino-compatible layer to call the Wi-Fi and audio libraries, while the software operation steps follow the VS Code + ESP-IDF workflow of Build, Flash, and Monitor.
Reference materials:
2. Learning Objectives
- Be able to open and flash the audio playback project within the ESP-IDF 5.5.4 environment.
- Be able to configure the Wi-Fi SSID and password.
- Be able to understand the relationship between the online song URL, the song ID, and
audio.connecttohost(). - Be able to explain why this lesson requires a directly accessible MP3 audio stream.
- Be able to determine from the serial log and the speaker sound whether networking, decoding, and I2S output are working normally.
3. What You Need to Prepare
- CrowPanel Advance 2.4-inch Version 1.1 / 1.2 development board.
- A USB data cable that supports data transfer.
- A Wi-Fi network with internet access.
- An external speaker, connected to the
SPKaudio output connector on the development board. - VS Code, the ESP-IDF extension, and the
ESP-IDF 5.5.4already installed in Lesson01. - This lesson's project:
2.4_2.8_ESP-IDF/Lesson02-Open_http_mp3_small
Note: To play online songs, you must ensure that the Wi-Fi network connected to the development board can access the corresponding audio URL. Corporate networks, campus networks, or hotspots that require web-based login authentication may result in a Wi-Fi connection that is established but unable to play songs.
Code and Resource Download
Code download: - Lesson02-Open_http_mp3_small
4. Software Operation Steps
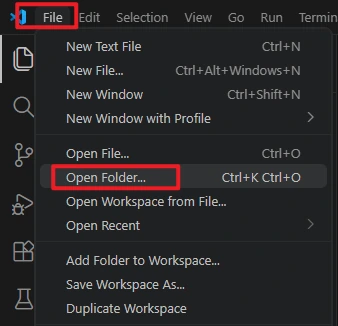
In VS Code, select File -> Open Folder... and open the root directory of this lesson's ESP-IDF project.
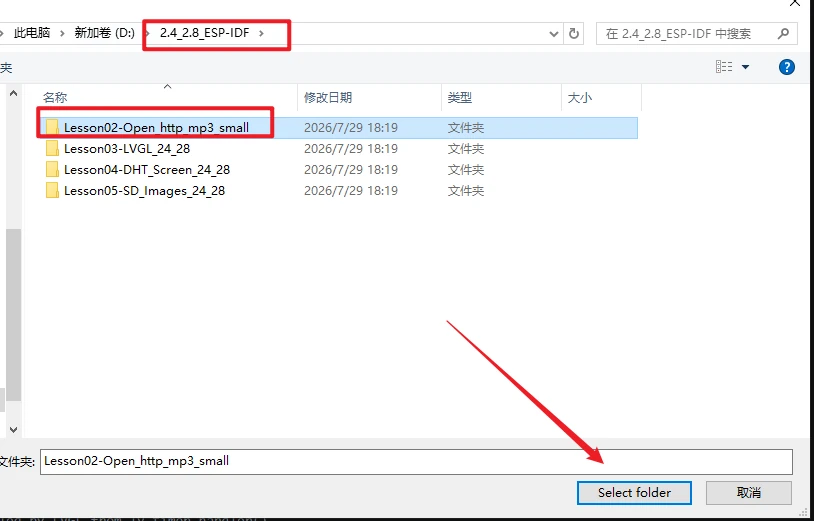
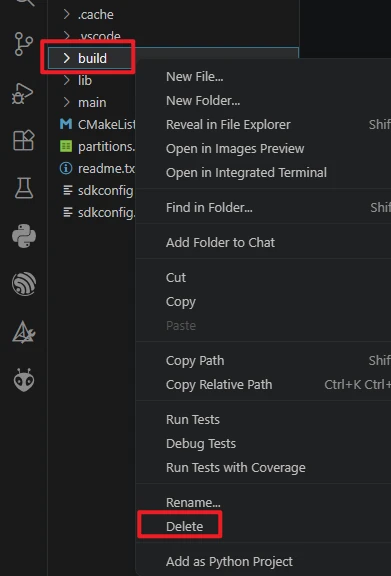
After opening the project, first run Build -> Delete to clear the build cache and path records generated by the old project. It is recommended to do this step after switching computers, switching ESP-IDF versions, or copying the project.
Confirm that VS Code has loaded ESP-IDF 5.5.4. If the version shown in the status bar or the ESP-IDF extension is incorrect, return to the installation steps in Lesson01 and reselect the 5.5.4 environment.

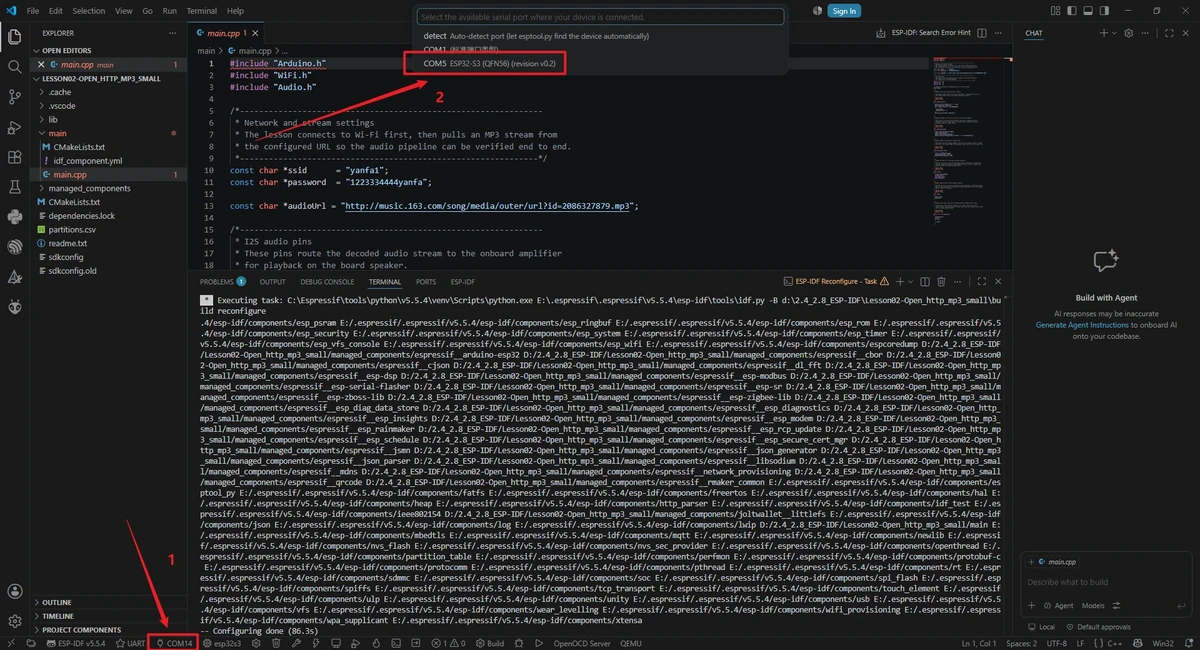
Connect the development board using a USB cable, then click the serial port location in the VS Code bottom status bar and select the actual COM port detected by your computer.
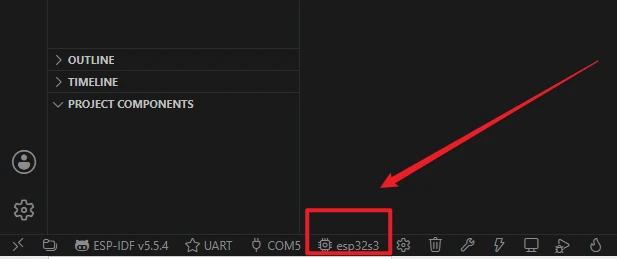
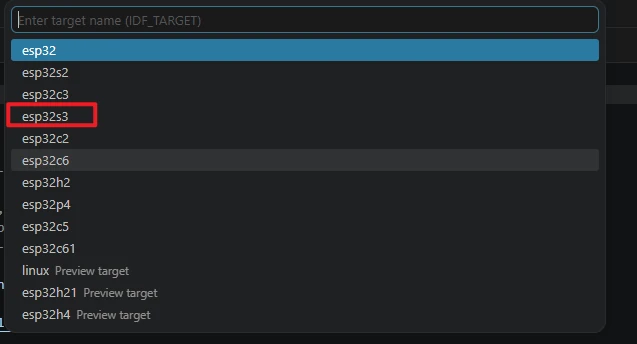
Click the target chip location in the status bar, or run the command ESP-IDF: Set Espressif Device Target, and select esp32s3 as the target chip. The reference images are provided to illustrate the entry points; the actual selection should follow this course's esp32s3.
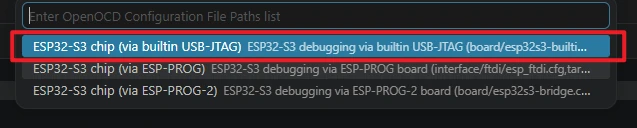
When selecting the debug configuration, choose the configuration that matches the ESP32-S3 development board, such as the ESP32-S3 built-in USB-JTAG configuration. Ordinary UART flashing mainly depends on the serial port and the correct target chip settings.
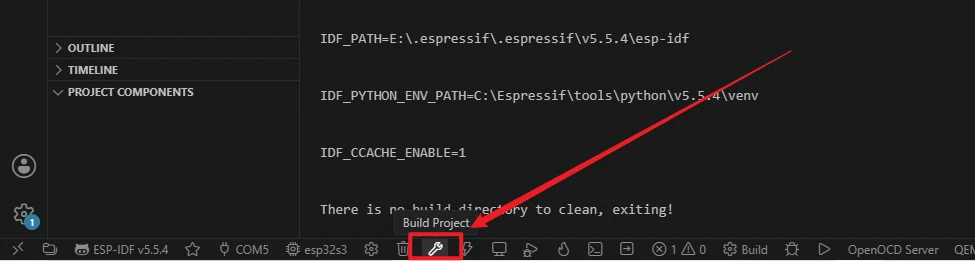
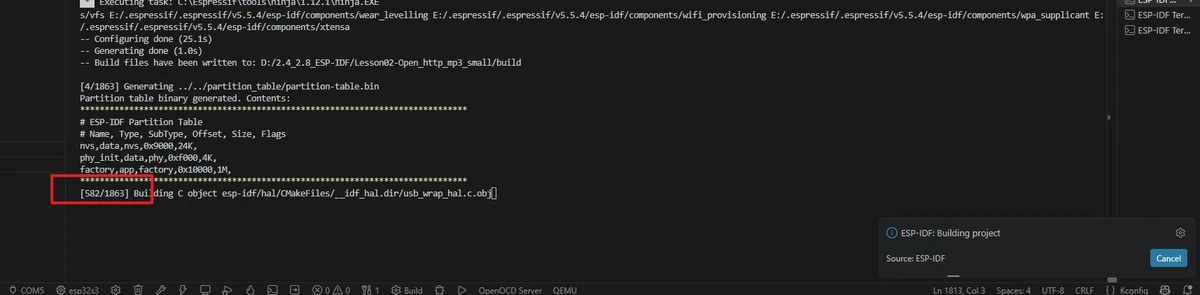
Click the Build button in the status bar to start compilation, or run the following command in the ESP-IDF terminal:
The first compilation needs to download and generate dependencies, so it will take a relatively long time. Continue to the flashing step only after you see the Build success message.
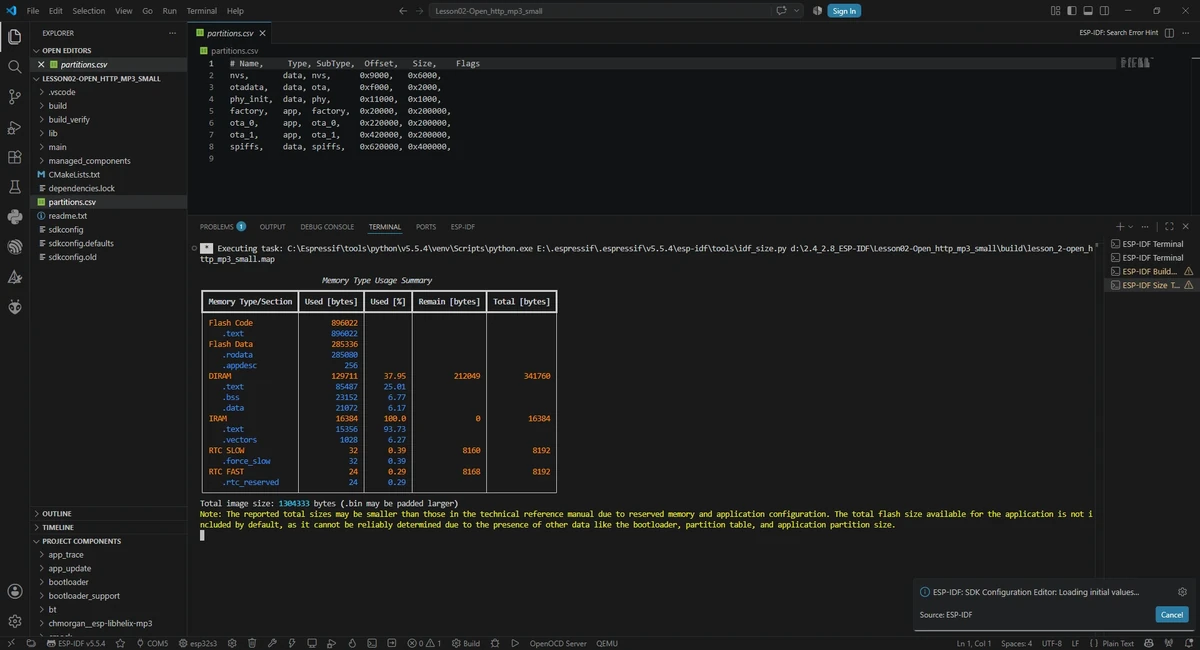
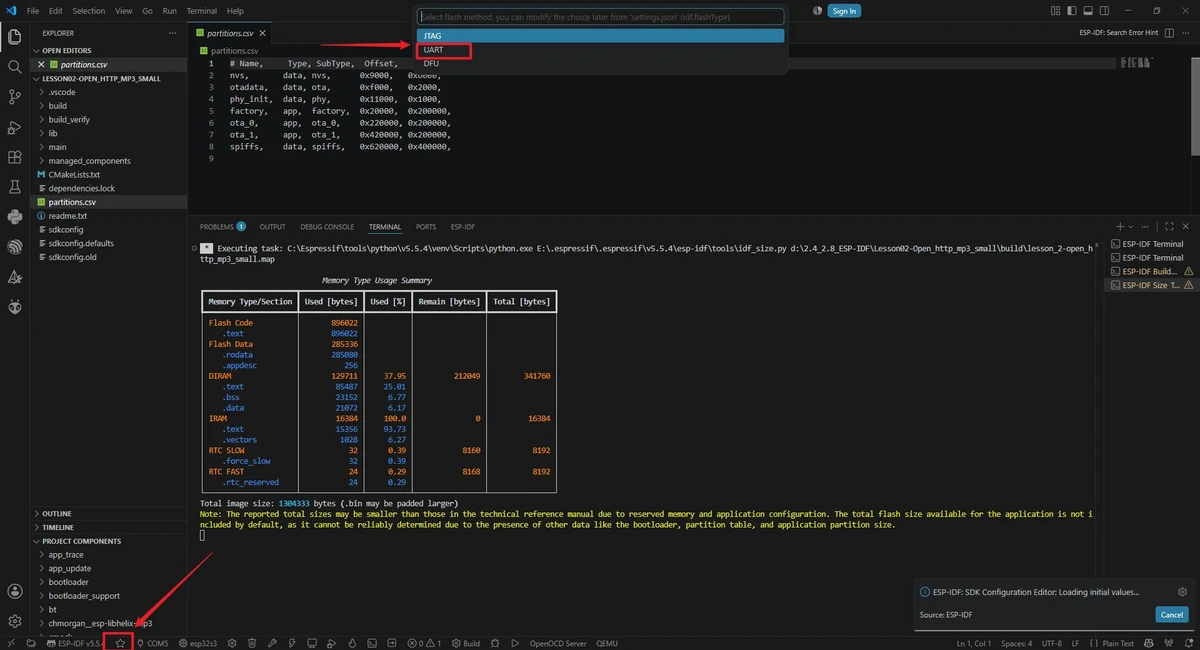
Confirm that the flashing method is UART, then click the lightning icon Flash, or run the following command in the ESP-IDF terminal:
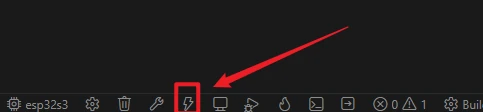
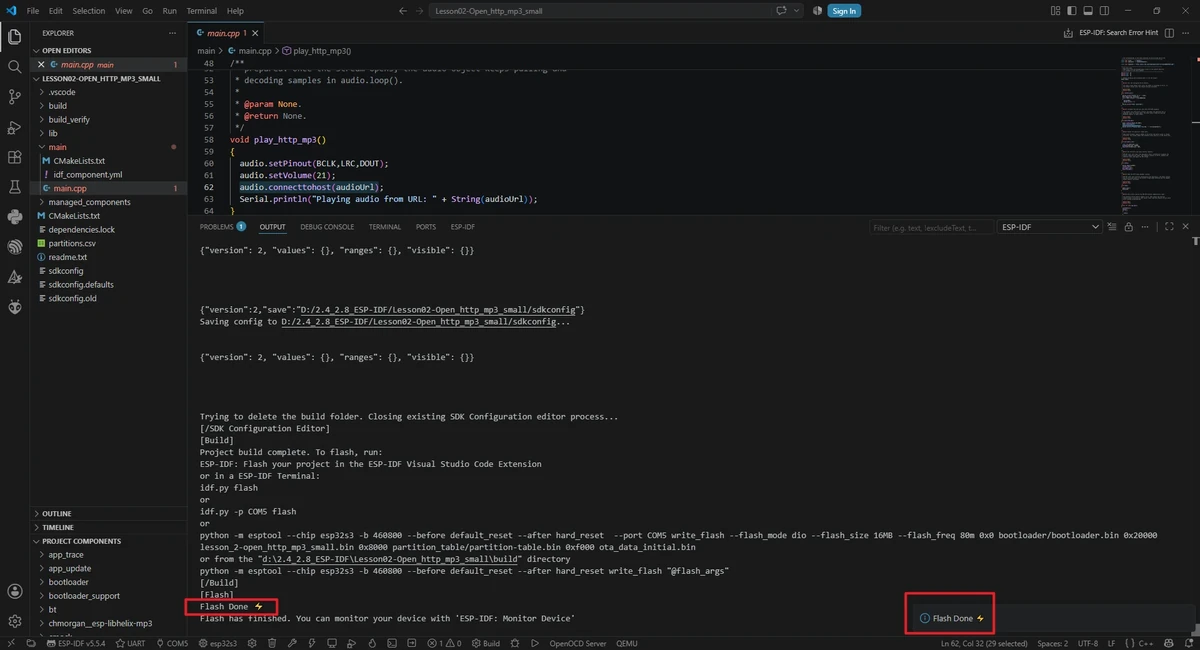
After flashing is complete, click Monitor.


Note: If compilation fails, first confirm that ESP-IDF 5.5.4 is loaded in VS Code and that you have opened the complete project root directory, not just the single main.cpp file.
5. Hardware Operation Steps
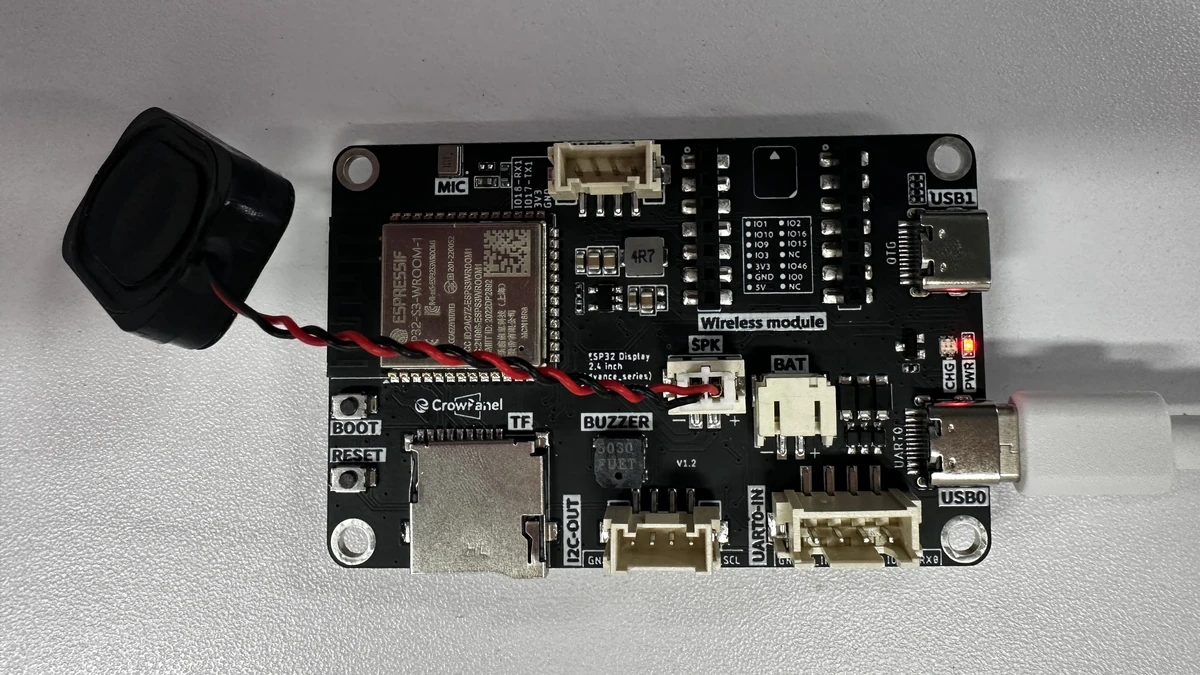
Connect the external speaker to the SPK connector on the development board. 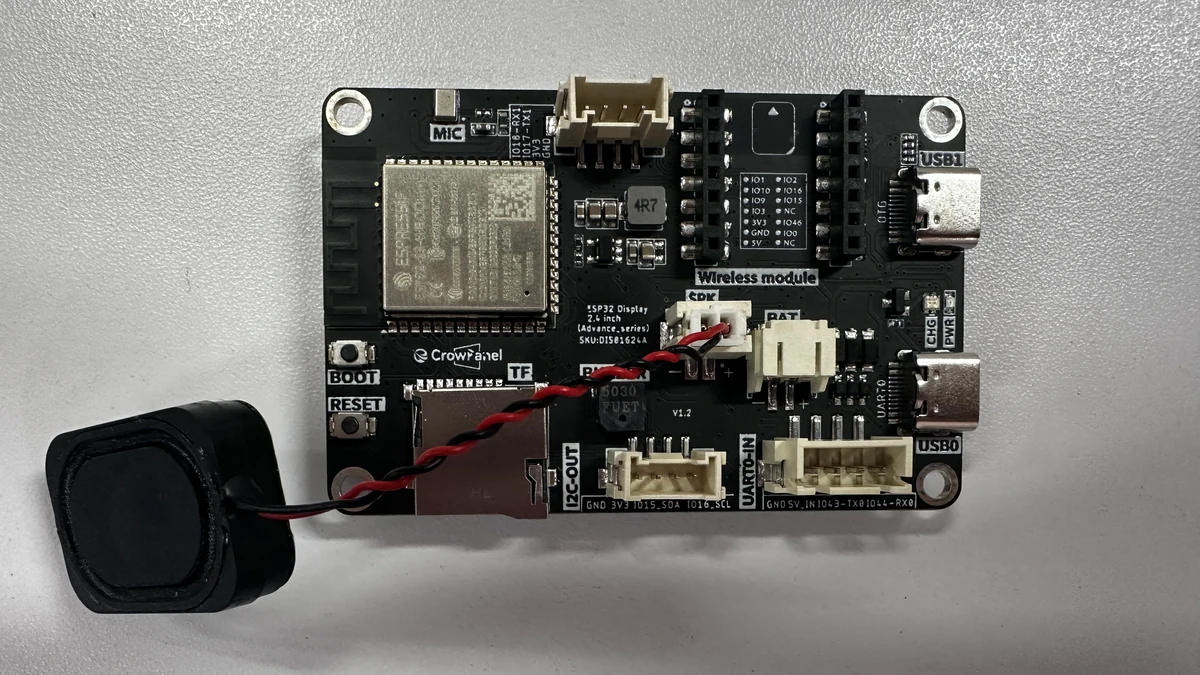
Connect the development board to the computer using a USB cable that supports data transfer.
Note: V1.1 / V1.2 do not have an onboard volume knob, so do not look for R51 to adjust the audio the way V1.0 does. For V1.1 / V1.2, prefer adjusting the volume through audio.setVolume() in the code.
6. Modifying the Wi-Fi and Song ID
6.1 Modifying the Wi-Fi SSID and Password
Before flashing, you must change the Wi-Fi name and password in the code to those of your currently available network.

Note: The Wi-Fi in the official sample code is an example environment and cannot be used directly on your network. If the Wi-Fi name or password is entered incorrectly, the program will stall at the connection stage and the subsequent audio playback will not start.
6.2 Modifying the NetEase Cloud Music Song ID
In the current IDF project, the audio URL is written in audioUrl:
The song page URL on NetEase Cloud Music usually contains an id= parameter, for example:
Copy the 2086327879 from it and replace the value after id= in audioUrl, then recompile and flash.

Next, we use NetEase Cloud Music as an example to show how to find the song ID. Use a browser to search for "NetEase Cloud Music" and open it.
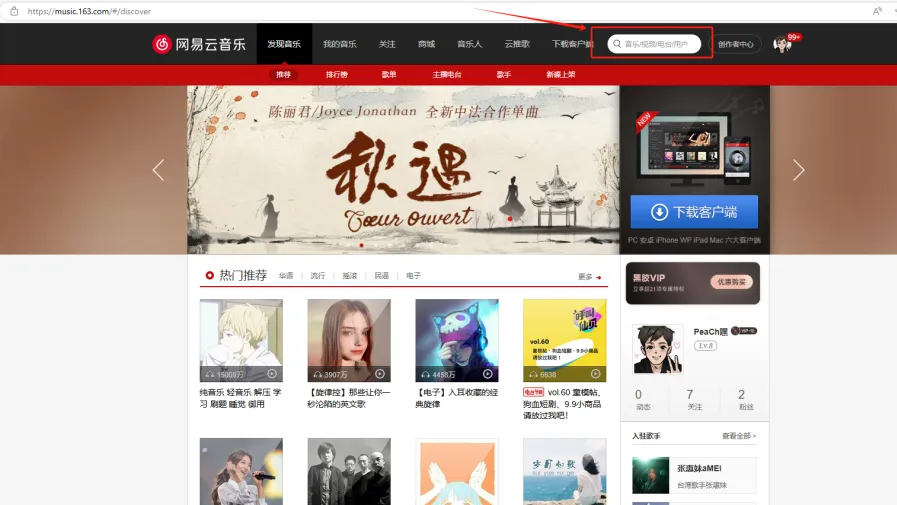
Select and play the song you want to listen to.
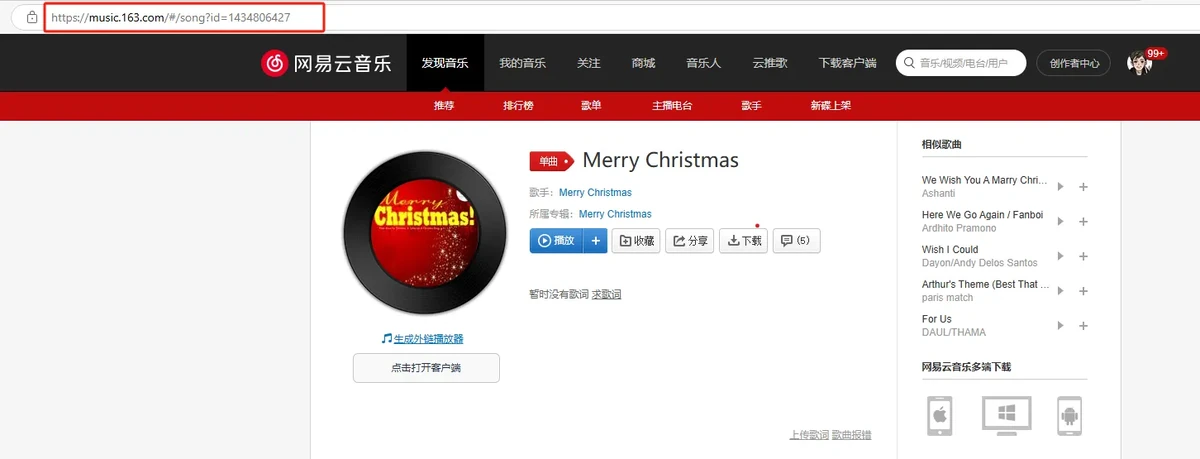
Get the ID number from the link and replace the ID number in the code with it. On NetEase Cloud Music or other music platforms, every song has a unique ID. Therefore, what you need to do is replace the ID number in the URL within the code.
Note: You can only select publicly playable, non-VIP songs. Songs that are VIP-only, paid, copyright-restricted, region-restricted, or require login to play usually cannot be played through this external link method. After modifying the song ID, you must re-flash the program. Simply changing the song in the computer's web page will not automatically change the firmware currently running on the development board.
7. Key Code Explanation
7.1 Project Dependencies and Entry Method
main/CMakeLists.txt adds both main.cpp and the audio library source under lib/ESP32-audioI2S-3.0.12/src to the compilation, and depends on the espressif__arduino-esp32 component. This way, the project is still compiled, flashed, and monitored over the serial port through ESP-IDF, but the code can continue to use Arduino-style Wi-Fi, serial, GPIO, and audio interfaces.
app_main() is the true entry function of the ESP-IDF application. Because setup() and loop() are C++ functions, extern "C" is used at the entry point to prevent the function name from being mangled by the C++ compiler. initArduino() must run first; it initializes the runtime environment required by the Arduino core. Then setup() is executed once, followed by continuous calls to loop() in an infinite loop.
7.2 Wi-Fi Parameters and Audio Address
const char *ssid      = "yanfa1";
const char *password  = "1223334444yanfa";

const char *audioUrl = "http://music.163.com/song/media/outer/url?id=2086327879.mp3";
ssid and password are the router name and password, which need to be changed to the on-site network before the experiment. audioUrl is the online MP3 file address; this lesson's example uses a NetEase Cloud Music external link. If you only want to change the song, you usually only need to replace the song ID in the URL or directly swap in another accessible MP3 link.
7.3 Connecting to Wi-Fi
void connent_wifi()
{
  Serial.printf("connect to %s ", ssid);
  WiFi.begin(ssid, password);
  while (WiFi.status() != WL_CONNECTED)
  {
    delay(500);
    Serial.print(".");
  }
  Serial.println("WiFi connected");
}
WiFi.begin() starts connecting to the wireless network, and the while loop keeps waiting until WL_CONNECTED. When the serial port keeps printing ., it means the program has not yet connected to Wi-Fi; in this case, the subsequent online audio connection will not start, and you need to check the Wi-Fi name, password, router frequency band, and whether the network can access the internet.
7.4 I2S Audio Output Pins
These three wires send the digital audio decoded by the ESP32-S3 to the onboard or external audio amplifier. DOUT is the audio data line, BCLK is the bit clock, and LRC is used for left/right channel synchronization. When Wi-Fi is connected and the URL is correct but there is no sound, you should first check these three pins and the audio module connection.
7.5 Amplifier Control Pin
void pull_gpios_low()
{
  const int audio_pin = 21;
  pinMode(audio_pin, OUTPUT);
  digitalWrite(audio_pin, LOW);
}
The current 2.4-inch / 2.8-inch ESP-IDF code retains the handling of GPIO21. pinMode() configures GPIO21 as an output, and digitalWrite(..., LOW) pulls that pin low to meet the control requirements of the small-screen audio circuit. This function runs after the Wi-Fi connection in setup(), ensuring that the audio path is in the correct state before playback begins.
7.6 Initializing Audio Playback
Audio audio;

void play_http_mp3()
{
  audio.setPinout(BCLK, LRC, DOUT);
  audio.setVolume(21);
  audio.connecttohost(audioUrl);
  Serial.println("Playing audio from URL: " + String(audioUrl));
}
Audio audio creates the audio playback object. setPinout() binds the I2S output pins, setVolume(21) sets the playback volume, and connecttohost() connects to the online MP3 address and begins pulling the audio stream. The subsequent MP3 download, decoding, and I2S output are continuously handled by the audio library within audio.loop().
7.7 The Division of Work Between setup() and loop()
void setup()
{
  Serial.begin(115200);
  connent_wifi();
  pull_gpios_low();
  play_http_mp3();
}

void loop()
{
  audio.loop();
  delay(10);
}
setup() performs one-time initialization only: opening the serial port, connecting to Wi-Fi, configuring the audio control pin, and starting playback. loop(), on the other hand, must keep running audio.loop(), which is responsible for maintaining the network connection, filling the audio buffer, performing MP3 decoding, and outputting the PCM data to I2S. If audio.loop() is not called continuously here, even if the Wi-Fi connection was successfully established earlier, the online audio cannot be played back stably.
8. Experimental Phenomena
After flashing is complete, the external speaker will play the online song.
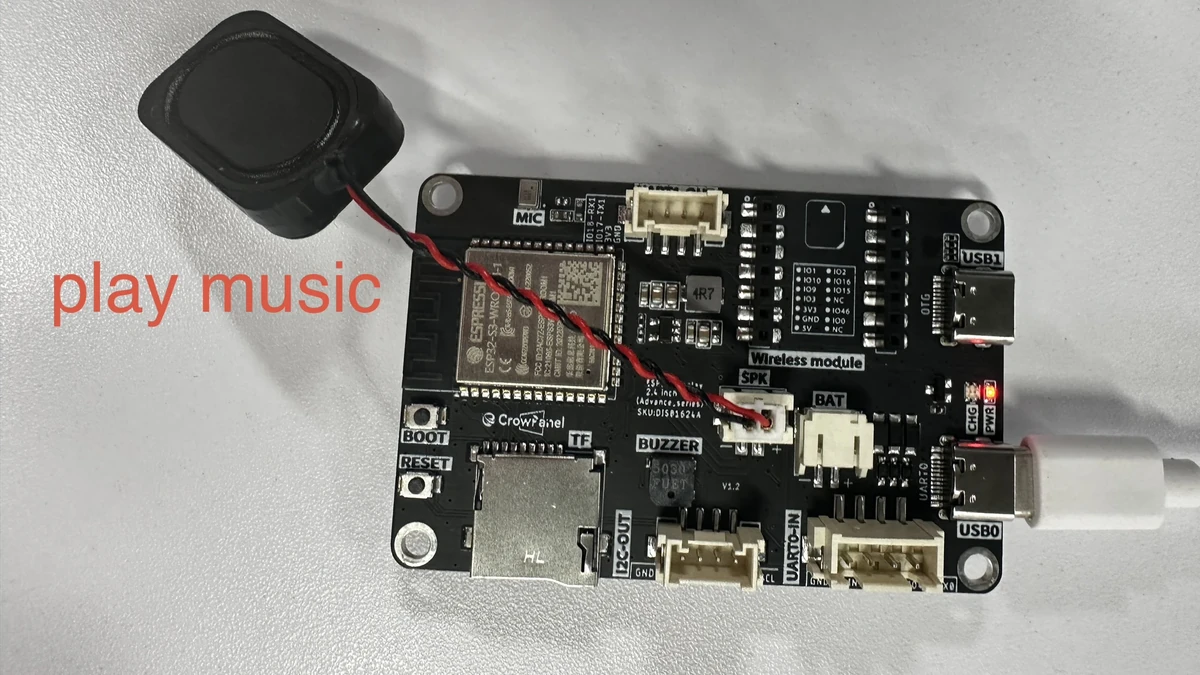
9. Code Download
Code download link: Lesson02-Open_http_mp3_small