3.5inch_Lesson02_Open_HTTP_MP3
1. Course Introduction
This lesson uses the Arduino-compatible entry point in an ESP-IDF project to initialize Wi-Fi and I2S audio output, and plays online MP3 files over an HTTP URL. The project entry point remains ESP-IDF's app_main(), but since the code calls initArduino(), Arduino APIs such as WiFi, Audio, pinMode(), and digitalWrite() can be used.
References:
2. Learning Objectives
- Be able to open the
Lesson02_Open_http_MP3_35ESP-IDF project. - Be able to modify the Wi-Fi name, password, and online MP3 URL.
- Be able to explain the call relationship among
app_main(),setup(), andloop(). - Be able to explain the roles of the I2S
BCLK,LRC, andDOUTpins. - Be able to determine from the serial log whether Wi-Fi connection, URL access, and audio output are working properly.
3. Preparation
-
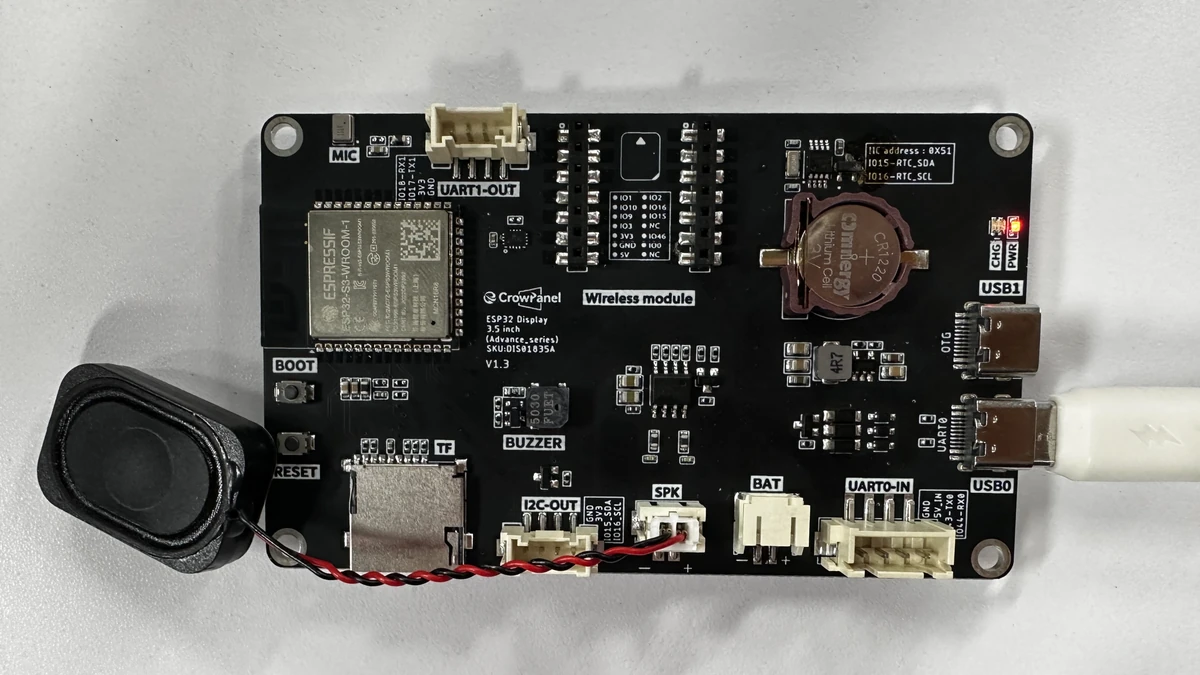
Hardware: CrowPanel Advance 3.5-inch ESP32-S3 development board, with an onboard or external audio output device.
-
Software: VS Code, the ESP-IDF extension, and the
ESP-IDF 5.5.4environment set up in Lesson01. -
Project:
Lesson02_Open_http_MP3_35 -
Network: 2.4 GHz Wi-Fi that can access the example MP3 URL.
-
Code dependency: the
lib/ESP32-audioI2S-3.0.12/audio library within the project.
Note: To play online songs, you must ensure that the Wi-Fi connected to the development board can access the corresponding audio URL. Corporate networks, campus networks, or hotspots that require web-based login authentication may result in a Wi-Fi connection but an inability to play songs.
Code and Resource Download
Code download: - Lesson02_Open_http_MP3_35
4. Software Operation Steps
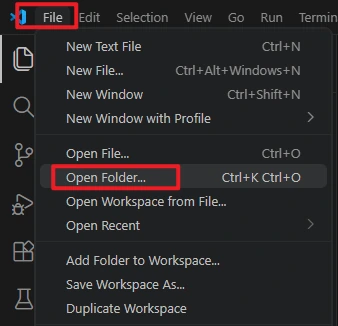
In VS Code, select File -> Open Folder... and open this lesson's project directory.
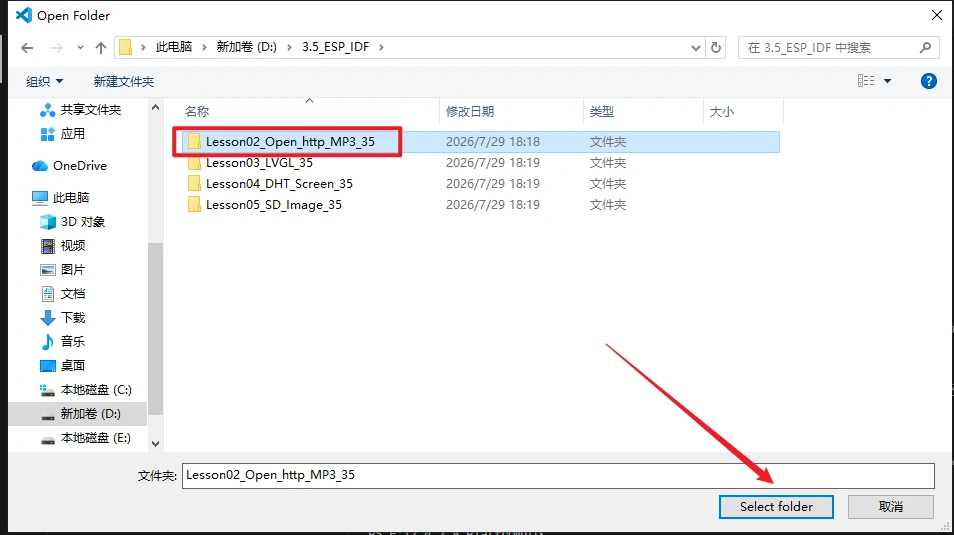
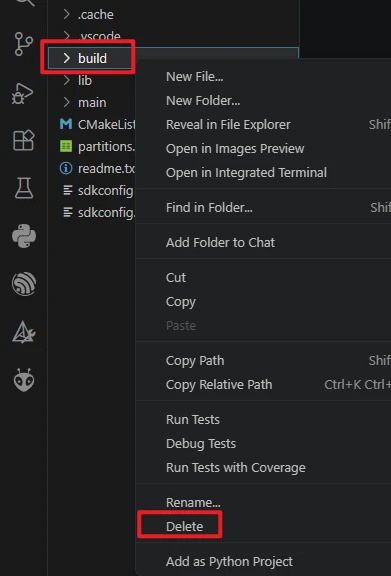
After opening the project, first run Build -> Delete to clear the build cache and path records generated by the previous project. It is recommended to do this step first after switching computers, changing the ESP-IDF version, or copying the project.
Confirm that VS Code has loaded ESP-IDF 5.5.4. If the version shown in the status bar or the ESP-IDF extension is incorrect, return to the installation steps in Lesson01 and reselect the 5.5.4 environment.

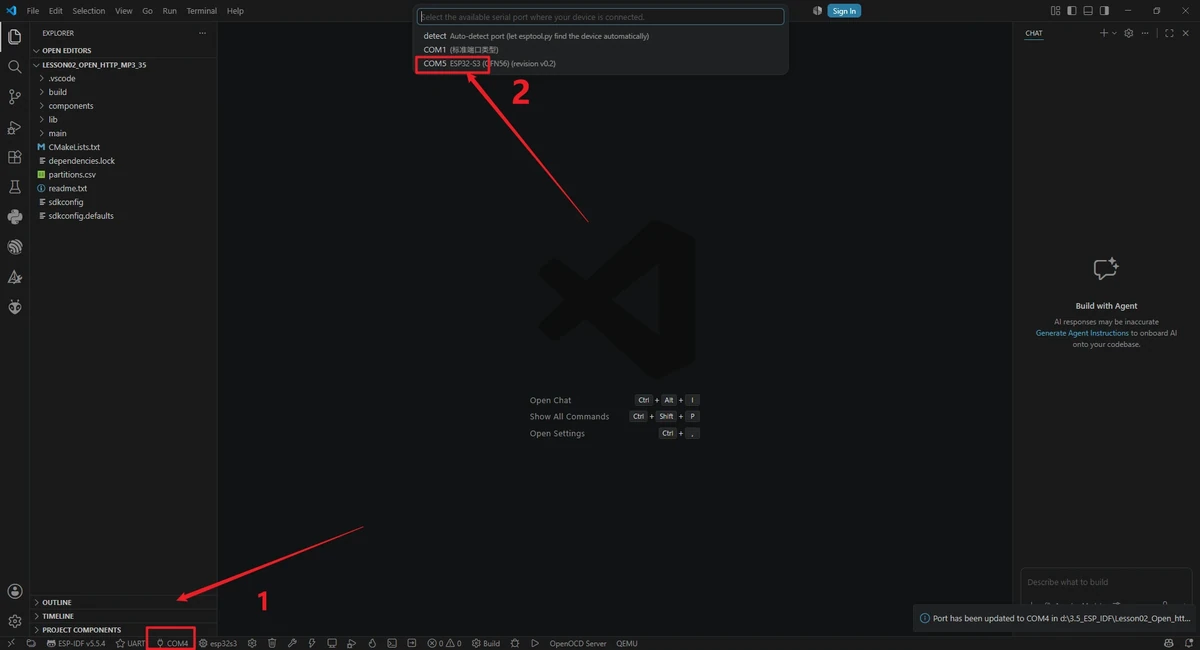
Connect the development board using a USB cable, click the serial port location at the bottom status bar of VS Code, and select the actual COM port recognized by the computer.
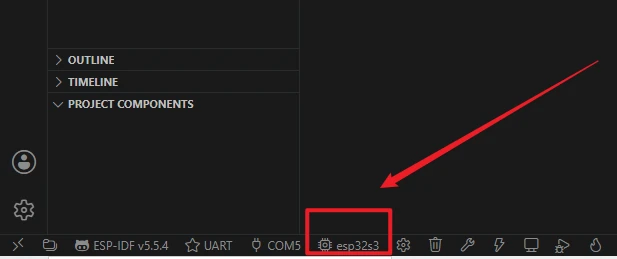
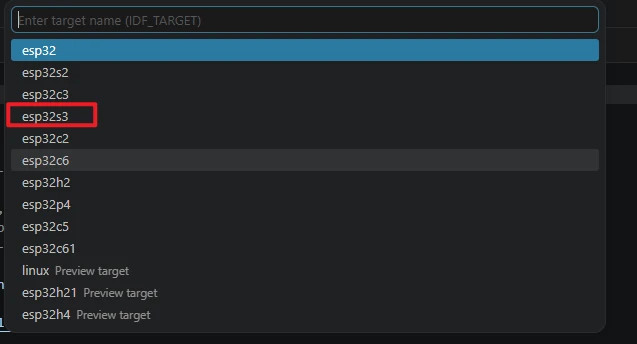
Click the target chip location in the status bar, or run the command ESP-IDF: Set Espressif Device Target, and select esp32s3 as the target chip. The reference images are for illustrating the entry location; the actual selection should follow this course's esp32s3.
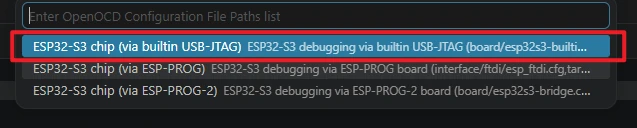
When selecting the debug configuration, choose the configuration that matches the ESP32-S3 development board, such as the ESP32-S3 built-in USB-JTAG configuration. Ordinary UART flashing mainly relies on the serial port and correct target chip settings.
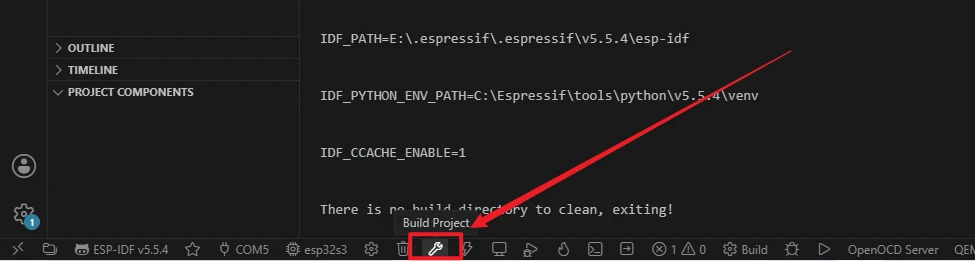
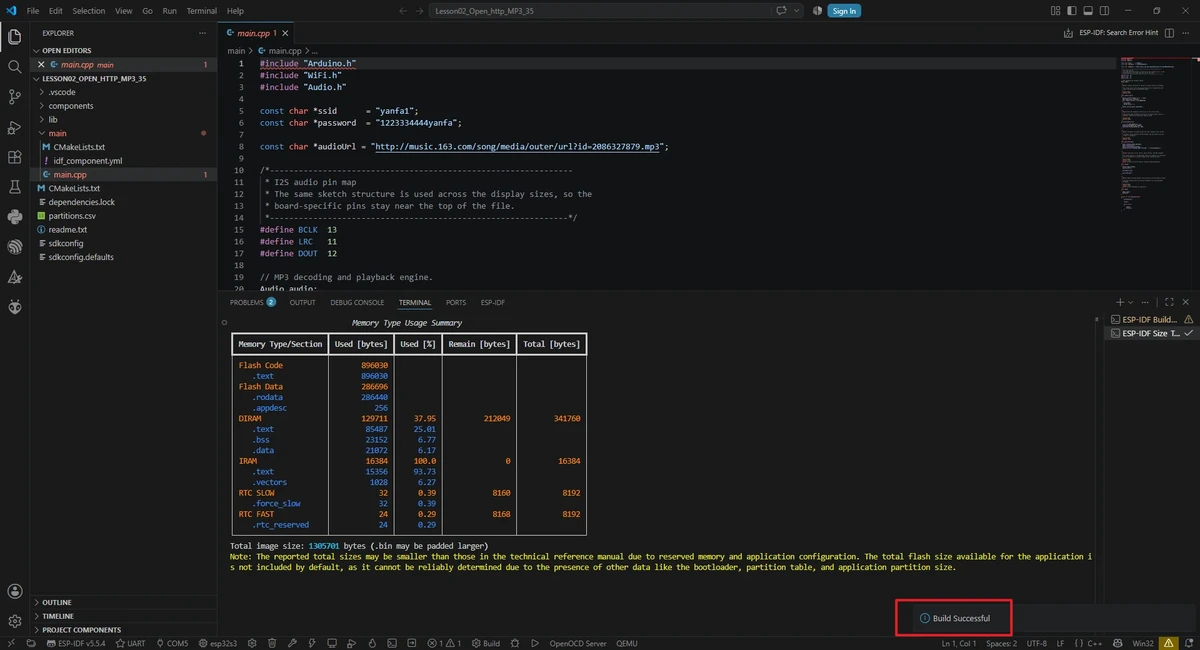
Click the Build button in the status bar to start compiling, or run the following in the ESP-IDF terminal:
The first compilation needs to download and generate dependencies, so it will take longer; continue flashing only after you see the build success message.

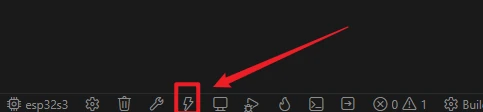
Confirm that the flashing method is UART, then click the lightning icon Flash, or run the following in the ESP-IDF terminal:
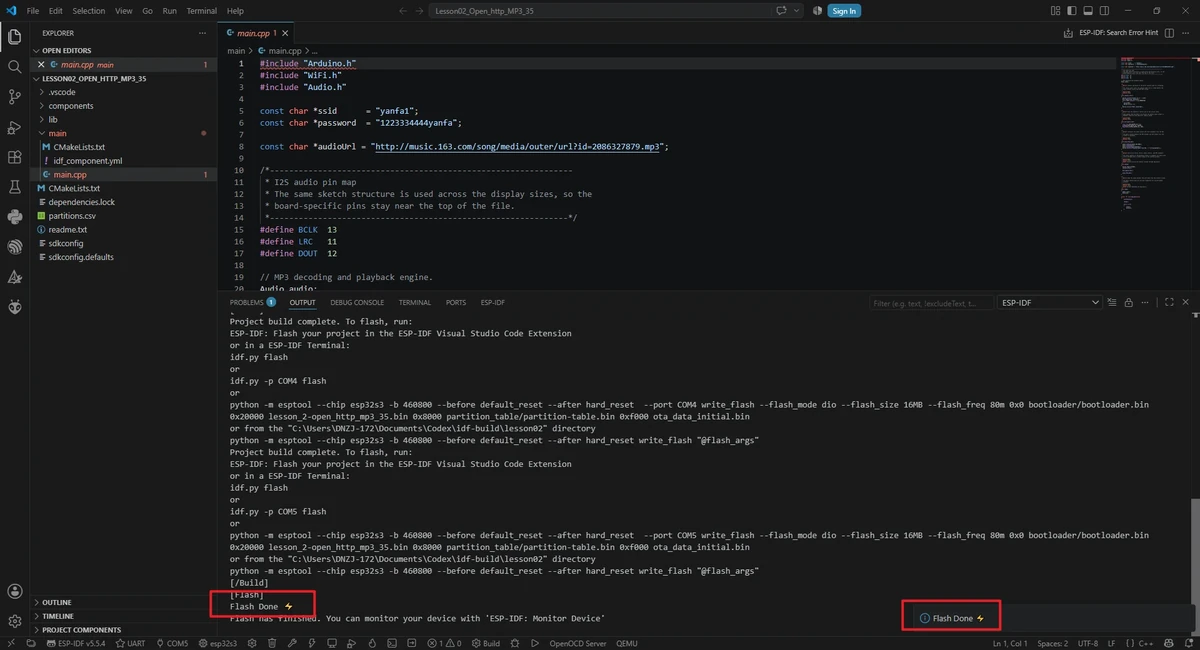
After flashing is complete, click Monitor.


Note: If compilation fails, first confirm that ESP-IDF 5.5.4 is loaded in VS Code and that the complete project root directory is open; do not open only the main.cpp single file.
5. Hardware Operation Steps
Connect the development board to the computer using a USB cable that supports data transfer.
After flashing is complete, wait for the development board to reset.
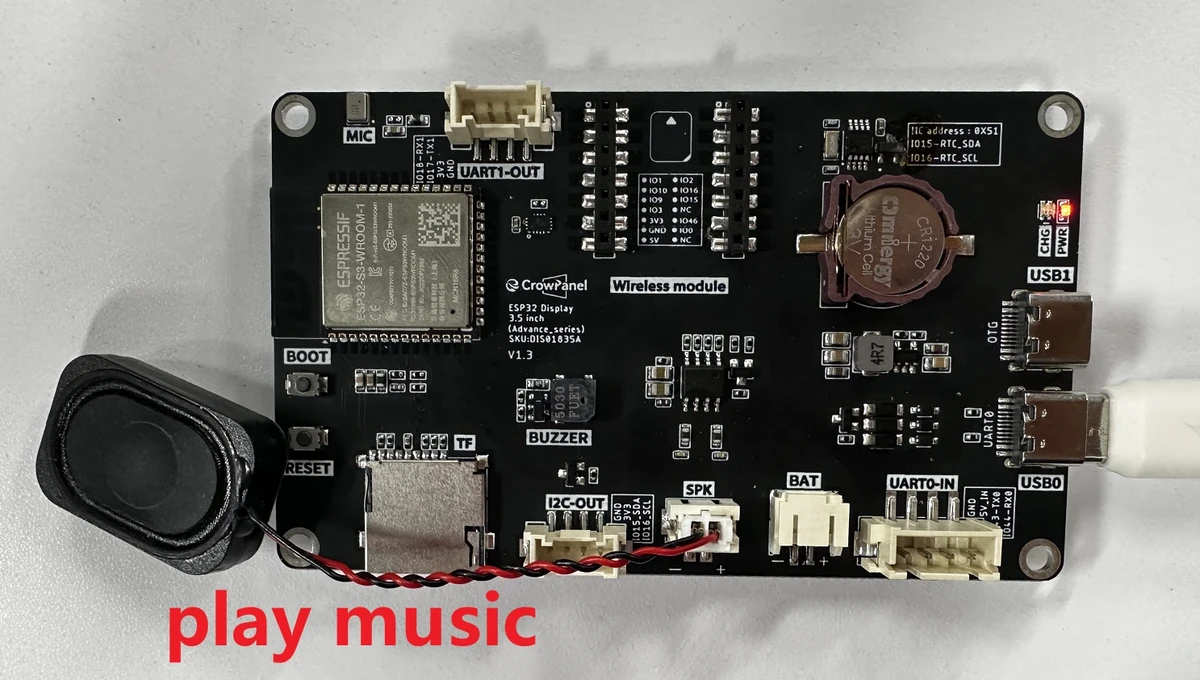
Listen to whether the speaker starts playing online music, and observe whether the serial port outputs the successful Wi-Fi connection and the playback URL.
6. Modify Wi-Fi and Song ID
6.1 Modify Wi-Fi Account and Password
Before flashing, you must change the Wi-Fi name and password in the code to the currently available network.

Note: The Wi-Fi in the official code is an example environment and cannot be used directly on your network. If the Wi-Fi name or password is entered incorrectly, the program will stall at the connection stage and audio playback will not begin.
6.2 Modify the NetEase Cloud Music Song ID
In the current IDF project, the audio URL is written in audioUrl:
The song page URL of NetEase Cloud Music usually contains an id= parameter, for example:
Copy the 2086327879 from it, replace it after the id= in audioUrl, then recompile and flash.

Next, taking NetEase Cloud Music as an example, here is how to find the song ID. Use a browser to search for "NetEase Cloud Music" and open it.
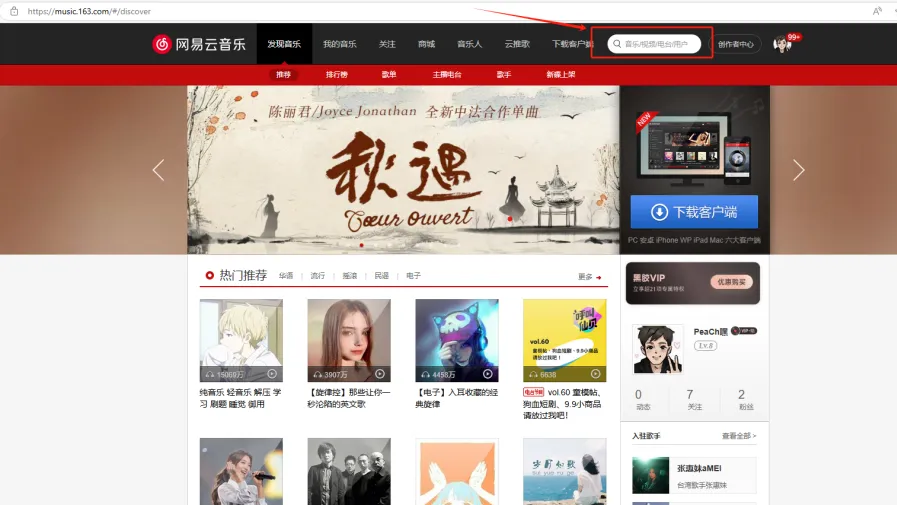
Select and play the song you want to listen to.
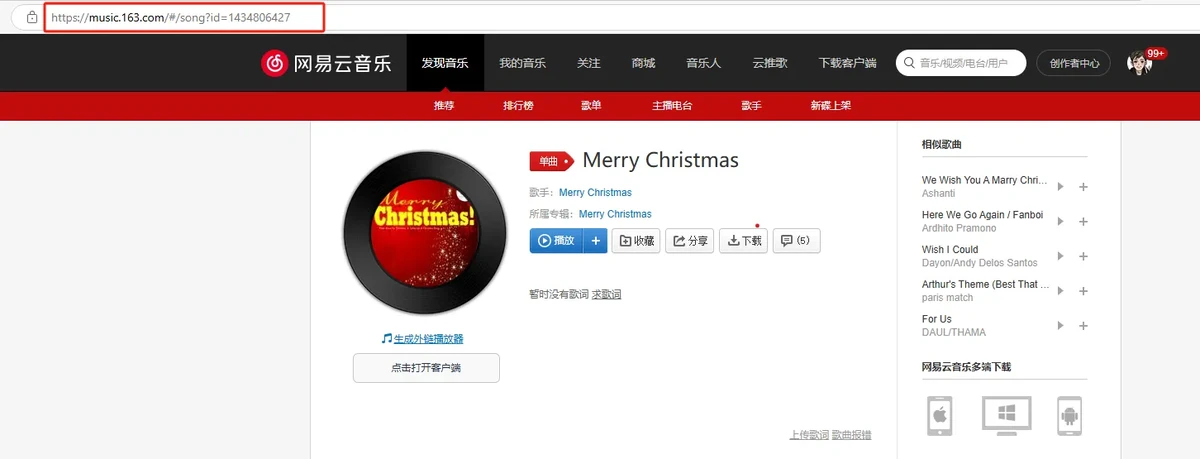
Get the ID number from the link and replace the ID number in the code with it. On NetEase Cloud Music or other music platforms, every song has a unique ID. Therefore, replacing the ID number in the URL link within the code is what needs to be done.
Note: You may only select non-VIP songs that are publicly playable. VIP, paid, copyright-restricted, region-restricted, or login-required songs generally cannot be played through this external-link method. After modifying the song ID, you must re-flash the program. Merely changing the song in the computer's web page will not automatically alter the firmware currently running on the development board.
7. Key Code Explanation
7.1 ESP-IDF Entry Point Compatible with Arduino
An ESP-IDF project enters through app_main(). initArduino() sets up the Arduino runtime environment, then manually calls setup() and calls loop() in a loop. If initArduino() is omitted, the Arduino capabilities that WiFi, Serial, delay(), and the audio library depend on may not work properly.
7.2 Wi-Fi Connection
void connent_wifi()
{
  Serial.printf("connect to %s ", ssid);
  WiFi.begin(ssid, password);
  while (WiFi.status() != WL_CONNECTED)
  {
    delay(500);
    Serial.print(".");
  }
  Serial.println("WiFi connected");
}
The program blocks while waiting for the Wi-Fi connection. When the serial port keeps printing dots, first check the Wi-Fi name, password, signal strength, and the 2.4 GHz band. The program will not start playing MP3 until the Wi-Fi is successfully connected.
Open main/main.cpp and locate the Wi-Fi configuration.
Change ssid and password to the currently available 2.4 GHz Wi-Fi. The ESP32-S3 generally cannot connect to 5 GHz Wi-Fi.
Check the online MP3 URL.
If you need to change the song, use a browser to confirm that the URL can directly access the MP3 stream. If the URL requires login, redirection, or has an abnormal HTTPS certificate, the development board may not be able to play it.
7.3 Amplifier Control GPIO
void pull_gpios_low()
{
  const int GPIO_OUTPUT_IO = 21;
  pinMode(GPIO_OUTPUT_IO, OUTPUT);
  digitalWrite(GPIO_OUTPUT_IO, LOW);
}
Some onboard audio circuits require GPIO21 to be pulled low first before the amplifier enters an output-capable state. If Wi-Fi is connected, the URL is printed, but there is no sound, in addition to checking the I2S pins, also check whether GPIO21 is correctly controlled.
7.4 I2S Output and Online Playback
void play_http_mp3()
{
  audio.setPinout(BCLK,LRC,DOUT);
  audio.setVolume(21);
  audio.connecttohost(audioUrl);
  Serial.println("Playing audio from URL: " + String(audioUrl));
}
audio.setPinout() specifies the three key I2S signals, audio.setVolume(21) sets the volume, and audio.connecttohost() begins accessing the online MP3. During playback, loop() must continuously call audio.loop(); otherwise, audio data cannot be decoded and output continuously.
8. Experimental Observations
The serial port first outputs connect to ... and continuously prints dots during the connection process. After a successful connection, it outputs WiFi connected, followed by Playing audio from URL: .... When the audio hardware is normal, the speaker starts playing the online MP3.
9. Code Download
Code path: Lesson02_Open_http_MP3_35