4.3_5.0_7.0inch_Lesson03_LVGL_LED
1. Course Introduction
This lesson uses the Lesson03-LVGL_Control_LED project to display an LVGL LED control interface on the CrowPanel Advance 4.3inch, 5.0inch, and 7.0inch large-size displays, and controls the GPIO19 output through a touch button. The project uses an RGB LCD, GT911 touch, and the UI files exported from SquareLine Studio.
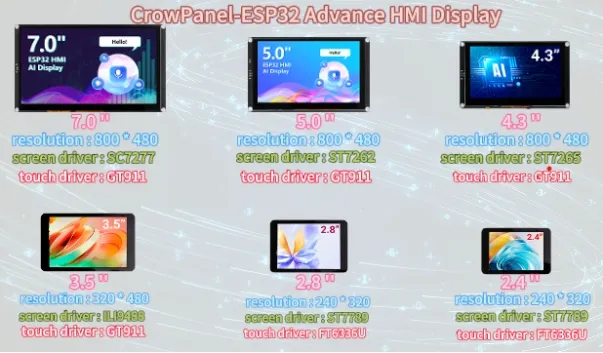
This tutorial uses the 7.0inch board as an example. The steps for all three large-size boards are the same, and the UI resolution is uniformly 800 x 480. The UI creation flow, screenshots, and exported files should all follow the large-size 800 x 480 project settings.
DIP switch mapping for the large-size boards: 00 = MIC&SPK, 01 = WM (wireless module), 11 = MIC&TF Card. This lesson does not use the MIC, wireless module, or TF/SD card functions, so leave the DIP switch at its default state during the experiment. Before working on other lessons, you must re-check the DIP switch according to the corresponding function.
2. Learning Objectives
- Be able to open and compile an ESP-IDF LVGL project.
- Be able to understand the initialization flow of the large-size RGB LCD and GT911 touch.
- Be able to use SquareLine Studio to create an
800 x 480LED control interface. - Be able to copy the exported UI files into the ESP-IDF project's
main/uidirectory. - Be able to control the GPIO19 output through LVGL button events.
3. What You Need
- CrowPanel Advance 4.3inch / 5.0inch / 7.0inch ESP32-S3 HMI.
- A VS Code environment with ESP-IDF
5.5.4installed. - SquareLine Studio.
- An LED module or a peripheral capable of observing the GPIO19 output.
- A table lamp image asset.
Code and Resource Download
Code download: - Lesson03-LVGL_Control_LED
Resource download: - table_lamp.png

4. ESP-IDF Software Operation Steps
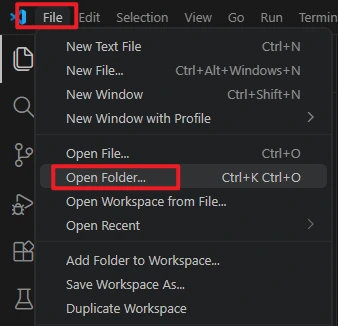
Open this lesson's project in VS Code:
Lesson03-LVGL_Control_LED
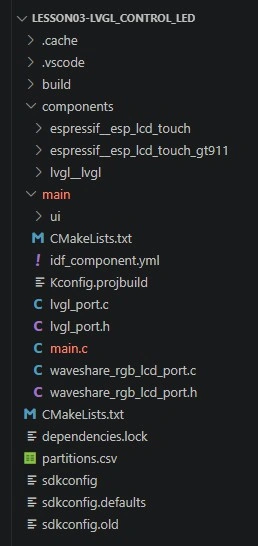
Confirm that the project directory contains main/main.c, main/ui, the RGB LCD driver, and LVGL-related files.
Confirm that the ESP-IDF version is 5.5.4 and the target chip is esp32s3.

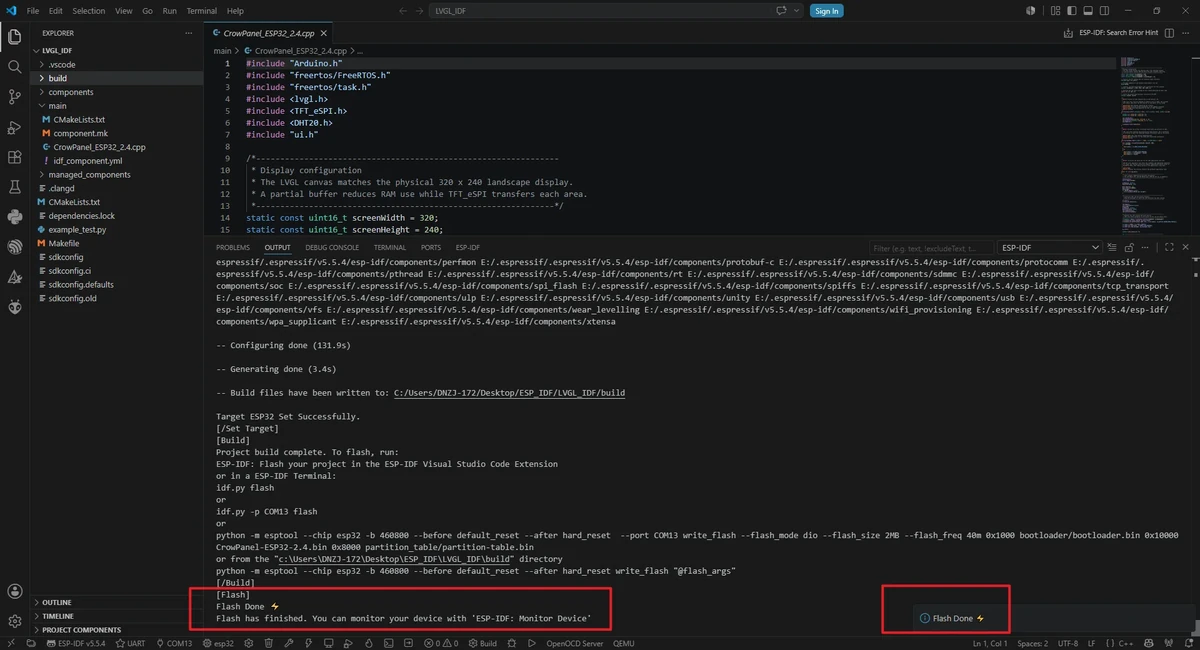
Click Build to compile the project.
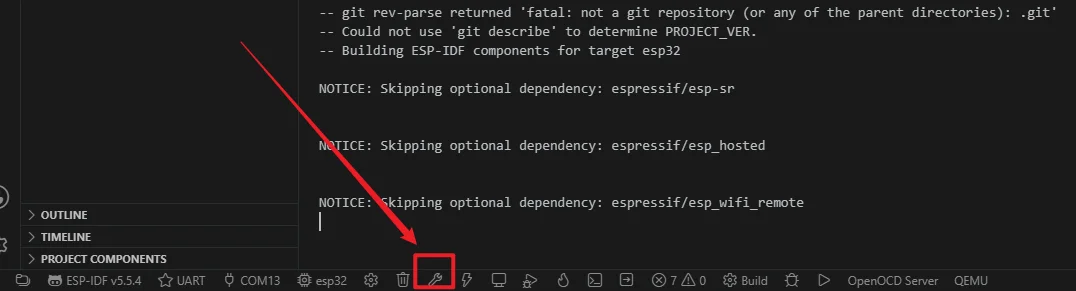
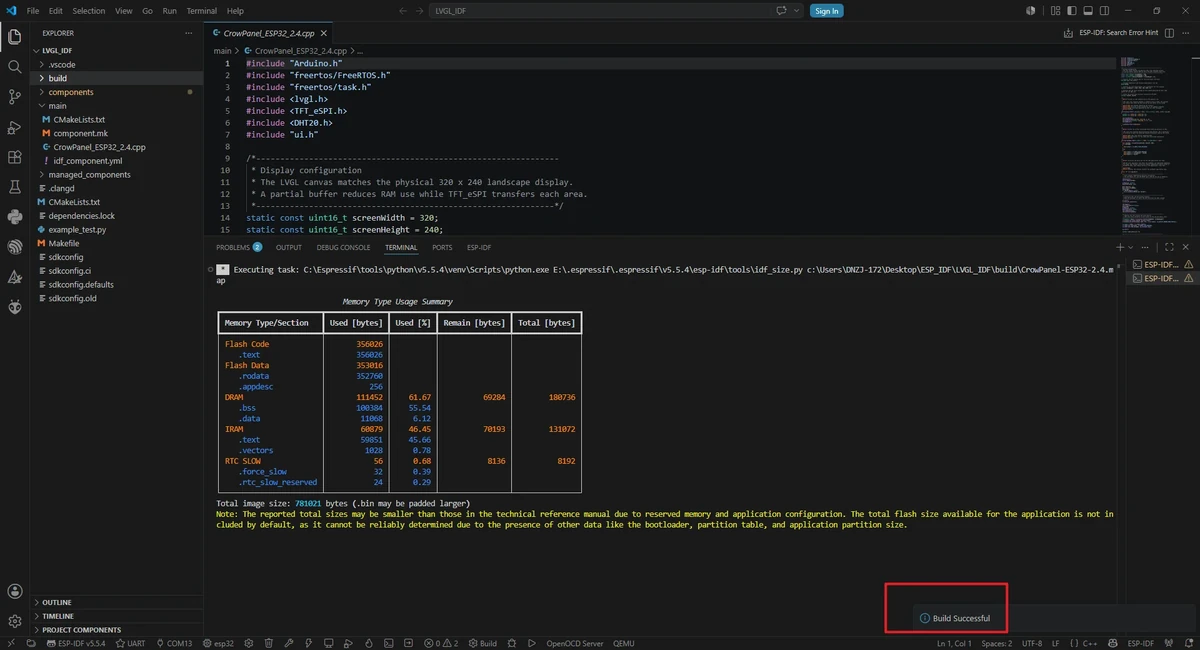
Select the correct serial port, then click Flash to upload.
5. Hardware Operation Steps
- Connect the development board to the computer using a USB data cable.
- Connect the LED module to the GPIO19 output position used in this lesson.
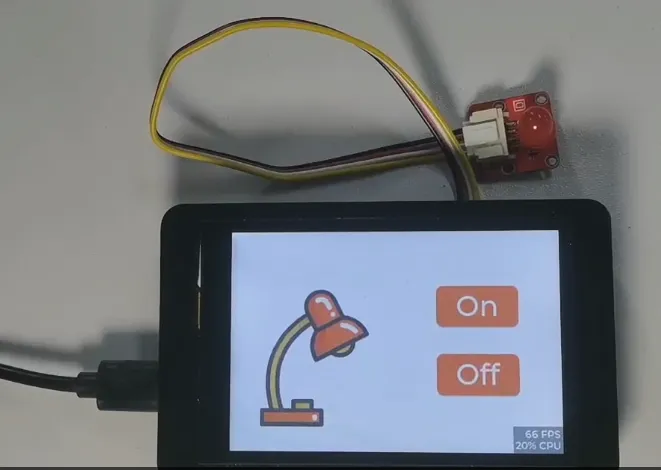
- After uploading, wait for the screen to light up and display the
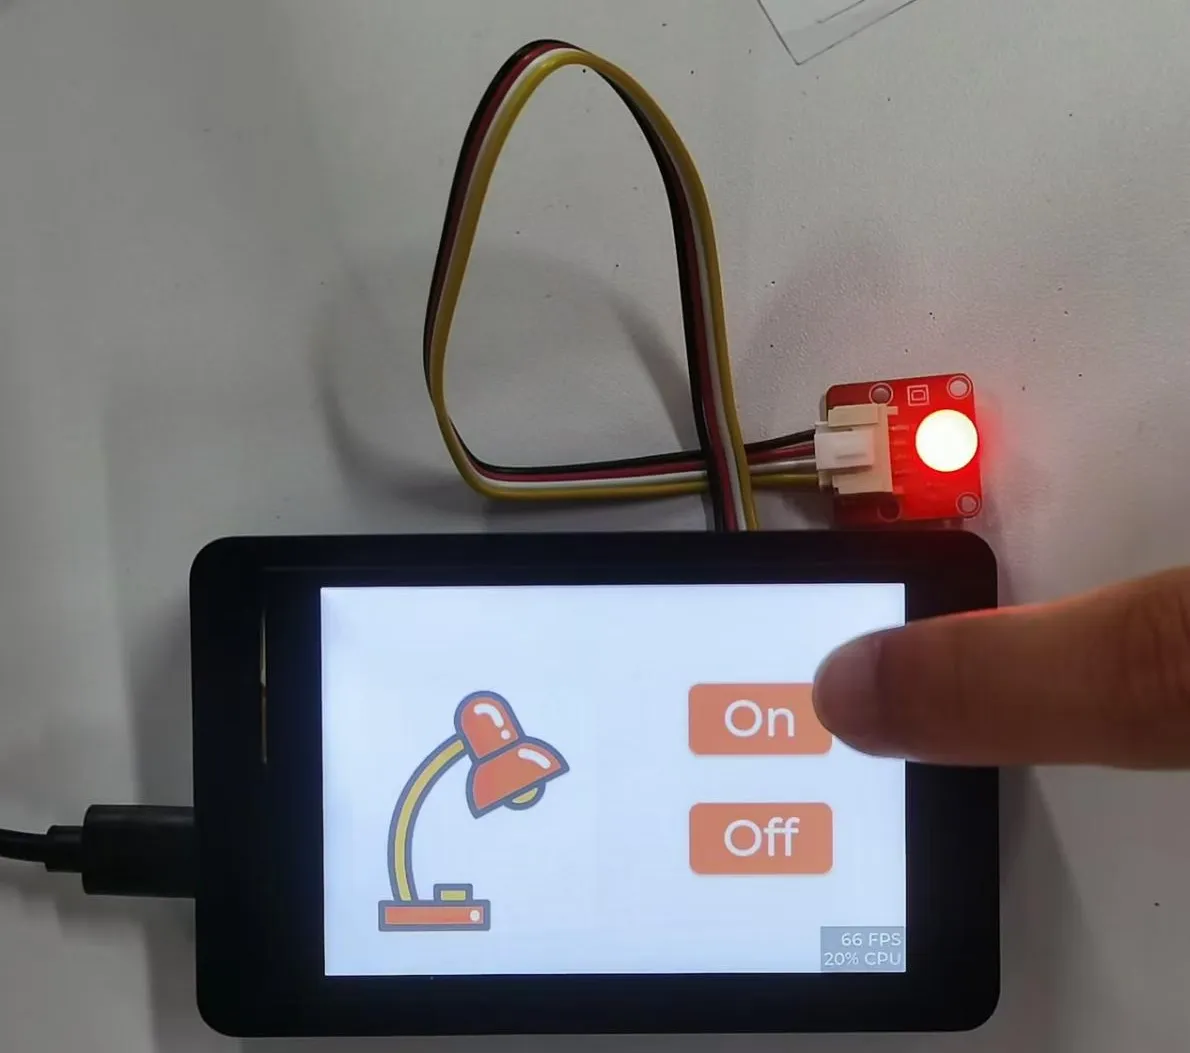
800 x 480LED control interface. - Tap the On button on the screen to set GPIO19 output high.
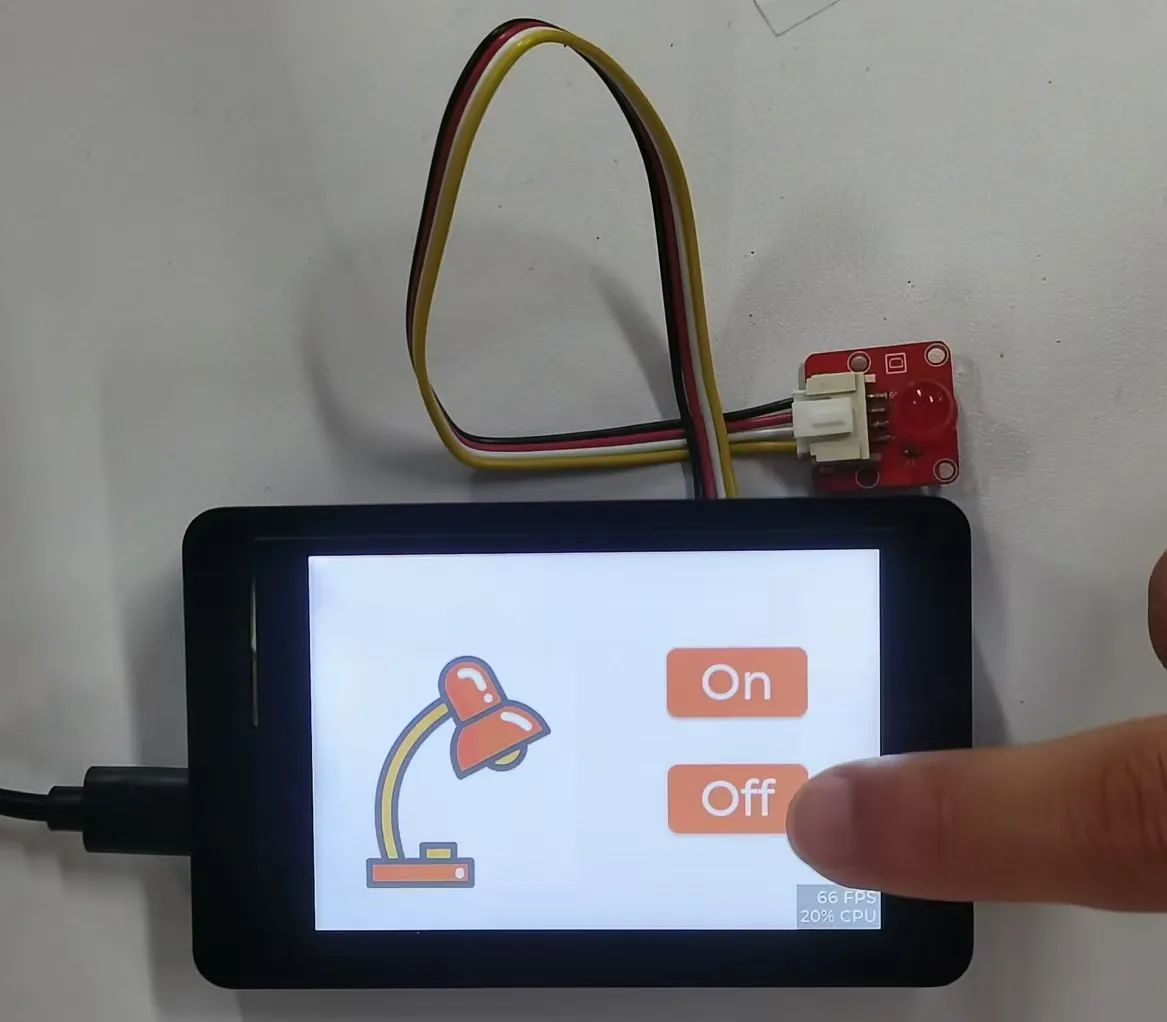
- Tap the Off button on the screen to set GPIO19 output low.
6. Key Code Explanation
The core code for this lesson is located in Lesson03-LVGL_Control_LED/main. The program first controls the large-size on-board peripherals via I2C, then initializes the RGB LCD, touch, and LVGL, and finally loads the UI exported from SquareLine Studio.
6.1 I2C Peripheral Control
#define I2C_MASTER_SDA_IO 15
#define I2C_MASTER_SCL_IO 16
#define DEVICE_ADDR_1 0x30
#define DEVICE_ADDR_2 0x5D
The large-size boards use GPIO15/GPIO16 as the I2C pins. The program uses i2c_write_byte(0x30, 250) to enable touch-related functions, and i2c_write_byte(0x30, 0) to turn on the screen backlight.
6.2 GPIO19 Output
GPIO19 is configured as an output, and its level is subsequently controlled by UI button events.
6.3 LCD and LVGL Initialization
waveshare_esp32_s3_rgb_lcd_init() completes the initialization of the RGB LCD, touch, and LVGL port. ui_init() loads the UI exported from SquareLine Studio.
6.4 UI Button Events
main/ui/ui_Screen1.c contains the On and Off button objects. The button events are used to control the table lamp image state and the GPIO output. In the large-size UI, the positions of buttons, images, and fonts are laid out according to the 800 x 480 canvas.
7. UI Creation Operation Steps
The UI in this section is created using SquareLine Studio. For the large-size project, set the canvas to 800 x 480. The exported UI files are finally copied into the ESP-IDF project, where main/ handles the screen driver, touch driver, and LVGL runtime.
For SquareLine Studio download and basic installation, refer to:
Create LVGL UI with SquareLine Studio
7.1 Create a SquareLine Project
Open SquareLine Studio and click Create at the top. When creating a new project, select LVGL 9.1.0.
In the board category, select the TFT_eSPI-compatible template category shown by SquareLine Studio.
Select the TFT_eSPI project template.
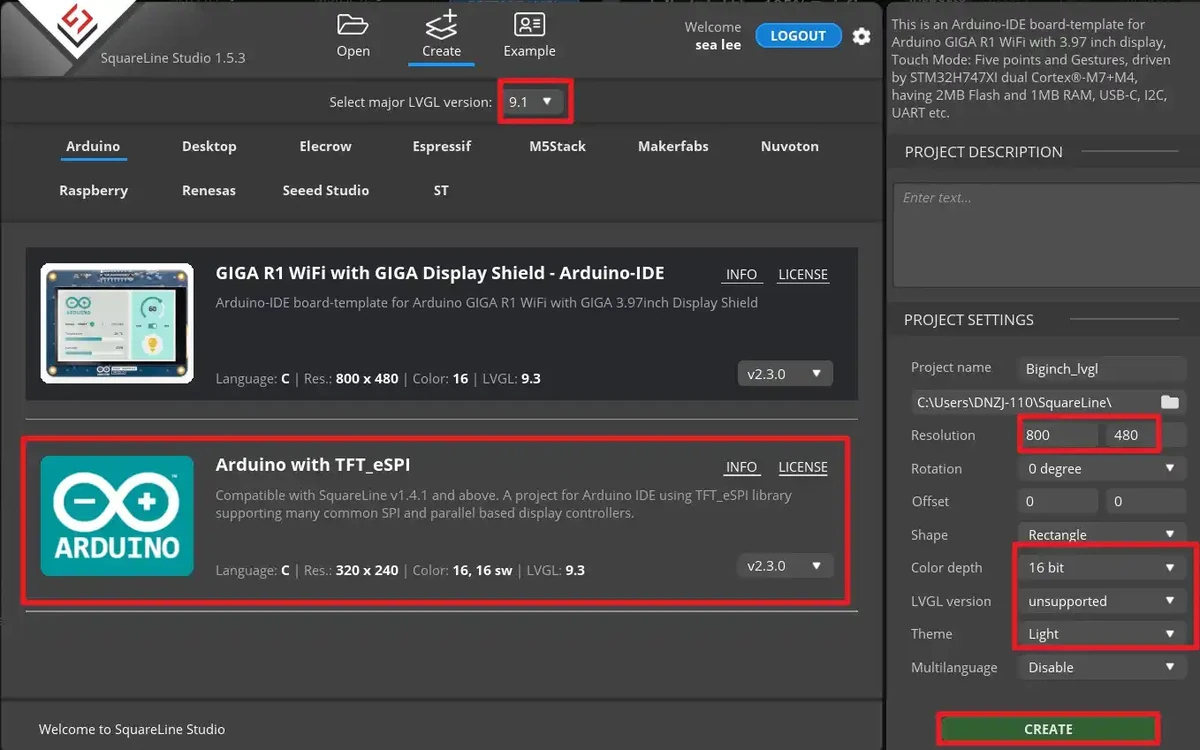
Confirm the resolution according to the large-size screen. The 4.3inch / 5.0inch / 7.0inch lesson projects uniformly use 800 x 480.
In the Project Settings on the right, set the project name and path, and confirm the key parameters:
After confirming the parameters, click CREATE to create the project.
7.2 Import the Table Lamp Image Asset
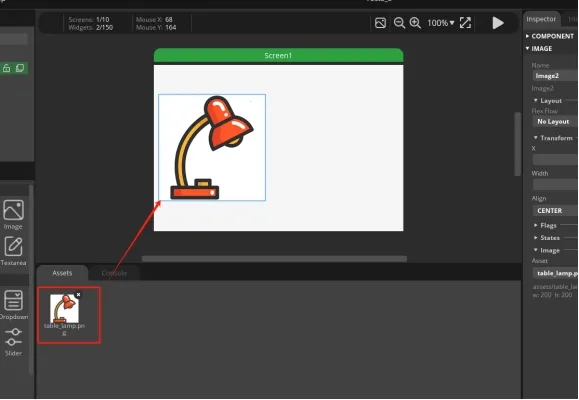
After entering the project editing interface, switch to the Assets area at the bottom.
Click ADD FILE INTO ASSETS to import the table lamp image asset into the project resources.
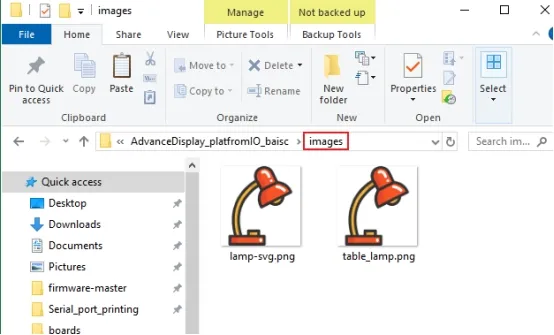
The local assets for this project are located at:
The image assets can also be obtained from the repository asset path.
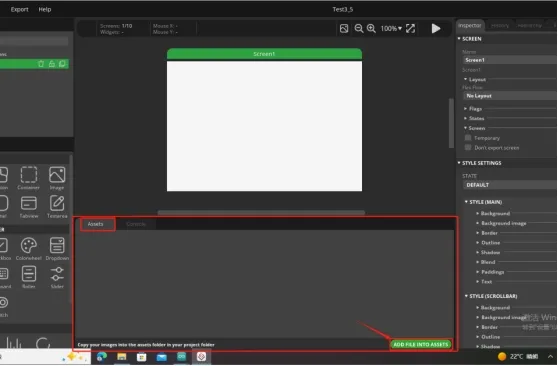
After importing, drag the table lamp image asset onto the Screen1 canvas. Adjust its position on the 800x480 canvas so it sits on the left side of the screen, leaving the right side for the button area.
7.3 Add the On Button
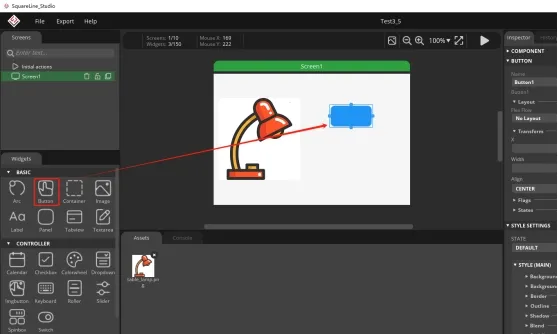
In the left Widgets > BASIC, select Button.
Drag the Button onto the right side of the canvas to serve as the On button.
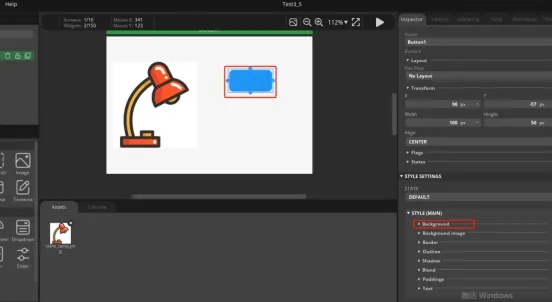
Select the button and adjust its position and size in the Inspector on the right.
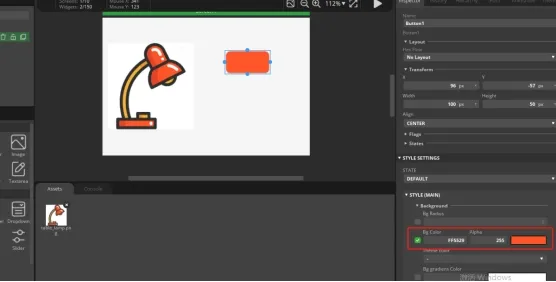
Expand STYLE (MAIN) > Background and set the button background color to orange-red. As an example, you can use F1412F.
Add a Label from the left Widgets > BASIC and drag it into the button.
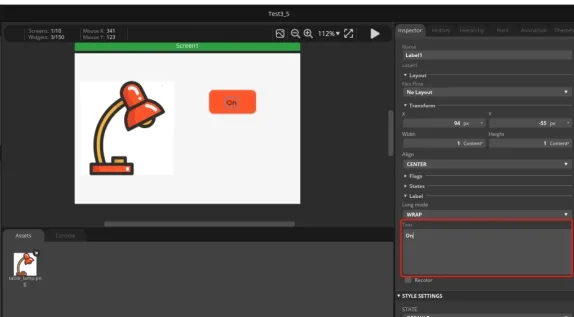
Select the Label and change its text to On in the text box on the right.
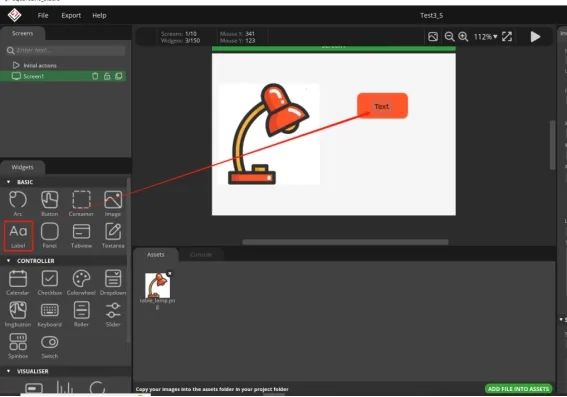
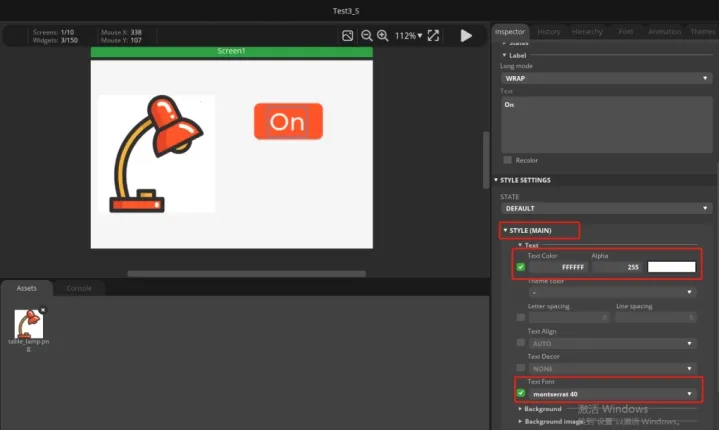
Adjust the Label style, set the text color to white, and choose an appropriate font size. The example project uses montserrat 40.
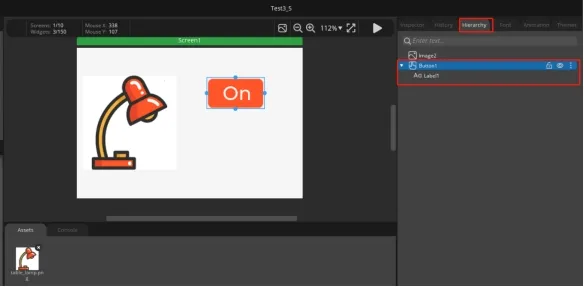
In the Hierarchy panel on the right, confirm that Label is a child of Button.
7.4 Duplicate and Create the Off Button
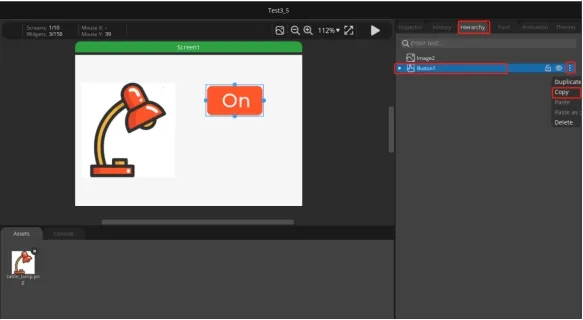
In the Hierarchy panel, select the completed Button1.
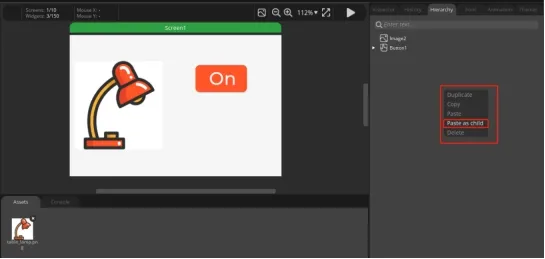
Open the more menu and select Copy.
Paste it as a new button on the canvas or in the hierarchy.
Move the pasted button below the On button.
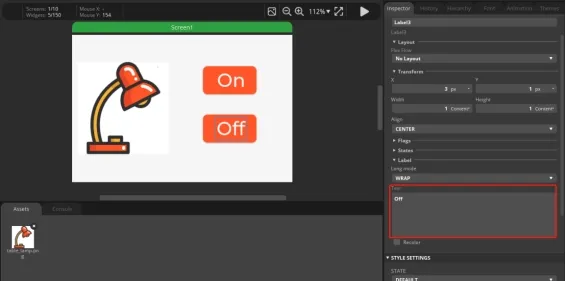
Select the Label in the new button and change its text to Off.
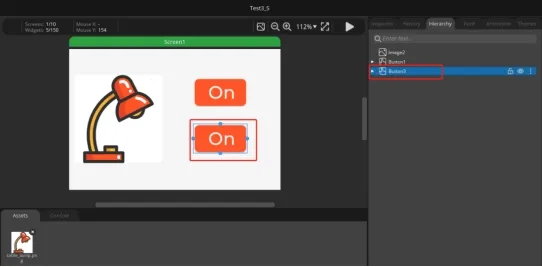
Adjust the position and background color of the two buttons as needed so that the On / Off buttons are stacked vertically on the right side.
7.5 Set Button Events
Select the On button and scroll the Inspector on the right down to the EVENTS area.
Click ADD EVENT to add an event.
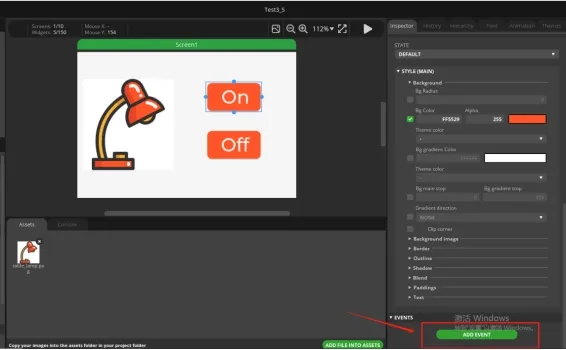
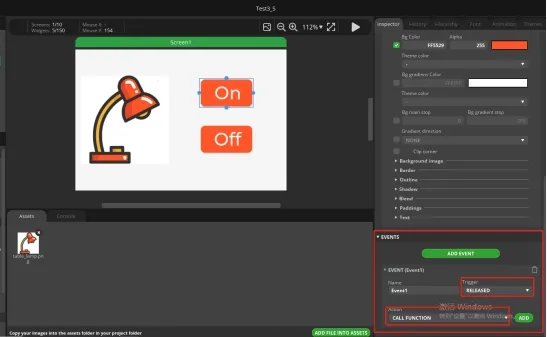
Set Trigger to RELEASED.
Select CALL FUNCTION for Action.
Enter the Function name:
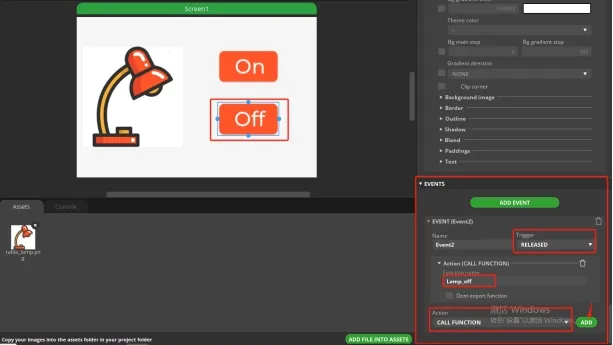
Select the Off button and add an event the same way.
Set Trigger to RELEASED, select CALL FUNCTION for Action, and enter the Function name:
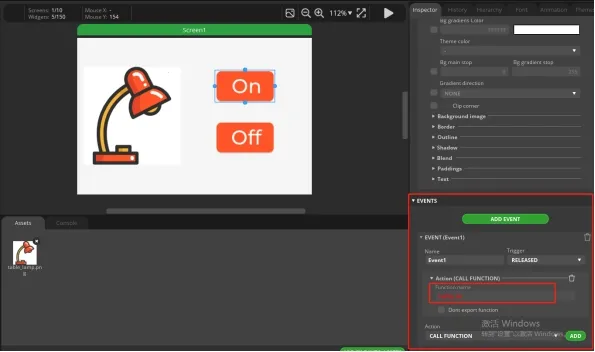
Note: The function name in Call function must match the function name in the ESP-IDF project exactly. In this lesson, the On button uses Lamp_on and the Off button uses Lamp_off. A wrong upper/lower case will cause the button to fail to control GPIO19.
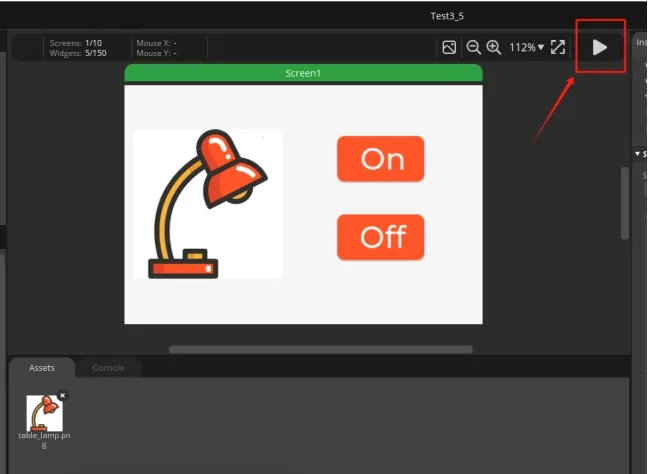
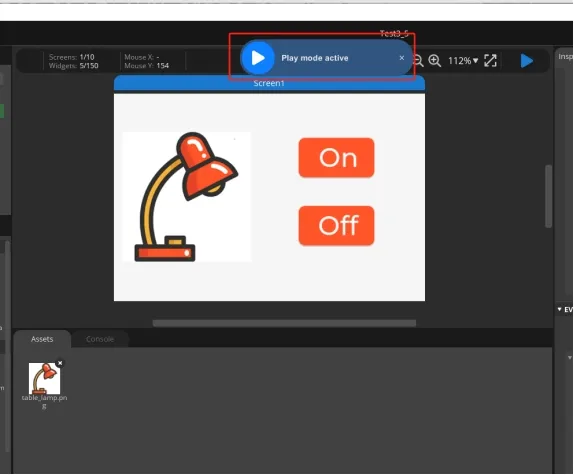
Click the play button at the top-right to enter preview mode and check whether the On / Off buttons respond to taps correctly.
7.6 Set the Export Path
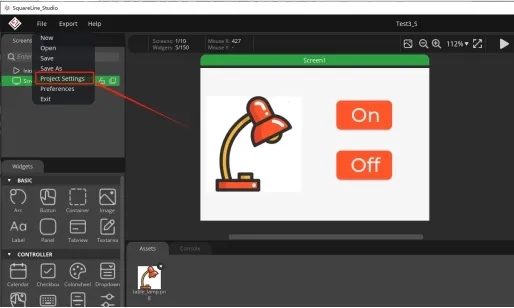
Click File > Project Settings to open the project settings.
In FILE EXPORT, set the export path. In the example, Project Export Root points to the SquareLine project directory, and UI Files Export Path points to the Output folder.
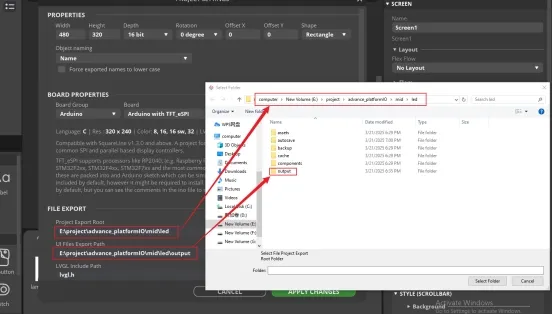
Set LVGL Include Path to:
Check Flat export (exports all files to one folder), then click APPLY CHANGES.
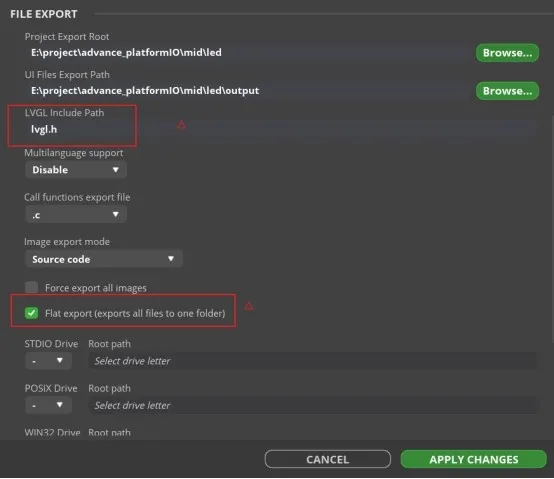
Note: It is recommended to check Flat export so that the exported UI files are gathered in one folder, making it less likely to miss files when copying them into the idf project later.
7.7 Copy the UI Files into the idf Project
After exporting the UI files.
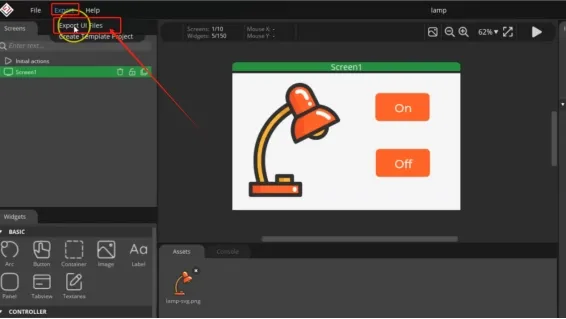
Copy the UI source files generated by SquareLine Studio into the IDF project:
.c files -> 4.3_5.0_7.0_IDF_Code/Lesson03-LVGL_Control_LED/main/ui/
.h files -> 4.3_5.0_7.0_IDF_Code/Lesson03-LVGL_Control_LED/main/ui/
The current project already has the UI files exported from SquareLine Studio placed in main/ui/:
main/ui/ui.c
main/ui/ui.h
src/ui_events.c
src/ui_events.h
src/ui_Screen1.c
src/ui_Screen1.h
src/ui_img_table_lamp_png.c
src/ui_helpers.c
src/ui_helpers.h
src/ui_comp_hook.c
After copying, run Upload again. If you only modified the UI files, you can also run Build first to confirm there are no missing headers, function names, or image resources, then upload to the board for verification.
8. Experimental Results
-
The screen displays the
800 x 480LED control interface. -
After tapping On, the LED lights up.
- After tapping Off, the LED turns off.
- No continuous touch or LCD initialization errors appear on the serial port.
If the screen is black, first check the USB power supply, the backlight command, whether the project is the large-size 800 x 480 version, and whether the UI files were completely copied into main/ui.
9. Code Download
GitHub code link: Lesson03-LVGL_Control_LED
Image asset link: table_lamp.png